And now, I present to you the final installment in this “Tips for the Beginner Food Photographer” series! Before we get to it, here are the links to Part I, Part II, and Part III. And if you’re not already signed up for my Food Photography Snapshot (i.e., newsletter), be sure to do that over on the Resources Page.
[Note: I originally wrote this series in 2017, but updated it significantly in 2019.]
In this last post, I’ll first tackle something that seems a bit granular and technical (food photography editing) before moving onto some loftier stuff, so you get the finer details and the big picture.
8. Use Photo Editing to Highlight Good Photos
My first rule of photo editing is to edit only good photos that I really like. Why? Because even the best editing can’t make a bad photograph look good.
Having done food photography for a few years now, I must admit that I have a sizable huge cache of photos that I have never posted on Instagram or my blog and never will. I know, it seems like a waste of time and money to have prepared a dish, styled it and photographed it, and then to never use it. But not all of my food photos are great or even good (especially those early ones). So I don’t waste time editing them to try to make them look better. I’ve accepted the fact that they’re going to Photo Hell, an imaginary place where rejected photos go to die.
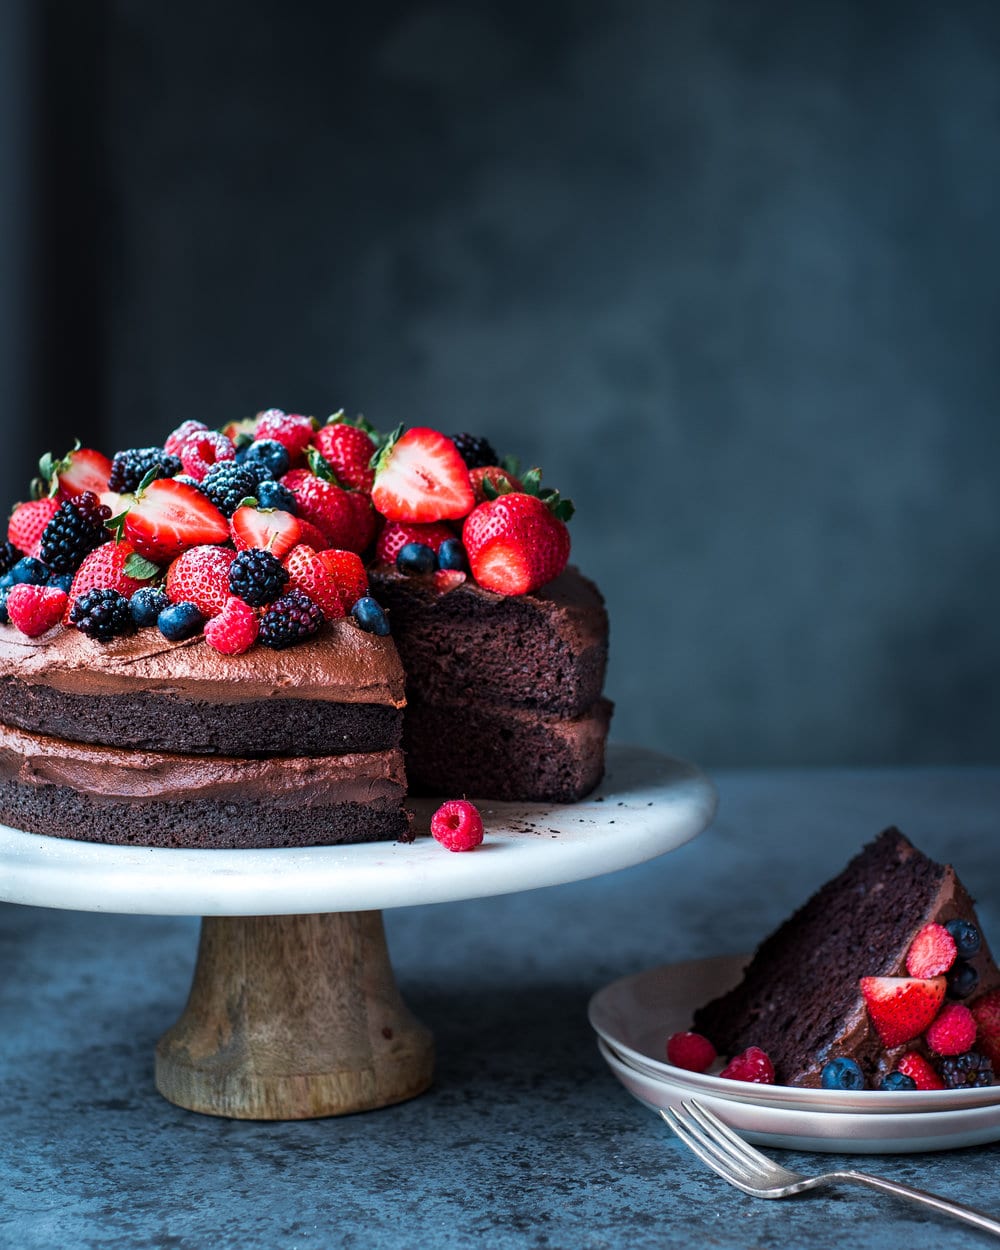
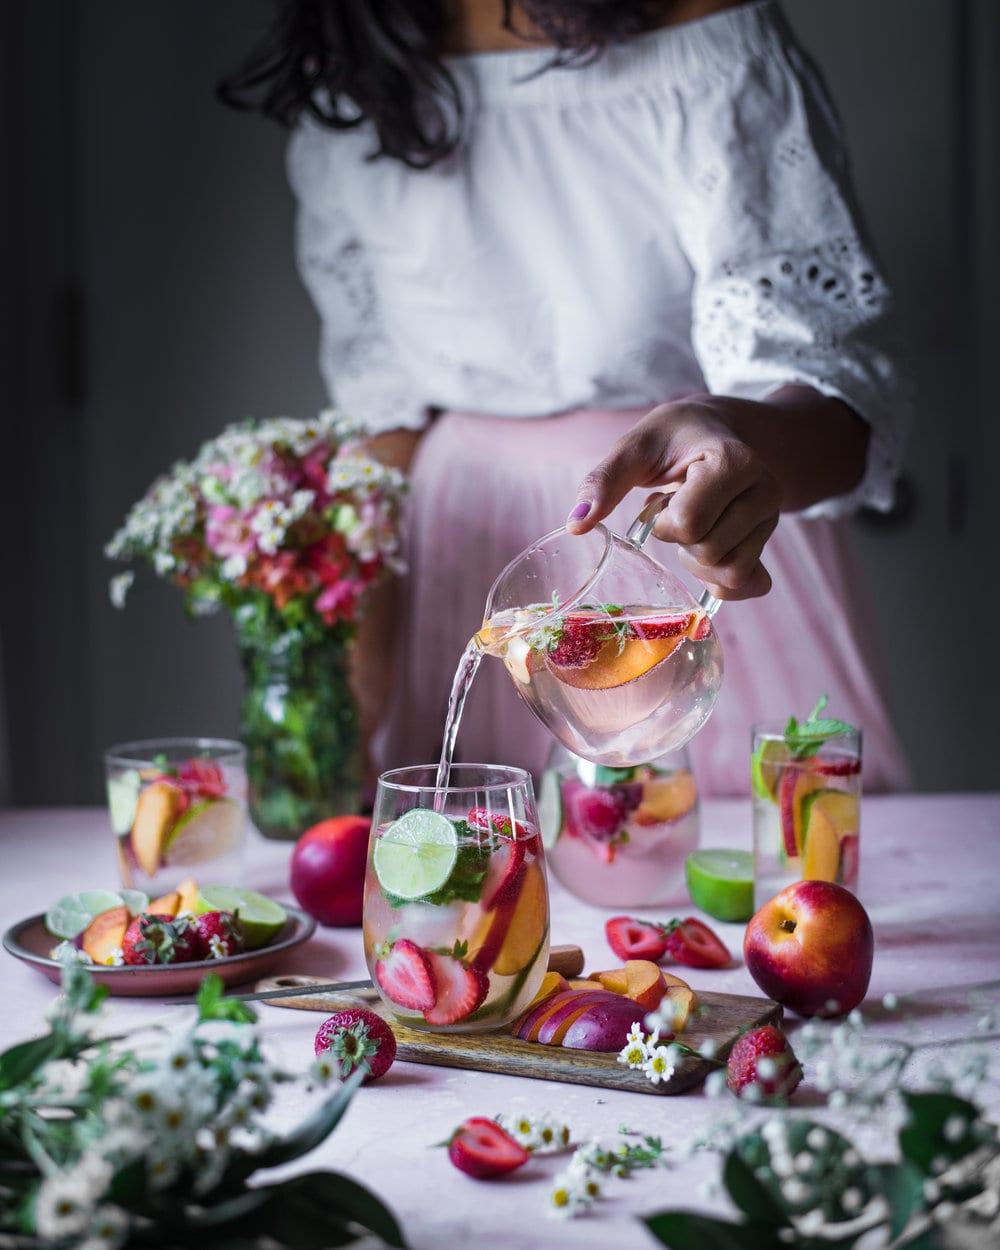
I used editing to bring up the shadows, increase the contrast, and make the reds in the berries pop more.
With that said, when you do have a good photo that you like, edit your photo wisely. First, analyze your photo before editing it because you don’t want to be editing just for the sake of editing. Think about (1) what you’re trying to achieve with the editing process and (2) what look/vibe/feel you are going for in this photo. Do you want to bring out the greens in your salad, add brightness to the image, create a moody, dramatic look, etc.? The answers to those questions will help you focus on what parts of the photo to edit.

Second, stay away from Instagram filters, as their filters are typically too strong and unrealistic for food photography. Instead, focus on making less obvious but more fundamental edits to your photos by playing around with contrast, saturation, exposure, white balance, shadows, and highlights.
For instance, if you are shooting on a sunny day, your image may end up with a bluish tint. Use the White Balance editor to correct for this and add more warmth to your photo. Or, if you underexposed your image, try increasing the exposure a bit and if necessary, bring up the shadows a bit. And, always start out slowly with a gradual increase or decrease and see how it looks before continuing to edit. There’s nothing worse than an oversaturated, uber-HD photo of food.
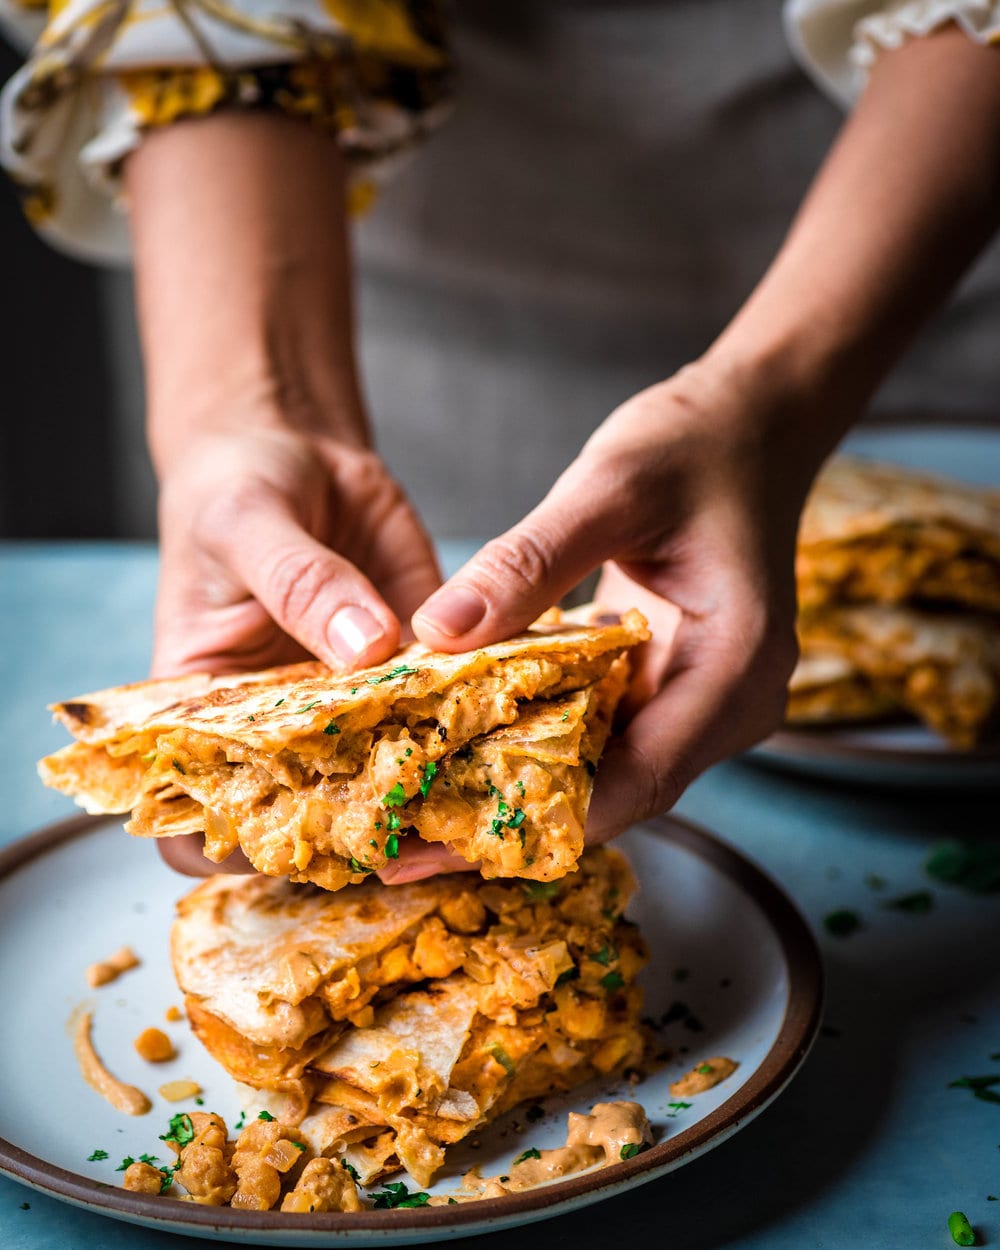
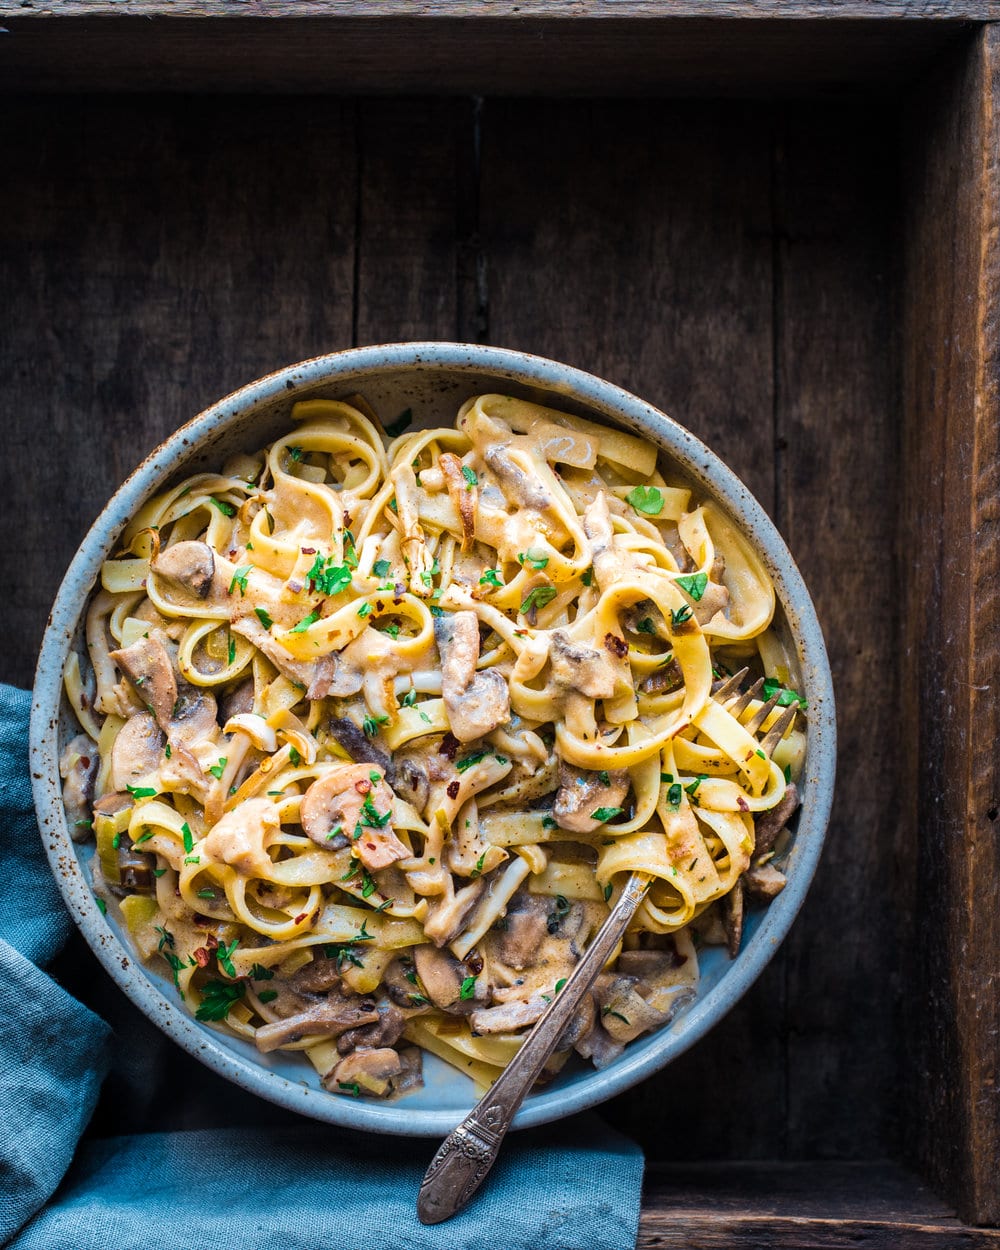
I edited this photo to make the orange hues appear less harsh, emphasize the dark shadows, and give the photo an overall moody, intimate feel.
Whenever someone asks what software I recommend for food photography editing, my answer is always Lightroom. Lightroom is a desktop-based photo editing software, and one of the most powerful tools a food photographer has. Smart editing in Lightroom can truly transform nice images into extraordinary images.
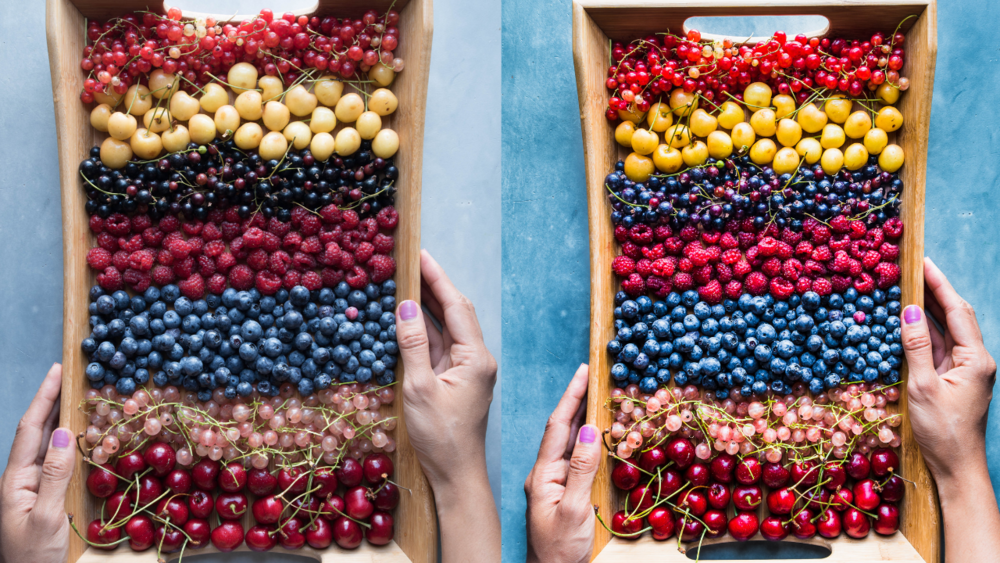
Lightroom makes your photos POP!
Lightroom for desktop, however, is not free, so if you are just starting and don’t want to drop the money, here are some free recommendations:
-
Google Snapseed: Start editing your photos here. Make edits to contrast, clarity, saturation, sharpness, highlights, shadows, etc.
-
VSCO: If you want to add a little bit of mood to your photo, then move on to VSCO, which has some beautiful and unique filters that work great for food photography, particularly if you’re going for a moody feel. I rarely, if ever, use VSCO filters at their highest strength because it looks artificial to me, but you can adjust the filter levels and even use multiple filters to create the exact look you’re going for. Check out my How to Edit Food Photos Video around the 03:00 mark to find out which VSCO filters are best for food photos.
-
Lightroom Mobile: You can also try using Lightroom Mobile. I personally don’t use it because I like having a large screen while I edit, but I’ve heard good things about it, and unlike Lightroom for desktop, it is free.
9. Invest in Yourself
If you are serious about improving your photography, the single most important thing you can do is INVEST IN YOURSELF.
I highly recommend enrolling in photography classes, reading tutorials, and watching educational videos, all of which can be found online, many for free (hello, you are reading a free food photography resource)! I’ve listed some websites below where you can find online photography classes.
But don’t just stop at free resources because investing in yourself requires, well, some investing. Take that photography course, hire that private tutor for a weekend of lessons, buy that fundamentals of photography book, and upgrade your gear once you’ve mastered the fundamentals (see Part I). Yes, it costs money now, but I guarantee you, the money spent will be well worth it and pay off over time. If you want to turn food photography into something more than a hobby, you MUST invest in yourself!
Skillshare
An online learning platform, Skillshare offers hundreds of short photography classes for free. There isn’t a huge number of classes specific to food photography, but you can learn lots of fundamentals of photography that apply to food photography. You can also pay for a premium account to get access to more classes.
CreativeLive
On CreativeLive, you can watch live classes on creative topics (great descriptive name, right?). If you watch an online class while it’s streaming live, it’s typically free. If you’re taking a multi-class course and watching it at your own pace, however, you will need to fork up some cheddar. There are always sales going on and once you purchase one course, you will forever be inundated with discount offers.
The Great Courses
The Great Courses offers college-level video courses developed by the Teaching Company. They don’t have any food photography-specific courses, but they have a really great Fundamentals of Photography class and it’s perpetually on sale. Disclaimer: I didn’t get through the whole course, but I did enjoy the videos I finished.
10. Practice, Patience, and Planning
Okay, so this last tip is comprised of three separate tips, but I wanted to get an even number of 10 tips. Plus, who doesn’t love a little bit of alliteration?
First, practice. All of the Holy Trinity mastery and most expensive photography classes can only take you so far. You have to practice, practice, practice. Try to take photos as often as you can without driving yourself crazy. For some people, this might be every day; for others, it might be a few times a week.
There are so many things you can learn through practice alone, such as the exact angle of light that streams into your kitchen window on a winter afternoon, or which dishtowel perfectly complements your earthy wooden background board. Plus, practicing is fun!
Secondly, be patient. Unless you’re a prodigy, you’re not going to become an expert overnight, or even after a few months. A good photographer is constantly evolving her style and picking up new tips and tricks on the way, so the learning process is never finished. But, if you practice for a solid few months with these tips in mind, I guarantee you will notice an improvement in your food photography.
And finally, plan. I get it, you’re busy. I’ve heard it before. Hell, I’m constantly talking about how busy I am because I hear it’s a good conversation starter and makes people like you more (just kidding, it’s the worst).
But, if you really want to excel at food photography, you should plan out your food photo shots. You don’t have to write things out or sketch out a mockup, but you should spend some time planning out in your head what you’re trying to achieve with the dish(es) you’re photographing.
When planning out a shoot, here are some things to keep in mind:
-
The type of food you’re shooting and the best angle for it. More on that in Part II.
-
Number of shots: How many different setups do you want for this particular dish? Just one? Two to three? Five? Make sure that you always plan enough time for your “hero shot.”
-
Types of shots: Do you want overhead shots and/or table view shots? Do you want an ingredient shot, an action shot, and/or a finished dish shot?
-
Food styling: How are you going to style the dish? Will the styling change if you vary the setup? Will you be using any garnishes? More on food styling in Part III.
-
Props: What kind of surface are you shooting on? What props, if any, will you be using? Try picking colors and materials that complement the colors of your dish and the mood of your photo.
Was this series helpful for you? Please let me know in the comments! And please feel free to tag me or send a direct message on Instagram to share a photo that you took using one of these tips
XoXo,
Nisha


Hi Nisha, thank you so much for your energy you put into this article. It’s very useful to me. Can’t wait to continue taking pictures of food, such fun and art.
We’re so happy you found it useful, Tamara! :)
I just finished reading your series and love you! Your personality shines through while offering amazing advice that is practical. Thank you so much!
Thank you for reading, Julie!
very useful
Glad to help, Hiba!
I really enjoyed your photography series. They are very well written and informative.
Great content and explanations, easy to follow.
I feel like I have learned a lot from your tutorials.
Thank you, very much appreciated.
All the best,
Mia
You’re so welcome, Mia! Thanks for reading :)
Thank you so very much Nisha for all these tips! I was wondering for some time how come your feed and images were so colorful yet harmonious and beautiful, compared to other accounts that are colorful but somehow hurt your eyes because it’s too much, or other restaurants that sell really great and vegan food if you know them but their feed doesn’t communicate that. Thank you again for your generosity and good spirit !
Hi Nisha! I’m only just getting into bettering my food photography skills but, working with a limited budget, I’m trying to see if I can have my iPhone camera with a tripod setup before I take the deep dive and invest in a professional camera. Can you recommend any good tripod setups that don’t cost a fortune? I’ve looked over amazon’s offerings and there are TONS! I’m not super confident that I understand all jargon and attachments, etc. I’ve looked at some of the more affordable tripods with horizontal arms for flatlays but get lost trying to find the right clamps for my phone.
This series is fantastic and your photos are incredible. Thank you for this wonderful resource!!
I just love your site. I am contemplating writing a blog so I can feature some of my favorite recipes and I am also highly interested in food photography. Your site is definitely a one stop shop for me where I can see great recipes and photography inspiration!
Hi Sherri! What a lovely message! Thank you so much for stopping by and for letting me know. I appreciate it!
Thank you for this post Nisha! All your photos are HD quality. What quality did you use when saving your photos (70%, 80%, 90%, or 100%)? Other bloggers suggested saving at 70% for faster upload but I noticed my images don’t seem HD quality when saving at 70% quality. I plan to use Square Space as my food blog platform and was wondering if they have restriction on how the photos are been saved.
Hi Nina! Thanks so much for stopping by and apologies for the delayed response! I shoot all my images in RAW, which is the highest quality (instead of shooting them in JPEG). So even if I save the photos (once edited in Lightroom and converted to a JPEG) at 60%, they are still quite high quality. I usually save them between 70-85%. If they are too large in file size, it can slow down download time. I haven’t had any issues with my files being too large and they are uploaded as JPEGs. Hope that helps!
more of these pplease!
I am glad you enjoyed it! thanks for the feedback!
These posts have been super helpful!
I am so happy to hear that! thanks for reading!
I really enjoyed this series! Thank you for taking your time too write out some helpful tips for a beginner like me. Very helpful and informative!
Hi Taylor! So happy to hear that and thank you for reading. You are most welcome :)
thanks a bunch
You are welcome :)