

I’m back with Part II of this four-part series on tips for the beginner food photographer. Before we get to it, here is the link to Part I and head to the bottom of this post for Parts III and IV. And if you’re not already signed up for my Food Photography Snapshot (i.e., newsletter), be sure to do that over on the Resources Page.
[Note: I originally wrote this series in 2017, but updated it significantly in 2019.]
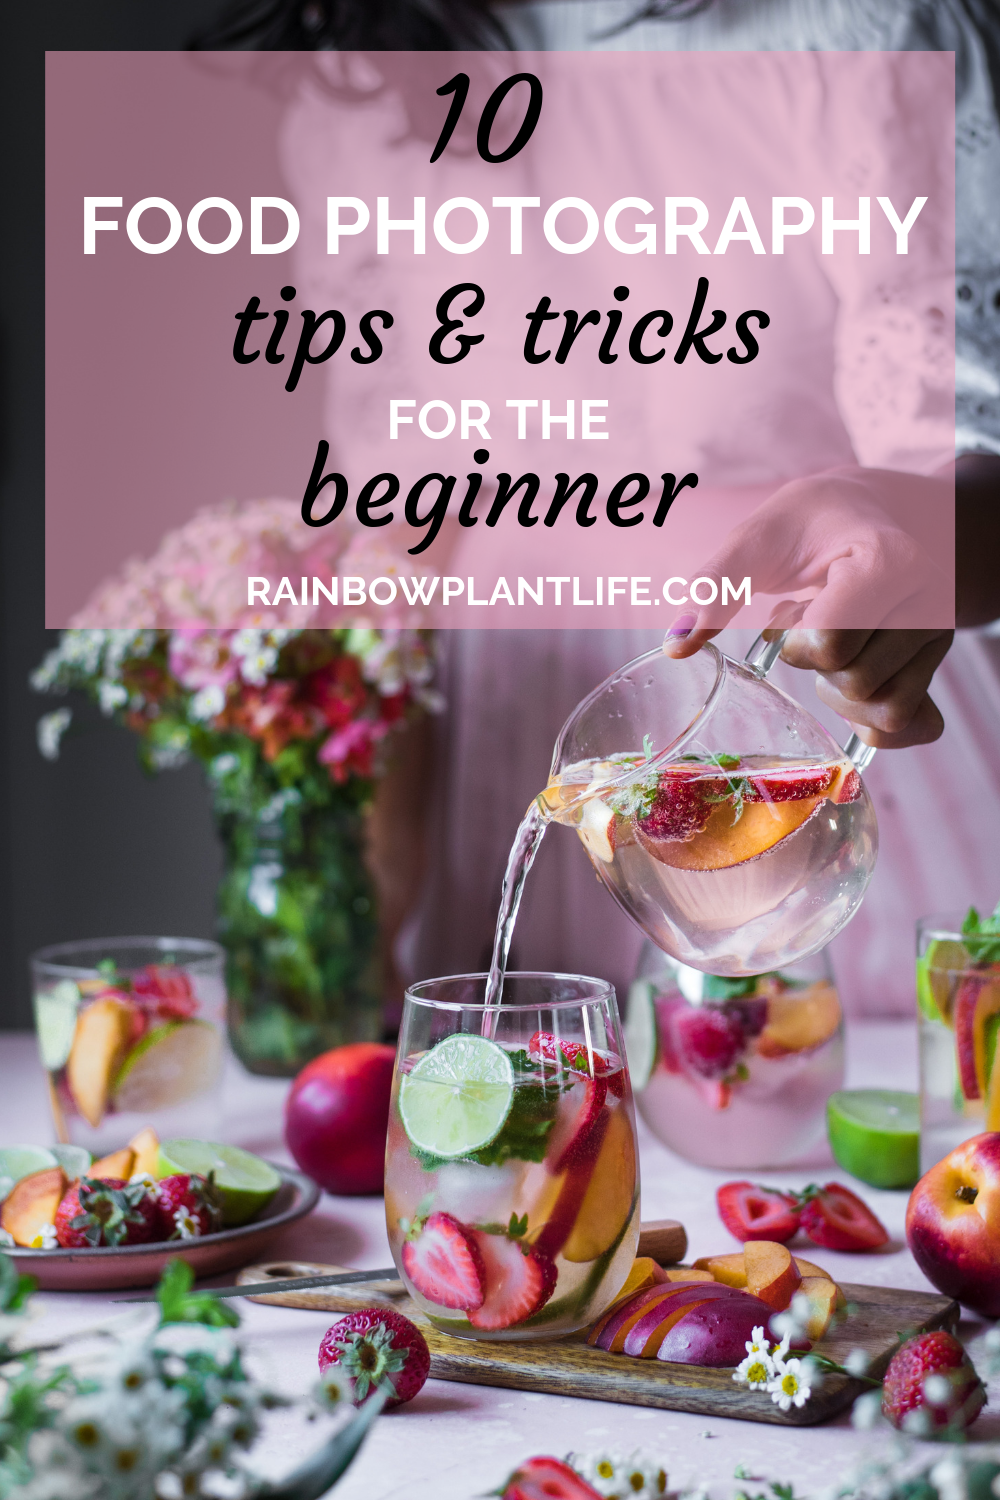
In Part I, I talked about natural light, the value of investing in a good camera, and the Holy Trinity of aperture, shutter speed, and IOS. Today, we’ll be talking about composition and composition alone since there is A LOT to say about composition.
4. Composition is a Craft
Good composition–the arrangement of elements in a photo–can transform an average photo into a great photo. The goal with composition is to guide your viewer’s eye to the focal point of your photo and, in some cases, to tell a story with your photo.
Try to keep these tips to keep in mind when you are framing a photo. Don’t try to use all of these techniques at once, just FYI. For one, it will take an hour just to set up your photo. And more importantly, some of these tips contradict one another.
Visualize your composition before you take the photo
Before you snap your camera, think about what dish you are photographing, the best angle to photograph it from, and which elements you want to be the focus of your photo. Visualize all of this first. Then, and only then, set your camera gear up. If you just start shooting without thinking about the arrangement and layout of food and props, you’ll likely end up with a photo that confuses your viewers or simply falls flat.
The Rule of Thirds is your Friend
The Rule of Thirds is one of the most fundamental rules in all types of photography. It states that when you compose a photo, you should visualize it being divided in thirds, both vertically and horizontally (i.e., like a tic-tac-toe grid), and place your focal point along one of those lines or ideally, along one of the intersection points. Human eyes are naturally drawn to these focal points, so placing your food along this grid will help your viewers better understand and relate to your food.
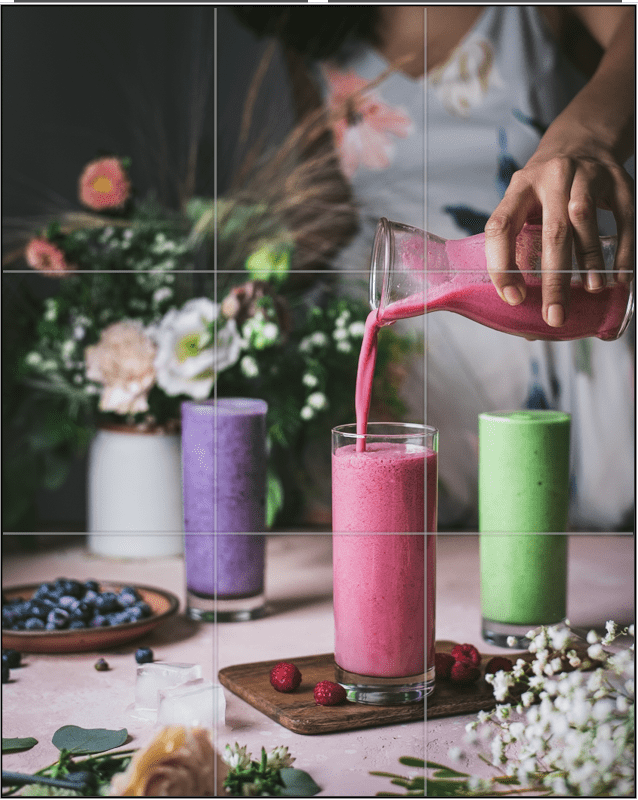
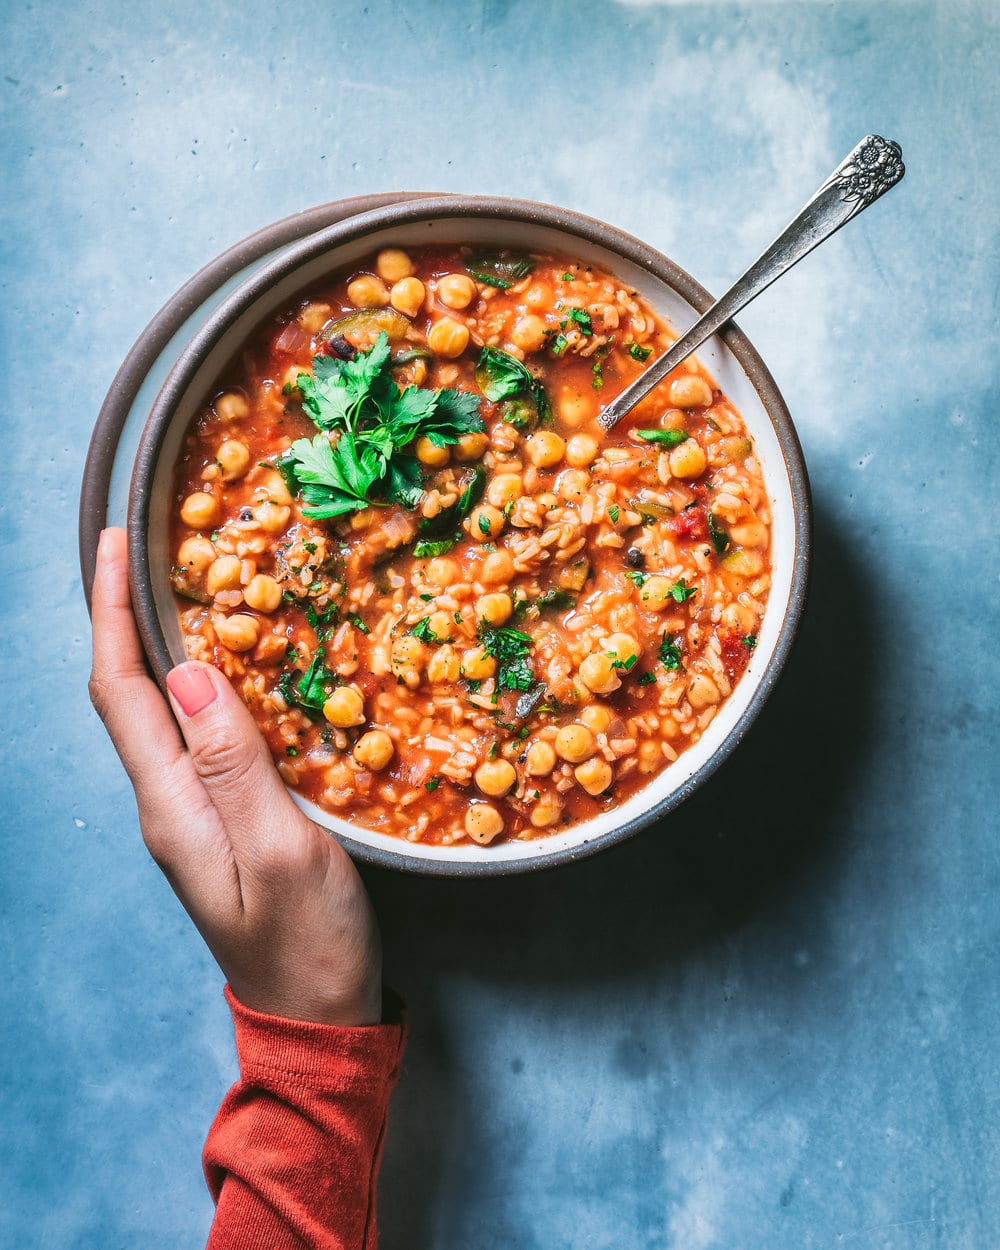
In this photo, the main element is the pink smoothie in the front and the pouring action. One of the intersection points hits the pink smoothie, another point hits the pouring vessel, and a third point hits the purple smoothie in the back.
Or, rely on symmetry
You don’t always have to use the Rule of Thirds, and there are many other compositional techniques out there…but again, that’s for a more advanced series.
The rule of symmetry can be quite pleasing if you square crop your photos for the ‘Gram. While Instagram has allowed us to move out of the square format for many years, I know that some ‘grammers still use a square crop. And if you are using a square crop, if you place your photo directly in the center of the grid–as opposed to at the intersection of one of the grid lines–it can produce a very visually pleasing result. Just make sure you have equal space on both sides of your photo and that your lines are straight. Nobody likes a sloppy square crop or a crooked horizon in a #basic sunset photo.
Step back from the food!
Unless you are taking a macro shot with a macro lens, don’t place your lens up close and personal with your food. Doing that can result in a composition that is too tight and doesn’t give any context to your food. For instance, taking a very close-up photo of granola will probably just look like crunchy dog poop. Instead, back away and show other elements of visual interest, such as a bottle of mylk in the background or a mason jar half-filled with the granola.
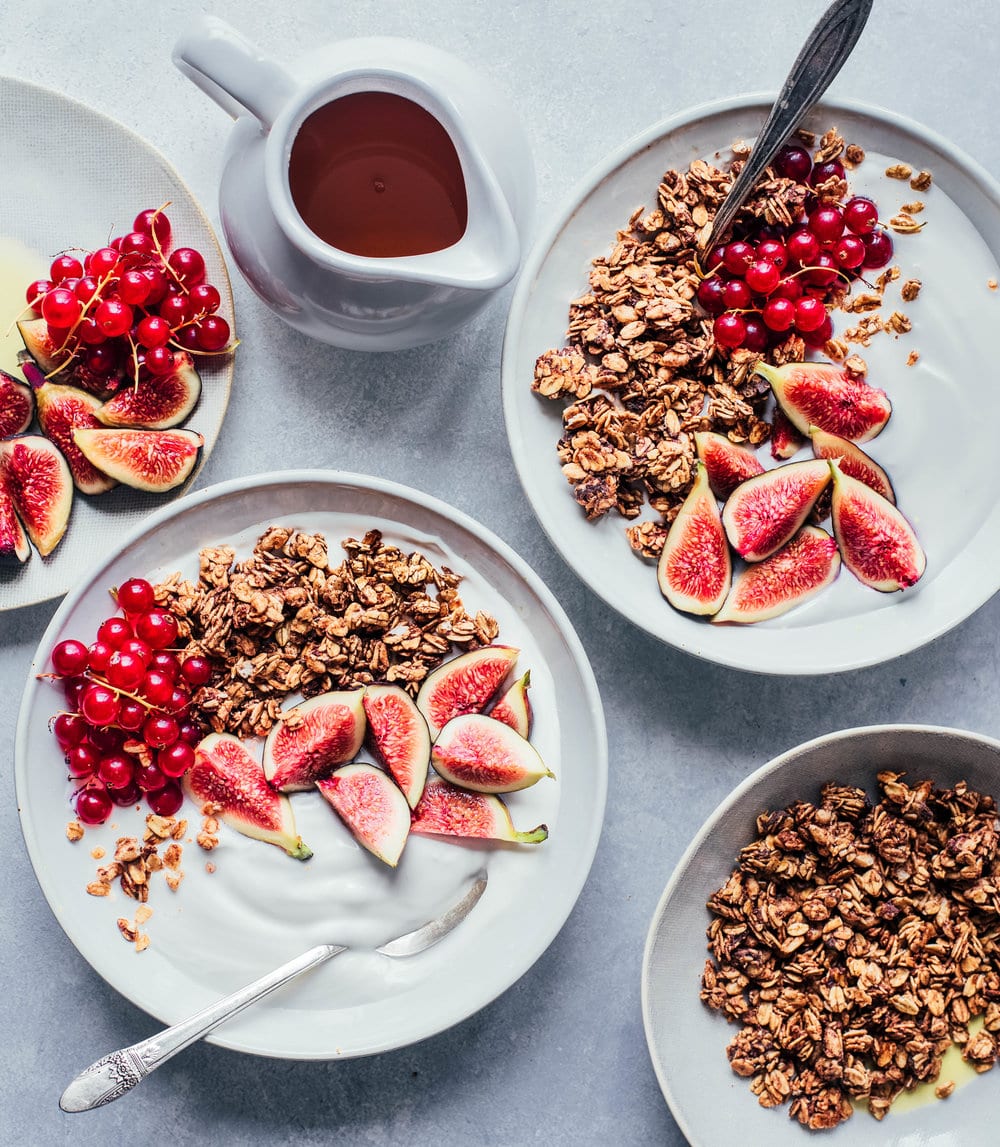
Know your angles
Know which angles work best for particular types of food. For instance, foods such as pizza and flatbreads photograph best from an overhead angle so you can clearly see all of the toppings. In contrast, vertical-oriented foods like burgers, parfaits, and ice cream cones photograph best at table view or straight on. And almost all foods photograph nicely from a three-quarters angle, which roughly translates to 45° (or really, anywhere between 25° and 75°).
Whenever you have the time, try shooting your dish from multiple angles to see which angle looks best for a particular dish, especially when you are starting out. Maybe you’ll find that a three-quarters view of your pizza does look really good. After all, rules are meant to be broken, even by rule-loving teacher’s pets like myself.
My only word of caution: don’t take photos at weird slanted angles. You may think this is creative, but it rarely works and usually just makes your viewer dizzy.
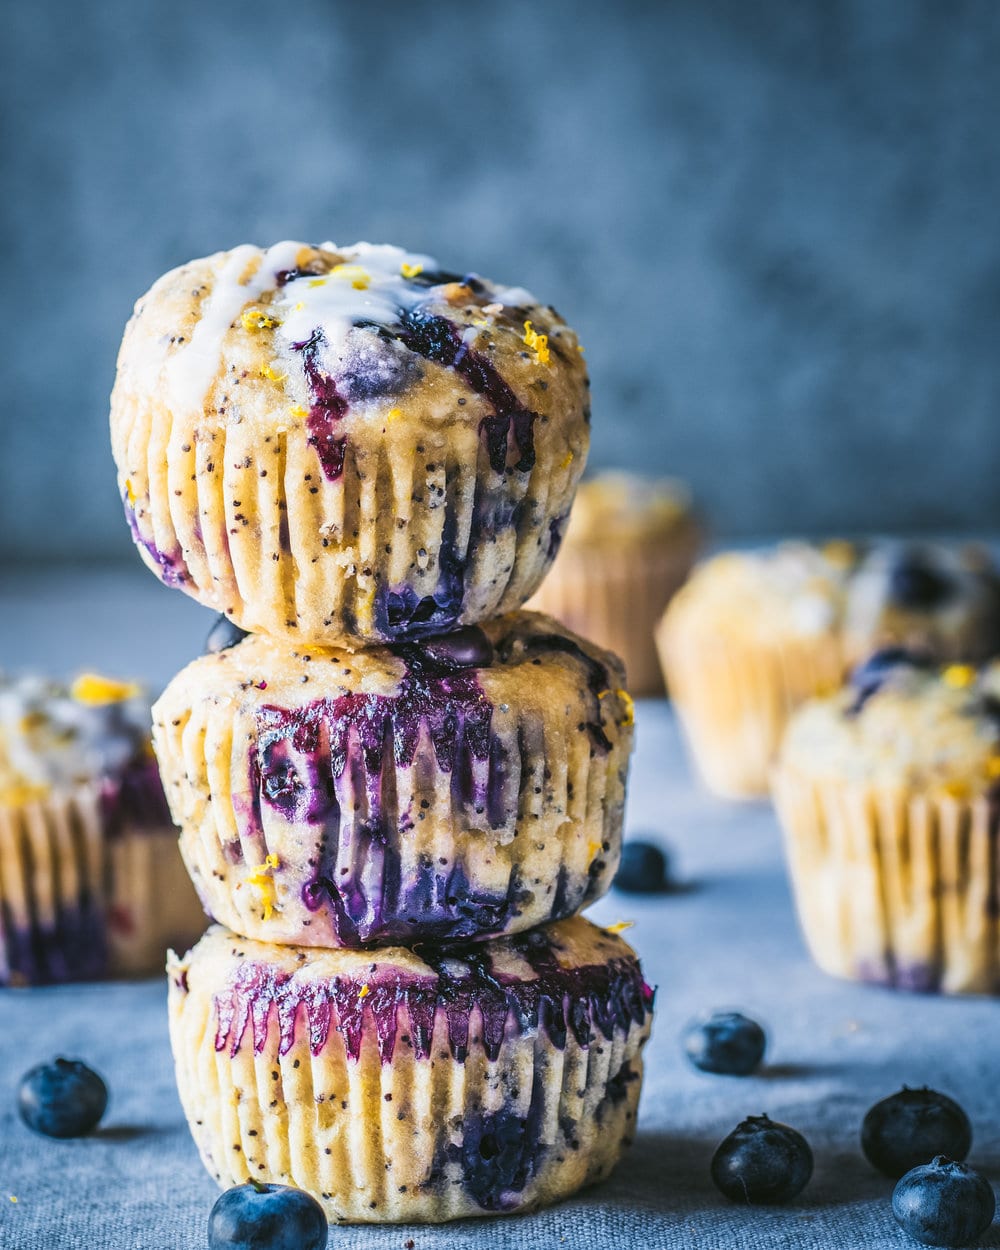
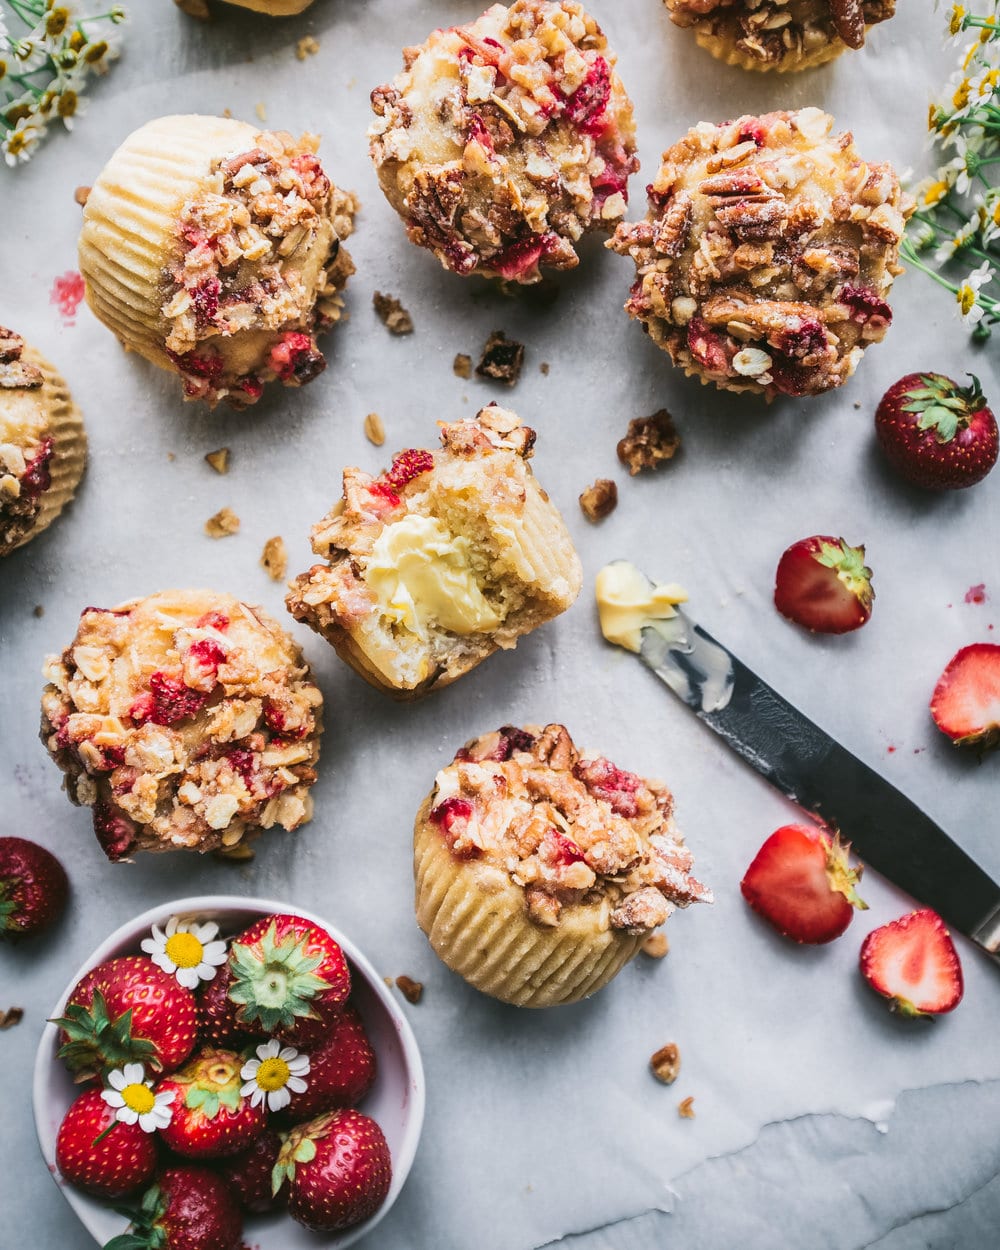
In the photo above on the left, muffins photographed from head on show off the filling and texture. In the photo on the right, muffins photographed rom overhead show the crumbly topping (and texture, if you get creative with the arrangement).
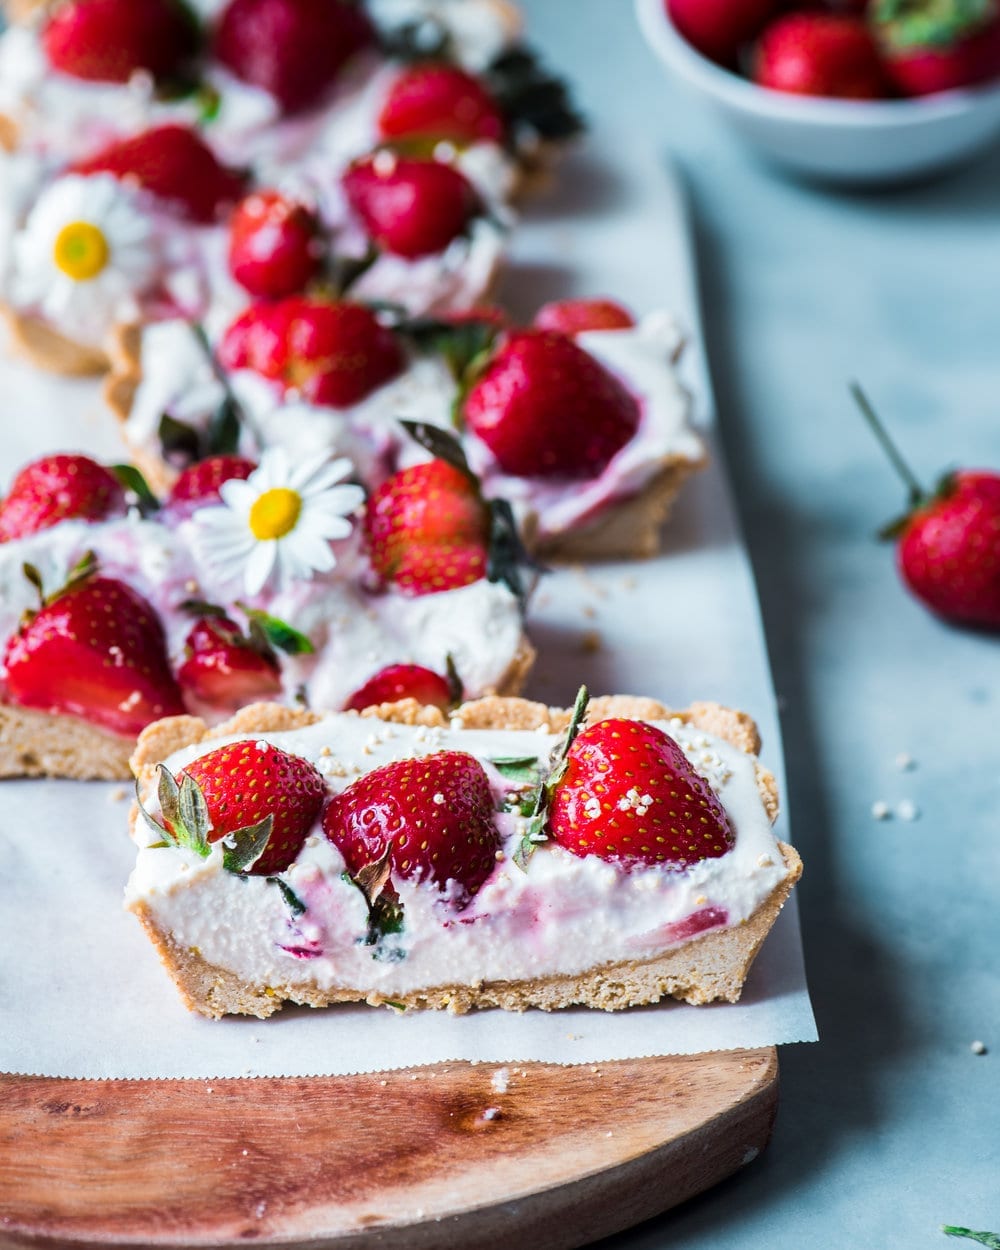
Shot with a macro lens and taken at ~ a three-quarters angle.
Less is more (sometimes)
I am by no means a minimalist photographer. In fact, I am often looking for the perfect prop. However, sometimes less is more, so don’t be afraid of using negative space. Framing your food in one corner and including empty space next to it can create drama in a very interesting way.
Negative space works particularly well when the food is so beautiful that it deserves to shine without other distractions.
Even if negative space doesn’t work for your style or your particular photograph, be sure to not clutter your scene with too much. For instance, if you bake a batch of 48 cookies, don’t try to fit every damn cookie in the photo. After the 8th cookie, your viewer knows what a cookie looks like! No need to inundate them with cookie overload.
And be thoughtful about which props you include in your photos. You may have just bought a beautiful antique cake server that you’re dying to show off, but it doesn’t belong anywhere near a photo of ice cream. Unless it’s an ice cream cake. Similarly, you may want to fill up the empty space next to a dish with herbs or fresh fruits, but if these aren’t ingredients in the dish or appropriate garnishes, the photo will look like it’s trying too hard and/or confuse the viewers.
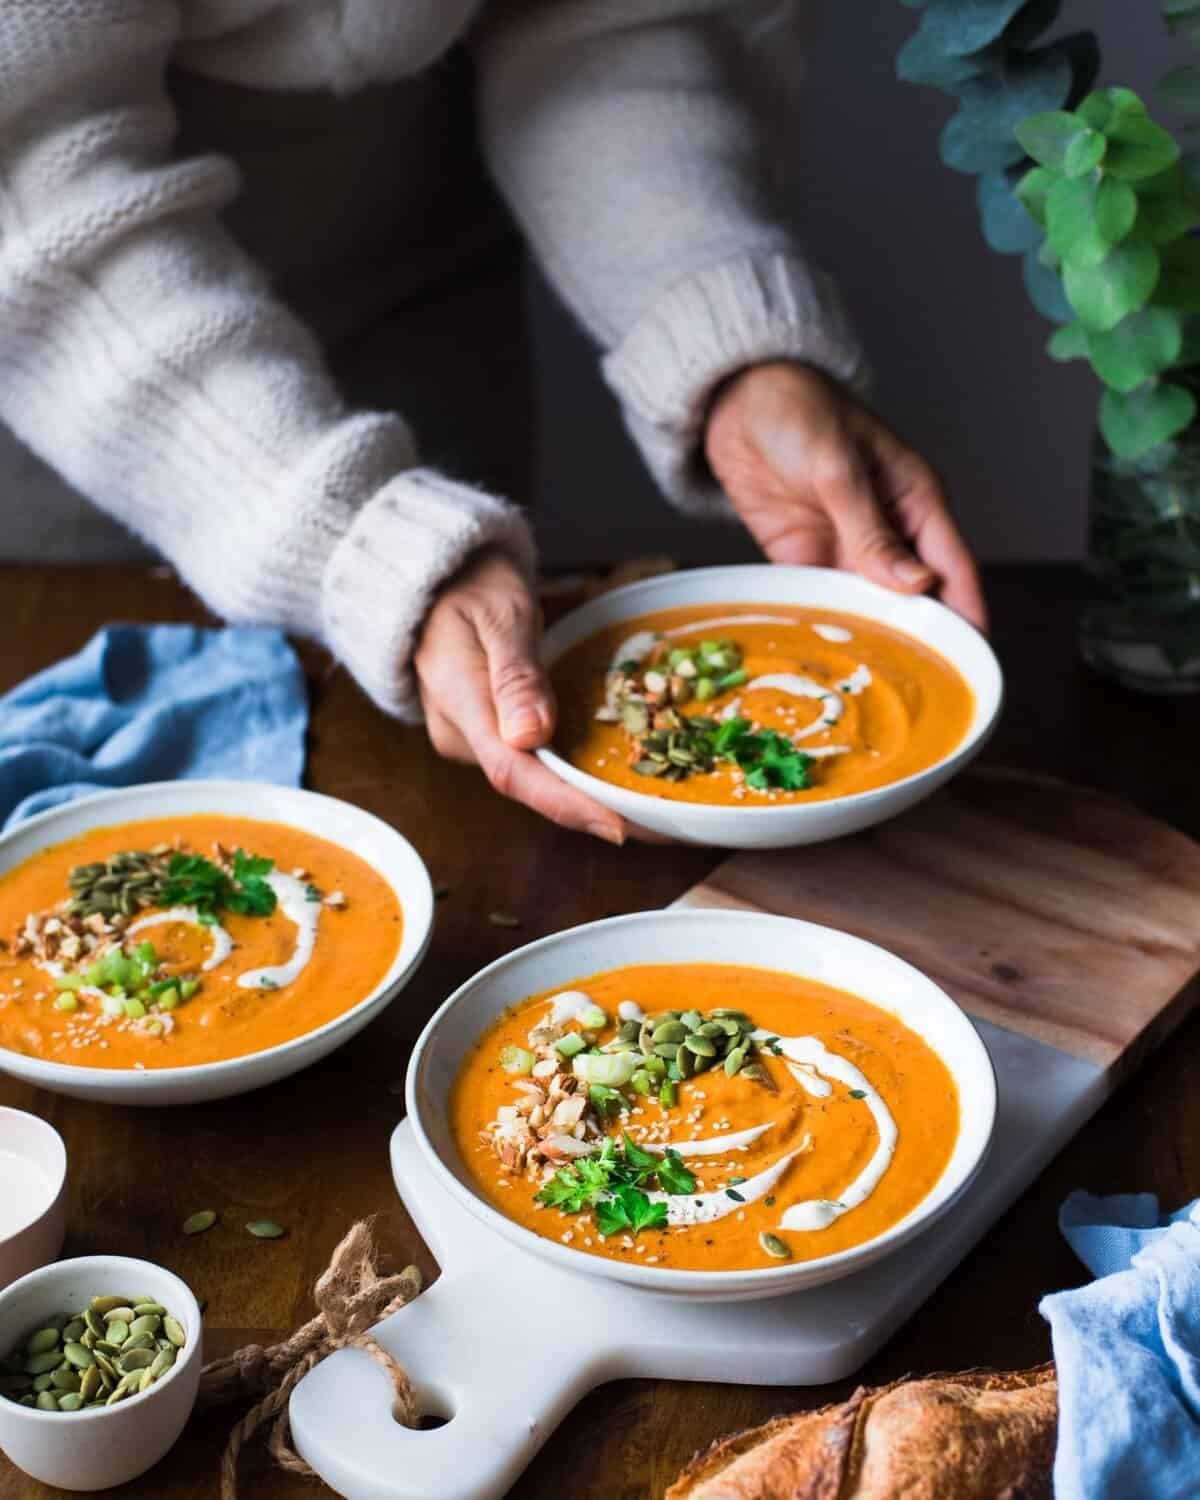
Create depth, movement, and drama
One of the main objectives of good photography is figuring out how to present our 3D world in a 2D medium (photography). To give more visual interest to your photos, you can use composition to create depth, movement, and drama. One easy way to do this is to include a foreground, a middle, and a background element in your photo.
Another way to bring life to your photos is to create movement or dynamism in your photos. Start by placing your main focal point along one of the grid lines. Then, use elements (food or props) to lead your viewer–to the next focal point, around the frame, or out of the photograph.

In this photo, the main subject is the front bowl of soup and the eye is naturally drawn to that point first. Using two other bowls of soup and diagonal lines helps guide the viewer’s eye throughout the frame. After the viewer sees the first bowl, her eye is drawn to the bowl to the back left, which then leads to the third bowl in my hands (which is the secondary subject in the photo).
Did you find this primer on food photography composition helpful? I’d love to hear from you, so please leave me a comment below! And for more tips, head on over to Part I, Part III, and Part IV of this series.
Smooches,
Nisha


Muchas gracias por toda la información.. intentare aplicarla toda!!
Hola, Monica! Gracias por visitar mi blog. Estoy feliz de que pensó que este artículo era útil.
I love your tutorials Nisha, they are very helpful for beginners but also for more experienced foodies. Very well done, I am looking forward to read part 3. 😀
Hi, Ela! Thanks so much for stopping by and for your kind comment. I am so flattered to hear that you think it is helpful even though you are not a beginner 🙂
This article blew my mind and obviously the stunning pictures speak for themselves. I don’t know much about photography but always want to learn more and these tips will help me in the future. I really like how you explained it in detail but it was easily relatable to the novice photographer.
Thank you, Puja. I’m glad this was helpful for you as a budding photographer. When you decide to invest in a nice camera, I’ll give you an in-person tutorial 🙂
Another AWESOME article! Are you sure, you´re not a professional photographer for over a decade 😉 Cant wait for part III and IV!
Haha oh you flatter me, Jana. Thank you so much! I wish I could sit down with a professional and pick their brain and learn everything!
I love this series, Nisha! I especially like your point about using composition to create depth in photos. I’ve always said depth of flavor is important in making great food, and now I know the same is true for depth of composition in photos!
Hi, Horatio. Thanks so much for your comment. I totally agree about depth of flavor in food too. Makes a dish so much more interesting!
I had no idea about so many of these things. I definitely need to work more on moving away from my food and not cluttering it with so many things. I wasn’t thinking about that until now. Thanks for this, Nisha!
Hi, Renee! Thanks so much for visiting. The getting in close and not cluttering things came to me over time. I was tempted to do those as well. I’m glad it was helpful!
I can’t wait for the next part. I’m learning so much. Thanks for sharing your knowledge!
Hi, Jenny! Thanks so much for the love. I’m thrilled to hear you’re learning from these posts!
Love these tips Nisha! You reminded me to step back, I always forget!! And with IG, you really need to step back for a good shot or viewers are on top of it, which is often the case with me unfortunately haha! And love the rule of thirds reminder, I actually love the look of that…so appreciate you taking the time to write and share this, thank you! Dee xx.
Thank you so much for stopping by, Dee! I think stepping back also helps you take in the whole scene and remind you what message you’re trying to convey. So happy you enjoyed reading this 🙂
This is such a great article, Nisha. I am learning so much from you. I am a total beginner but I already noticed a difference in my photos from yesterday due to your first post. Thank you for sharing your knowledge with us.
Hi, Cindy! Thanks so much for reading, and I can’t tell you how happy I am that my tips are helping you. I feel so flattered!
Thanks for sharing Lovely! I really love to read your tips Nisha! Very helpful and I didn’t know abut the Rule of Thirds for example!
Hi, Verena! Thanks so much for stopping by. I’m so happy this was useful for you 🙂 Your photography is beautiful already!
Thank you so much for sharing your tips Nisha. Was really helpful .loved reading it 🙋
Hi, Monisha! Thank you for visiting and I’m so happy you enjoyed reading this 🙂