

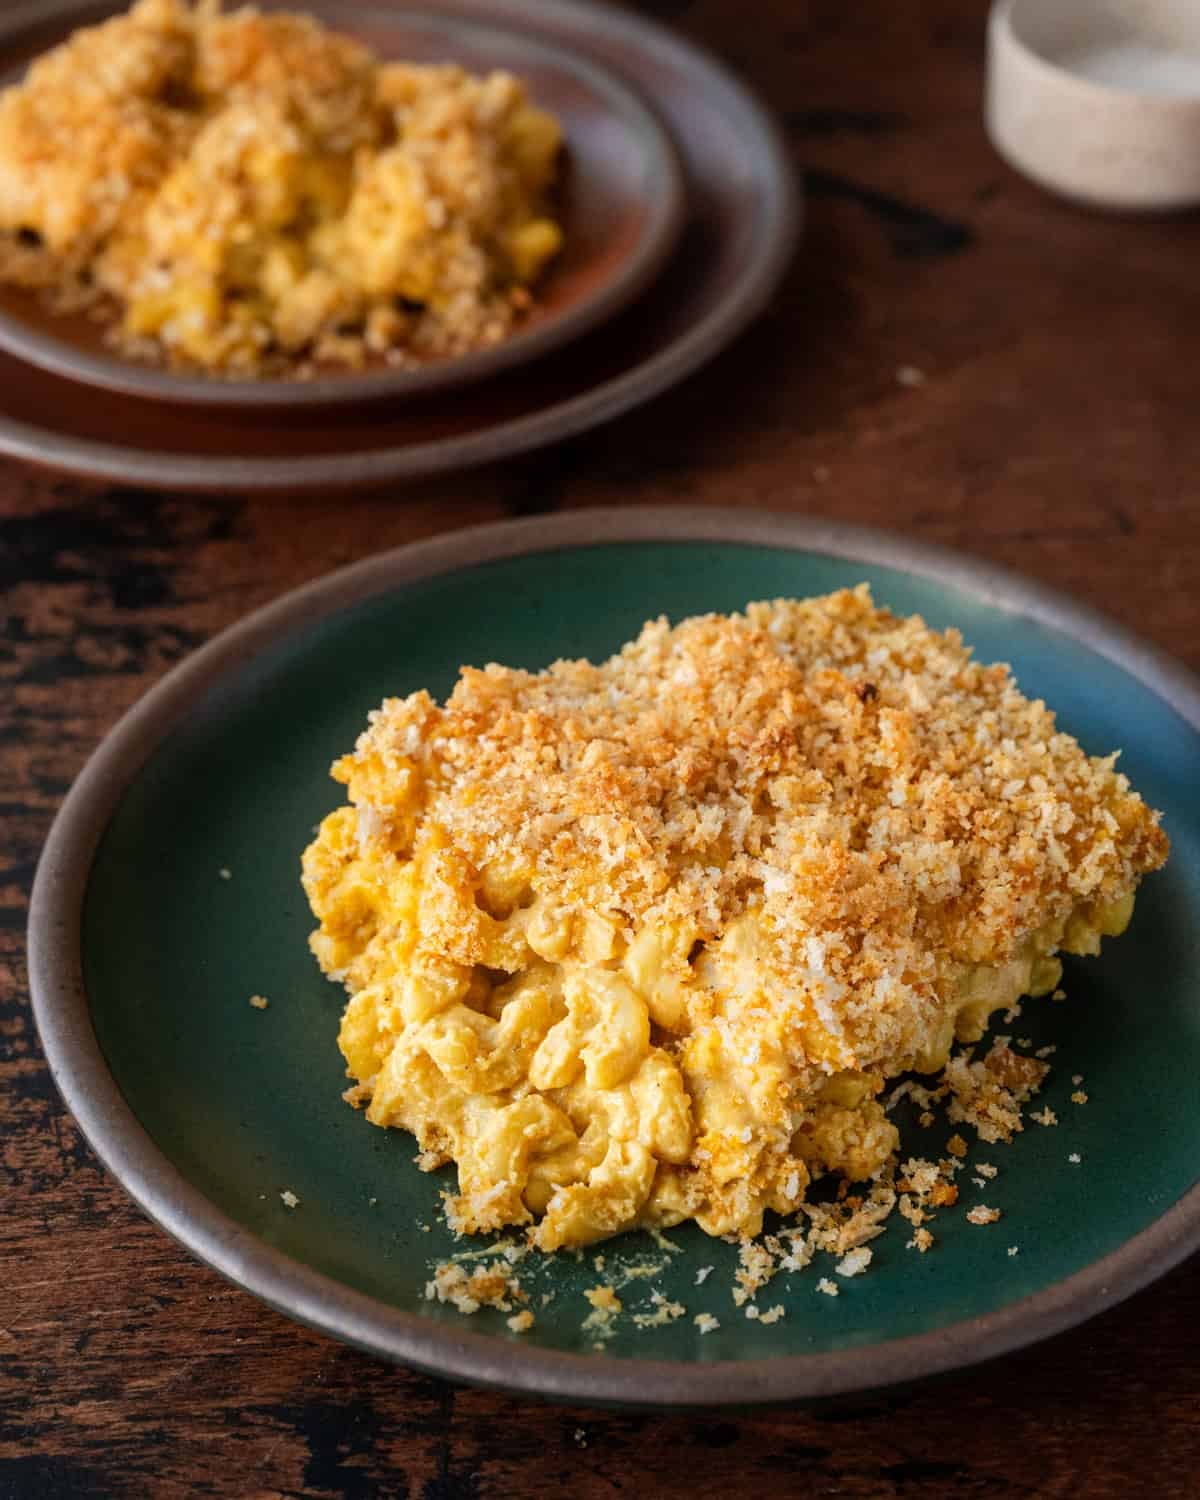
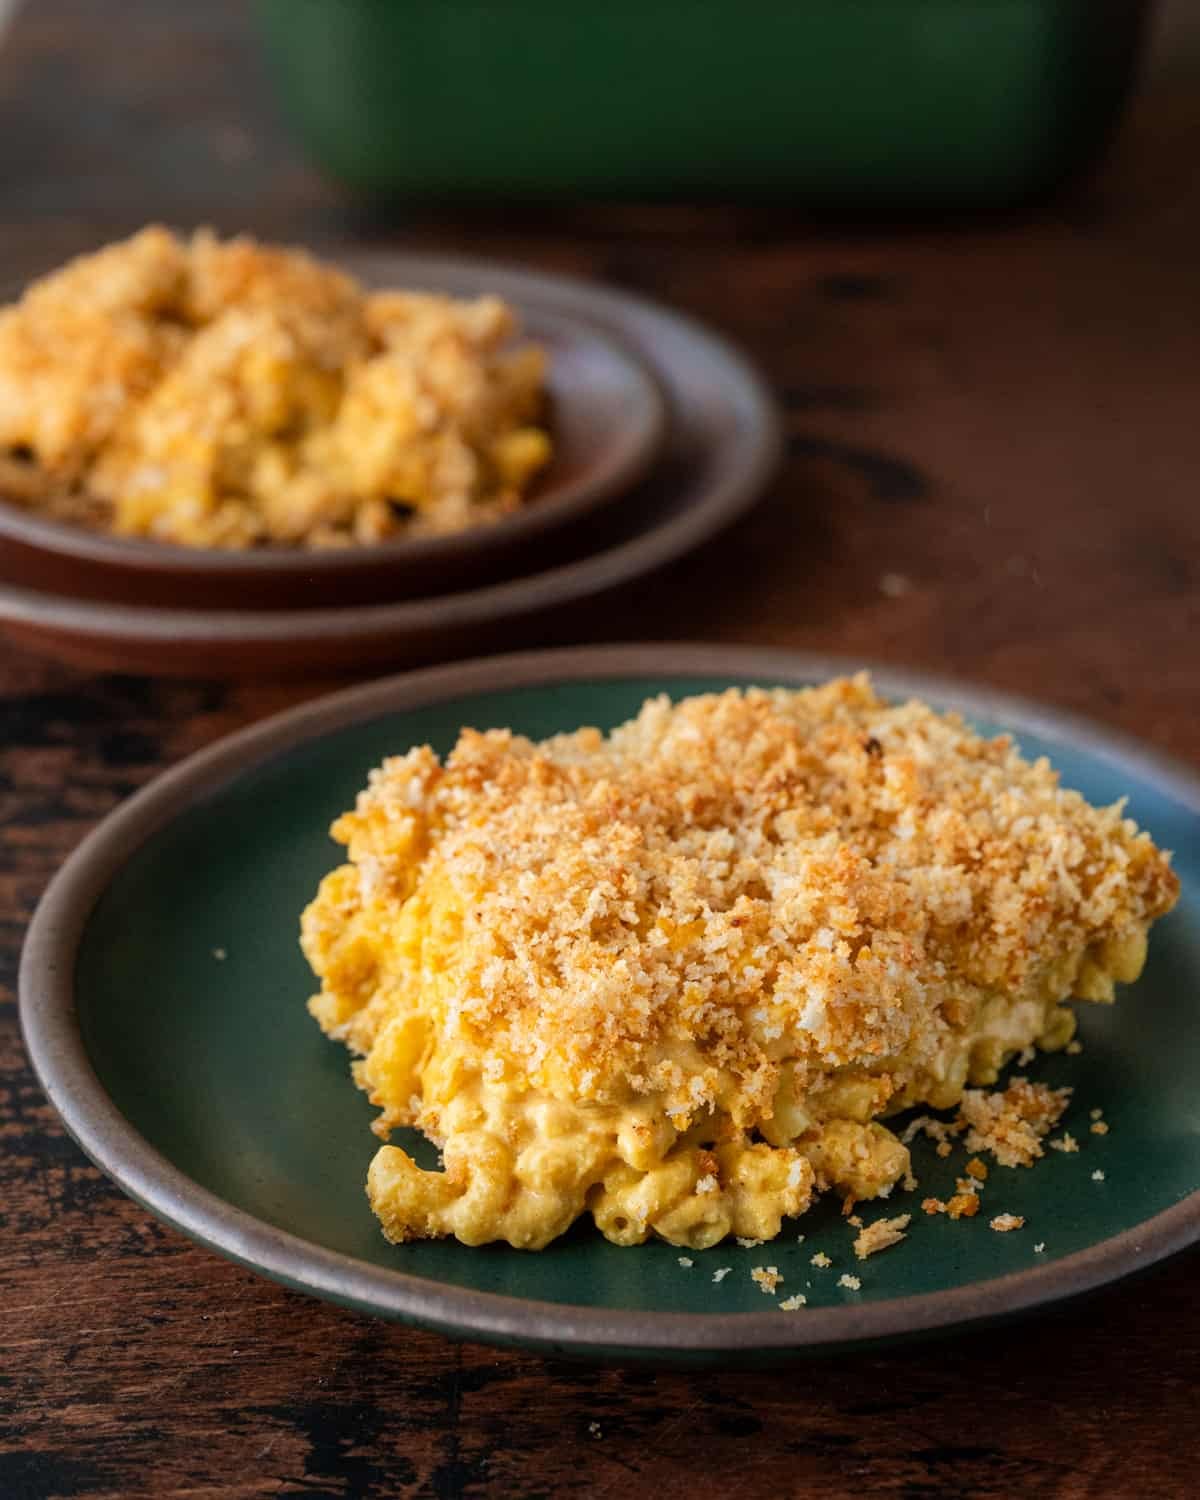
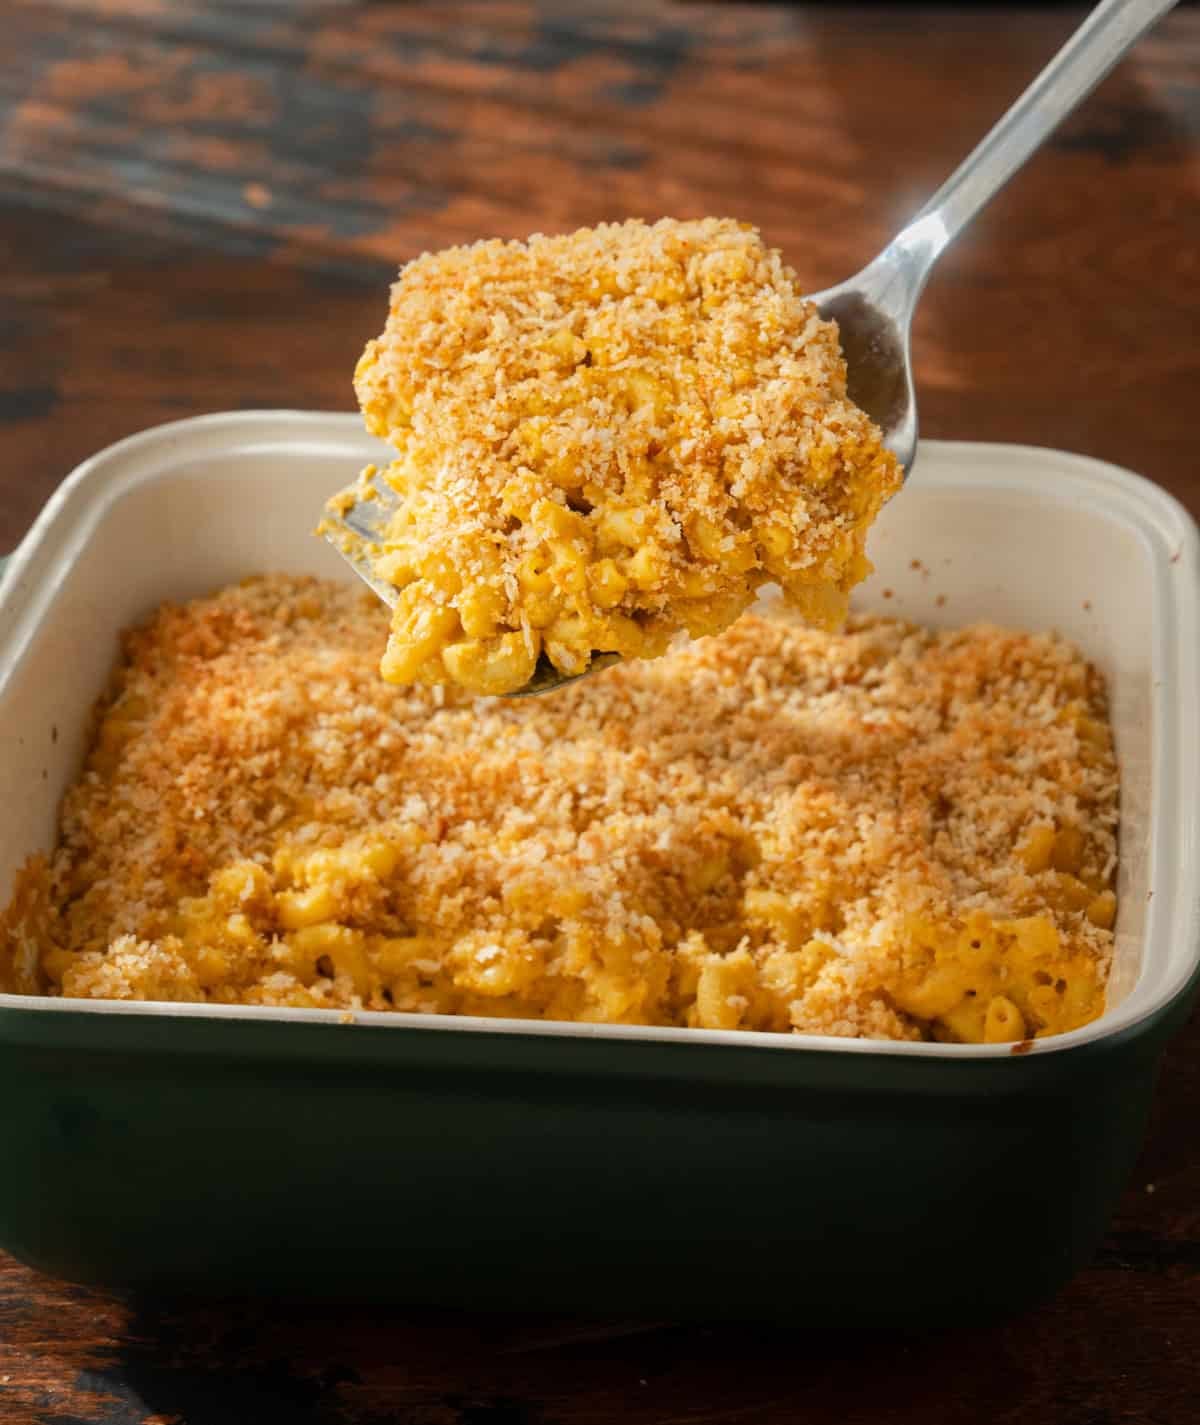
As a child of the ’90s, I can think of no dish more universally comforting than mac and cheese. And this crispy baked vegan mac and cheese hits all the comfort food notes: creamy, cheesy, savory, salty, and even crispy thanks to the buttery breadcrumb topping.
No store-bought vegan cheese required, and it’s ready in 45 minutes.
Feed your inner child (or your actual children) with this indulgent and nostalgic dinner, or serve it up as a crowd-pleasing side for holiday dinners.
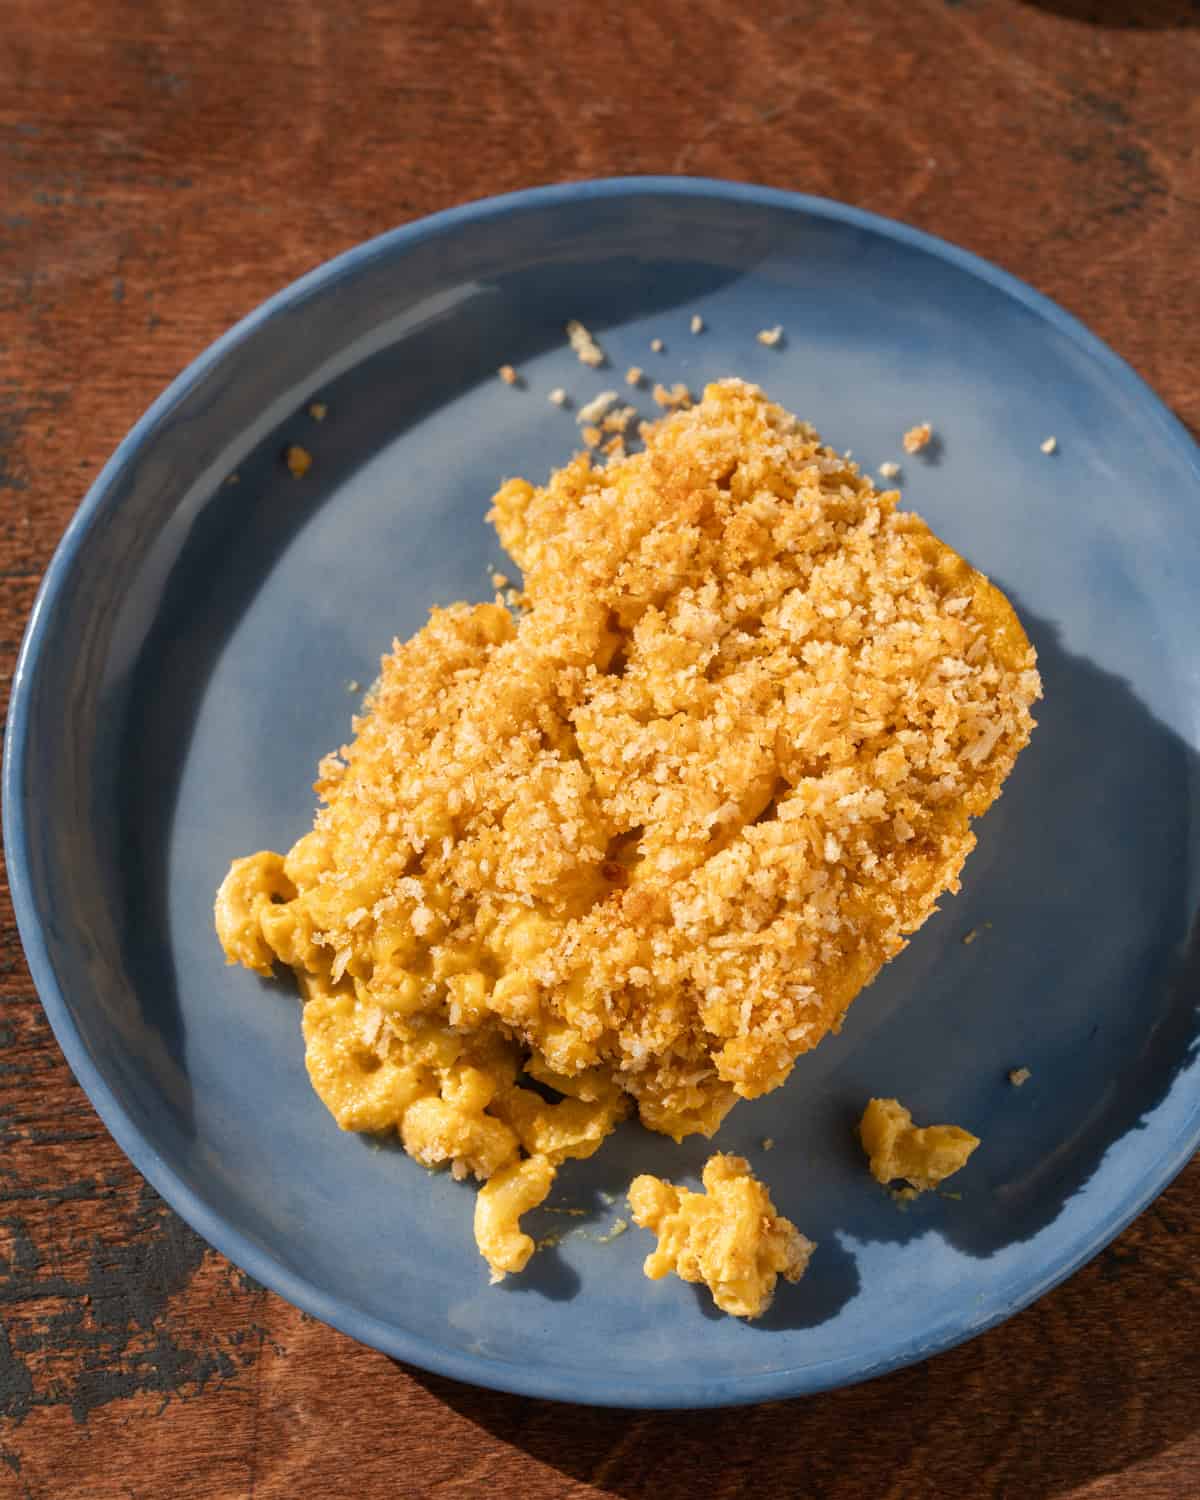
A Better Vegan Mac and Cheese
Even though this recipe has been a popular one (rated 4.9 of 5 stars with 200+ ratings as of this writing), I recently realized it was in need of an update.
When I tried it a few weeks ago, I found it wasn’t as savory or as cheesy as I was expecting, and the butternut squash added more sweetness than I wanted.
So I went back to the drawing board and came up with something far better (I tasted both versions side-by-side and the revamped version was the clear winner: more savory, more flavorful, and the best sign of all—I couldn’t stop eating it).
Without the squash, the recipe is also quicker (~45 minutes) and requires far less oven time.
If you liked the last version, I think you’ll LOVE this one. And if it’s your first time, prepare to enter comfort food heaven 😇

Ingredient Notes
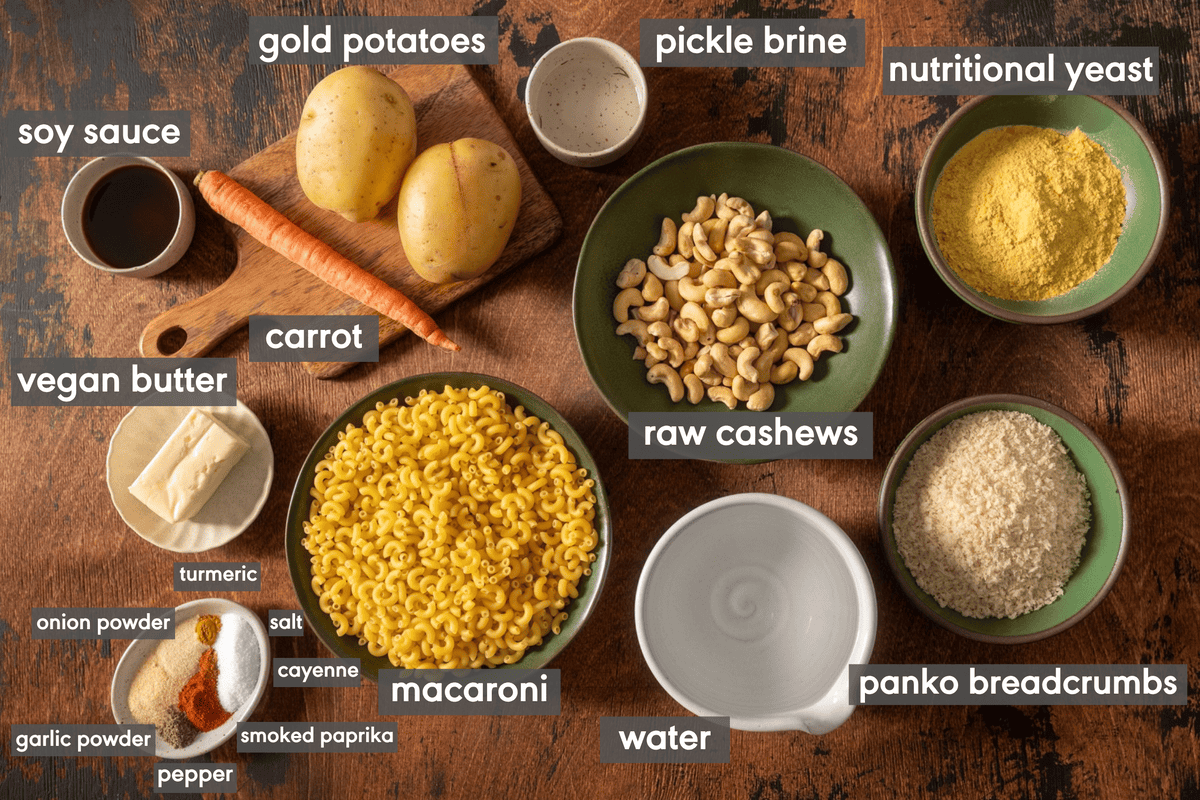
- Raw Cashews. Soaked raw cashews, when blended up, rival the creamiest of dairy-based cheese sauces. Plus, their neutral flavor doesn’t interfere with any of the other sauce ingredient flavors.
- Nutritional Yeast. Given the wide variability of vegan cheeses in terms of meltability and flavor (and the unfortunate plastic taste in some 😭), I didn’t want this recipe to hinge on the quality of store-bought cheese. Luckily, nutritional yeast is a potent source of umami (thanks to its naturally occuring glutamic acid) and brings a nice cheesy flavor.
- Potatoes and Carrots. Yukon gold potatoes add the starch necessary to thicken the cheese sauce while keeping the flavor neutral, while carrots bring the light orange color our brains associate with mac and cheese. To avoid any sweet flavor, this recipe uses just one small carrot, which is plenty for color.
- Soy Sauce and Pickle Brine. These might sound like unusual additions, but without any actual cheese, our sauce needs more savoriness and a bit of tang to mimic the natural flavors of cheese.
- Vegan Butter. This is used to coat the macaroni and to make the buttery breadcrumb topping, and brings, well, the necessary buttery richness you’d expect in mac and cheese.
- Panko Breadcrumbs: The light, flaky texture brings an irresistible snappy crunch to the topping and works much better than standard breadcrumbs.
Substitutes
Live outside the U.S. / don’t have Yukon gold potatoes? Use any medium-starch, all-purpose potato.
Be sure to use the brine from dill pickles or kosher pickles. Don’t use the brine from sweet pickles, such as bread and butter pickles, as it will ruin the sauce. If you don’t have pickle brine, you can use white wine vinegar, but start with less.
Most vegan butters are salted, but if yours is unsalted, you may want to add a tad more salt to the cheese sauce and topping. Don’t want to use vegan butter? You can replace it with extra virgin olive oil.
Step by Step Instructions
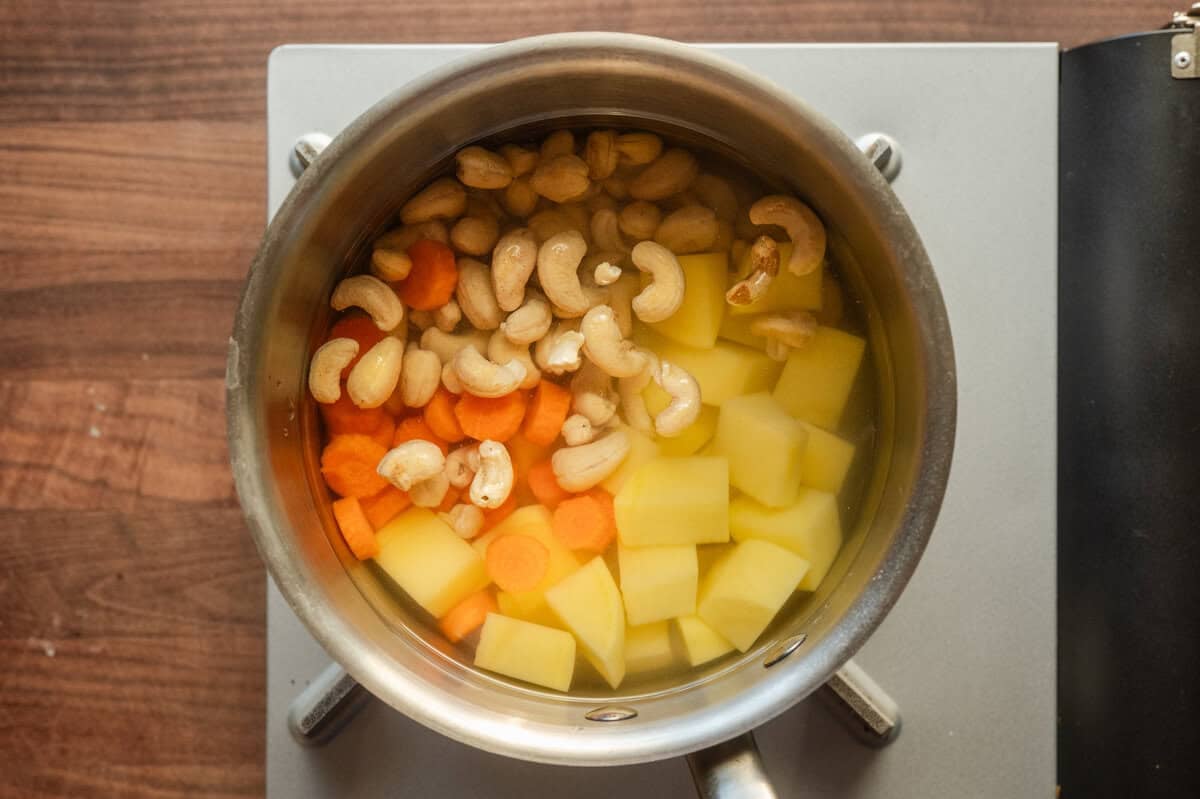
- Add the raw cashews, sliced carrots, and chopped potatoes to a saucepan. Cover with water and bring to a boil.
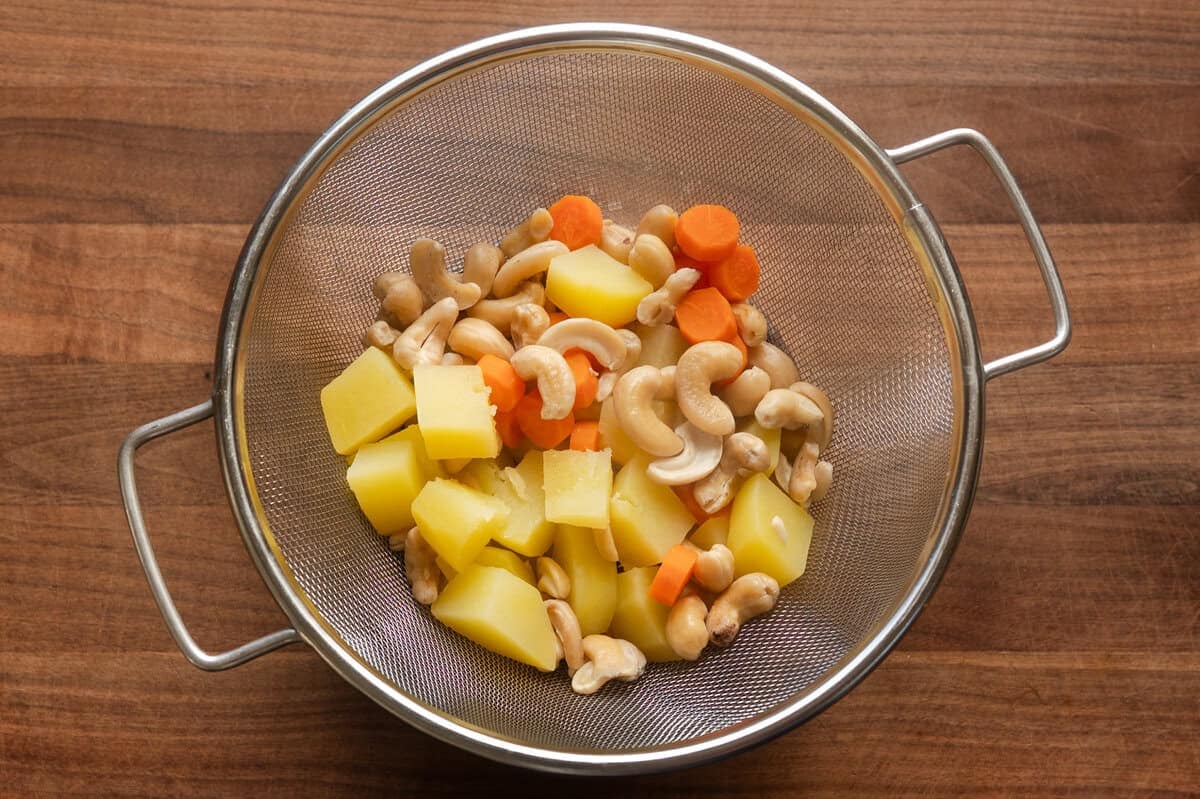
- Boil for 15 minutes until the carrots and potatoes are soft and easily mashed with a fork, then drain and cool.
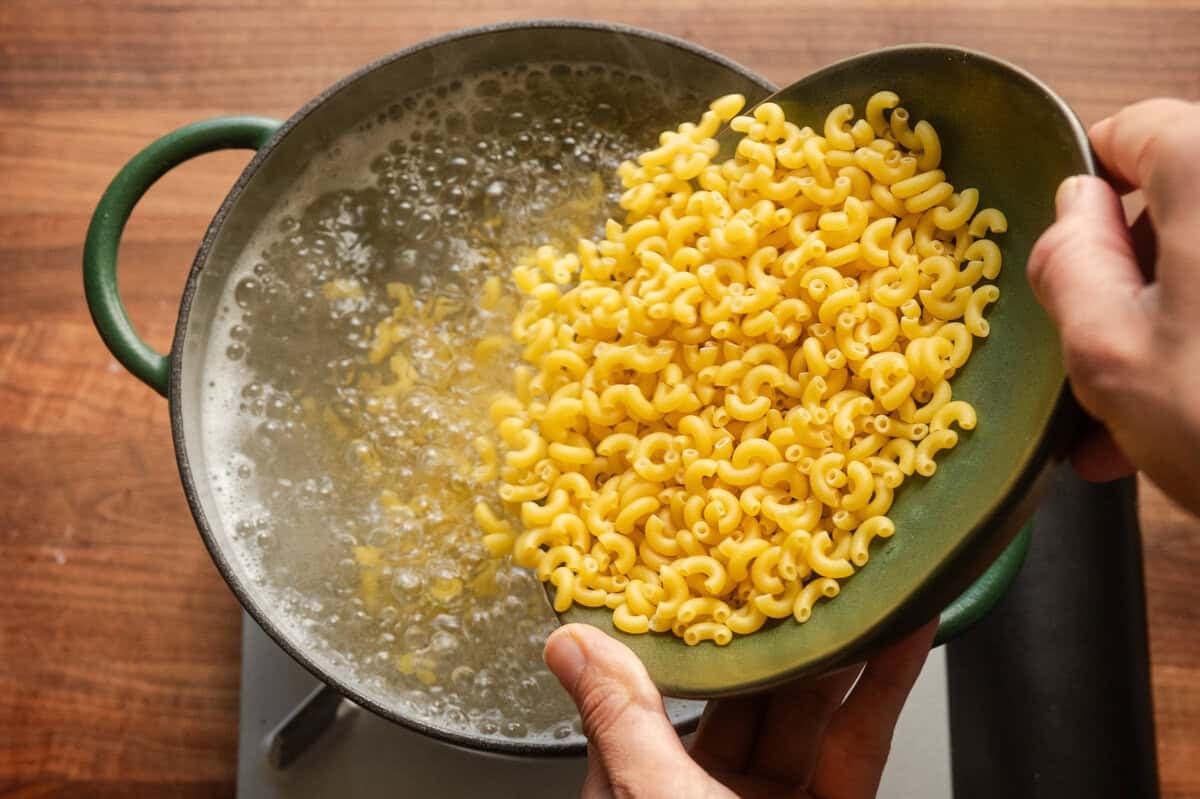
- Cook the macaroni in a large pot of generously salted boiling water until just shy of al dente.
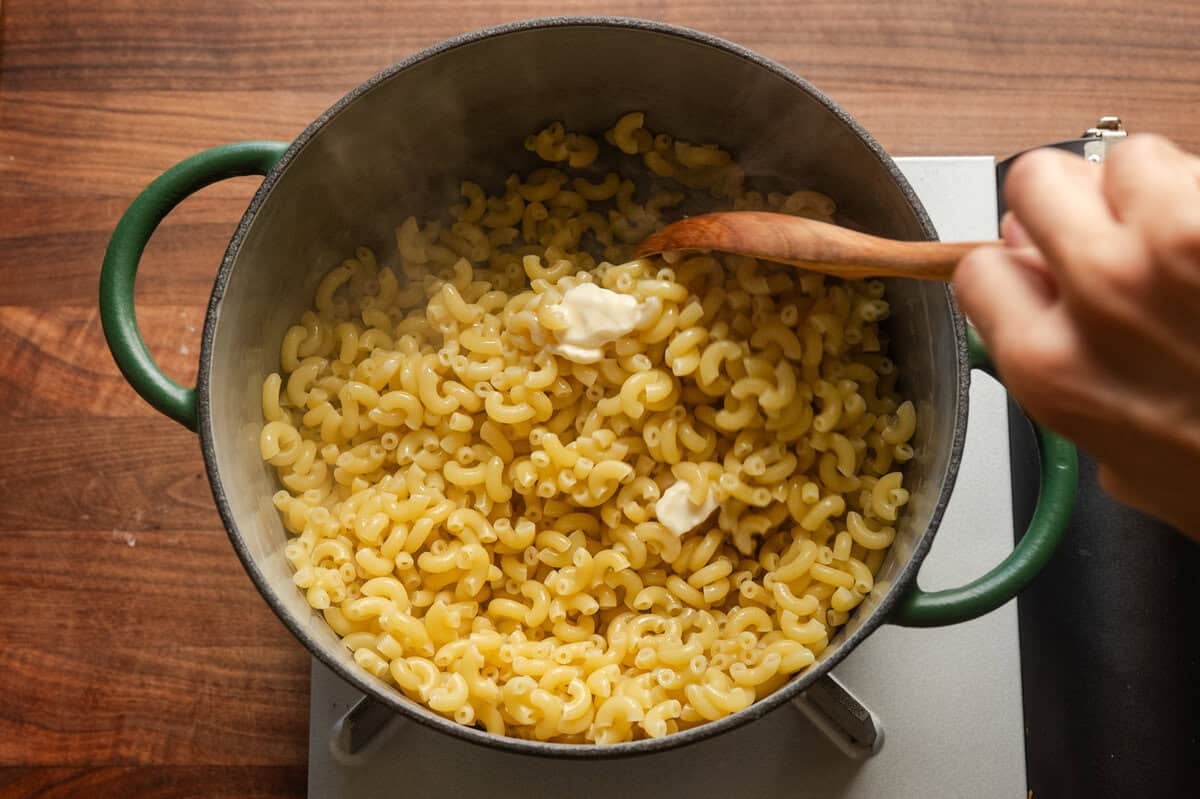
- Drain but don’t rinse, then toss with vegan butter and set aside.
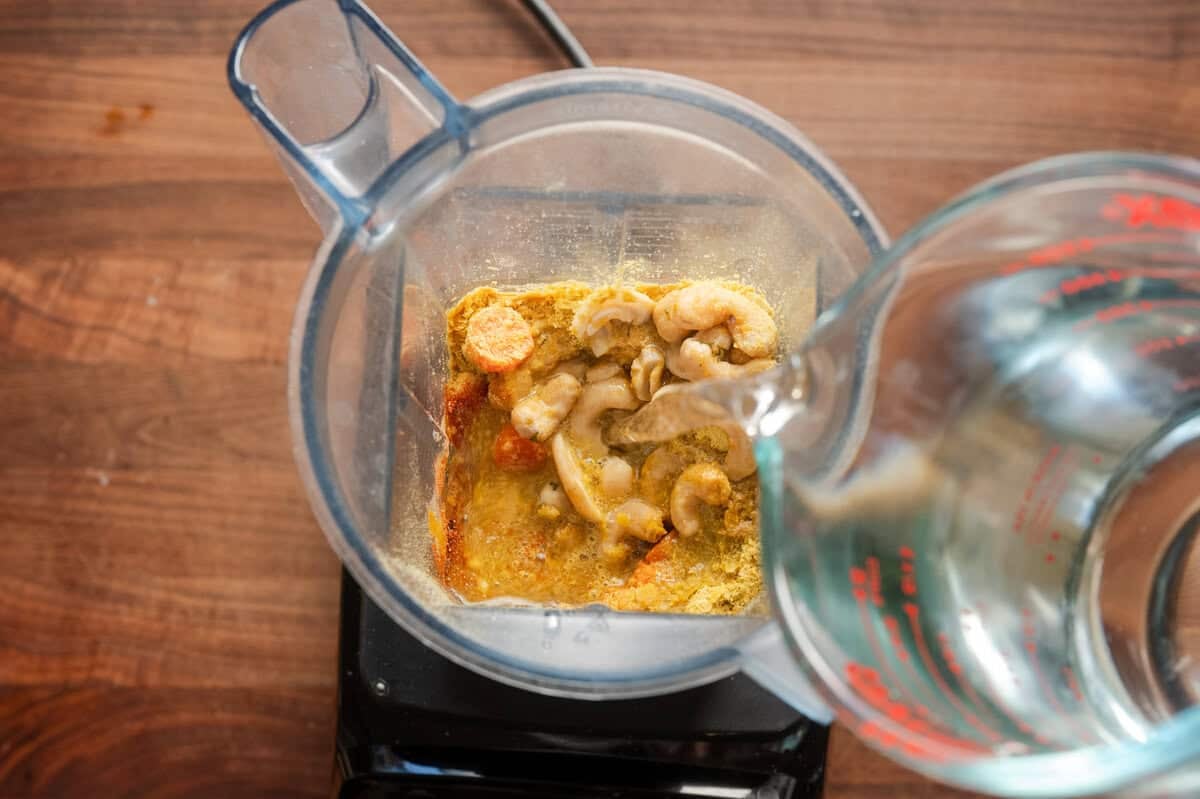
- Make the sauce: In a high-powered blender, combine the boiled cashews and carrots (but not potatoes), water, nutritional yeast, spices, salt/pepper, soy sauce, pickle brine, and olive oil.
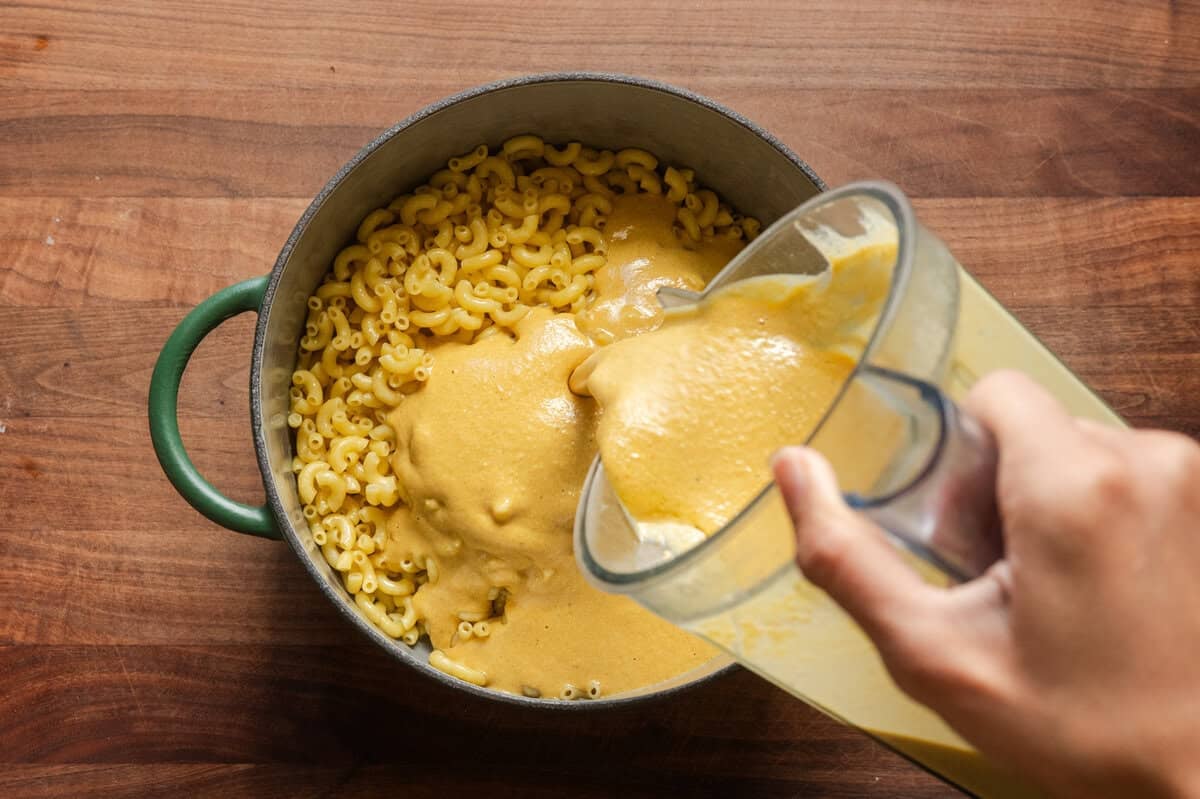
- Blend the sauce on high until smooth, then add the potatoes and briefly blend until pureed. Pour the sauce into the buttered macaroni.
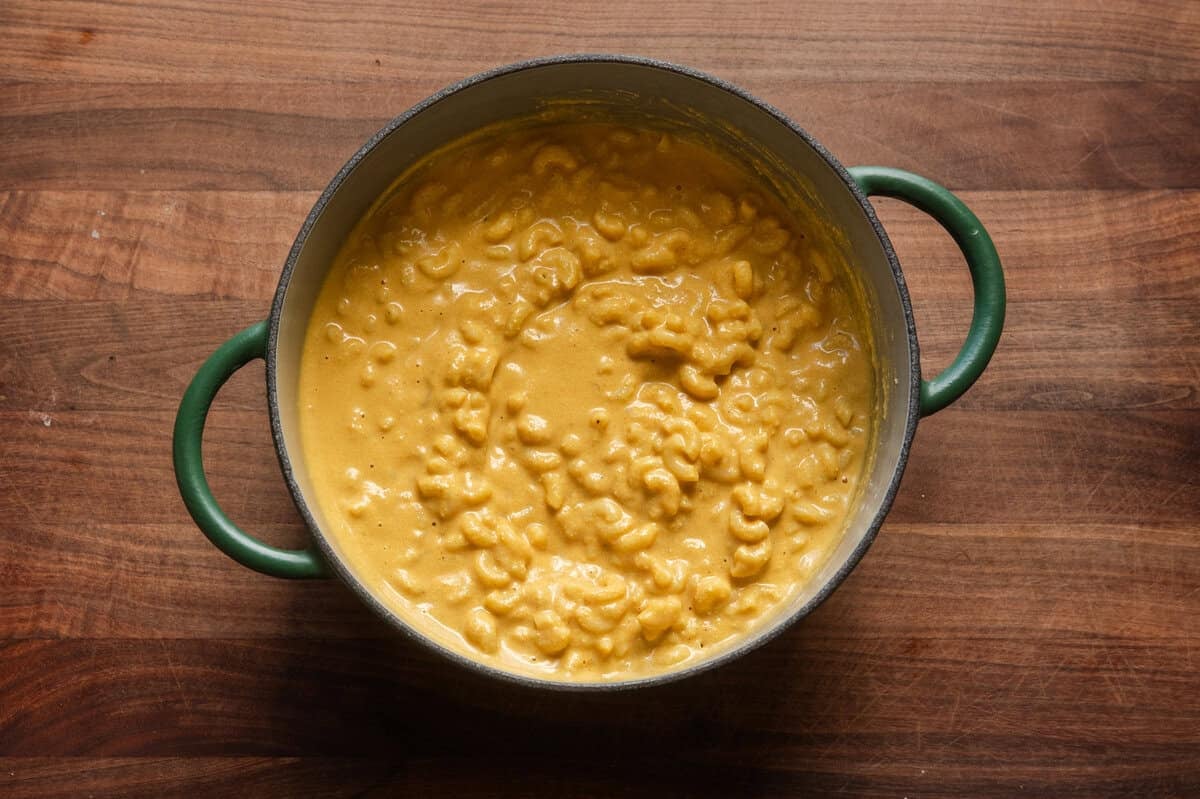
- Toss the sauce and macaroni until well coated (it will be quite saucy).
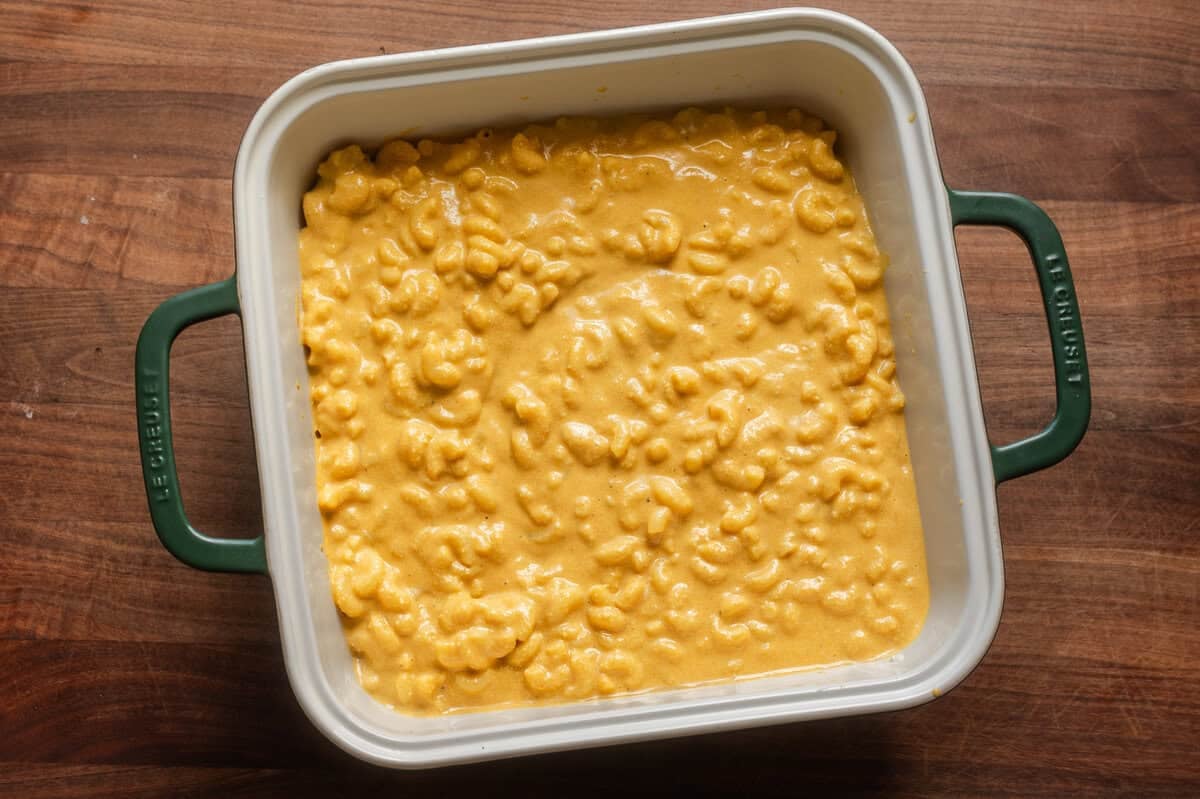
- Transfer the mac and cheese to a lightly greased 3-quart (3 L) baking dish.
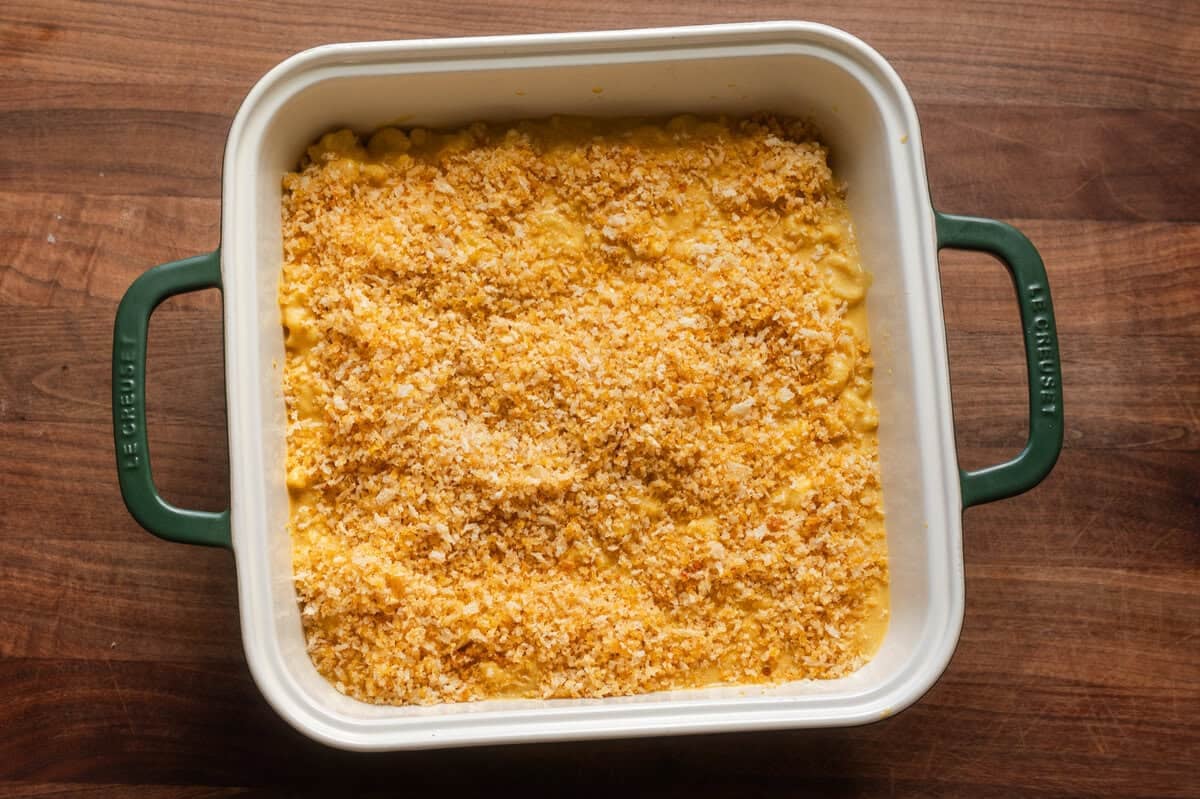
- Sprinkle the buttered breadcrumb topping over the mac and cheese.
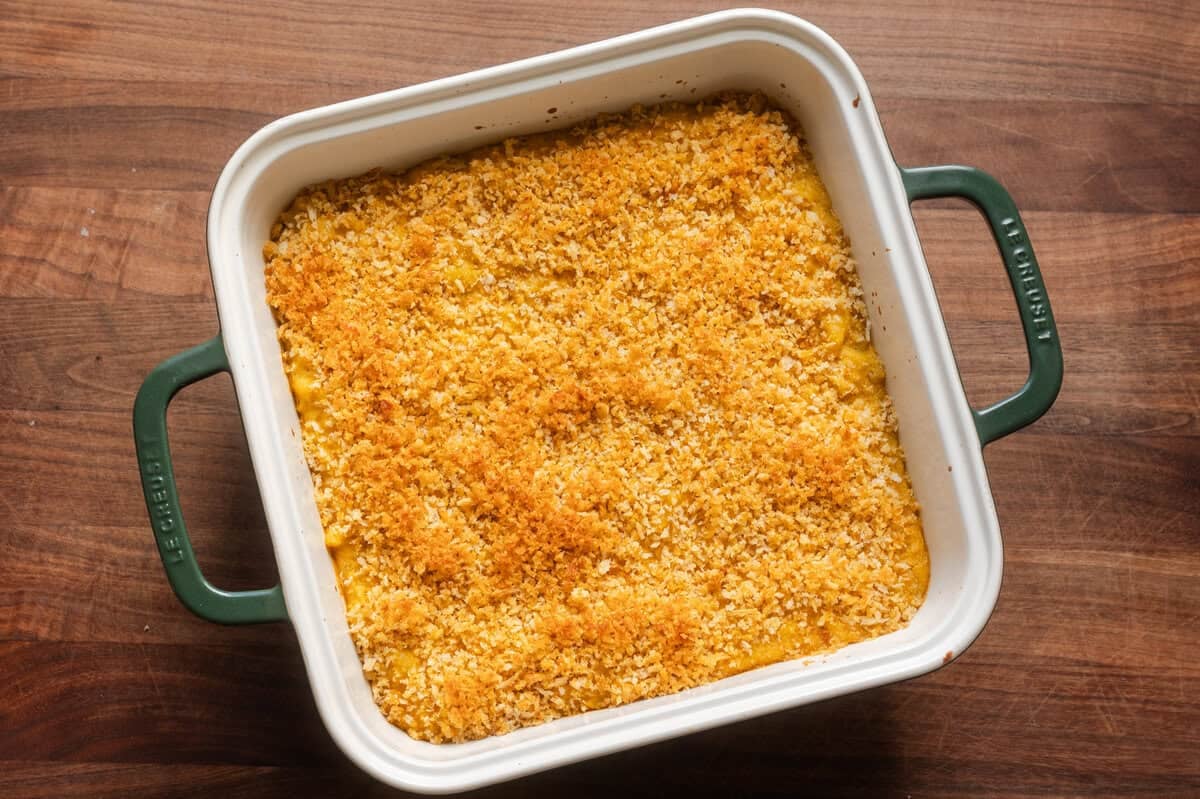
- Bake at 375ºF/190ºC for 20 minutes, then cool for 10 to 20 minutes to set.
Tips for making this recipe
Blend the potatoes separately
Raw cashews and potatoes make for a rich and luxurious cheese sauce, no dairy or store-bought vegan cheese needed. The only problem is they can cause the sauce to thicken too much and dry out a bit after the mac and cheese rests.
To prevent that, I blend the potatoes into the cheese sauce at the end on medium-low, after all the other cheese sauce ingredients have been blended. This prevents the potato from being overworked, keeping the sauce loose yet creamy as it sets.
Tip: Once the potatoes, carrots, and cashews are done boiling and have cooled off, simply pick out the potato pieces and set them aside.
Taste the cheese sauce
Before you pour the cheese sauce into the macaroni, give it a taste and assess. If desired, add more nutritional yeast for cheesy savorines, more soy sauce for savory saltines, more pickle brine for acidity/tang, or more salt to taste.
The sauce starts off thin, then thickens
After blending, the cheese sauce will not be very thick (more like the consistency of a smoothie). When you toss it with the cooked macaroni, it will look like too much sauce.
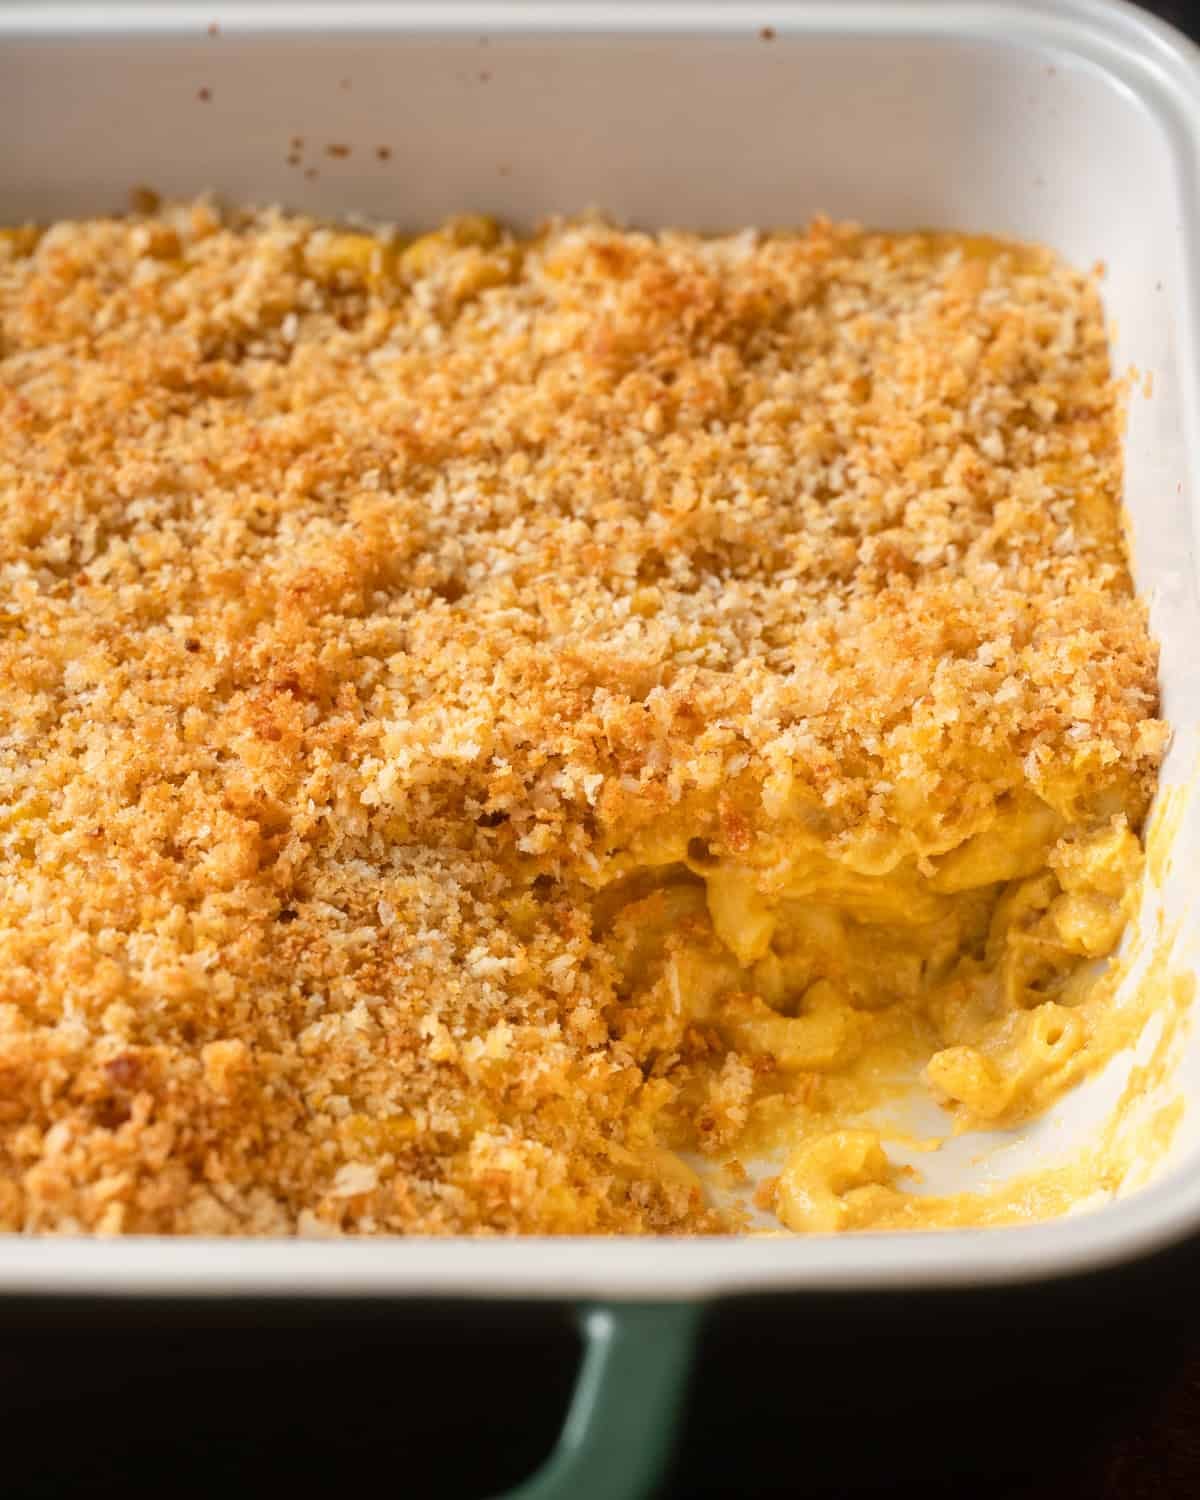
Don’t be alarmed! The pasta will absorb the water from the sauce as it bakes/rests, and the starch from the potato will swell and then set as it cools. So the sauce will thicken as it bakes and continue thickening as it rests.
Looking for more classic holiday side dishes? Try my Ultimate Crispy Roasted Potatoes, Mushroom Gravy, and Vegan Cornbread!
Frequently Asked Questions
For the best results, cook the macaroni and make the cheese sauce ahead of time, combine them, and spread them out in your baking dish. You can do this about 2 days ahead of time.
Make the crispy topping, but store it separately in an airtight container or ziplock bag on the counter for a couple days.
When you’re ready to bake:
(a) If possible, let the dish sit out at room temp so you’re not baking from cold, then sprinkle with the breadcrumb topping and bake as instructed in the recipe card.
(b) If baking the dish cold: Bake the plain mac and cheese for 5 to 10 minutes or until no longer cold, then sprinkle with the crispy bread topping. Bake for 15 to 20 minutes or until golden brown on top.
Once cooled, store the leftovers in an airtight container or tightly cover the baking dish and refrigerate for up to 5 days.
(a) Reheating the full dish or a large portion: Drizzle a few tablespoons of unsweetened soy milk/cashew milk around the edges of the dish, ideally so it can seep into the sauced pasta without wetting the breadcrumb topping. Cover with foil and bake at 350°F (175°C) for 20 minutes, until hot in the center. Uncover and bake 6 to 8 more minutes to re-crisp the top.
(b) Reheating a single serving: add your portion to an oven-proof dish, adding a teaspoon or two of plant milk at the edge. Cover with foil and bake at 350°F (175°C) for 5 minutes, then remove the foil and bake for another 3 to 5 minutes.
Blend the cashews and carrots with the water for several minutes in your blender or food processor, scraping down the sides as you go. Blend until you can get it as smooth as possible.
If you have little unblended cashew bits, strain the mixture over a fine-mesh sieve and discard the cashew bits.
Return this mixture to your blender and add in the remaining ingredients, blending until well-combined.
Unfortunately, I have not been able to come up with a nut-free version that is just as good, so I don’t have a good alternative to raw cashews.
While we haven’t tried this ourselves, you can try using gluten-free macaroni (or any small gluten-free pasta) and gluten-free panko breadcrumbs.
And replace the soy sauce with tamari or GF soy sauce.
If you love this vegan mac and cheese, please let us know by leaving a rating and review below 🫶🏽
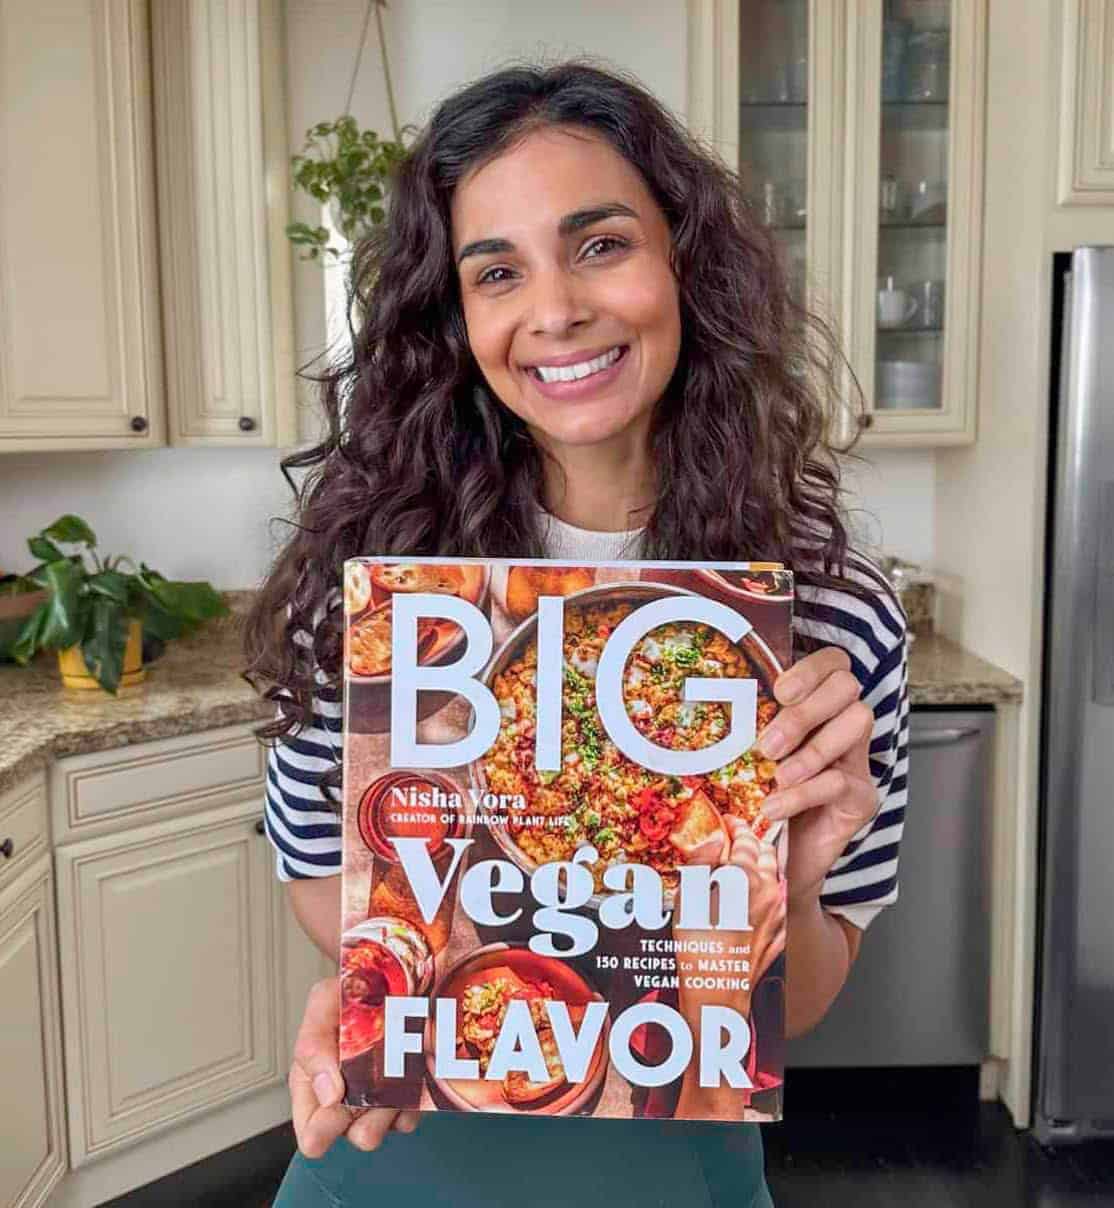
Introducing
Big Vegan Flavor
Techniques and 150 recipes to master vegan cooking.
Mind-Blowing Vegan Mac and Cheese
Ingredients
Cheese Sauce
- 1 small carrot (2 oz / 56g)
- 8 oz (227g) Yukon gold potatoes (see Note 1)
- 115 g raw cashews (this is ¾ cup + 1 TBSP)
- 2 cups (480 mL) water
- 50 g nutritional yeast (this is ½ cup + 2 TBSP)
- 1 tsp garlic powder
- ½ tsp onion powder
- ½ tsp smoked paprika
- ⅛ tsp cayenne pepper
- ⅛ tsp turmeric for color
- 3 to 4 tsp soy sauce
- 1 ½ TBSP dill pickle brine (don’t use brine from sweet pickles, see Note 2 for sub)
- 2 ½ TBSP (35g) extra virgin olive oil (or vegan butter, melted)
- Diamond Crystal kosher salt and freshly cracked black pepper (see Note 3)
Crispy Topping
- 2 ½ TBSP (35g) vegan butter, melted
- 65 g panko breadcrumbs (this is ~ ¾ cup + 2 TBSP)
- 1 TBSP (5g) nutritional yeast
- ⅛ tsp smoked paprika
Macaroni
- 12 oz (340g) elbow macaroni
- 1 ½ TBSP (21g) vegan butter
Instructions
- Bring a large saucepan of water to a boil for the macaroni.
- Peel the carrot, then slice into ¼” coins (6 mm). Peel the potatoes, then into 1” chunks (2.5 cm).
- Add carrots, potatoes, and cashews to a medium saucepan and cover with enough water to submerge. Bring to a boil and boil for 15 minutes, or until potatoes and carrots are soft and easily smash with a fork. Drain and let rest until no longer hot.Pick out the potato pieces and keep separate from the cashews/carrots (the potatoes get blended at the end).
- While the cashews/veg boil, make the Crispy Topping. Add 2 ½ TBSP (35g) butter to a small bowl and melt in the microwave. Mix in the panko, 1 TBSP (5g) nutritional yeast, ⅛ tsp smoked paprika, and 2 pinches of salt, stirring well until the butter is evenly distributed and there are no clumps. Set aside.
- Cook the pasta. When the water is boiling, salt it generously. Cook the macaroni 1 minute less than the time indicated on the box, or until just shy of al dente.Drain the pasta but do not rinse. Return the pasta to its pot, and toss with 1 ½ TBSP (21g) vegan butter (or olive oil). Set aside.
- Preheat the oven to 375ºF/190ºC. Lightly grease a 3-quart / 3L (13"x9") baking dish with softened/melted butter or olive oil.
- Blend the cheese sauce. In a high-powered blender, combine the 2 cups (480 mL) water, nutritional yeast, garlic powder, onion powder, smoked paprika, cayenne, turmeric, 3 teaspoons soy sauce, pickle brine, olive oil, several twists of black pepper, and 1 ½ teaspoons kosher salt (half if using sea salt/table salt). Add the boiled carrots and cashews (but not the potatoes). Blend on high until completely smooth and creamy and all cashew bits have been pulverized, scraping down the sides as you go.Now add the boiled potatoes and blend on medium-low for 15 to 30 seconds, just until combined and pureed (blending lightly at the end prevents the potatoes from turning gummy). NOTE: The sauce will be looser than seems right, like the consistency of a smoothie.
- Taste the sauce, adding more pickle brine for zing/tang, more nutritional yeast for cheesiness, or more soy sauce for savory saltiness (I usually use 4 teaspoons total). If adding any additional ingredients, blend on medium-low just to combine, taking care to not over-blend the potatoes.
- Pour the cheese sauce into the pot of cooked macaroni, tossing well. NOTE: It will feel like too much sauce now, but it thickens as it bakes.
- Transfer the mac and cheese to the prepared baking dish and sprinkle the Crispy Topping evenly over the top. Bake for 20 minutes or until the topping is golden brown. Cool for 10 to 20 minutes to help set up, then slice and serve.
Notes
- If you live outside of the U.S. or Yukon Gold potatoes are not available, use a medium-starch, all-purpose potato. Try to avoid a high-starch potato or a low-starch potato.
- Don’t use pickle brine from sweet pickles, such as bread and butter pickles. If dill or kosher pickles aren’t available, sub the brine with white wine vinegar, but start with 2 to 3 teaspoons, then add more as needed.
- I use Diamond Crystal kosher salt, which is a lot less salty than other salts. If using table salt, use half the amount of salt listed in the recipe. If using sea salt or Morton’s kosher salt, use slightly more than half.
Nutrition
Nutrition information is automatically calculated, so should only be used as an approximation.
 Love this? Leave a rating below!








Wow… excellent recipe. Full of flavor, minus all the dairy. Nisha does another creative work of art, orchestrating veggies to make a classic American dish, guilt free. Good for soul and body
What happened to the original recipe? It was AMAZING! Please keep the original and let people choose their favorites.
Looking forward to trying this! Can you re-post the butternut squash one? Pretty sure I have it memorized from making it so many times but like having a recipe handy
For other squash fans — you can use frozen squash to make the squash version both more affordable and faster to prepare
Hi E, Nisha recently tried the original butternut version and felt it didn’t taste quite right, so she tried it again with a couple tweaks and it was still a bit off in terms of mac and cheese.
But we’re happy you loved the original! If you send us an email at help@rainbowplantlife with the subject line “Original mac and cheese recipe,” we’ll be sure to send you the original recipe.
This was delicious, so complex and savory! My non-vegan husband didn’t think it tasted a lot like “regular” mac and cheese, but he really enjoyed it and ate several portions 🙂 The leftovers were delicious, too–I added a little water when reheating to restore the creaminess.
We appreciate your feedback and support, Jen. Thank you for leaving a review!
Incredible flavour! I made enough for 4 nights and it kept its taste too. My husband gave a ‘wow’ with his first mouthful. This is now going to be a staple.
We’re so happy that the mac and cheese turned out well for you, Gez. Thank you for taking the time to leave a comment and for trying out the recipe!
This recipe tastes like a really savory Mac n cheese. The butternut squash recipe was good but I agree it wasn’t really a Mac n cheese taste to me. This recipe I think I could serve to non vegans and it would be quickly devoured:). Thank you for tweaking, it’s really yummy!
Thanks for the sweet feedback about our update, Leanne! It’s great to hear you noticed an improvement.
Well, you have done it again, another fantastic recipe. I have been making your older version on repeat for a while and my family loves it. This was delicious and definitely preferred over the previous recipe, thank you! Is there a way to freeze this to bake at a later date?
Thank you so much Laurie, we’re so happy this one is the new favorite! We haven’t tested freezing the whole dish, since pasta doesn’t freeze very well.
The sauce does freeze well, though it can separate a little once thawed. We recommend thawing the sauce in the fridge, then give it a quick blend with a splash of plant milk to smooth it out.
If you mostly want to get ahead, you can also make the sauce and pasta 1 to 2 days early, toss them together in the baking dish, and refrigerate in the baking dish (covered). Then make the topping since it only takes a couple of minutes, sprinkle it on top, and bake when ready.
Hope that helps!
Very good! Salty in the best way!! Will definitely make again! Even hubby approved!
Thanks for the lovely feedback, Perri!
Do you have any suggestions for a replacement for the cashews?I’m trying to minimize my use of them due to the ethical concerns around their processing and would.love to try this. I know sometimes you can use.macadamia’s, other times you can use tahini, etc. But not sure what the best substitute would be in this case.
Hi Michael, unfortunately we have not been able to come up with a nut-free version that is just as good, so we don’t have a good alternative to raw cashews.
This updated version was absolutely delicious – thank you Nisha! The only problem is that I couldn’t stop at one serving. Paired it with the Korean BBQ tempeh – out of this world!
Sounds like a lovely pairing, E! Thanks for the great feedback!
I was a little worried about this update but I gave the new one a try and… wow! I liked the old one but the new is significantly more savory and identifiably “mac and cheese” tan the old one, which tended to be a tad too sweet. I also like that it’s now a weeknight friendly, I got it done in like half the time as the old one.
PS: the RPL team is very sweet, I emailed them because I was worried about losing the old recipe and they sent me it. I don’t *think* I’ll be using it but I’m grateful nonetheless.
Thanks for the lovely review, Annika 🙂 We really appreciate it!
Please notice that when printing the recipe, only the US measurements will be scaled according to the number of servings; the metric will stay the same. E.g., the printout will say “(340 g) elbow macaroni” no matter how many servings you choose.
Just fyi….when I print out the recipe with an increased number of servings (from the original 8 servings to 10 servings)….the amounts of the recipe ingredients do not consistently or proportionately increase (and some of the ingredient amounts do not increase at all). For example, the amount of panko remains at 65 grams–no matter the number of servings that I input into the recipe print-out. This unreliable correlation between the number of servings and ingredient amounts makes me nervous about deviating from the recipe’s 8 servings when printing the recipe.
Hi Patty, the issue of imperial measurements not updating when serving sizes are adjusted should be fixed for this recipe. Panko and nutritional yeast both update when serving sizes are changed.
NB: this does not apply to metric measurements, those are static.
It’s weird that you didn’t just create a new entry for this new recipe, because most of the star ratings and reviews are for the old recipe. Seems kind of misleading to be honest.
I am a huge Nisha fan (I always recommend her recipes to my nutrition clients), but I also agree this was not a cool move. I completely understand the SEO and Google ranking implications and would understand using the same blog post for a few recipe tweaks, but this is literally a completely new recipe. Plus, I now have to buy an entire jar of pickles to get 1-1/2 TBSP of pickle brine? Kind of ridiculous. Your YouTube video for this recipe now makes zero sense because the recipe link does not match the video. I might try this new version, but I honestly thought the “cheese sauce” with the miso, mustard, and coconut milk was divine and so cravable. You traded the umami essence of miso + the mustard for soy sauce and pickle brine? The previous recipe was amazing. My non-vegan son ate 1/2 a tray of it. I served it at my Hanukkah party last year, and no one realized it was vegan until I told them. I am so thankful that I have a printout of the old recipe. I am now nervous that this bait-and-switch will continue to all my recipe favorites.
Hi Erin,
Thanks for sharing your feedback. I can address this. Apologies in advance, this reply is a bit long but hopefully it provides some insight and transparency.
As Nisha shares above, when she tried this recipe recently, it did not meet her standards, and she decided to update it to streamline the recipe and make it taste more like traditional mac and cheese. Between research, many rounds of recipe testing and re-shooting and editing all the photos, Nisha and her culinary manager probably spent 20+ hours on this process.
We did consider both (1) creating new a new post and (2) deleting previous comments but chose not to do either. We did not do this to mislead readers — we tried to make it clear the recipe has been updated both in the email newsletter we sent to our audience and in the written blog post itself — but more because of how the economics of food blogging works.
We don’t charge a fee for the recipes on the blog, so income on each post comes from ad revenue, and that ad revenue depends on page traffic. For better and worse, most traffic these days still comes through Google search.
For a recipe to get traffic, it needs to appear on the first page of search results. And to do that, it’s much easier if you update an existing post on the topic. Google search likes to see how a recipe progresses over time and that a blogger is responsive to audience feedback (and there was a lot of feedback on this recipe that it was too time consuming and too sweet from the squash). Google also hates when you have duplicate content and tends to penalize both posts. So had we created a new post, it’s likely neither post would have a chance to rank.
This is, to be frank, just one example of what makes Google search a crummy system. Older blogs are favored over newer blogs (even if the newer blog has a better version of a recipe) and there is a strong incentive for bloggers to update content even if it doesn’t need updating.
We try not to over-index on pleasing Google, so if Nisha thinks an existing recipe is good enough, she won’t touch it, even if it might benefit her to from a revenue perspective to tweak it. But in instances where she re-tests a recipe and it doesn’t meet her standards, she will update it, because she isn’t comfortable with substandard recipes when she knows she can offer a better one.
All that to say, if Nisha and the team are going to invest 20 hours on updating a recipe and taking new photos, we, like any business, have to take revenue considerations into account. The alternative is for Nisha to keep recipes she’s not proud of and doesn’t stand by, which she would never want to do.
We’ve tried to do this as transparently as possible by highlighting this via email and in the post itself, and we’re following up with every reader who has requested a copy of the old recipe.
Hopefully this provides a bit more insight into our process. Thanks for reading and being part of the RPL community.
Agreed. First the reviews are for the other recipe, and now the original recipe disappeared for the people who liked it making it inconvenient and making me wonder if the other recipes I like will be sneakily removed
Plus some of the recipe comments will be confusing for the new people. I often refer to the comments to find notes and alternatives from others 😵💫
Hi Anna,
Thanks for sharing your feedback. I can address this. Apologies in advance, this reply is a bit long but hopefully it provides some insight and transparency.
As Nisha shares above, when she tried this recipe recently, it did not meet her standards, and she decided to update it to streamline the recipe and make it taste more like traditional mac and cheese. Between research, many rounds of recipe testing and re-shooting and editing all the photos, Nisha and her culinary manager probably spent 20+ hours on this process.
We did consider both (1) creating new a new post and (2) deleting previous comments but chose not to do either. We did not do this to mislead readers — we tried to make it clear the recipe has been updated both in the email newsletter we sent to our audience and in the written blog post itself — but more because of how the economics of food blogging works.
We don’t charge a fee for the recipes on the blog, so income on each post comes from ad revenue, and that ad revenue depends on page traffic. For better and worse, most traffic these days still comes through Google search.
For a recipe to get traffic, it needs to appear on the first page of search results. And to do that, it’s much easier if you update an existing post on the topic. Google search likes to see how a recipe progresses over time and that a blogger is responsive to audience feedback (and there was a lot of feedback on this recipe that it was too time consuming and too sweet from the squash). Google also hates when you have duplicate content and tends to penalize both posts. So had we created a new post, it’s likely neither post would have a chance to rank.
This is, to be frank, just one example of what makes Google search a crummy system. Older blogs are favored over newer blogs (even if the newer blog has a better version of a recipe) and there is a strong incentive for bloggers to update content even if it doesn’t need updating.
We try not to over-index on pleasing Google, so if Nisha thinks an existing recipe is good enough, she won’t touch it, even if it might benefit her to from a revenue perspective to tweak it. But in instances where she re-tests a recipe and it doesn’t meet her standards, she will update it, because she isn’t comfortable with substandard recipes when she knows she can offer a better one.
All that to say, if Nisha and the team are going to invest 20 hours on updating a recipe and taking new photos, we, like any business, have to take revenue considerations into account. The alternative is for Nisha to keep recipes she’s not proud of and doesn’t stand by, which she would never want to do.
We’ve tried to do this as transparently as possible by highlighting this via email and in the post itself, and we’re following up with every reader who has requested a copy of the old recipe.
Hopefully this provides a bit more insight into our process. Thanks for reading and being part of the RPL community.
Is a 3 quart dish a 9 x 13?
Hi Jan — yes, that’s right! We’ll update the post to reflect this.
You can find gold potatoes in the UK under the taste the difference brand in Sainsbury’s or Trinity Gold potatoes in Marks and Spencer. Seen to be seasonal in Tesco (under Finest brand). They’re more expensive than large white fleshed potatoes (which is why they’re unheard of/not sought out specifically by the UK public) but they actually taste of potato (tried side by side. Maris Pipers don’t taste of potato, just butter and milk) and hold their shape well over a low boil (takes an age to cook on simmer). To sub golden potatoes texture, always use red skinned potatoes over white skinned which break up too readily before the insides soften.
I made this today for a mixed diet potluck. I used 4 tsp of soy sauce. It was completely finished.
Amazing! Thanks for sharing, C!
I came to make the squash Mac and cheese and it’s not here. I tried to send an email with the request of the original recipe as listed below, but it says the email is not a valid email address. Can you please send me the recipe? This doesn’t help with dinner tonight, but hopefully before my butternut squash goes bad…
Hi Tracie, sorry we just saw this comment. We just sent you that recipe!
I just came on here with the same situation… Roasted my butternut squash and came to get the rest of the recipe only to find it doesn’t exist!!!
Hi Brandi, we’re sorry about this! We just sent you the recipe via email.
I agree, this isn’t okay. I hope she restores the original recipe and posts the new one as a separate page.
I’ll update my rating once this is fixed.
Same! I was making the original tomorrow with my left over squash and went to my saved recipe- can I find it somewhere? I really enjoyed it (and do love potatoes and carrots
though I may try it someday). Thanks!
12/10!!! This is SO yummy and will be made on repeat this fall and winter! Thank you Nishi for another amazing recipe!!!
Awesome, Sheila. Thanks for your comment and for taking the time to review!
Have you ever craved a meal you’ve never even eaten? That’s how I felt looking at the photos of this recipe for the first time. And making it tonight, it lived up to every expectation I had for it. 10000/10, this is going into my rotation immediately.