

In terms of nutritional and literal “bang for your buck,” beans are hard to top—they’re packed with protein and fiber and extremely affordable. And while I’m a fan of canned beans for convenience, there’s nothing like beans cooked from scratch.
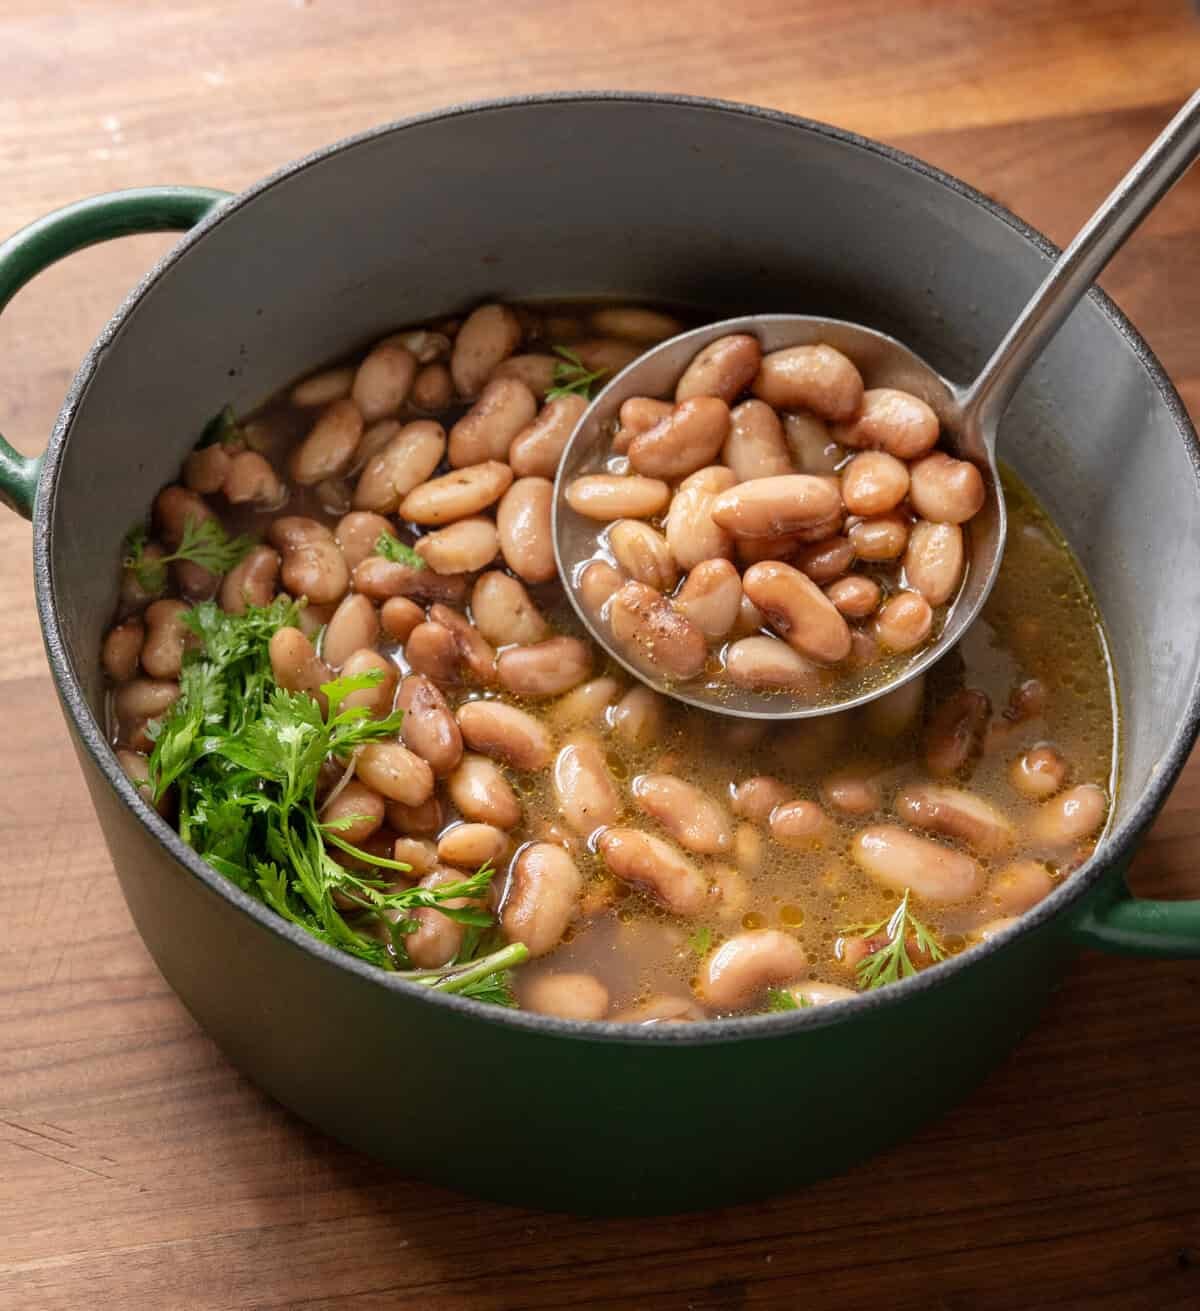
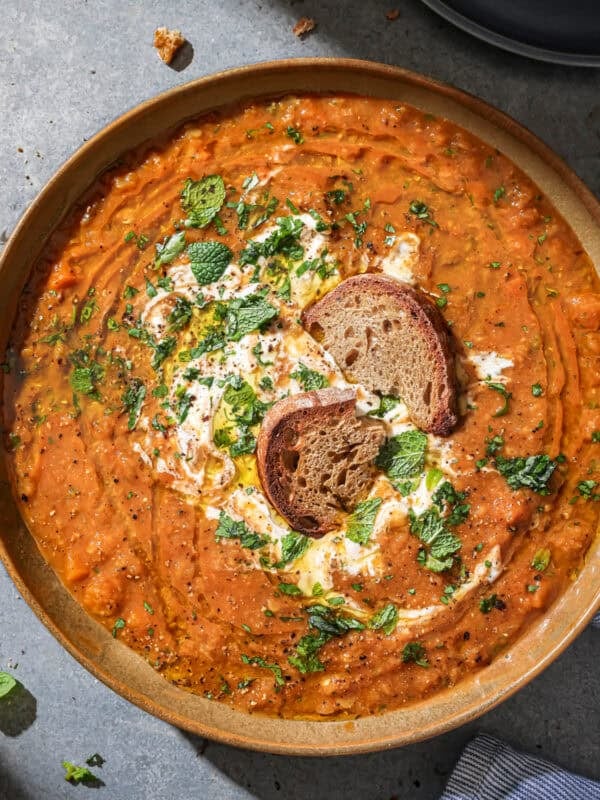
In this post, I share all my secrets for how to cook beans so they taste utterly irresistible: tender and creamy, perfectly seasoned, and ensconced in a luxurious and flavorful broth.
I meal prep a pot of these brothy beans nearly every week, and while they’re good enough to eat on their own, they add life (and nutrition) to so many different meals: enjoy them with tacos, on toast, in grain bowls or burrito bowls, and alongside breakfast scrambles!
📣 Calling all Instant Pot fans! I have an entire blog post (and YouTube video!) dedicated to how to cook beans in the Instant Pot. It’s a one-stop shop with everything you need to know to cook all types of beans using the Instant Pot—check it out!
In this post:
🎥 Watch the video

Over on YouTube, I walk through my exact process and share a few of my favorite ways to use them. With over 100K views, this video was a huge hit with my audience!
Brothy beans vs. “plain” beans
A point of clarification: this post is focused on how to cook a legendary pot of brothy beans that are good enough to eat all on their own.
If you are looking for guidance on cooking beans more simply, perhaps to use as a one-to-one substitute for canned beans, no problem!
Here’s what I recommend for “plain” beans:
Use the method described in this post, but simply cook the soaked beans in water with salt and black pepper (add 2 bay leaves to the cooking water, as desired). Skip the sauteed aromatics and the finishing olive oil/vinegar, but season to taste with salt.
Once cooked, I recommend storing the beans in 1.5-cup increments if you’re freezing them (I love Souper Cubes for this!)—that way you have an easy equivalent to a standard 15-ounce can of beans.

Ingredient notes
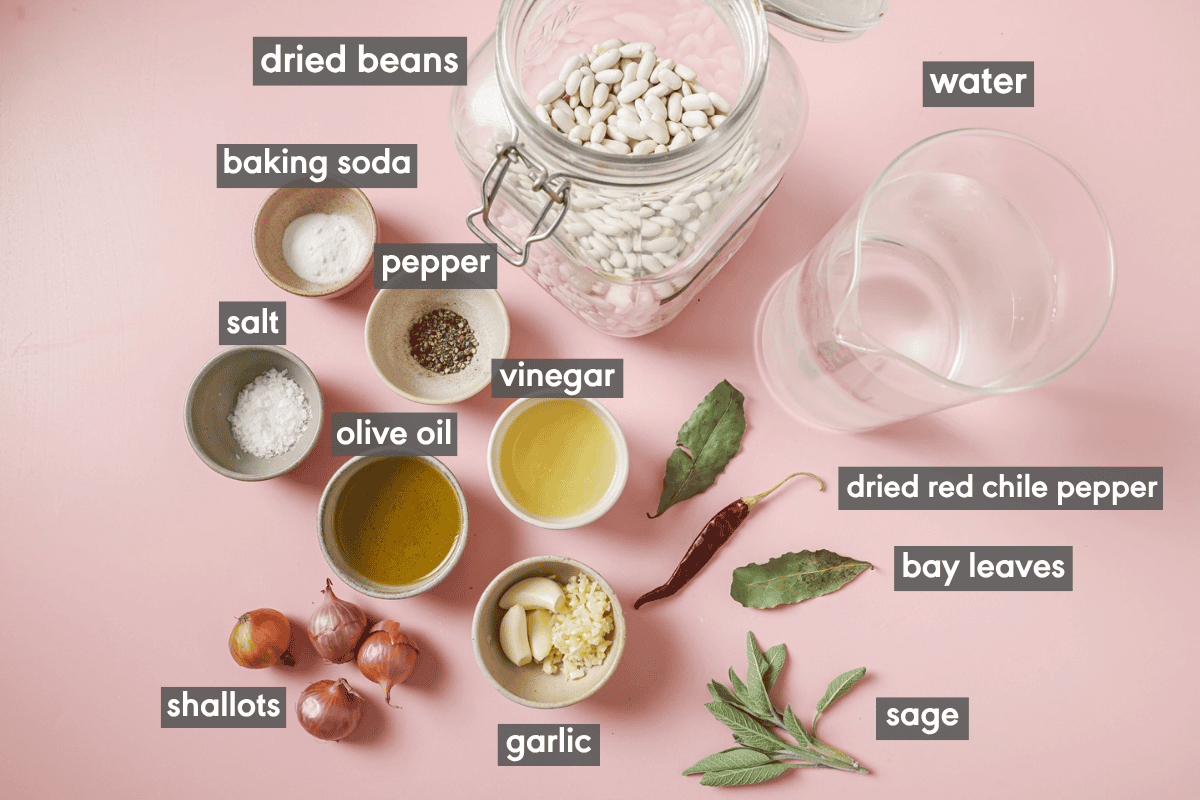
Dried Beans
The method in this recipe will work for virtually any variety of dried bean, but keep in mind that the overall cook time will vary based on several factors:
- Bean size and density: smaller beans cook faster; large, dense beans take longer.
- Bean freshness: the fresher the beans, the quicker they cook.
- Soaking: Soaked beans cook a fair amount faster than unsoaked beans.
Freshness Tip
If your beans are 2+ years old, they may never fully soften, so it’s best to toss them and use newer beans. Not sure how old they are? Try checking the back or bottom of the package to see if there’s a “best by date.”
Aromatics
AKA, the ingredients that take these beans from “much better than canned beans” to “a food that is not even in the same realm as canned beans.”
When you start a pot of beans with sautéed aromatics—I use shallot and garlic here, but onions and leeks are also welcome—and then throw in a bouquet garni (bundle of herbs) and a couple dried chile peppers, you’re laying the flavor foundation for a transformative bean experience.
Water
Of course, you need some water to cook your beans! I start with 6 cups (1.5 L) of water for 1 pound (454g) of dried beans and then add more water as needed while the beans cook.
How much water should I use to cook beans?
Cover the beans with about 1 inch (2.5 cm) of water, maybe slightly more.
You don’t want to fill the pot up with a ton of water, because (1) it might boil over and (2) your bean broth won’t be as flavorful or as rich.
As the beans cook, they release their starches into the water, which thickens the texture into saucy goodness. Adding too much water will dilute that broth.
Finishing elements
I promised you a luxurious pot of brothy beans, so you must finish them with good-quality olive oil for richness!
Plus a generous amount of salt (beans are dense and need it!) and a bit of acid for brightness and balance—think fresh lemon juice or a mild vinegar such as champagne vinegar / white wine vinegar / apple cider vinegar.
Step-by-step instructions
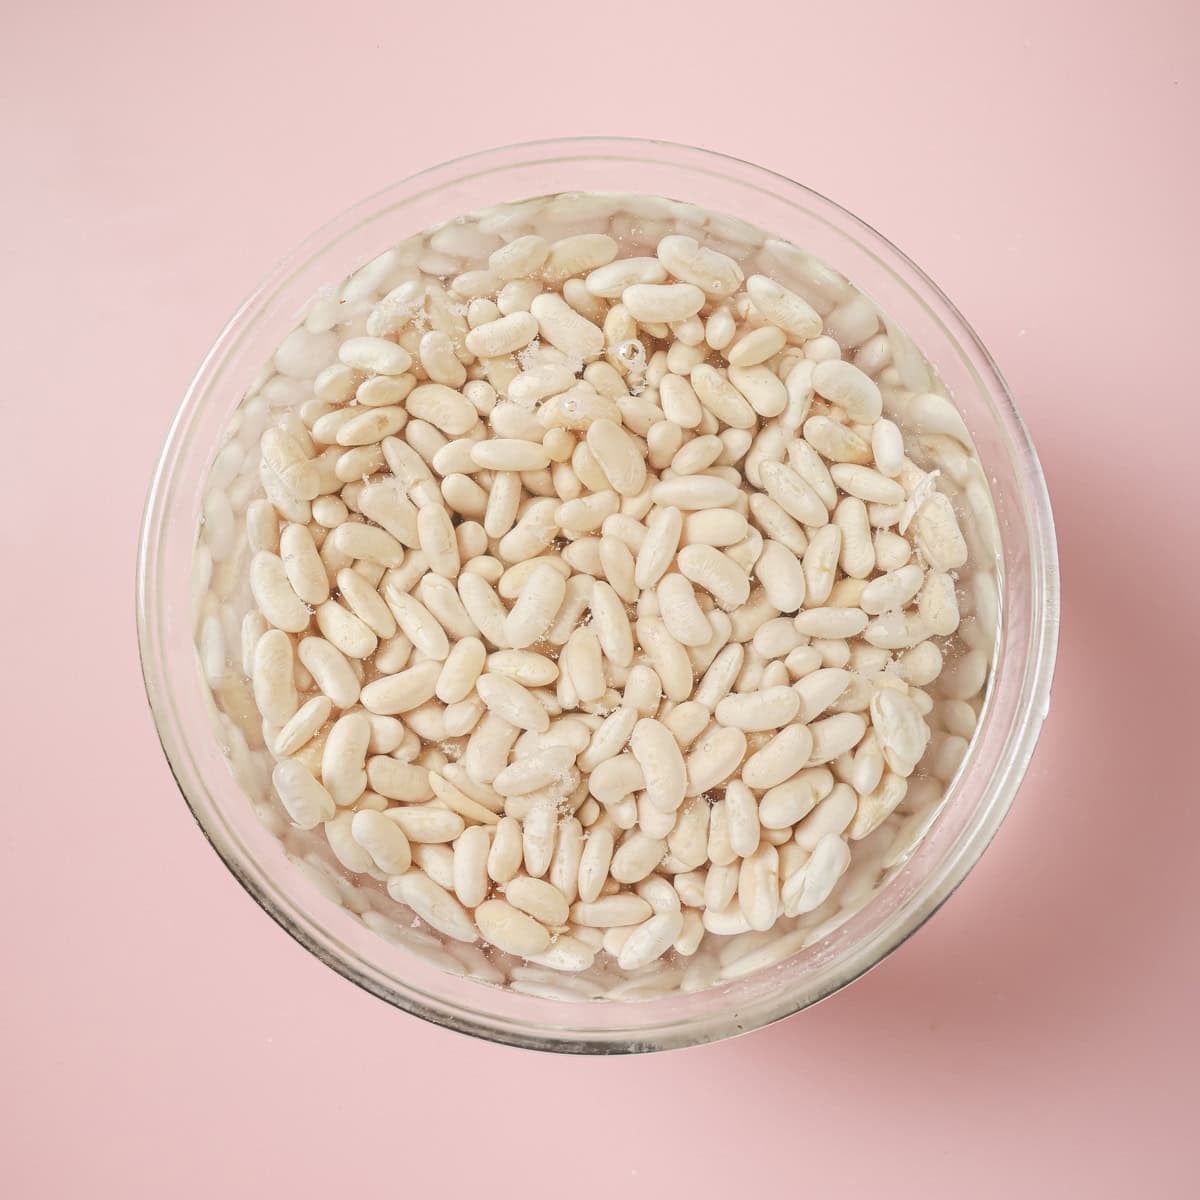
- Cover the beans in plenty of cool water. Add kosher salt and baking soda (optional). Soak covered for 8 to 12 hours.
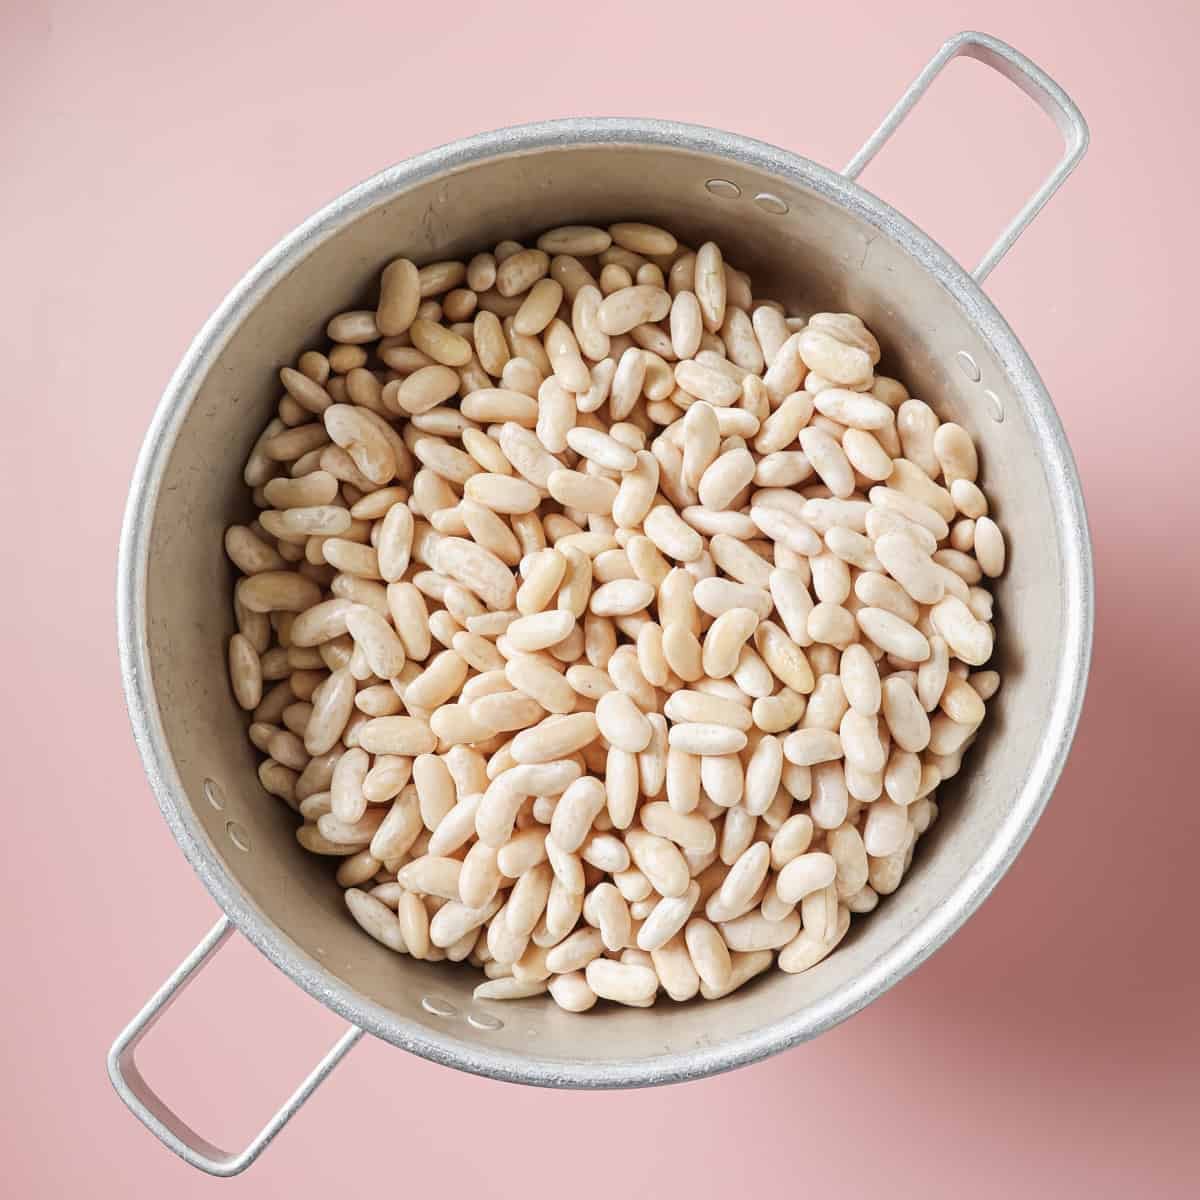
- After soaking, drain and rinse the beans.

- Heat olive oil in a Dutch oven over medium heat, then add the shallots/onions and cook until golden and soft, about 5 minutes.
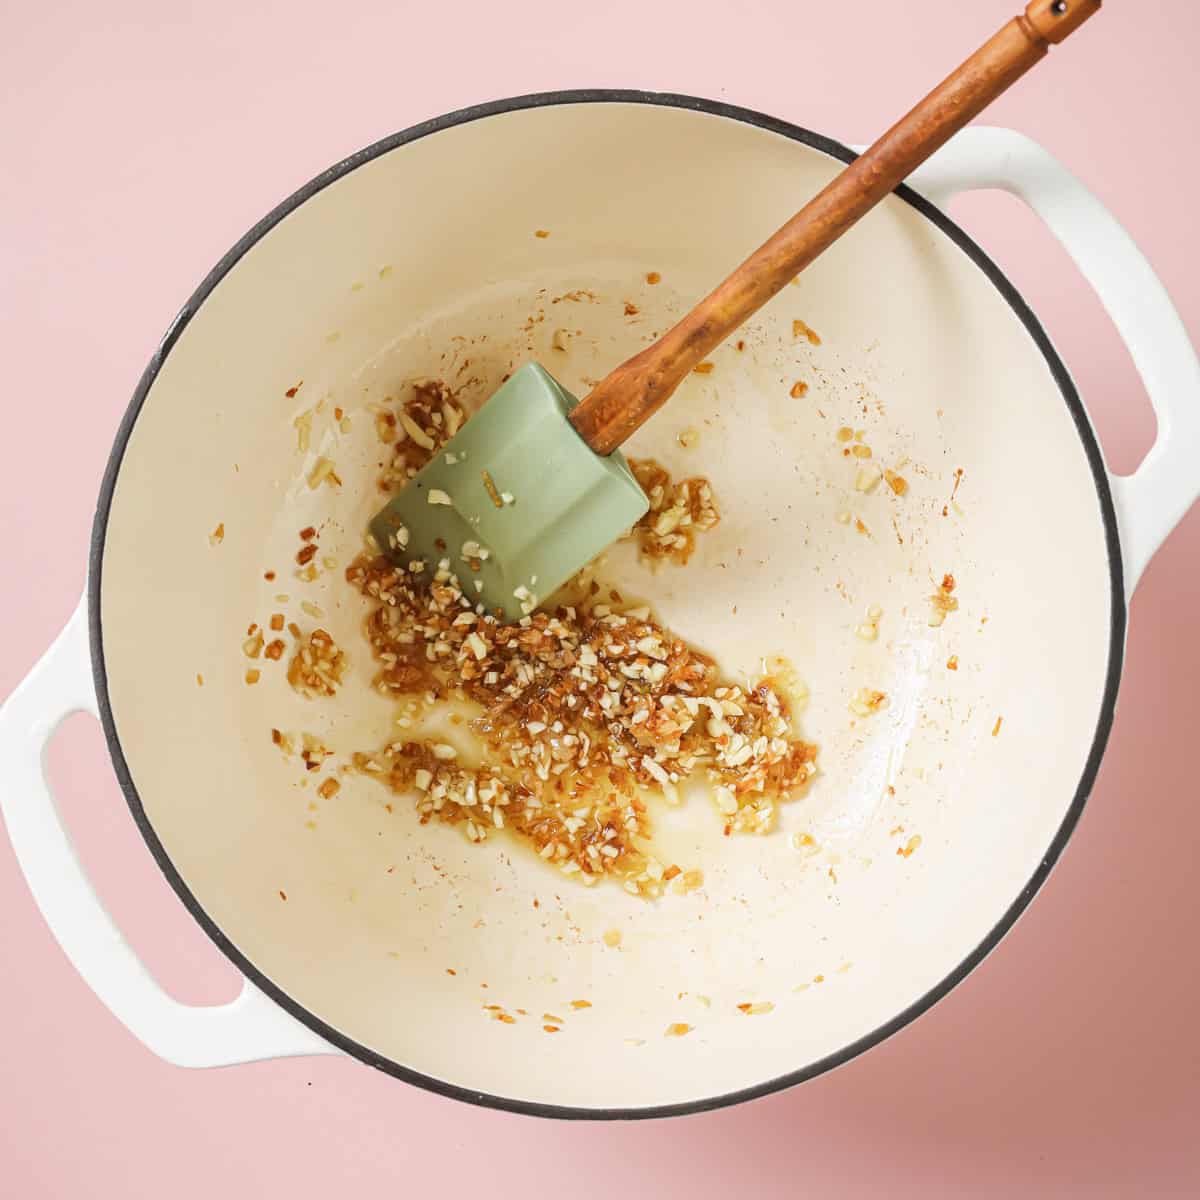
- Add the garlic and stir frequently for 1 to 2 minutes.
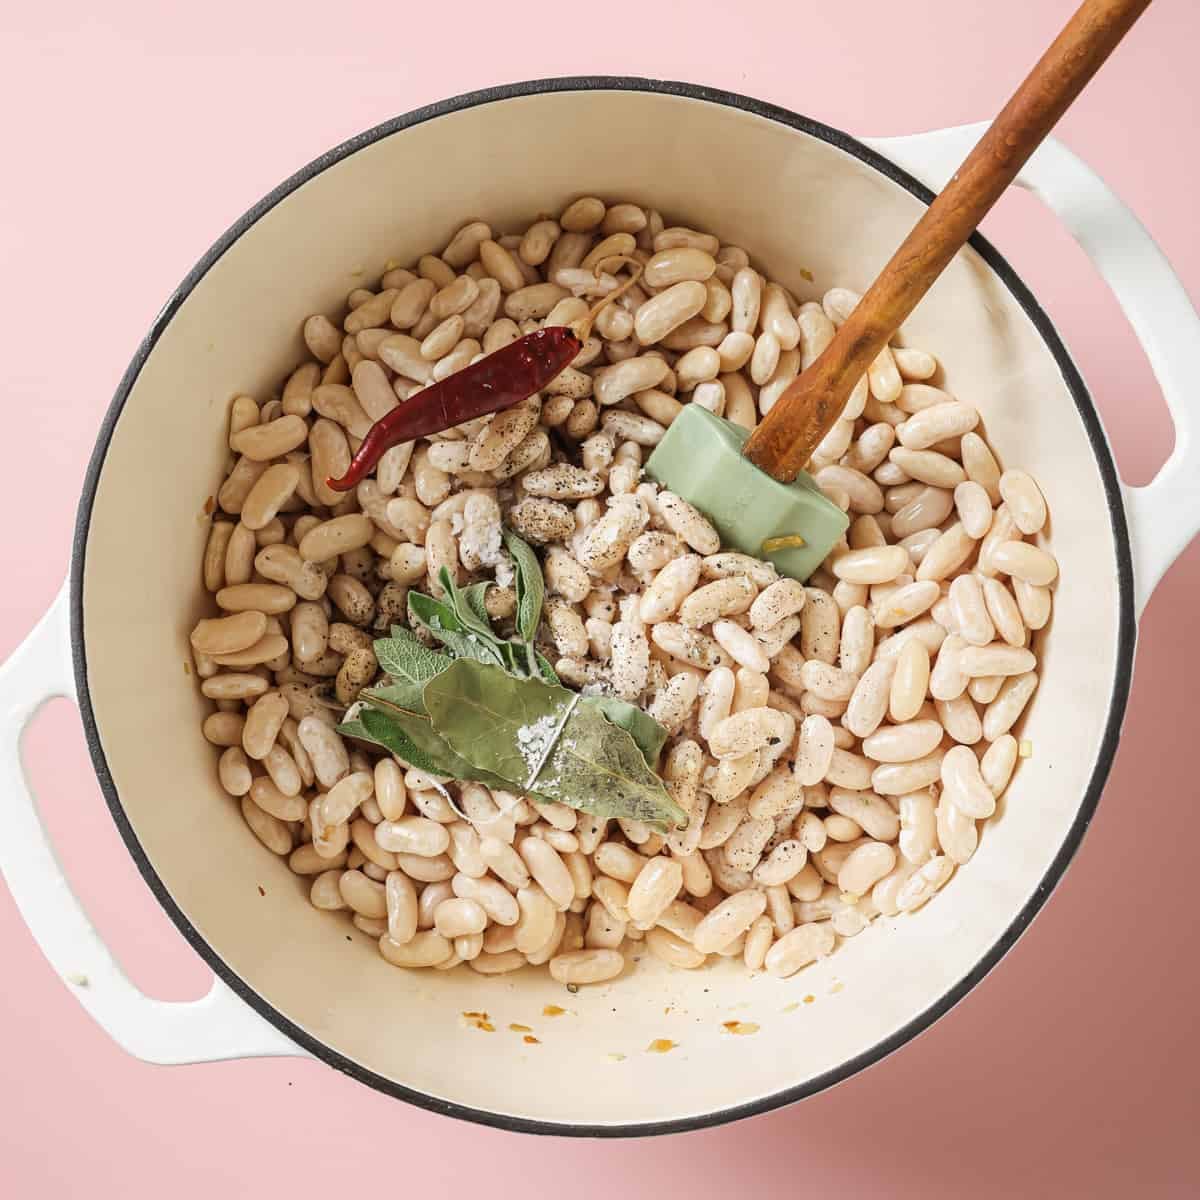
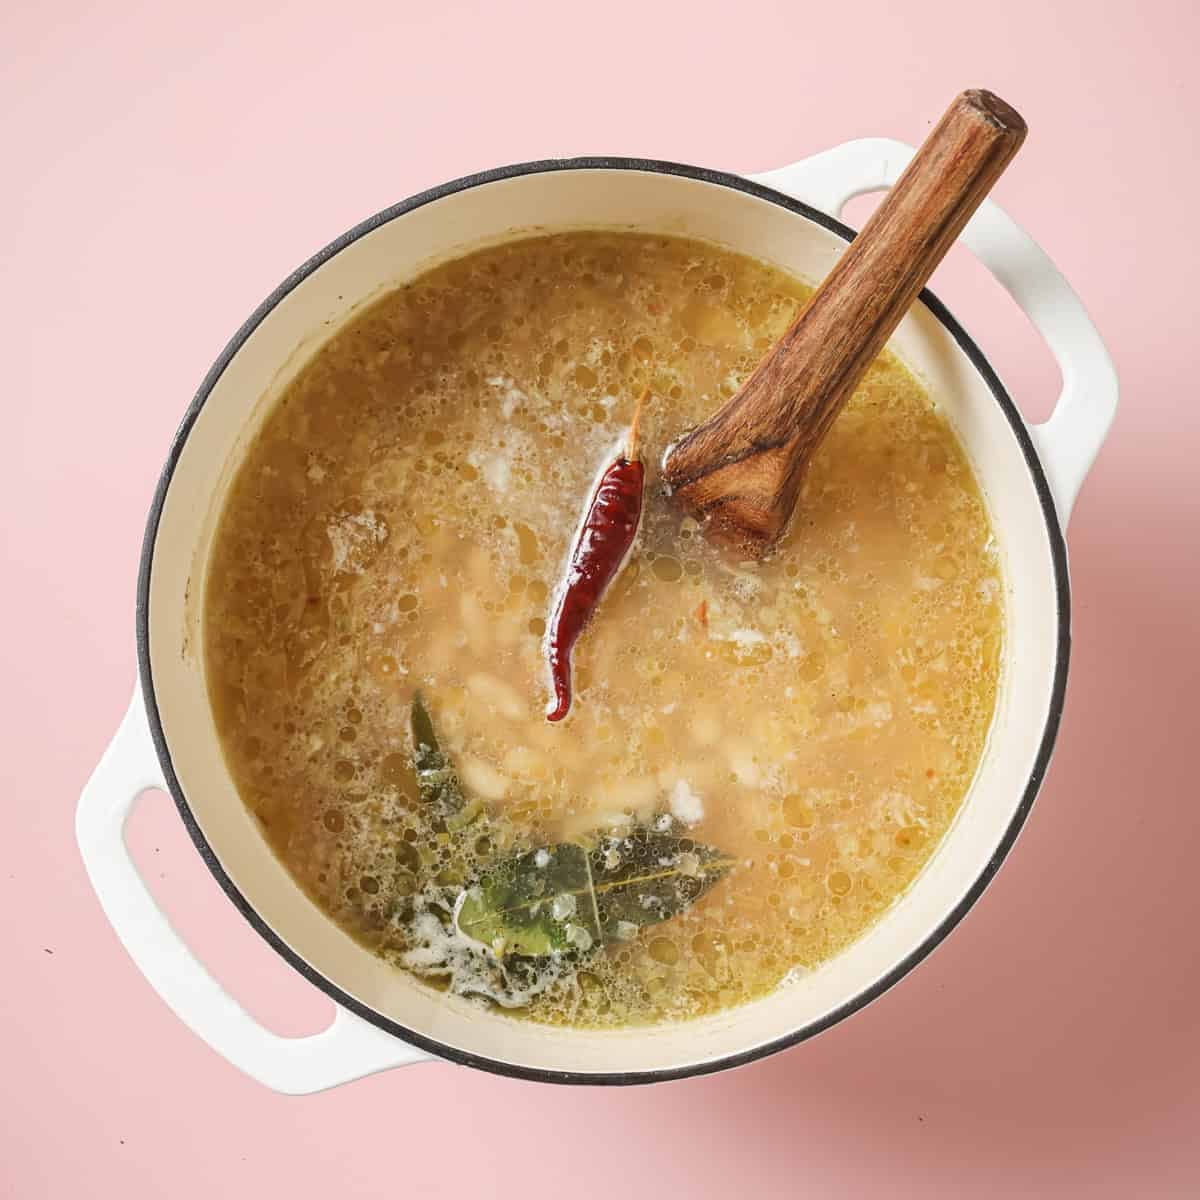
- Add the soaked beans, the bouquet garni, dried chiles (if using), pepper to taste, and a bit of salt. Pour in 6 cups (1.5 L) of water and stir well.
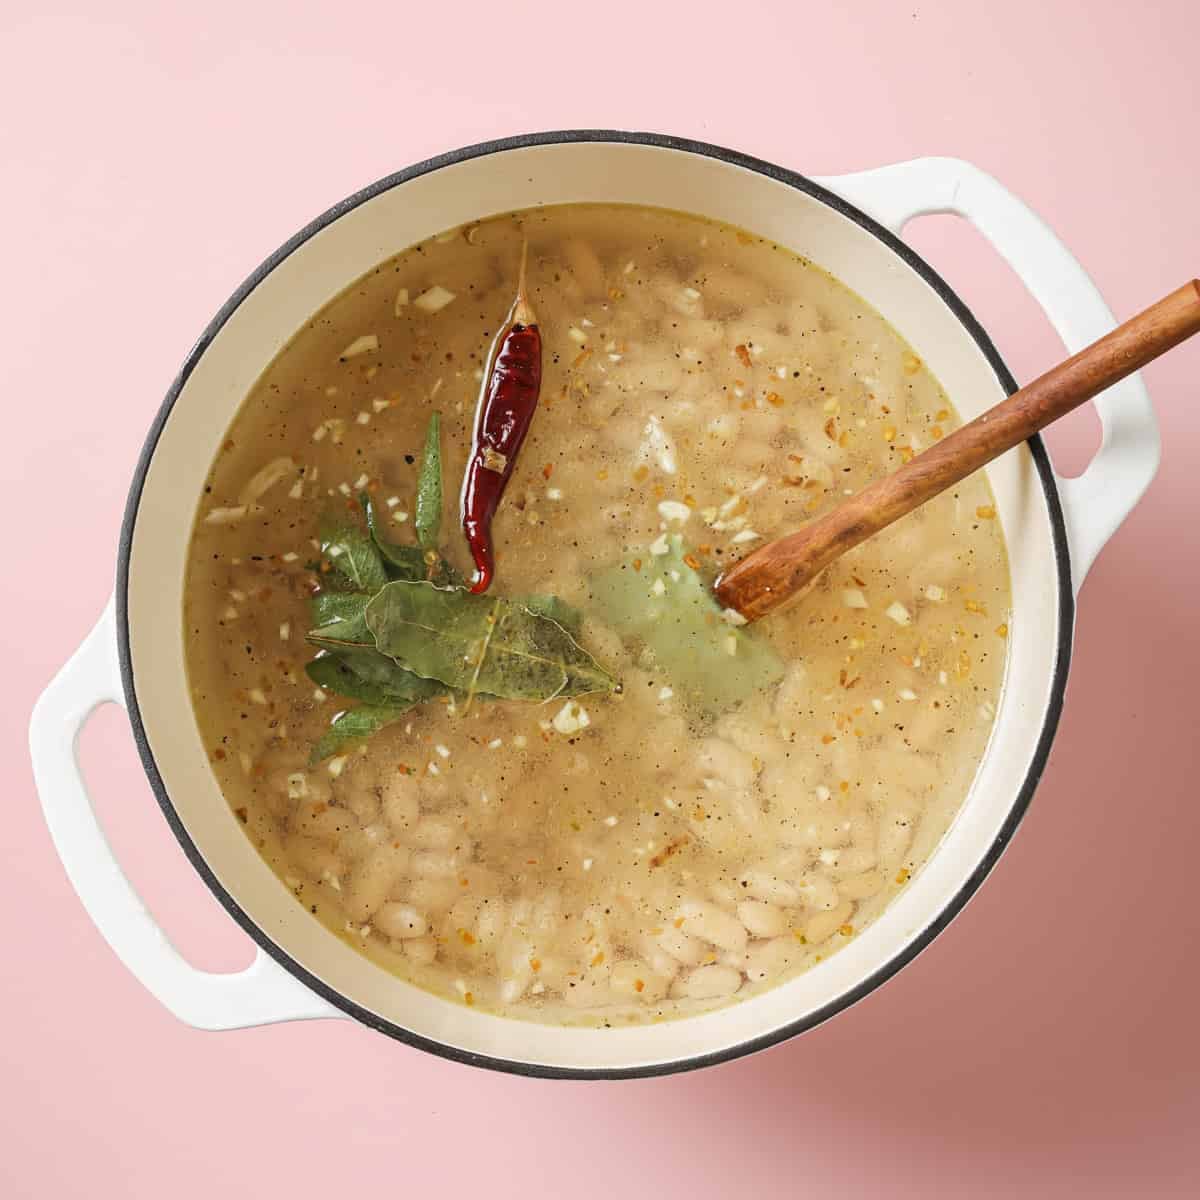
- Bring to a rapid boil and boil, partially covered, for 10 minutes.
- Reduce the heat to low and gently simmer until the beans are tender—about 40 to 50 minutes for medium-sized beans.
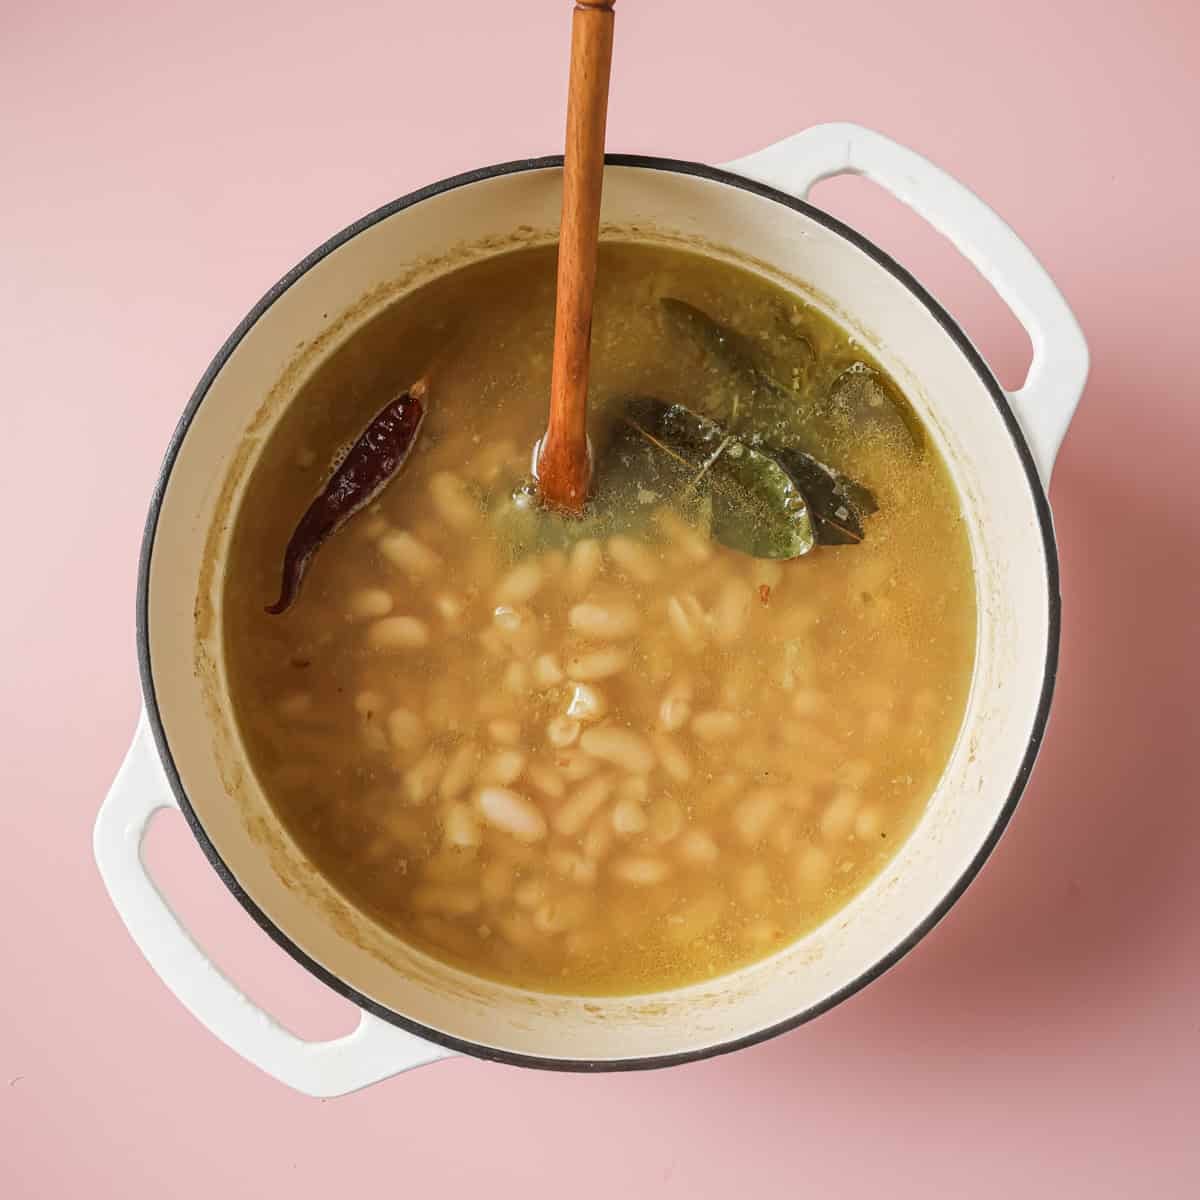
- If the water level gets low during cooking, top off with freshly boiled water.
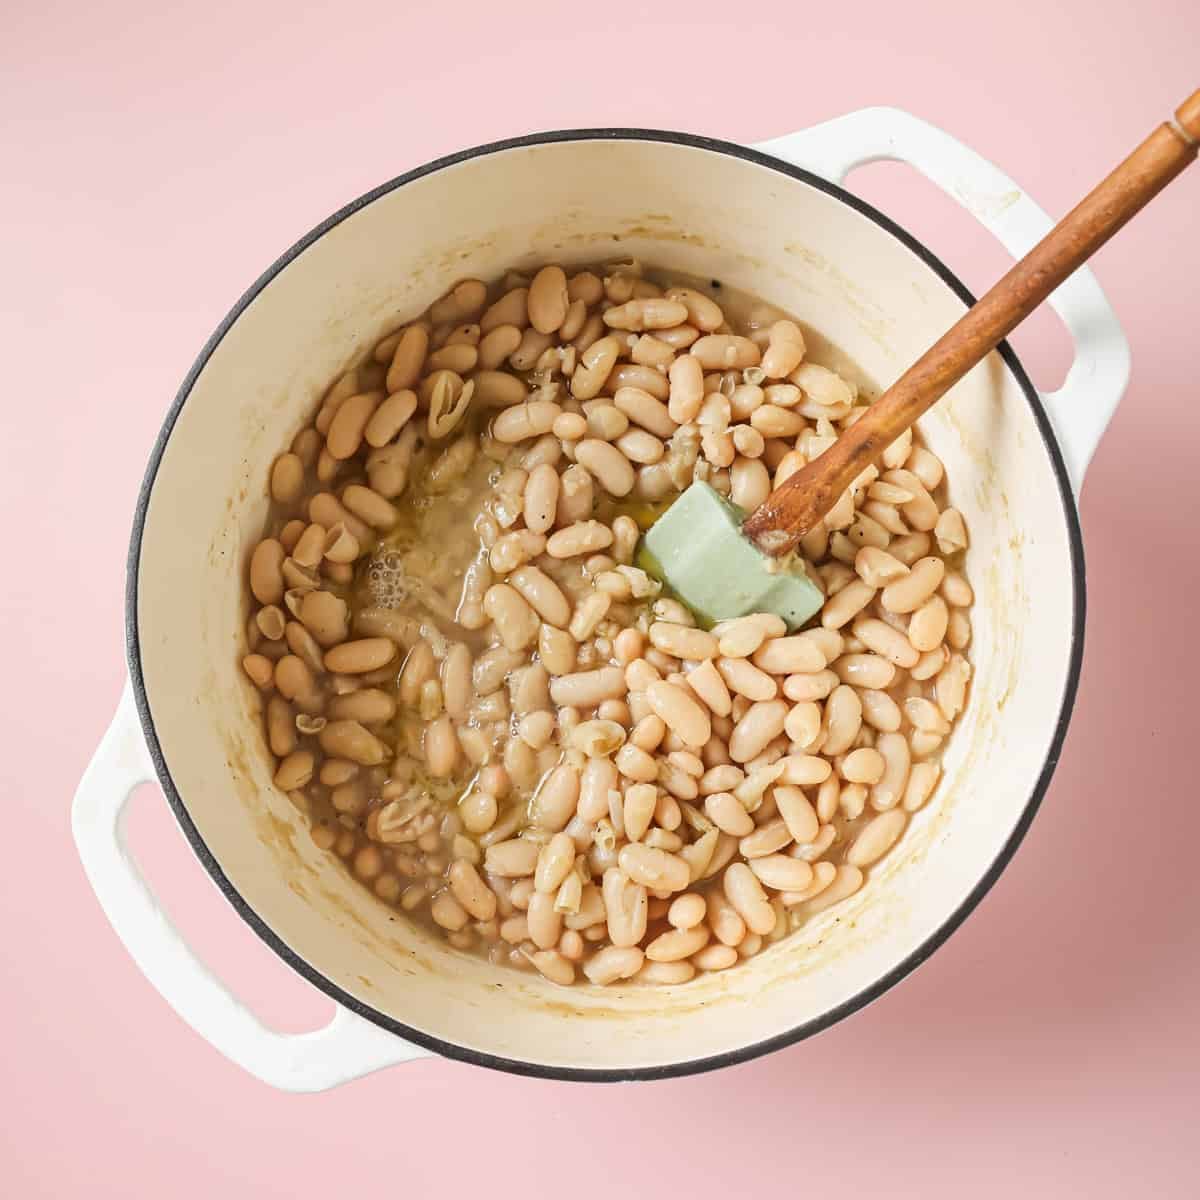
- When the beans are tender, season generously with salt. Stir in good-quality olive oil and a bit of vinegar.
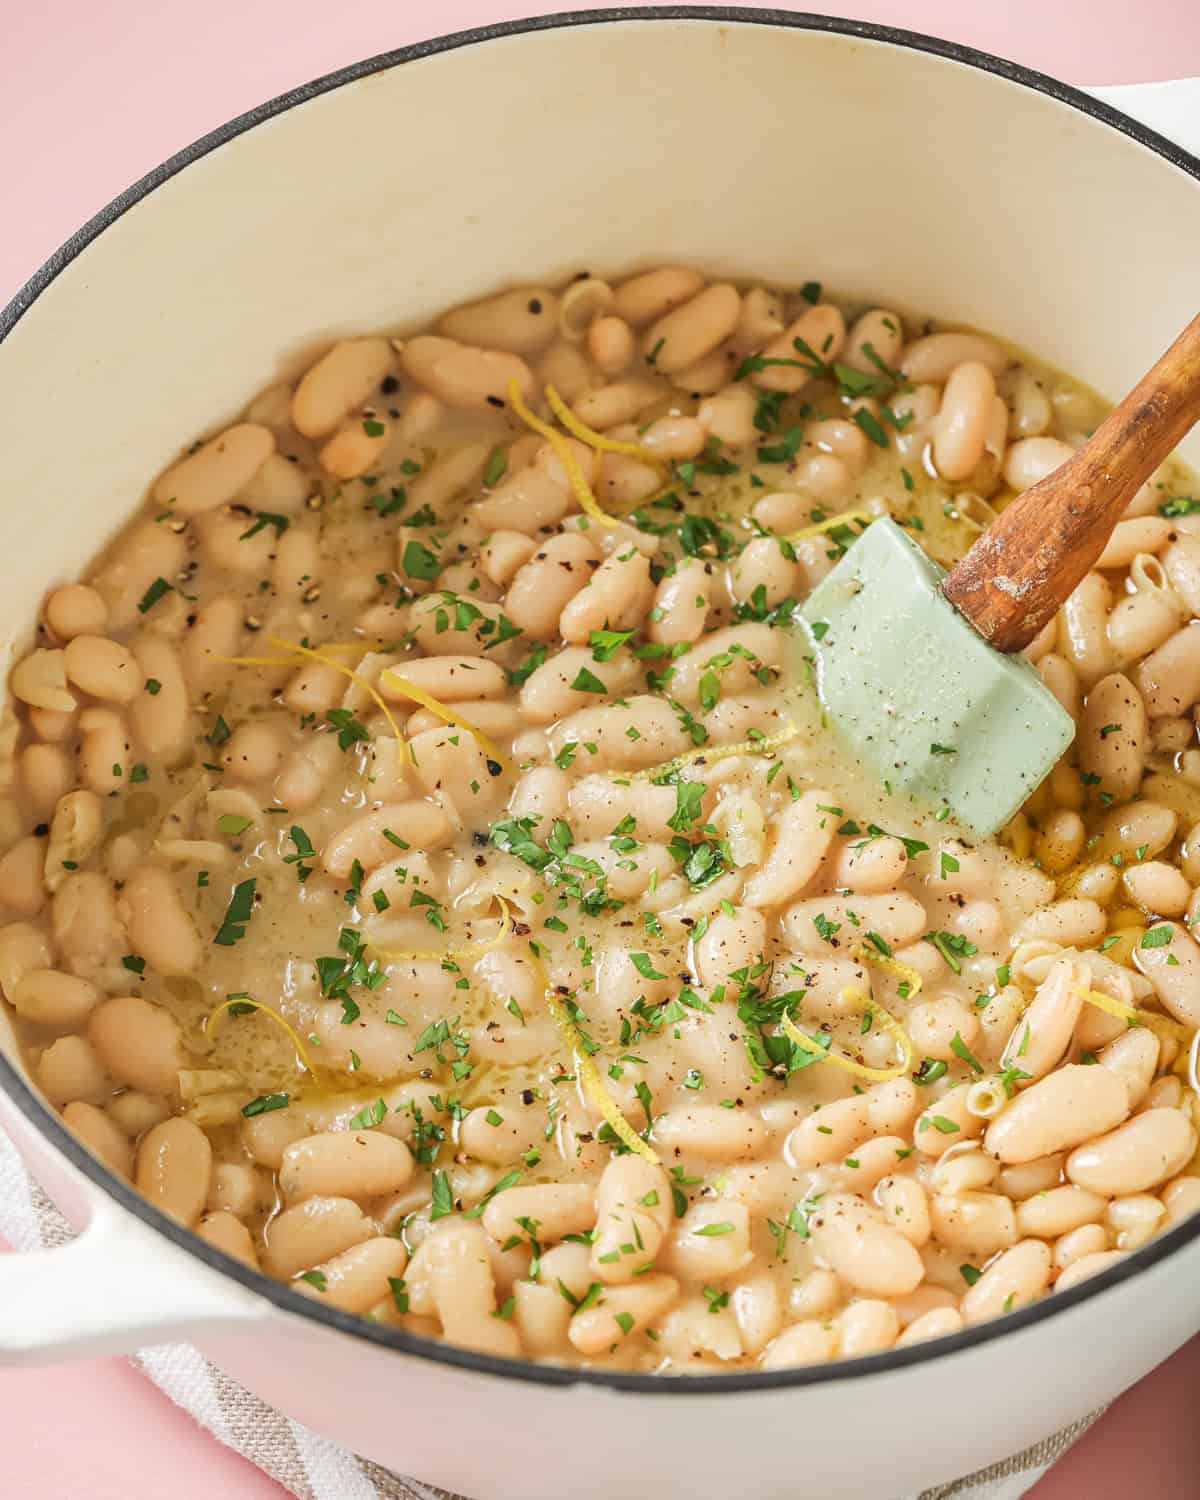
- If desired, garnish with fresh chopped herbs and/or lemon zest (or gremolata!)
To soak, or not to soak?
Technically, you don’t have to soak your beans, but it means you’ll have to cook them for longer.
Here’s why I always soak dried beans:
- It cuts down on the cook time, pretty significantly so for larger beans.
- In my experience, it makes the beans much easier to digest (read: fewer toots!).
- I find I get fewer split skins with soaked beans, so a more even texture.
My preferred method: a salty soak.
Cover the beans with a few inches of cool water, add a generous amount of salt, and let them soak overnight (for larger beans, I’ll soak for 12 hours).
Contrary to the annoyingly persistent myth—that adding salt to beans early on in the cooking process prevents them from cooking—salt actually softens the outside of the bean skins, so the beans end up creamier. Plus, you’re seasoning from the start, which is the best way to build flavor into the beans.
For larger beans, I’ll also add a bit of baking soda to the soaking water. It raises the pH of the water, which breaks down the pectin in the skins faster, so the beans soften more quickly.
Forgot to soak overnight?
You can still get most of the soaking benefits by using a “quick soak” method, which takes about an hour. It involves briefly boiling the beans, then letting them sit in the hot water.
Follow the instructions in this post from the Food Network.
Tips for minimizing toots
A few tricks for reducing the, shall we say, aromatic side-effects of eating beans (💨💨💨)!
- Soaking is the big one (covered above), since it draws out the oligosaccharides, the starches that ferment in your gut and can cause gas. Be sure to drain the soaking water and cook the beans in fresh water, as those oligosaccharides are found in the soaking water.
If you’ve tried soaking your beans and still struggle with gas, here are two more options to try:
- Add a strip of kombu (an umami-rich seaweed) to the beans while they simmer, then fish it out at the end. In my experience (and others), this helps with digestibility. Just don’t add the kombu while the beans boil, as this can make kombu slimy and bitter.
- OR, try using asafetida, a secret weapon South Asians have used for generations to make dals and bean dishes more digestible. It’s fat-soluble, so you’ll need to add a few pinches of it to the oil when you sauté the aromatics.
PS: For more benefits on using kombu, check out this article from America’s Test Kitchen.
Get creative!
Once you’ve nailed the basics, the fun part is making this pot your own:
- Try out new varieties of beans! Once you’ve gone through the major varieties at your local grocery store, consider trying out some specialty or heirloom beans (I’m a Rancho Gordo girly).
- Want to add some spices? Sauté a few of your choosing after you add the garlic.
- Got leftover vegetables like carrots, celery, or fennel lying around in the fridge? Give them a rough chop and throw them in with the beans.
- Don’t have dried red chiles? Add ¼ to ½ teaspoon of red pepper flakes (or 1 to 2 teaspoons of Aleppo pepper) for ~20 seconds after the garlic is done.
- Vary the herbs based on what you have on hand and the type of bean (e.g., oregano is lovely with black beans and pinto beans).
- Finish the beans with chopped fresh herbs or gremolata!
Getting creative lets you customize these beans from week to week, and it’s great practice for honing and trusting your chef’s instincts 👩🏽🍳
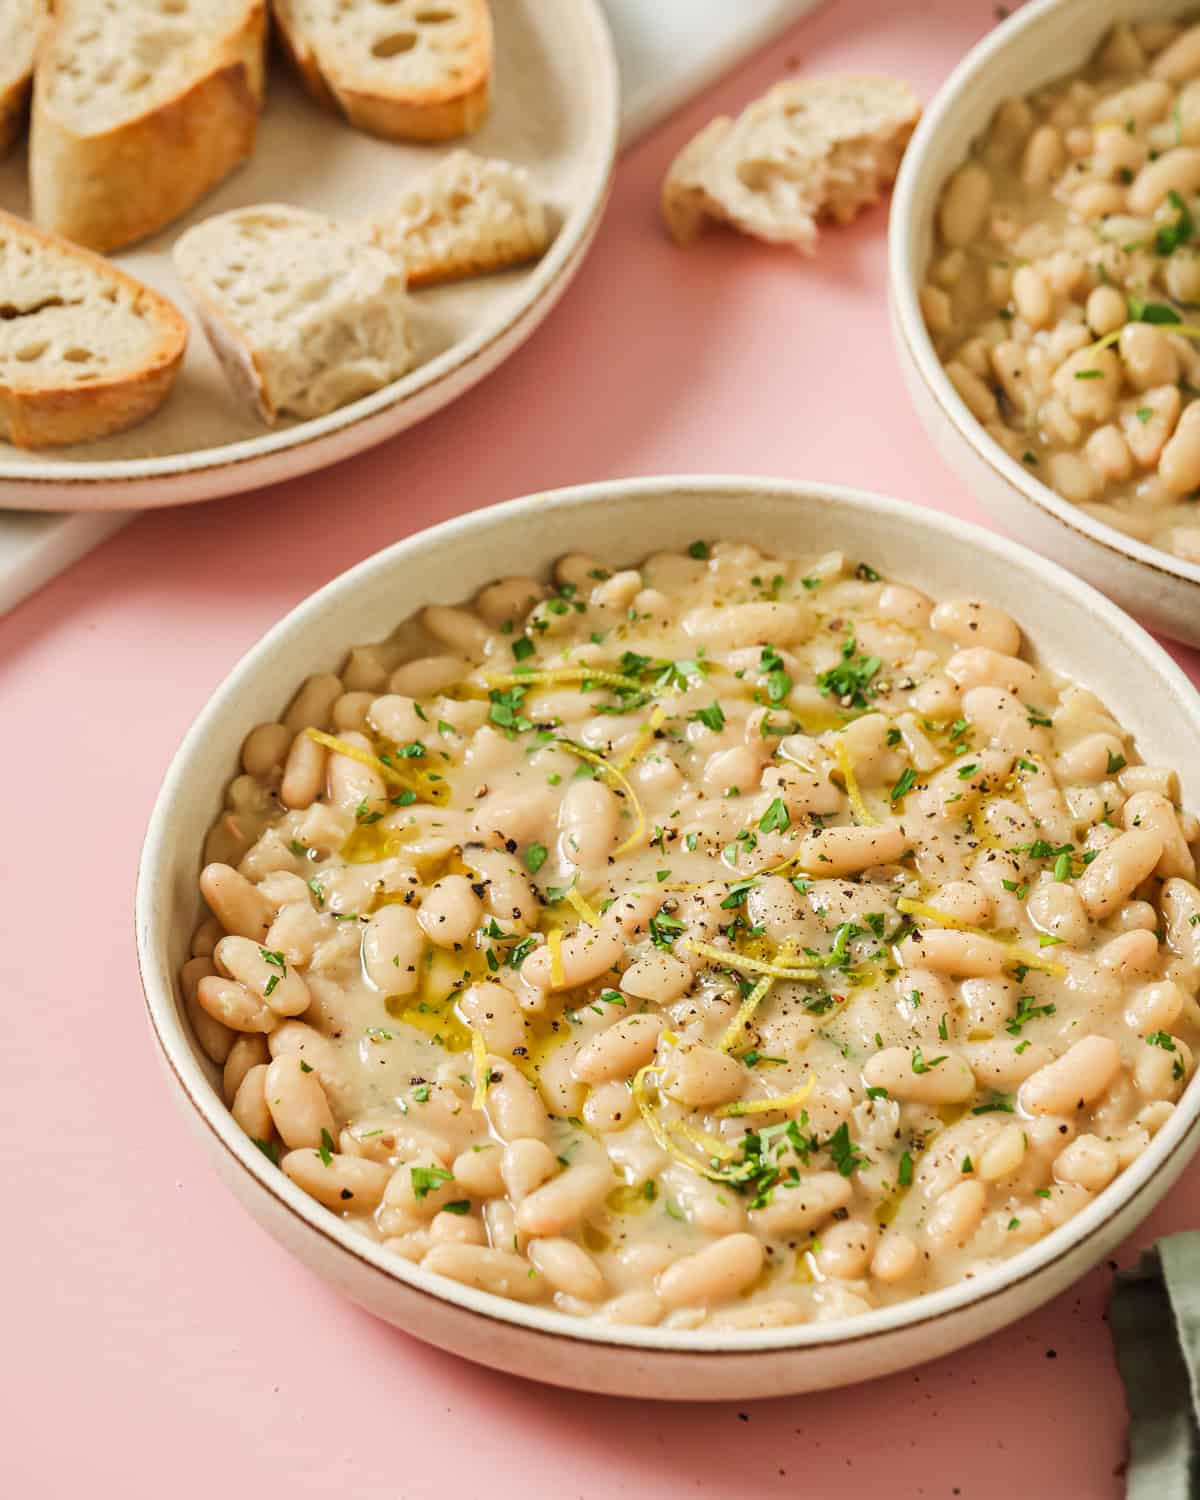
As for ways to eat them, these beans are good enough to spoon straight from the pot, but a few of my favorite ways to use them:
- In tacos. A no-brainer.
- In burrito bowls (10x better than Chipotle).
- Alongside a breakfast scramble. I have this combo regularly and finish it with something fermented like sauerkraut + broccoli sprouts or other greens + a fun condiment like chili crisp, pesto, or hummus.
- On toast. Toast some crusty sourdough, rub a halved garlic clove across the craggy surface, and pile the beans on top. DELISH!
- In a grain bowl, for an easy boost of protein and fiber.
Storage Instructions
Store leftover beans with their cooking liquid in the fridge for up to 5 days (any longer, and they’ll start to smell). Or freeze them (still with their liquid, which is delicious and prevents the beans from drying out) for 3 to 6 months.
PS: My favorite freezer hack is to portion the beans into Souper Cubes before freezing. Each block pops out as a single serving, so you can grab exactly as much as you need for a meal without thawing the whole batch.
Did these brothy beans level up your meal prep game? Let me know by leaving a rating and review! It makes my day to hear from you 💕

Introducing
Big Vegan Flavor
Techniques and 150 recipes to master vegan cooking.
A Perfect Pot of Beans

Ingredients
- 1 pound (454g) dried beans, such as Great Northern beans (see Note 1)
- Diamond Crystal kosher salt (see Note 2)
- 1 to 2 teaspoons baking soda (optional, see Note 3)
- 2 tablespoons (28g) extra virgin olive oil, plus more for finishing
- 4 medium shallots (OR 1 medium yellow onion), chopped
- 6 cloves garlic, chopped
- 6 to 8 cups (1.5 to 2L) water
- 2 bay leaves + a few sprigs fresh thyme (or 1 large or 2 small rosemary or sage sprigs)
- 2 dried red chile peppers (adds a gentle heat, see Note 4)
- Freshly cracked black pepper
- 1 to 2 teaspoons champagne vinegar or lemon juice (see Note 5)
Instructions
- Spread the beans out on a large surface, discarding any pebbles or debris.
- SOAK THE BEANS: Place beans in a large bowl with plenty of cool water, about 8 cups/2 L water. Add 1 ½ tablespoons Diamond Crystal kosher salt (see Note 2) and baking soda, if using. Stir well, cover, and soak for 8 to 12 hours on the countertop. If soaking for longer than 12 hours, transfer to the fridge. If cooking small beans, you can soak for 4 to 6 hours.
- Drain the beans and rinse well (see Note 6).
- PREP FLAVORINGS: Use kitchen twine to tie together the bay leaves and thyme (or rosemary/sage sprig); if you don’t have twine, see Note 7. Use scissors to snip open a slit in the dried chile peppers.
- COOK AROMATICS: Heat a Dutch oven or large soup pot over medium heat with 2 tablespoons (28g) olive oil. Once warm, add the shallots and cook until golden brown, stirring frequently, about 5 minutes. Add the garlic and cook until no longer raw and just starting to see some color, stirring frequently.Pour in 6 cups (1.5 L) water, soaked beans, herb bundle, dried chiles, a generous amount of black pepper, and 1 teaspoon kosher salt.
- BOIL BEANS: Bring to a rapid boil (cover the pan to speed this up and to prevent evaporation). Once boiling, partially cover the pan and boil for 10 minutes.
- SIMMER BEANS: Reduce the heat to low and gently simmer, uncovered*, until the beans are tender. You want just small, occasional bubbles; you don't want constant simmering bubbles. *NOTE: I simmer uncovered to concentrate the broth flavor, but the water may evaporate towards the end of cooking. If it does, top off with freshly boiled water to cover. If you won’t be in the kitchen to check the water level, simmer covered or partially covered instead.
- CHECK BEANS FOR DONENESS: A medium-sized bean (e.g., great northern bean) that’s been soaked typically takes 40 to 50 minutes; larger beans typically take 1 hour or more. The fresher the beans, the less time they need. The longer the beans have soaked, the less time they will need.When testing for doneness, be sure to test at least 5 different beans because some beans may be done sooner before others.TIP: If cooking beans longer than one hour, you may want to scoop out the bouquet garni so it doesn't overwhelm the flavors.
- FINISHING: Once the beans are tender to your liking, turn off the heat and discard the chile peppers and bouquet garni. Season with salt to taste. You’ll need to be pretty generous; I use at least 1 ½ teaspoons of kosher salt. Stir in some good-quality olive oil (I recommend at least 1 tablespoon). Stir in 1 to 2 teaspoons of vinegar or lemon juice. Adjust the seasonings, adding more oil, salt, or acid until the beans taste perfect to you.
- STORAGE: Store leftover beans with their liquid in the fridge for 5 days; or store in the freezer with their liquid for 3 to 6 months. The oil from the beans will solidify while in the fridge after a few days, but it will melt back down when you reheat the beans.
Video
Notes
- The approximate cook times listed here are for medium-sized beans. If using smaller beans, check a bit earlier. If using larger beans, they typically need 1 hour at a minimum and can take up to 2 hours or even longer, depending on how long you’ve soaked them and how fresh they are.
- If using table salt instead, use half the amount of salt listed in step 2 and step 5. If using sea salt (or Morton’s kosher salt), use a tad more than half the amounts listed.
- Baking soda will soften the beans more quickly, so if you aren’t using it, you may need to cook them a bit longer than listed. If using small beans or if you prefer your beans more al dente and firm, I’d skip the baking soda.
- Or, sub with ¼ to ½ teaspoon of red pepper flakes (or 1 to 2 teaspoons of a mild chile flake, such as Aleppo pepper). Add after the garlic for 15-20 seconds, stirring frequently.
- Or use any mild vinegar, such as apple cider vinegar or white wine vinegar.
- I always drain the soaking water since it contains oligosaccharides, which can be difficult to digest for some. If you don’t have trouble digesting beans, you can cook them in the soaking water.
- You can also use the string from a tea bag to tie the herbs together, or you can put them in a reusable tea bag or piece of cheesecloth and stick that into the pot.
Nutrition
Nutrition information is automatically calculated, so should only be used as an approximation.


Really helpful guide, especially the way it breaks down soaking vs no-soak methods so clearly.
Thank you for the sweet words!
i soaked the beans for 24 hours but unfortunately will not be able to cook them tonight. can they be stored in the fridge all drained and soaked and I can cook it tomorrow?
These are the most tasty beans I have ever made! I used black beans. I ate them with a small salad, rice, and guacamole. I am mostly vegan and have wanted to incorporate more dried beans into my diet but they never tasted that great – until now! Thank you!
That’s amazing to hear, Laura! Your meal sounds delightful. Thank you for the sweet feedback 🙂
Made these brothy beans over the weekend and they’re absolutely delicious. But more importantly, these beans helped me finally get rid of the mouse in my apartment that’s been mocking me the last few weeks. He’d been avoiding all the (humane) traps I put out, but I noticed that I’d see him on the stove after I had reheat the beans. So I put a bean in each trap and he finally went into one within a couple of hours. Now he’s back in the wild and I can reheat these delicious beans in peace.
Do you have any tips for making Butter Beans? (the large white lima beans). They always seems to explode white they are cooking and all that’s left are big bean skins and slightly thickened (but unusable) cooking water. Tried a couple of times with the InstantPot and once on the stovetop. Stovetop, was slightly better, but still not good. I “only” lost half the beans in the cooking water. I’ve adjusted the time (in the instant pot), but still had this issue. I don’t even try anymore!
No problem making other beans- just Butter Beans! I’ve resorted to buying canned butter beans and find even some of the canned ones have quite a few butter bean skins in there, so seems even the commercial folks may have a hard time
Delicious!!!!! I have seen recipes of brothy beans. Her video sold me. I made as is with great northern beans. I finished with oil as she suggests and I did add some nutritional yeast because it makes the broth look and taste creamy. I love these beans so,so much!! So much flavor! A bowl with some toasted sourdough on the side. These won’t last long! I will make often with different beans. Thank you so much for the video and recipe!
We’re so happy that the beans turned out well for you, Terri. Thank you for taking the time to leave a comment and for trying out the recipe!
I accidentally overcooked my beans, and they were way too mushy for my taste, but… they were still so GOOD! I didn’t even mind the mush, which is pretty big for me as I have sensory issues.
I can only imagine how fantastic they will be next time I make them (and don’t lose track of time… hehe!)
Thanks for the lovely feedback, Zarah! Best of luck on the next attempt 🙂
Hi EJ! We haven’t cooked dried butter beans aside from Rancho Gordo’s lima beans once or twice (same bean, different name), so we don’t have a ton of experience.
But we cook a lot of large, creamy white beans like cannellini, and the bursting you’re describing is something a gentler approach really helps with. Here’s what works for us:
Start with a long cold soak, close to 12 hours for beans this large, and season generously with salt (I use 1 ½ tbsp Diamond Crystal kosher salt or 2 ½ tsp sea salt for 1 pound of beans). Drain and rinse well before cooking.
Then go gentle with the heat. Bring them up to a boil for 10 minutes, but once they’re going, drop the heat right down to a bare simmer with just a few lazy bubbles. A hard rolling boil for the duration of cooking is what knocks the beans around and tears the skins, which sounds a lot like what’s happening to yours. Beans this big can take an hour to two when cooked a slow simmer, so check them slowly toward the end.
Since you found the stovetop a little kinder than the Instant Pot, that tracks. The stovetop gives you more control to keep things calm and watch the texture, so that’s probably your best bet for beans this delicate. If you give it another go, we’d love to hear how it turns out.
This is the method we use to cook brothy beans, so hopefully this guide will also be helpful!
I am not a vegan but I love this recipe 😋😁
Yay, it makes us so happy to hear that, MarieAnna!
These brothy beans are amazing. Thank you so much for sharing this recipe.
I have been vegan for 4 years now and struggle with dinner meals being hearty with Beans, grain and vegetables. This is the perfect solution instead of purchased sauces, the recipe makes its own gravy which is perfect.
I made this recipe using black beans and I couldn’t get over the fabulous flavour. For dinner, I added cremini mushrooms to the broth and poured the gravy & beans over baked potatoes and a side of asparagus, Delicious!
I’m so thankful I came across your site Nisha and the wonderful way you’re are presenting how to make..I’m looking forward to cooking & trying your recipes. Sue
Thanks a million for your kind words, Sue! 🙂 That meal you made sounds absolutely delightful!
We can’t wait for you to try even more RPL recipes, if you need some inspiration you can always look to our recipe roundups! Since you enjoyed this recipe, I think you’d find value in our bean recipe roundup. Happy cooking!
Dear Nisha. James from Sydney, Australia here. I’m a long-term fan of your recipes, book, and videos. I love how much better my “white beans” (as they’re sold here) taste with your method. They only took 30 minutes to simmer after the initial boil. I have a request for when the North gets cold again. I love Boston baked beans, and made the excellent Serious Eats recipe a lot before I gave up bacon. Could you try out a vegan adaptation? That would be much appreciated, because it’s unbeatable on toast from a British Aussie!
Hi James! We appreciate all of the support, it’s lovely to hear you are a fan of this recipe!
I’ll be sure to pass your recipe request along to the team 🙂
Loving this recipe made so simple!
Will be doing all my beans from now on just like this.
My cousin’s daughter told me about you and I had to get her your cookbook.
Thank you for being! Janet
Hi Janet, Thank you so much for such a fantastic review! 🙂
Appreciate you taking the time and being a member of the RPL community!