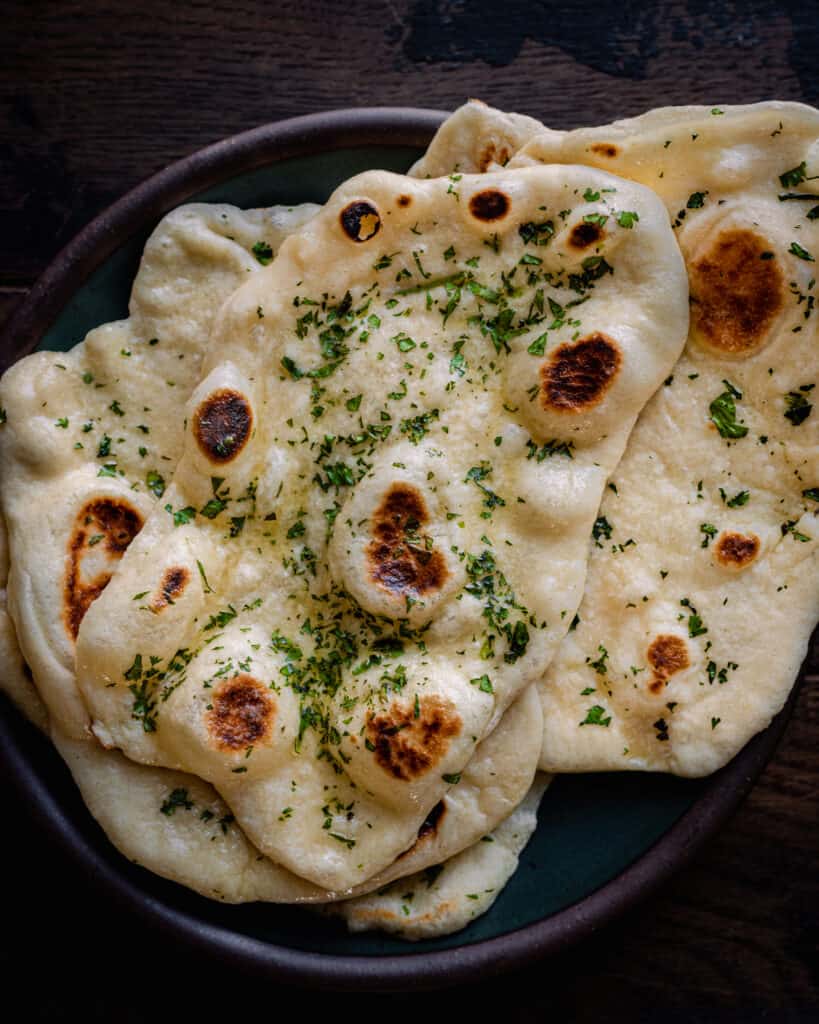
I recently rounded up 40 vegan Indian recipes, and this vegan naan recipe is exactly what you need to pair with all of those incredible, flavor-packed dishes. I know I’m not alone in saying naan is my favorite Indian bread. It’s simultaneously fluffy, airy, chewy, and crisp, and when served warm, it’s like biting into a slice of buttery heaven.
Unfortunately, most naan you’ll get at Indian restaurants is not vegan, as the dough often contains yogurt (or milk) and it’s brushed with melted butter. While there are a handful of store-bought vegan naan options, they are pretty lackluster and taste more like store-bought pita bread. Not a bad option if you need something, but incomparable to freshly made naan.
I’m proud to report that after a dozen and a half recipe tests, I’ve developed a naan recipe that is just as good as if not better than the naan you’ll find at a good Indian restaurant. Please enjoy!

What is naan?
Naan is an Indian leavened flatbread traditionally baked in a tandoor oven (a very hot clay oven). If you’ve been to an Indian restaurant, you’ve probably had the pleasure of eating naan. While there are dozens of amazing Indian breads, naan is probably the most well-known in the West. You’ll also find naan (and variations thereof) in the cuisines of Western and Southern Asia, Myanmar, Indonesia, and parts of the Caribbean.
Texturewise, naan is somewhat similar to Middle Eastern pita, but usually softer and thicker yet also more airy at the same time, thanks to its uneven gas pockets.
Most naan recipes start with all-purpose flour, salt, active dry yeast, and water. Yogurt or milk is often (though not always) added, and occasionally egg is added to the dough. The dough is kneaded by hand and then set aside to rise. In restaurants, the naan is usually baked in a tandoor oven, but in homes, it’s typically cooked in a very hot pan on the stove. The traditional Indian pan used is an iron tawa, but well-seasoned cast iron skillets also work well. Naan is almost always brushed with butter or ghee before serving.
Note: if you’re curious if you can make this recipe with whole wheat flour, the answer is yes! Read more in the “Frequently Asked Questions” section.
Why this recipe works
Texture heaven. This naan has all the best textures: it’s pillowy, puffy and fluffy, soft and chewy yet crisp and flaky in some spots. And when you eat it warm (as you should), it basically melts in your mouth. The combination of a well-hydrated soft dough + resting in a warm place + briefly cooking in a very hot pan = basically all you need for the best texture.
Minimal ingredients. After a dozen and a half recipe tests, I came to the conclusion that vegan naan does not need a vegan yogurt or milk substitute. There’s simply too much variation across plant-based yogurts and milks to guarantee it will work.
Even just within coconut yogurts, there was too much variation across brands that it didn’t make sense to include vegan yogurt as an ingredient. A few of the yogurts worked well, others made the dough too sticky, others made the dough hard to roll. And the amount of yogurt was very finicky, a result of how the various active cultures interact with the yeast (2 tablespoons of yogurt wasn’t enough to make a difference, but 3 tablespoons was slightly too much).
And when using a plant-based milk, the doughs seem to get either sticky or tough (soy milk basically turned the dough into a semi-hard rock).
So, really, all you need to make great naan is: flour, salt, yeast, water, and oil. The only “specialty” ingredient you need is a few tablespoons of vegan butter for brushing on at the end (please don’t skip that part, and make it even better by grating fresh garlic into the butter for garlic naan). Okay two more things: some cilantro to roll into the dough for extra flavor and flaky sea salt for sprinkling on that end. That’s it!
Restaurant-Quality. This naan recipe is as good as Indian restaurant naan or even better (I think it’s even better, especially when served warm). Even without using yogurt or a tandoor oven, this naan is incredible and melts in your mouth. And of course, it’s the perfect vehicle for scooping up your favorite Indian curries and dals.

How to make vegan naan
Bloom the yeast. Stir the sugar in the lukewarm water until dissolved. Add in the active dry yeast and whisk to dissolve, about 15 seconds. Set aside for 15 minutes until the yeast becomes foamy and a bit frothy (the photo on right is after 15 minutes).
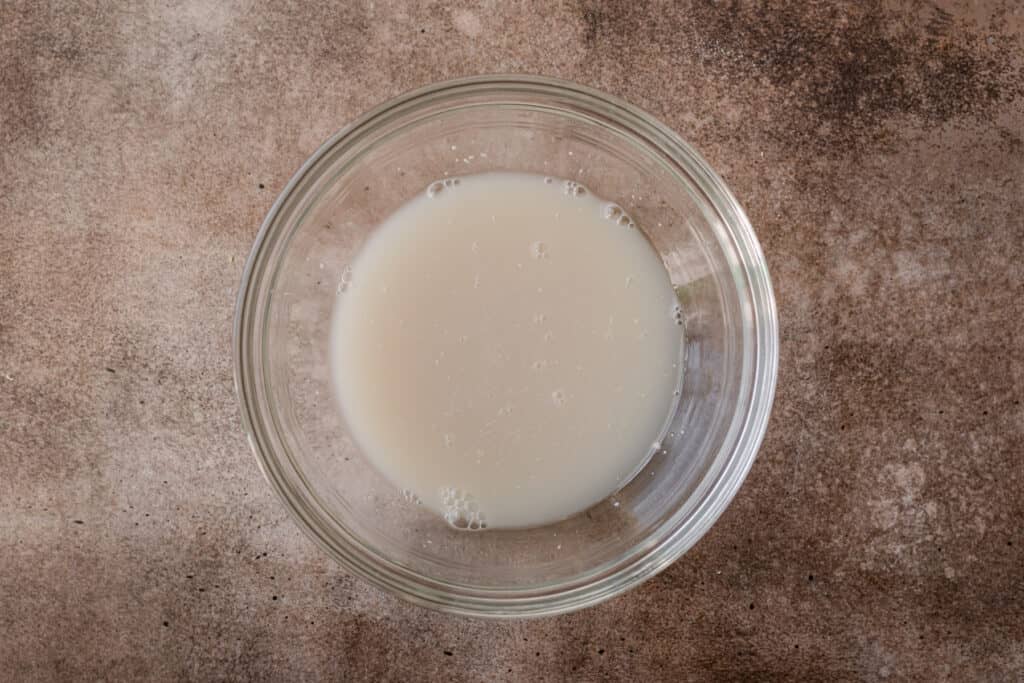
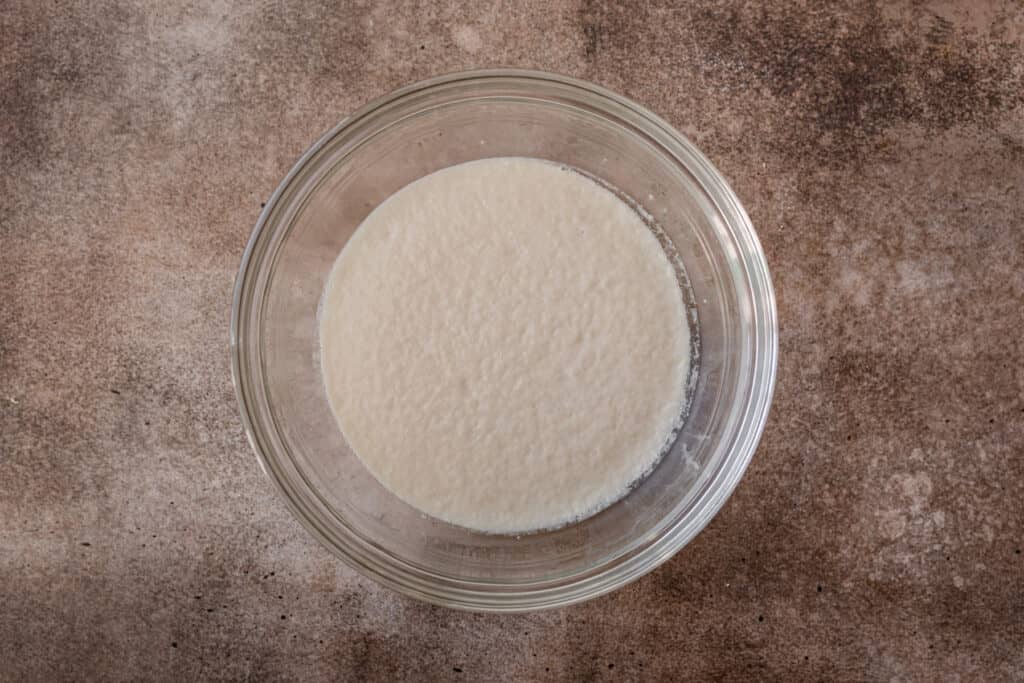
Tip: To test if yeast is fresh: mix together 1 teaspoon sugar + 1/2 cup lukewarm water (100-110ºF) + 2 teaspoons active dry yeast in a medium bowl. Stir, and set aside. After a few minutes, yeast should start to expand, and within 10 minutes, the mixture should be foamy and bubbly. If not, it’s expired and you’ll need new yeast.
While the yeast is resting, stir together the dry ingredients: all-purpose flour, sea salt, and baking powder.
Once the yeast mixture has activated, pour it into the flour mix and add 1 tablespoon of neutral-flavored oil.
Start mixing the ingredients with a fork. Mix until the dough is shaggy and you can’t stir it anymore with the fork.
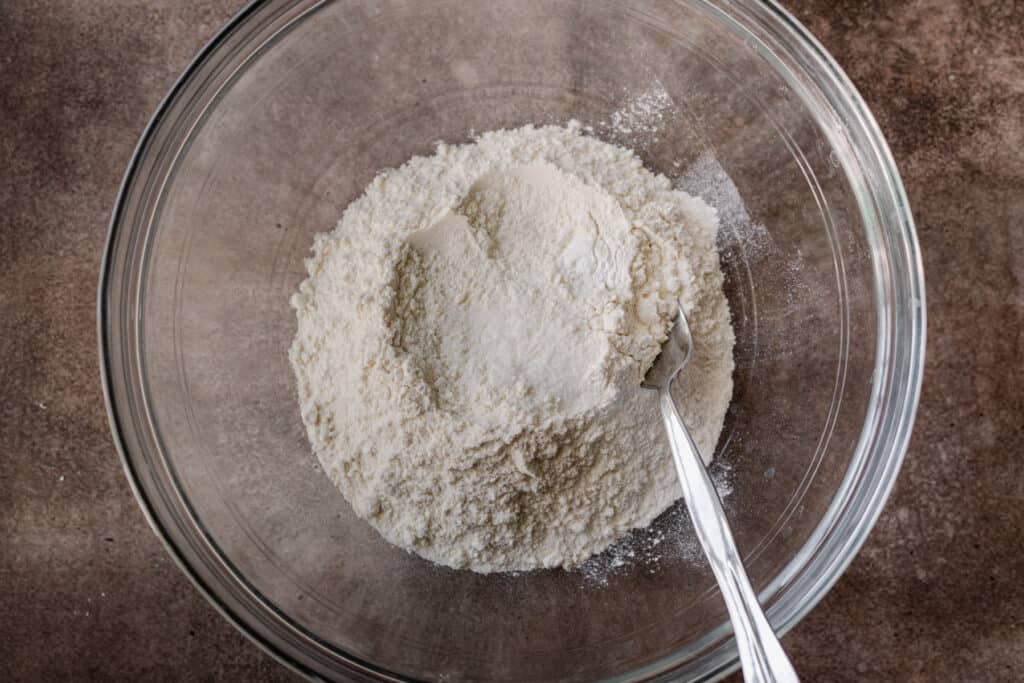
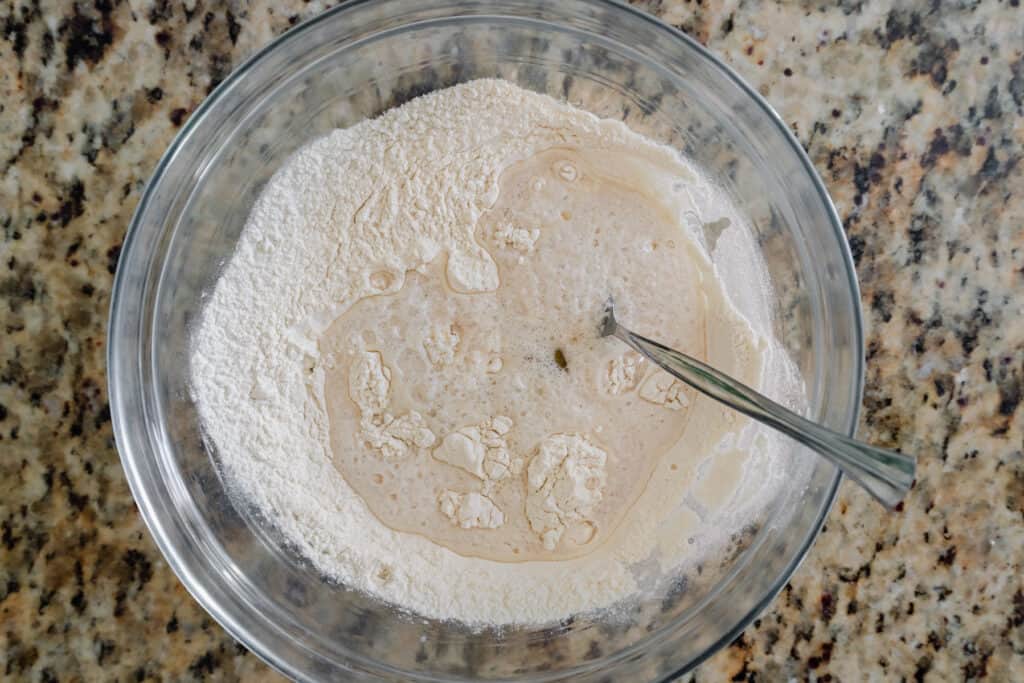
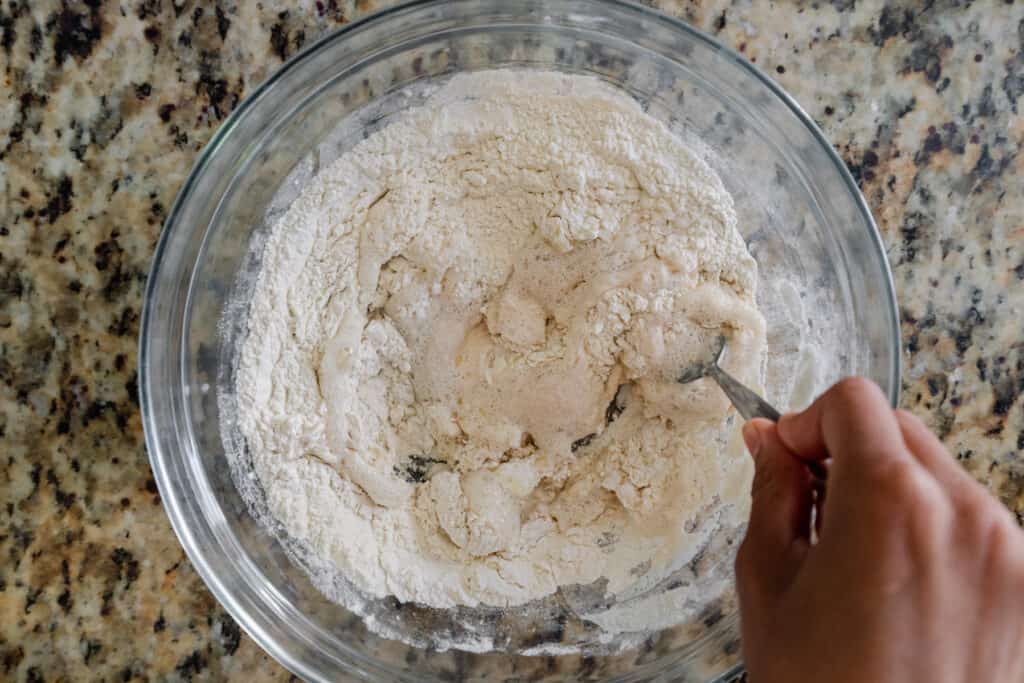
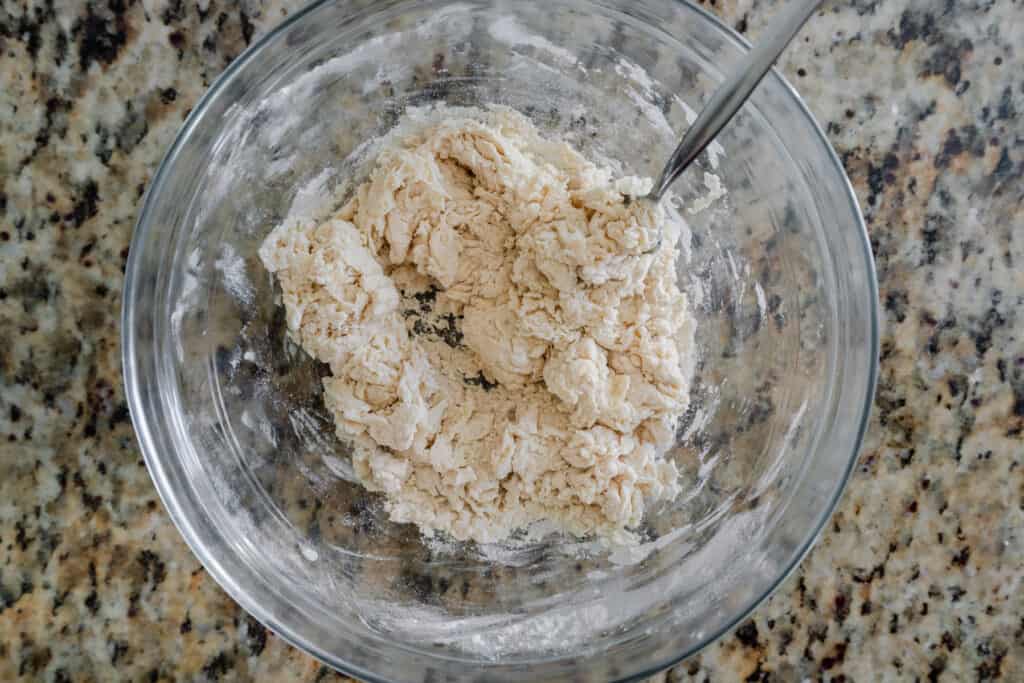
Pour a bit of neutral-flavored oil on your hands to grease them. Transfer all of the dough to a clean work space. Start kneading the dough with your hands. You will need to oil your hands several times during the kneading process.
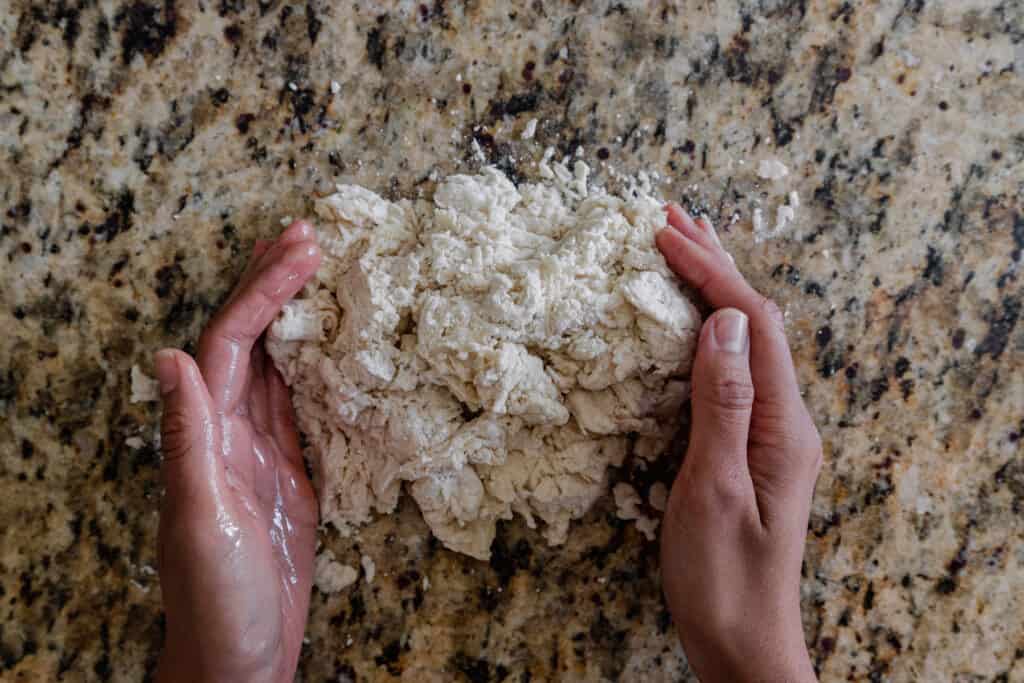
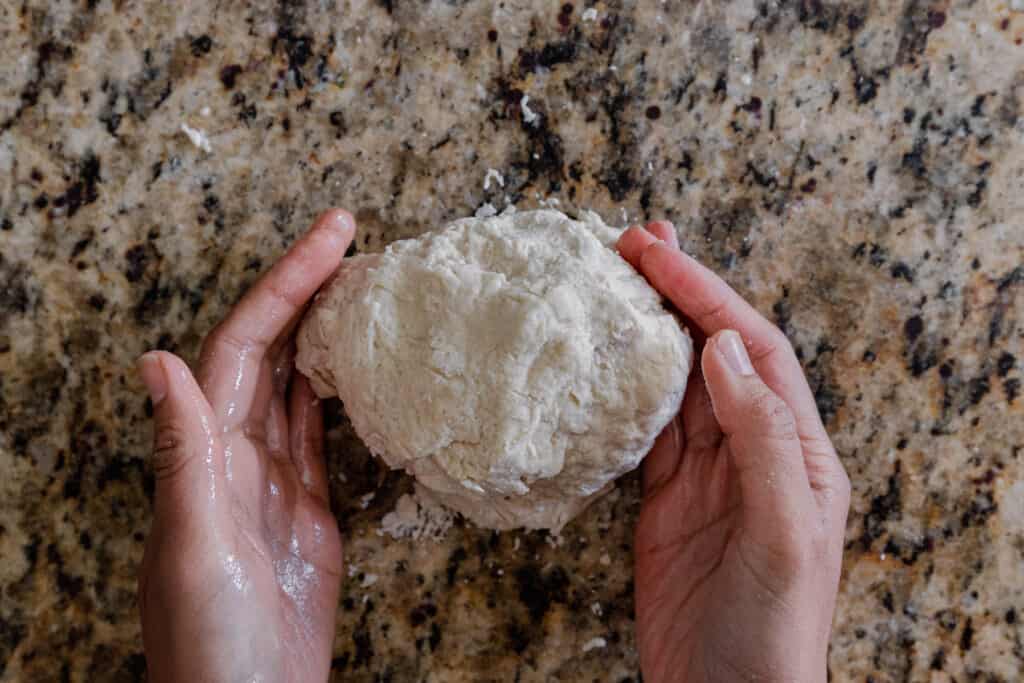
As you knead, you’ll notice the dough becomes quite sticky. It will stick to the counter and to your hands. Don’t worry and just keep kneading the dough for a total of 4 to 6 minutes.
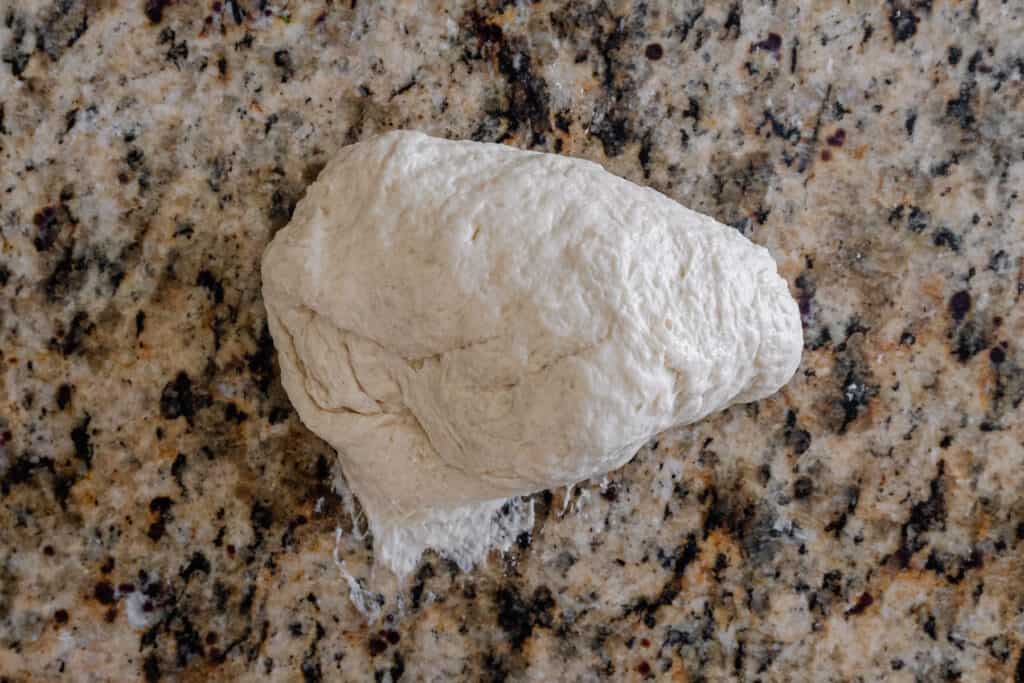
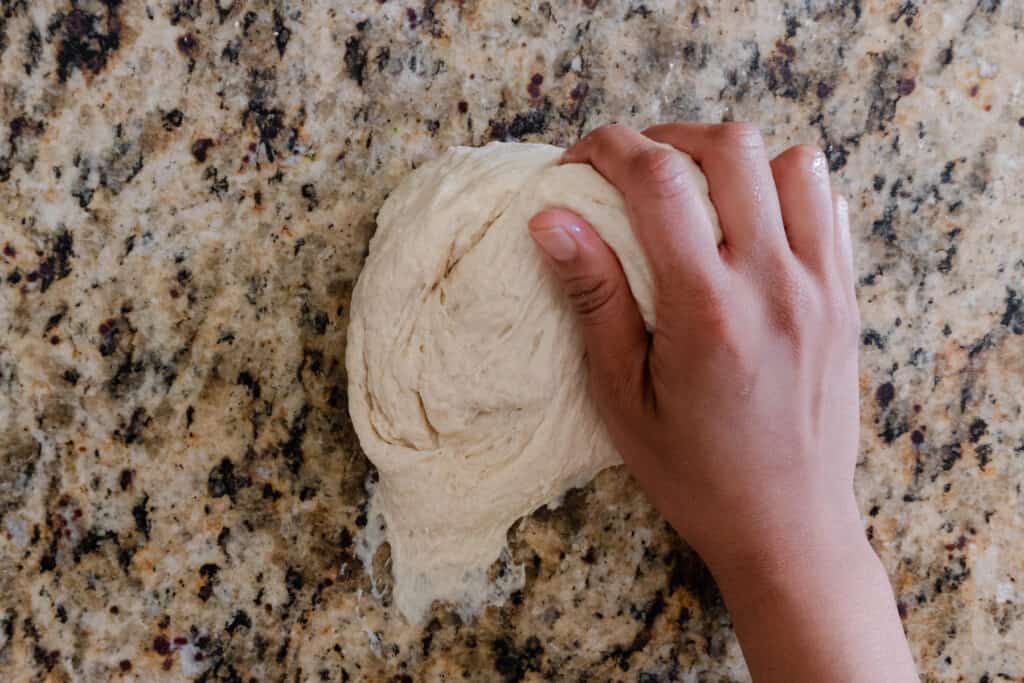
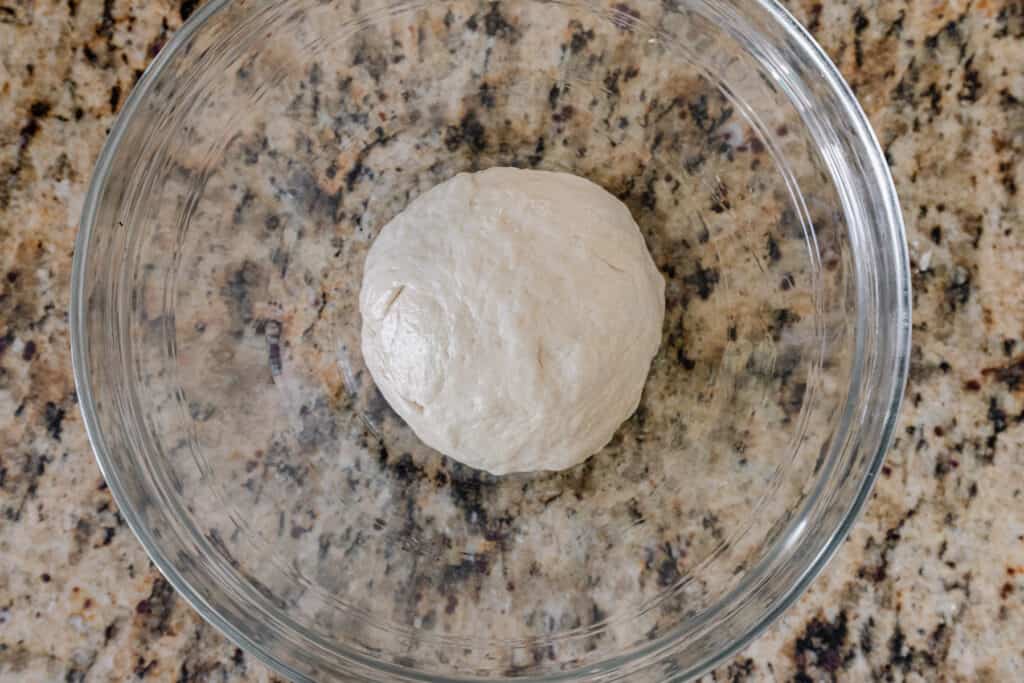
Knead the dough until it is no longer sticky and is instead soft, pliable, elastic, and fairly smooth. It should feel well hydrated but no longer sticky. Pour a bit of oil in a large bowl, add the dough ball, and coat the dough on all sides in the oil.
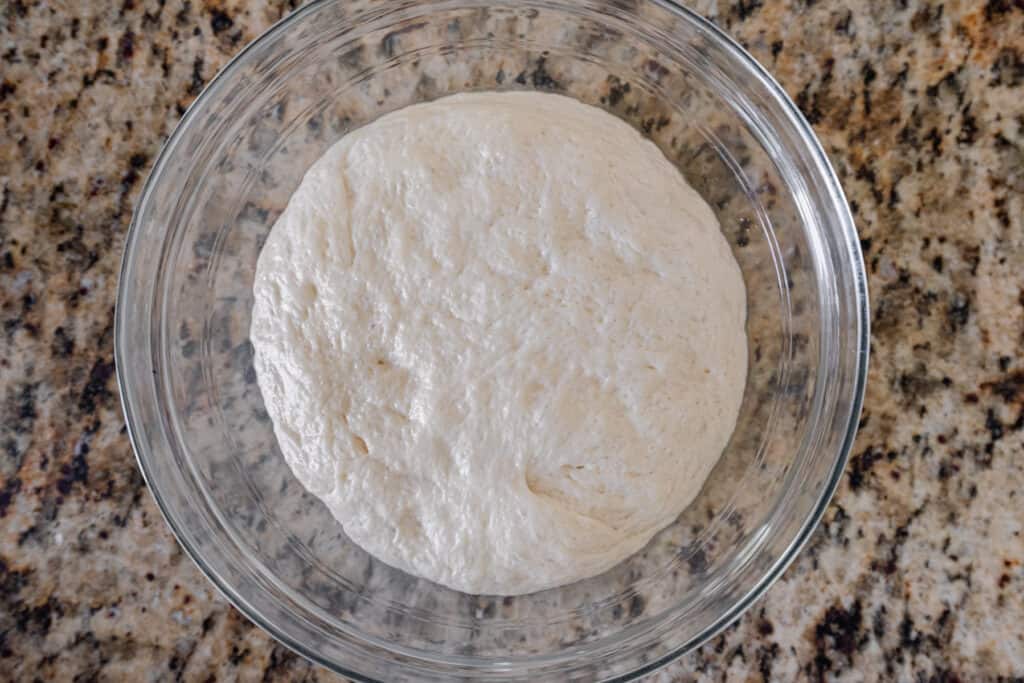
Cover the dough with a clean dish towel and set aside in a warm place for at least 90 minutes, or up to 4 hours. I turn the light on in my oven and rest it in the oven.
After rising, the should have risen and at least doubled in size. Lightly punch down on the dough to release the air. Then use your hands to briefly knead the dough until it’s back into the shape of a ball.
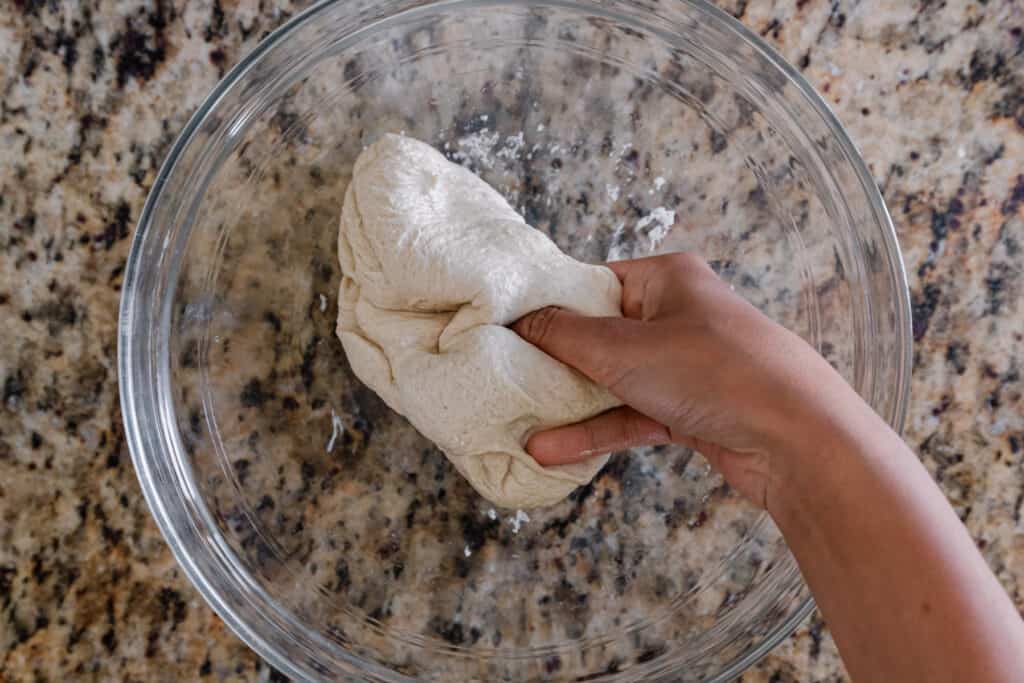
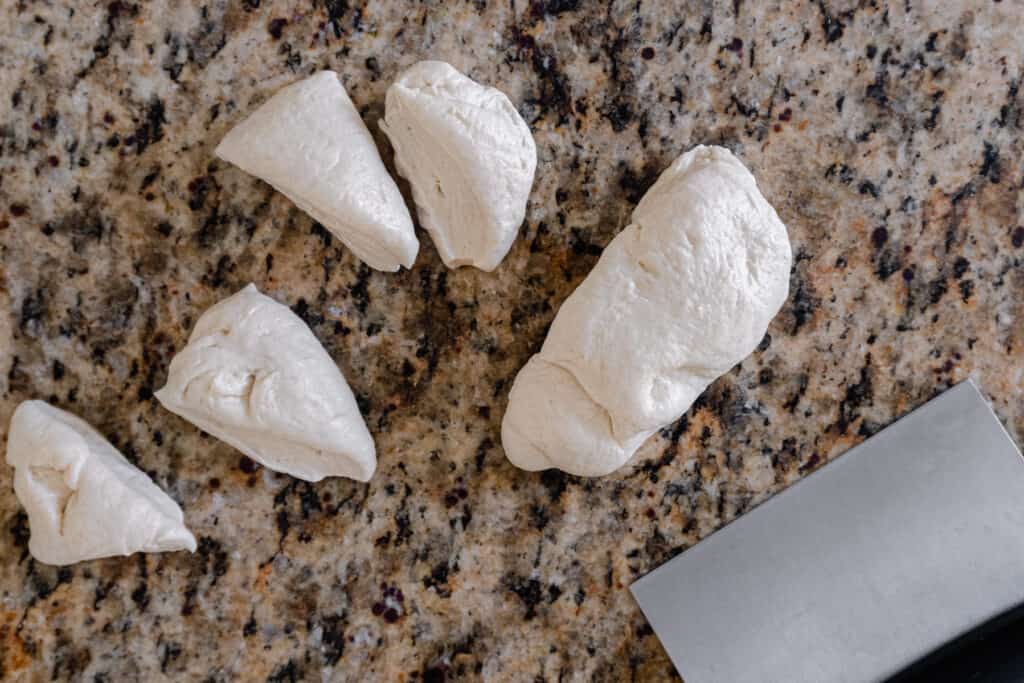
Use a bench scraper to cut the dough into 8 pieces. If you want smaller naans, you can do 10 pieces. Use your hands to roll each dough piece into a round.
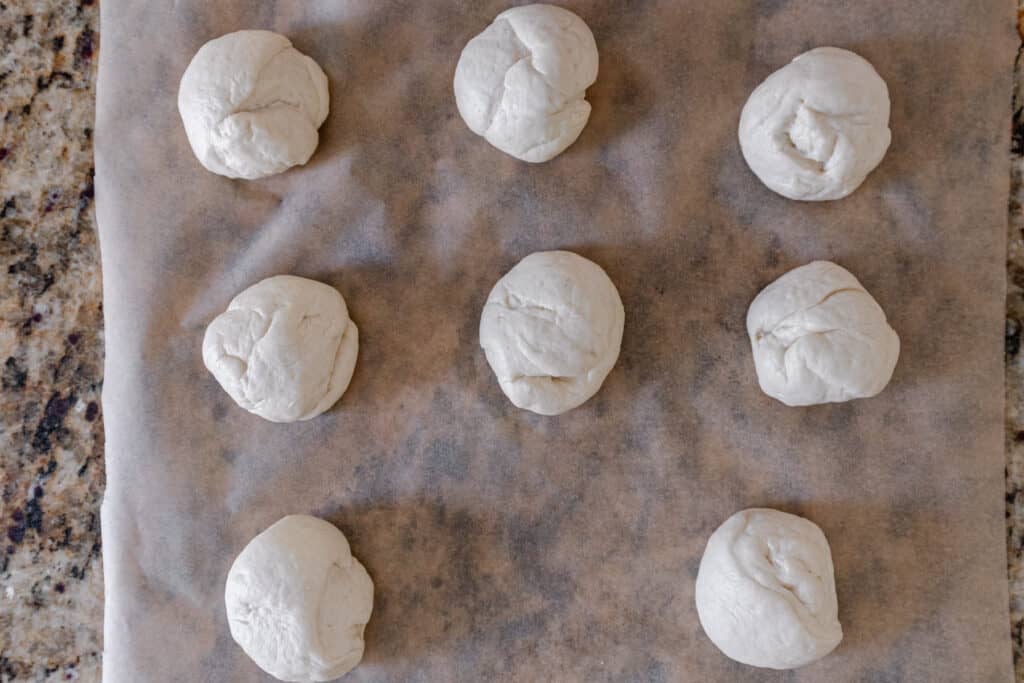
Proof the dough. Transfer to a sheet of parchment paper and cover with a clean dish towel. Allow to rest for 10 minutes (this is the dough’s second rise).
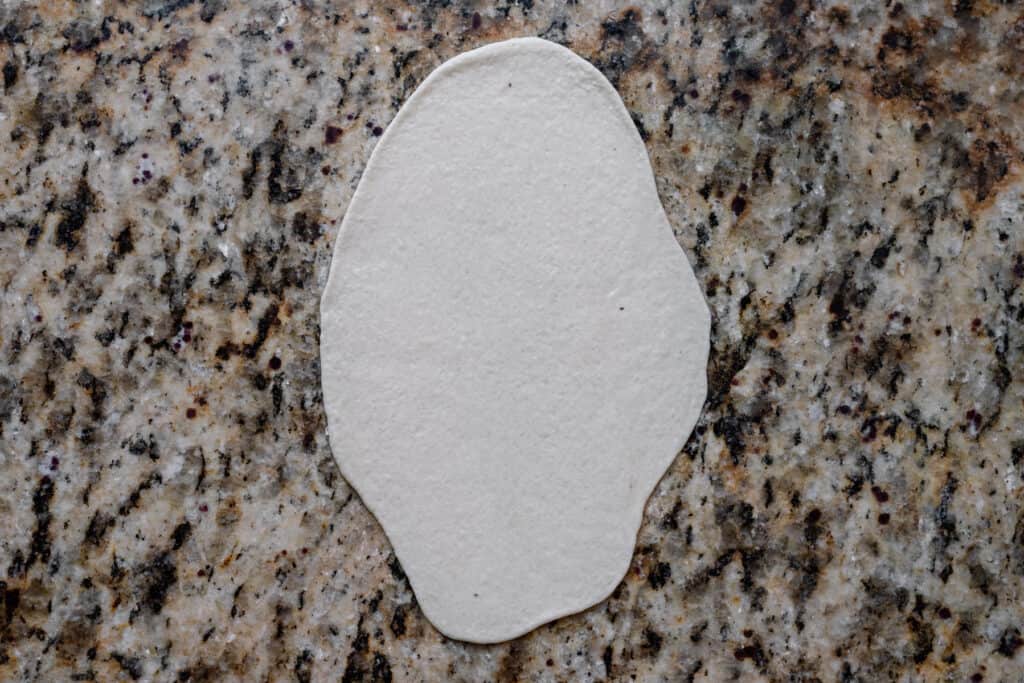
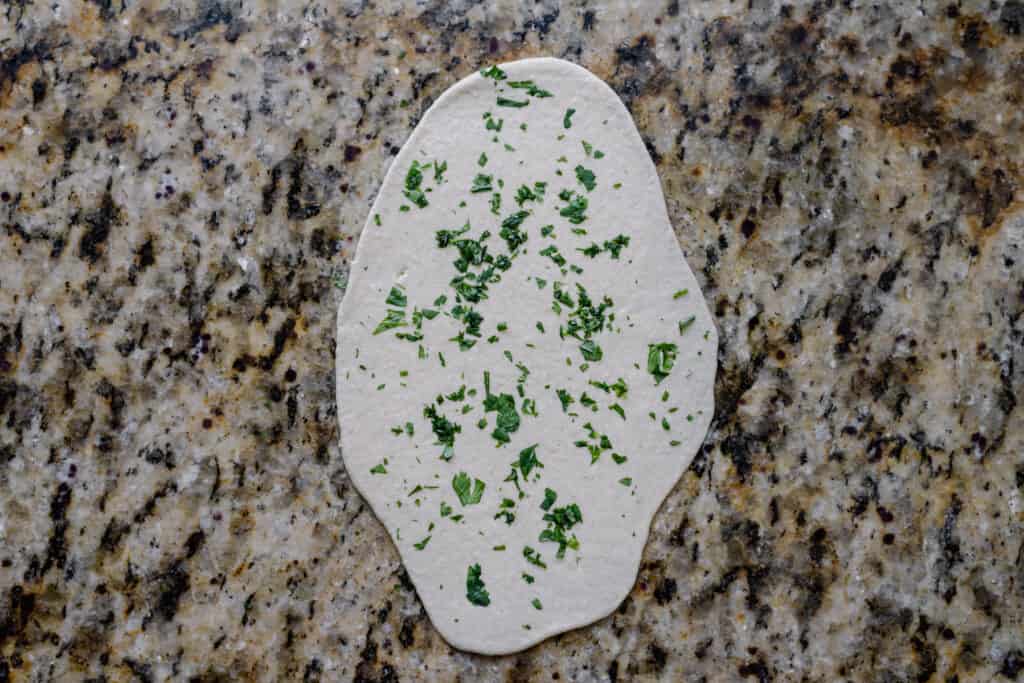
Use a rolling pin to roll the dough into a thin oval shape about 8″ long and 5″ wide at its widest, rolling outward and off (instead of rolling back and forth on the same spot).
Sprinkle the naan with a couple sprinkles of chopped cilantro. Dampen your fingers in some water and carefully pick up the naan. Flip it onto its backside and pat a bit of water all over the backside.
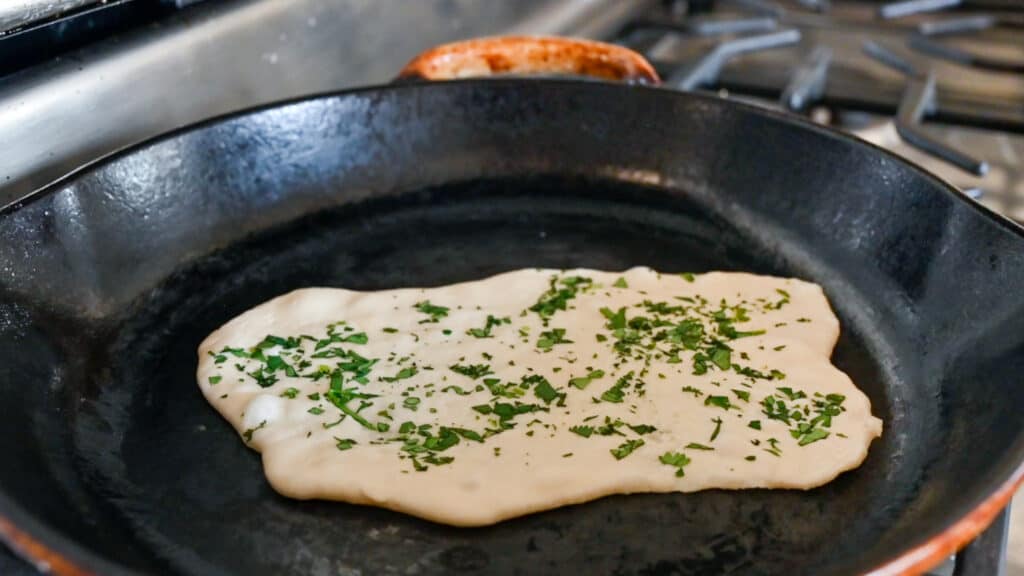
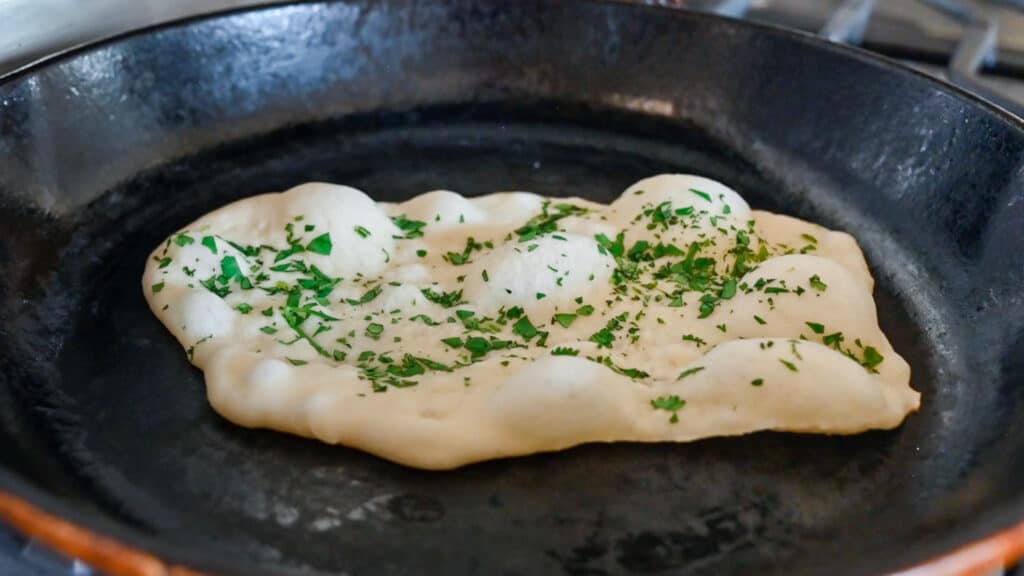
Use damp hands to carefully transfer the naan to the hot cast iron skillet, watered side down. Cook for 45 to 60 seconds, until bubbles puff up all over the naan.
Flip the naan and cover the pan to steam the naan for 30 to 40 seconds, then take off the heat and transfer to a plate.
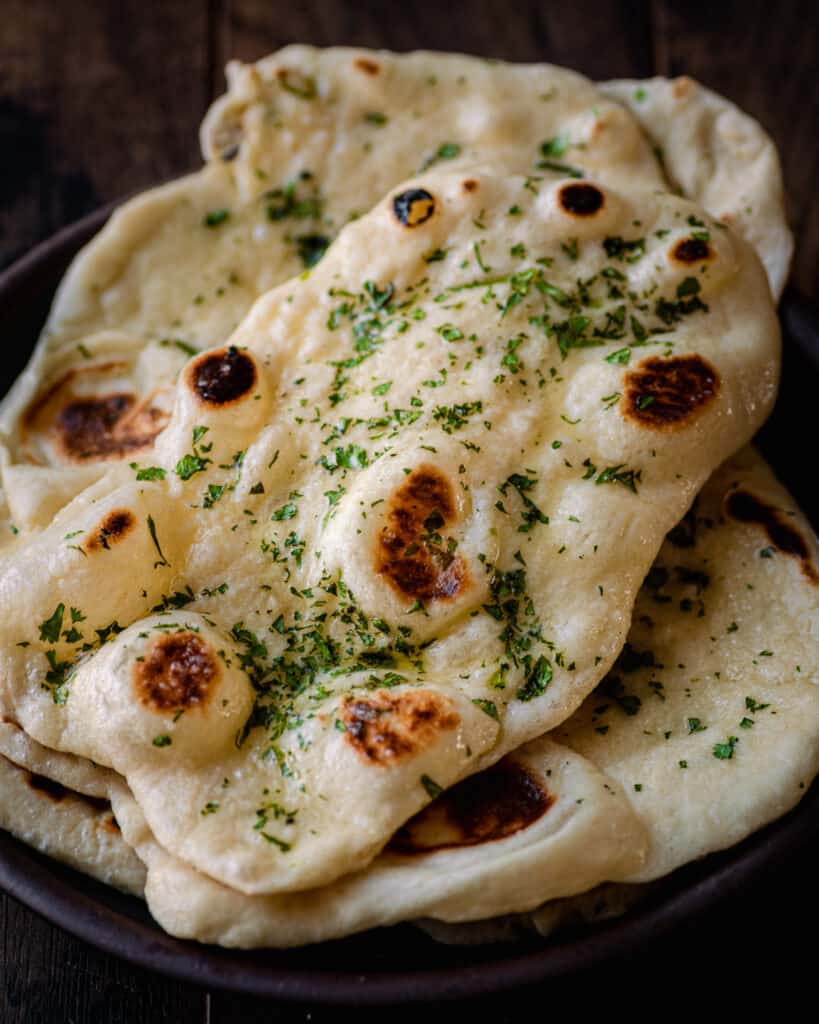
Brush the hot naan with melted vegan garlic butter and sprinkle with a pinch of flaky sea salt. Serve warm!
Tips for making vegan naan
Making naan can be tricky, especially your first time, because yeast is a fickle ingredient. The way yeast interacts with other ingredients depends on several factors, including its food source, the temperature of the water, and the temperature of the dough’s resting environment. Changes in any of these result in changes in the dough (e.g., using water at 99ºF instead of 105ºF makes a noticeable difference).
Takeway: I strongly encourage you to read through all of these tips before making this recipe.
Use a digital measuring scale. If you’re an avid baker or make homemade breads, you know how vital it is to measure in grams and milliliters, not in measuring cups (much more room for error). Yeast doughs are particularly finicky, and even an extra half tablespoon of water can turn this dough from perfect to too sticky to use.
Tip: To ensure success each time you make this recipe, measure everything using a digital scale down to the gram.
Use lukewarm water to activate the yeast. Cold water won’t activate the yeast (and it will make the dough too sticky). Hot water will kill the yeast.
Note: The water should be between 100-110ºF (37.8-43.3ºC) in order to activate the yeast. I recommend having a cooking thermometer (affiliate link) in your kitchen. I usually microwave room temperature water for 20 to 25 seconds and that usually gets me in the range.
Try to avoid adding more water or flour while kneading. When you start kneading the dough, it will look fairly dry. Just start kneading, and very soon, the dough will become very hydrated and sticky.
If you measure precisely (e.g., using a measuring scale in grams/milliliters), you should not have to add any extra water. If after 30-60 seconds of kneading, the dough still feels dry, add just a tiny bit of water. Seriously tiny – like a half teaspoon of water.
If you are too generous with water, the dough will become too sticky and wet. And if you’re thinking, okay, I’ll just add more flour to fix it, NOPE. This will only dry out the dough and make it tough and your naan will be tough and dry, not soft and pillowy.
Don’t be alarmed by the stickiness of the dough. Once you start kneading, the dough will go from dry to really sticky.
Note: The dough will stick to your hands and to the counter during the first few minutes of kneading. Please do not be tempted to add more flour. After a few minutes of kneading, the dough will go from sticky to soft, pliable, mostly smooth, and well-hydrated.
Oil your hands several times. The only way this dough will come together nicely is if you oil your hands several times during kneading. This helps bring the dough together, but also helps with reducing the stickiness of the dough. Please don’t skip this!
Adequately preheat the pan. If using a cast iron skillet, you need to heat it somewhere between medium and medium-high until nearly smoking. That usually takes 5 minutes, sometimes longer. To test if the pan is hot enough, flick a droplet of water into the pan. If it sizzles immediately and quickly disappears, it’s hot enough.
Adjust the heat as needed. Every stove is different, but after cooking the third or fourth naan, I need to reduce the heat on my stove from medium-high to medium (5 out of 7 to 4 out of 7 on my burner). If you notice that the naan is charring much more quickly than previously, turn down the heat a touch.
Cover the remaining dough balls while cooking each naan. Cover them with a clean dish towel. Otherwise, the dough will dry out, leaving you with naan that is not as soft as it could be.
Eat while warm! If you can, work quickly and cook each naan in succession. While one naan is cooking, I roll out another naan and cook them back to back. I can’t stress just how AMAZING this naan tastes when still warm from the pan. So, prepare your main dish–your curry, dal, etc.–in advance and make this naan right before you plan to eat.
What should I serve naan with?
Basically, any delicious Indian curry, dal, or sabji (vegetable dish). In much of Indian cuisine, breads are used as an alternative to utensils. For instance, growing up, we didn’t use a spoon to eat our nightly dal and sabji; instead, we scooped up all the food with roti.
Here are some fantastic vegan Indian recipes that would pair amazingly with this naan.
- Red Lentil Curry: gourmet Indian flavors but made weeknight friendly
- Dal Tadka: a spin on the nightly dal I ate as a child but a little more gourmet and super flavor thanks to the tadka, the tempered spiced oil.
- Vegan Palak Paneer: a veganized version of a takeout classic that’s creamy but wholesome
- Dal Makhani: an indulgent, special occasion dal that will blow you away with its complex flavors
- Chana Masala: an easy-to-make but gourmet spin on the classic Indian chickpea curry
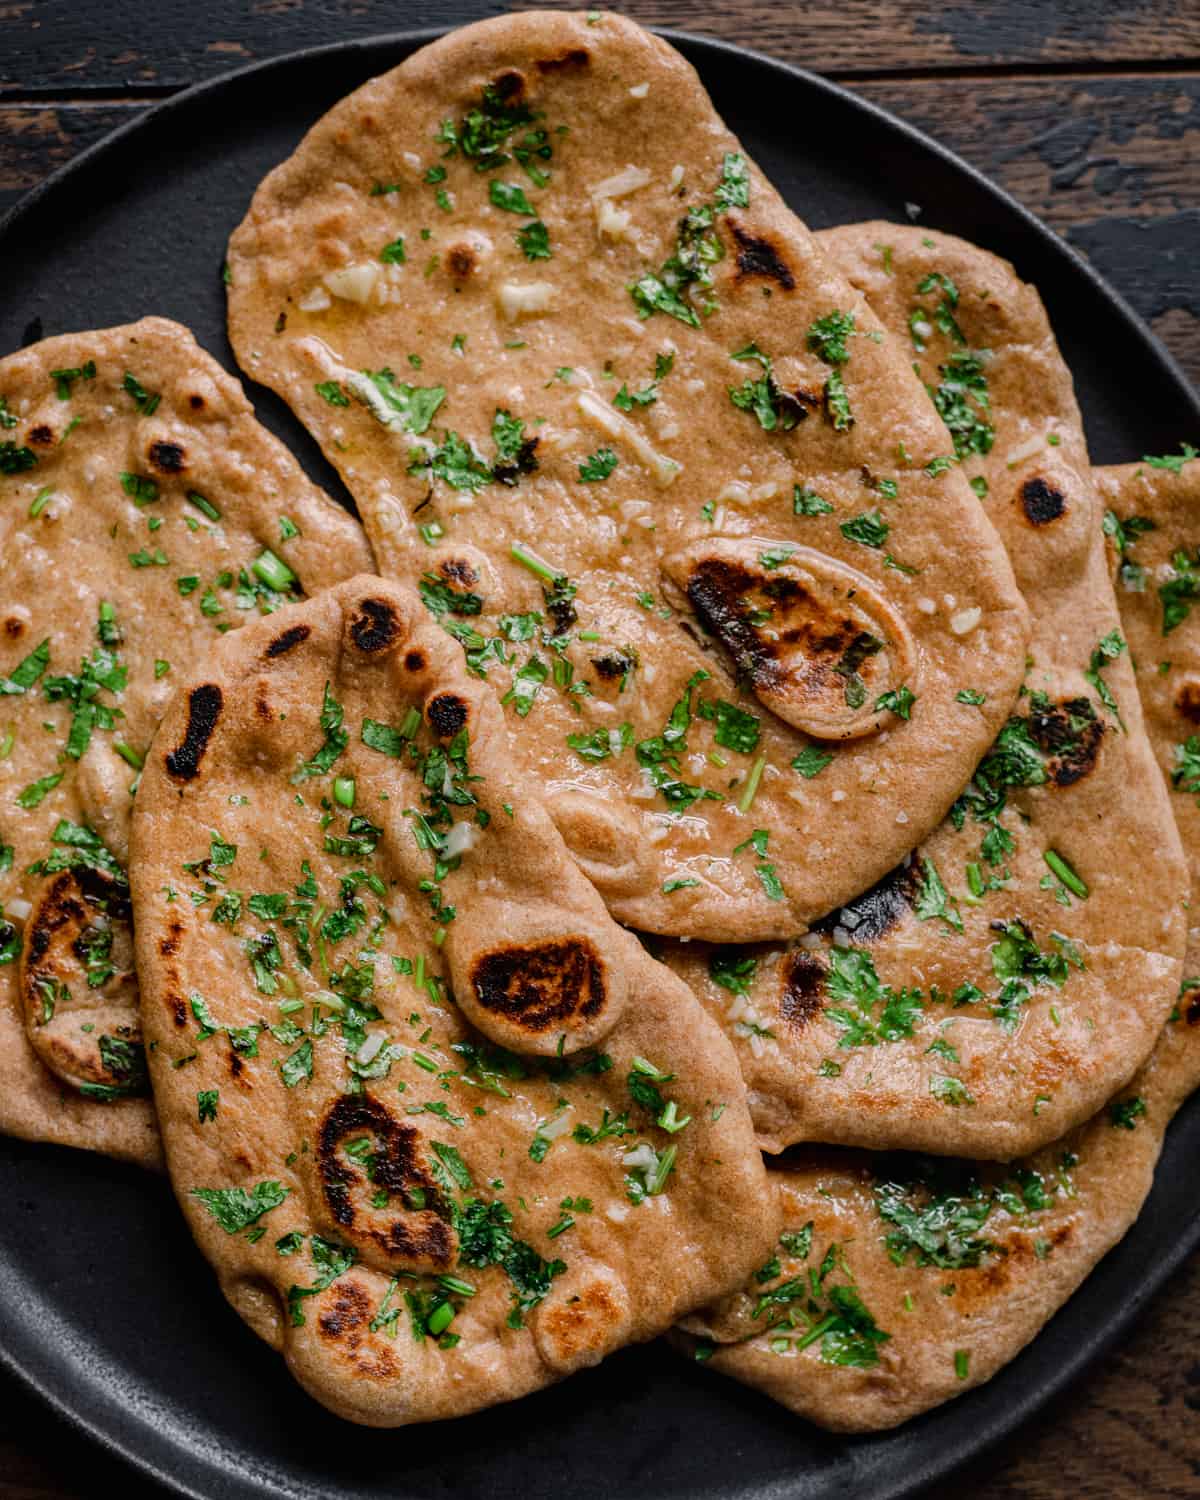
How to make a whole wheat version of vegan naan
While I think this recipe is the most amazing with all-purpose flour, it is still really good with whole wheat flour if you’re looking for something a bit more wholesome.
There are 3 main tweaks to this recipe when using whole wheat flour.
- You need to use slightly more water because whole wheat flour requires more hydration. Use 3/4 cup (180 mL) instead of 2/3 cup (160 mL).
- Rest the dough before kneading. Mix the dough in the bowl with the fork (it won’t fully come together), then let it rest uncovered for 30 minutes. This allows the flour to more fully absorb the liquid, resulting in a softer dough.
- The naan needs a bit more time to cook on the stove. About 60-80 seconds on the first side, and 45 seconds on the second side. The first few naan always take longer to cook, as the pan is not as hot on the first naan as on the fifth naan.
A few differences between regular naan and whole wheat naan:
- When cooking, the whole wheat naan don’t form as many bubbles. This means there are fewer flaky, airy pockets. The naan is still fluffy and soft.
- The taste is quite similar to regular naan, especially when you add the cilantro and garlic butter, but the texture is more toothsome and slightly nutty.
Frequently Asked Questions
We rarely have leftovers because it’s just so dang good, but you can store leftovers in a ziptop bag at room temperature for 1-2 days, or in the fridge for 3-4 days. You can even freeze naan by tightly wrapping in clingwrap and then foil for up to 2 months.
Reheat naan in a hot skillet on the stove until warmed through. If frozen, let sit at room temperature for 10 minutes, then reheat.
If you have leftover dough, you can also wrap that in plastic wrap and store in the fridge for up to 2 days.
If you’re not a cilantro fan, feel free to omit. I love it because it adds more flavor than just plain naan.
Technically, yes, but the naan won’t cook the same. You won’t get the same charring, and it will be a bit more like a traditional flatbread than a classic naan.
No! The oil is the only fat source in this bread (aside from the vegan butter brushed on top at the end), and contributes to the soft, thick texture. Oiling your hands while kneading is also essential (see the Tips section).
Nope. Dry active yeast needs “food” to feed on – that’s the sugar. The combination of sugar and yeast produces carbon dioxide (the gas that causes the dough to rise). No sugar means the dough won’t rise, or will rise very slowly. Don’t worry, you don’t taste the sugar (it’s just 2 teaspoons for the whole recipe).
I haven’t tried using a liquid sweetener such as maple syrup, but given how finicky yeast doughs can be, I would just opt for the sugar if possible.

Watch: How to make vegan naan
That’s all you need to know! If you love this vegan naan recipe, please leave a rating and review below and tag me with your remakes on Instagram!

Big Vegan Flavor
Techniques and 150 recipes to master vegan cooking.
Vegan Naan

Ingredients
- ⅔ cup (160 mL) lukewarm water (water needs to be at 100-110ºF)*
- 2 teaspoons organic cane sugar
- 1 ½ teaspoons active dry yeast
- 2 cups (250g) all-purpose flour
- ½ teaspoon fine sea salt
- ¼ teaspoon baking powder
- 1 tablespoon grapeseed oil or neutral-flavored oil of choice, plus more to oil your hands
- 3 to 4 tablespoons finely chopped cilantro (optional but recommended)
- 3 tablespoons vegan butter
- 2 to 3 cloves garlic, grated or minced
- Flaky or coarse sea salt for finishing
Instructions
- Please read through the instructions and the Tips section in the blog post before starting!
- In a medium bowl, combine the lukewarm water and sugar and stir until dissolved. Add the yeast and whisk for about 15 seconds until well incorporated. Rest for 15 minutes to activate the yeast – it will turn a bit foamy and frothy.
- Meanwhile, sift the flour, salt, and baking powder in a large bowl.
- Knead the dough. Add the yeast mixture and 1 tablespoon of oil to the flour. Stir to combine with a fork. When the dough is shaggy and you can no longer stir it with a fork, transfer it to a clean work surface and oil your hands well. Start kneading the dough with your hands, oiling your hands several times as you go. The dough will be very sticky and stick to the surface and your hands during the first few minutes, but as you continue kneading, it will stop sticking and become soft, elastic, and pliable. The kneading process should take 4 to 6 minutes.
- Rest the dough. Oil a large bowl, add the dough ball to the bowl, and coat it with a bit of oil on all sides. Cover the dough with a clean dish towel. Rest in a warm, draft-free place for 90 minutes (up to 4 hours), until the dough rises and at least doubles. I place it in my oven with the oven light on. If it’s summer or you live in a warm climate, the counter works great.
- Once the dough has risen, lightly punch the dough to release the air. Briefly knead the dough with your hands into a ball until smooth and tacky (it shouldn't stick to your hands).
- Divide the dough. Using a pastry cutter, divide the dough into 8 equal portions. Use your hands to roll the dough into 8 balls.*** Transfer the balls to a sheet of parchment paper and spread them apart to prevent sticking. Cover with a dish towel and rest for 10 minutes to “proof” the dough.
- Preheat the pan. Open nearby windows, as it may get smoky. Heat a large cast-iron skillet (or an iron tawa pan**) for which you have a large enough lid over medium-high heat until it's nearly smoking, at least 5 minutes.NOTE: my gas stove heat dial goes up to level 7. I use level 5 but usually lower it to 4 after the first 3-4 naans.TIP: You can test if it’s hot enough by adding a drop of water – if it sizzles immediately, it’s ready.
- Prep before cooking the naan. Pour the vegan butter into a small bowl and add the grated garlic. Microwave on high for 20 seconds, stir, then microwave for another 20 seconds. Set the butter next to stove with a pastry brush. Put a small bowl of water next to your work space.
- Roll out the naan. Using a rolling pin, roll each piece of dough into a oval shape, about 8 inches long long and 5 inches wide at its widest point (20 cm x 13 cm). Roll the naan almost as thinly as you can. TIP: roll outward and off (instead of rolling back and forth on the same spot).
- Add the cilantro and water the back side. Sprinkle each naan with a bit of chopped cilantro. Roll the rolling pin once over the dough to get the cilantro to stick. Dampen your hands using the water bowl and flip the naan onto its back side. Pat a small amount of water all over the back side of the dough (this will help the naan stick to the pan). NOTE: Cover the remaining dough balls while you roll each nan.
- Cook the naan. Dampen your hands again and pick up the naan and carefully place it in the hot skillet, watered side facing down. Once you see bubbles all over and the edges start to dry out (45 to 60 seconds, depending on heat level), flip the naan. Now cover the skillet with the lid and cook for 30 to 40 seconds. When it’s done, parts of the dough should look almost raw and doughy, with some parts charred. NOTE: You may need to slightly lower the heat after the 3rd or 4th naan.
- Transfer naan to a plate and brush with the melted garlic butter and sprinkle with just a pinch of flaky sea salt. Repeat the process with the remaining naan. Serve and eat while still warm! NOTE: depending on the quality of your pan, you may need to wipe out the skillet and give it a quick wash before making the next one (I do not need to do this with my well-used enameled cast iron skillet).
Notes


Can i make this recipe without the sugar??
Hi Billy, nope. Dry active yeast needs “food” to feed on – that’s the sugar. The combination of sugar and yeast produces carbon dioxide (the gas that causes the dough to rise). No sugar means the dough won’t rise, or will rise very slowly. Don’t worry, you don’t taste the sugar (it’s just 2 teaspoons for the whole recipe).
We haven’t tried using a liquid sweetener such as maple syrup, but given how finicky yeast doughs can be, I would just opt for the sugar if possible.
I loved the taste of the naan, but I couldn’t get mine to rise like you did. I thought I kneaded long enough, but I think my dough was a little too dry. I am going to try again. Thank you for the recipe.
Hi Christian, so sorry to hear your naan didn’t rise and was dry!
As for not rising, did you check to make sure your yeast wasn’t expired? Here are instructions for testing whether yeast is active: https://redstaryeast.com/yeast-activity-test/
And as for being too dry: If you measure using a scale in grams/milliliters, you should not have to add any extra water. That said, if after 30-60 seconds of kneading, the dough still feels dry, add just a tiny bit of water. Seriously tiny – like a half teaspoon of water. Then re-evaluate the texture of the dough.
Best of luck next time!
Made these tonight with Curry leftover. These nann are amazing!!! My husband said it is super airy and soft. They are better than the ones from the restaurant! Thank you so much! Great recipe!
Thank you for your lovely comment, Lily! It makes us happy to know that you two enjoyed the recipe.
This was amazing! Thanks Nisha!
I used my stand mixer to make it easier.
So good! I have been wanting to eat some of these but when I look at the ingredients on packages there are too many ingredients. These were so good and your technique of patting with water definitely helps. Thank you I am loving your cookbook and all your videos. So many recipes I have tried.
Lisa, thank you for your thoughtful review! We’re so happy to hear that you enjoyed the naan.
I made this with fresh milled flour (a combination of kamut and hard white wheat berries) and it turned out great. Nisha’s instructions for adapting for whole wheat flour worked for fmf very well! As cooking with fmf can be a bit of trial and error, I was surprised how soft the naan came out.
I was nervous to try it because I thought I needed yogurt, but it turned out excellent. Do you roll out all the balls of dough before cooking them in the skillet? I tried to roll as I cooked, but each bread took less than a minute on each side to cook, and I couldn’t roll fast enough.
Hi Kate, it’s great to hear you enjoyed the naan! To answer your question: we typically keep the dough balls unrolled until they’re nearly ready to cook, which prevents them from drying out. If you weren’t able to roll them out the dough rounds while the other naan cooked in the pan, you can try rolling out half of the dough balls before you start cooking, and then you won’t have as many to roll out during the cooking process.