

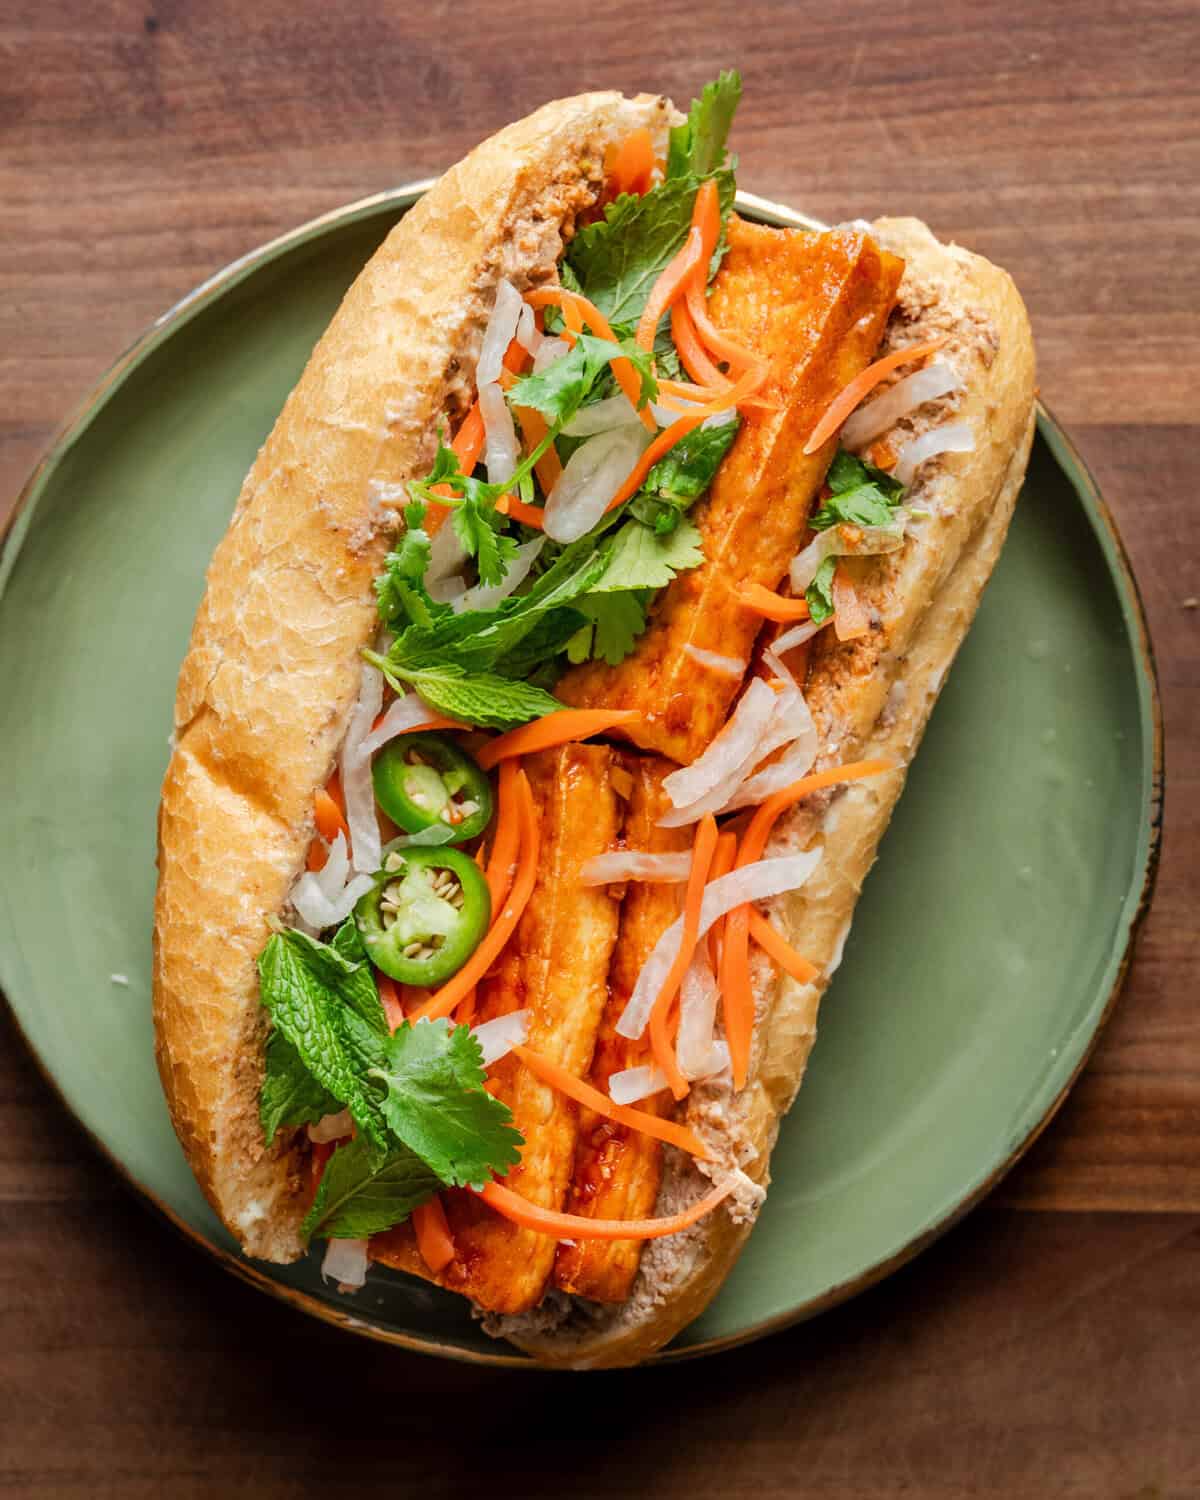
I’m not going to mince words: this might be the best sandwich I’ve ever eaten.
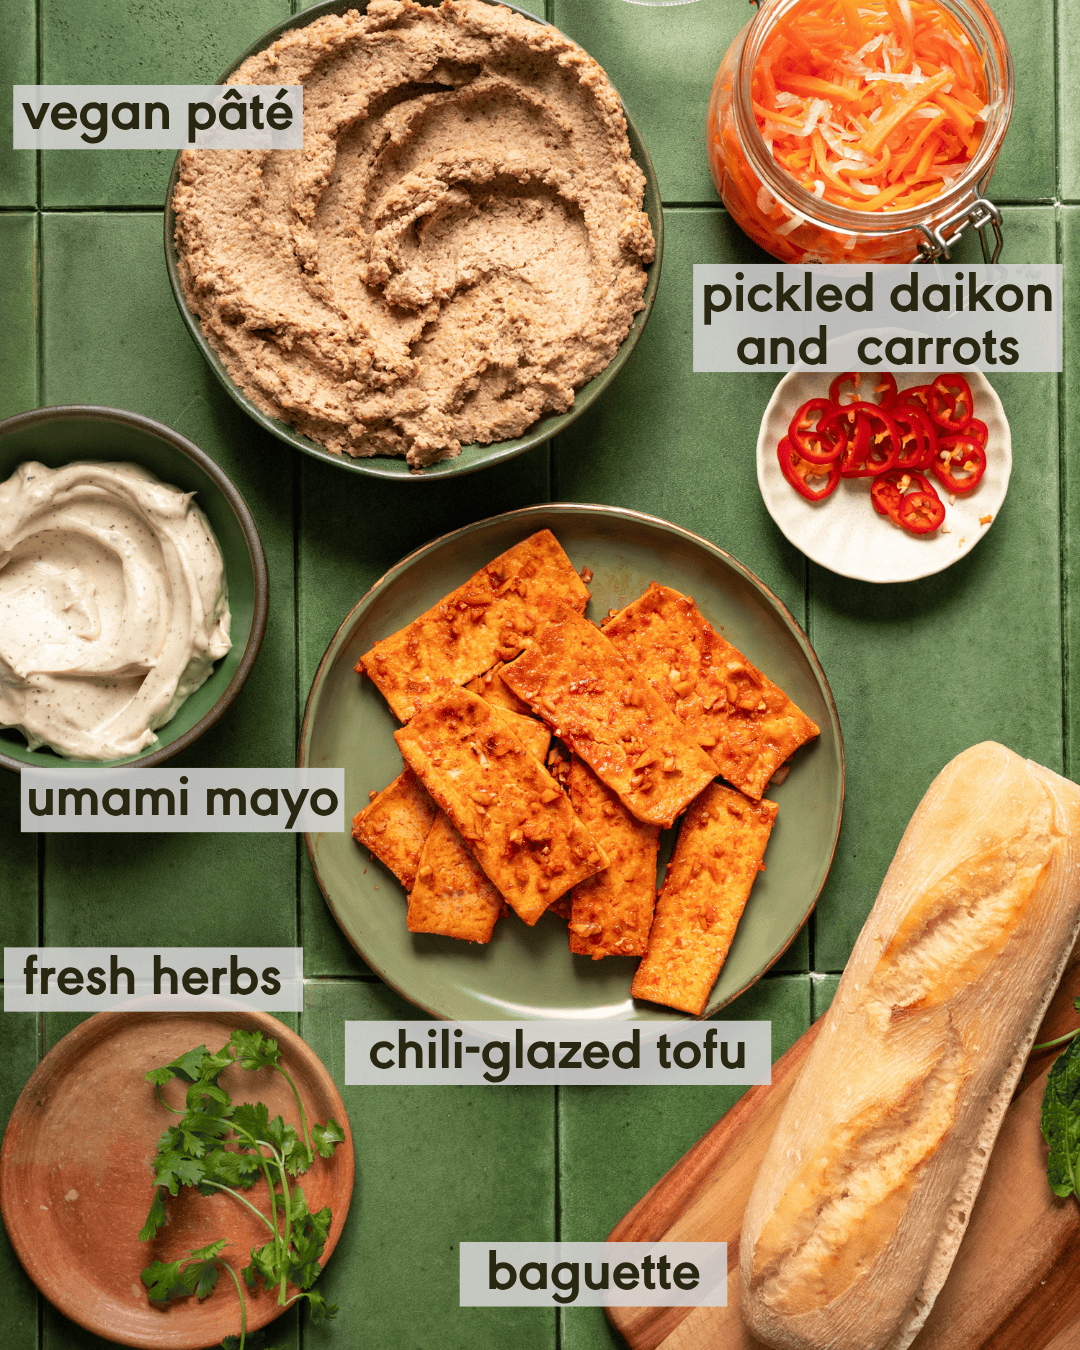
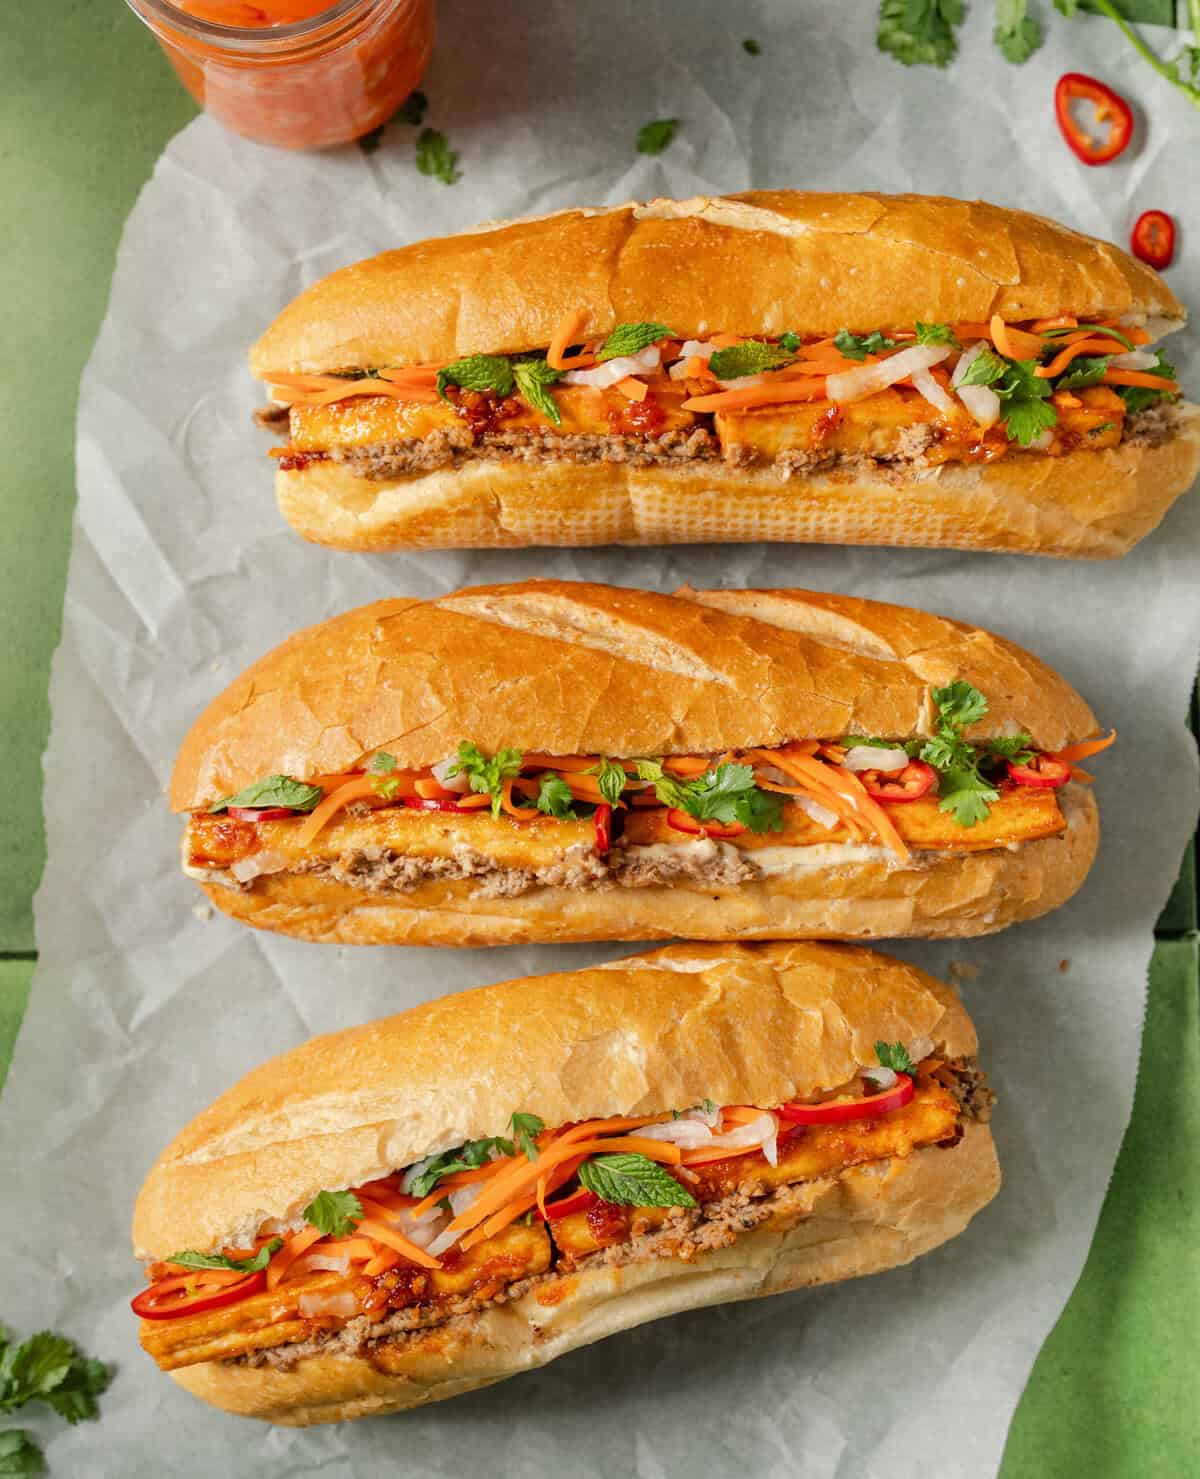
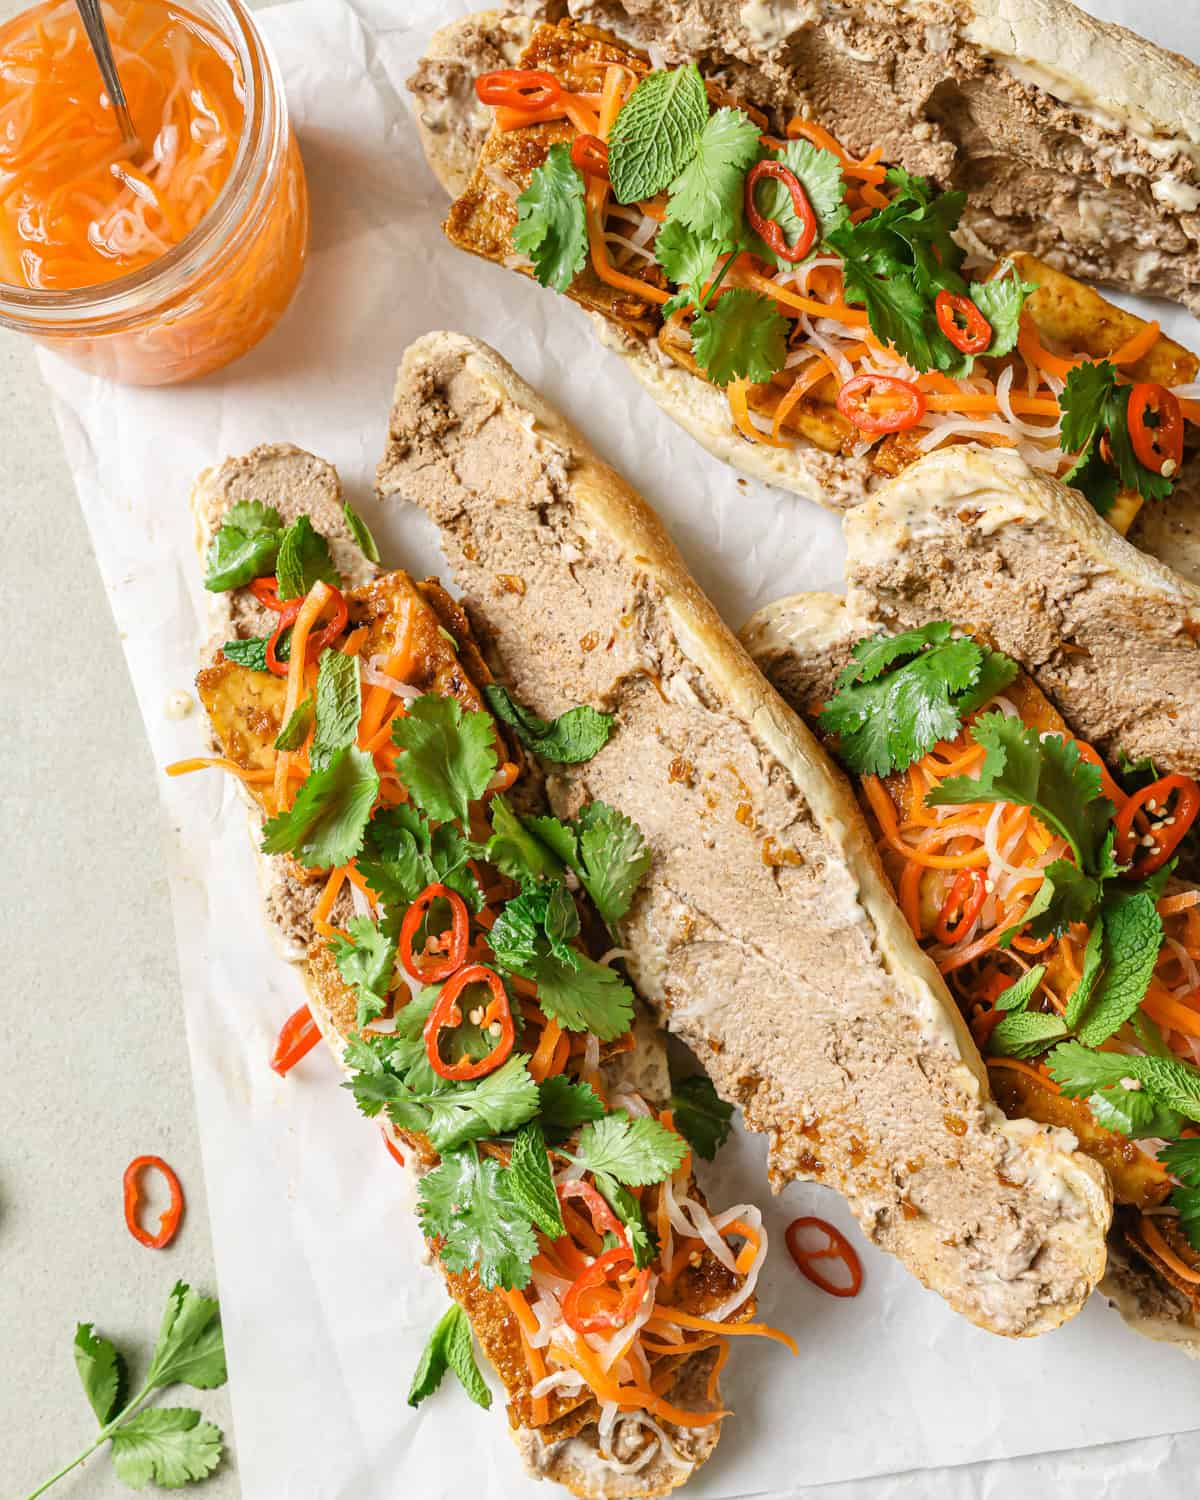
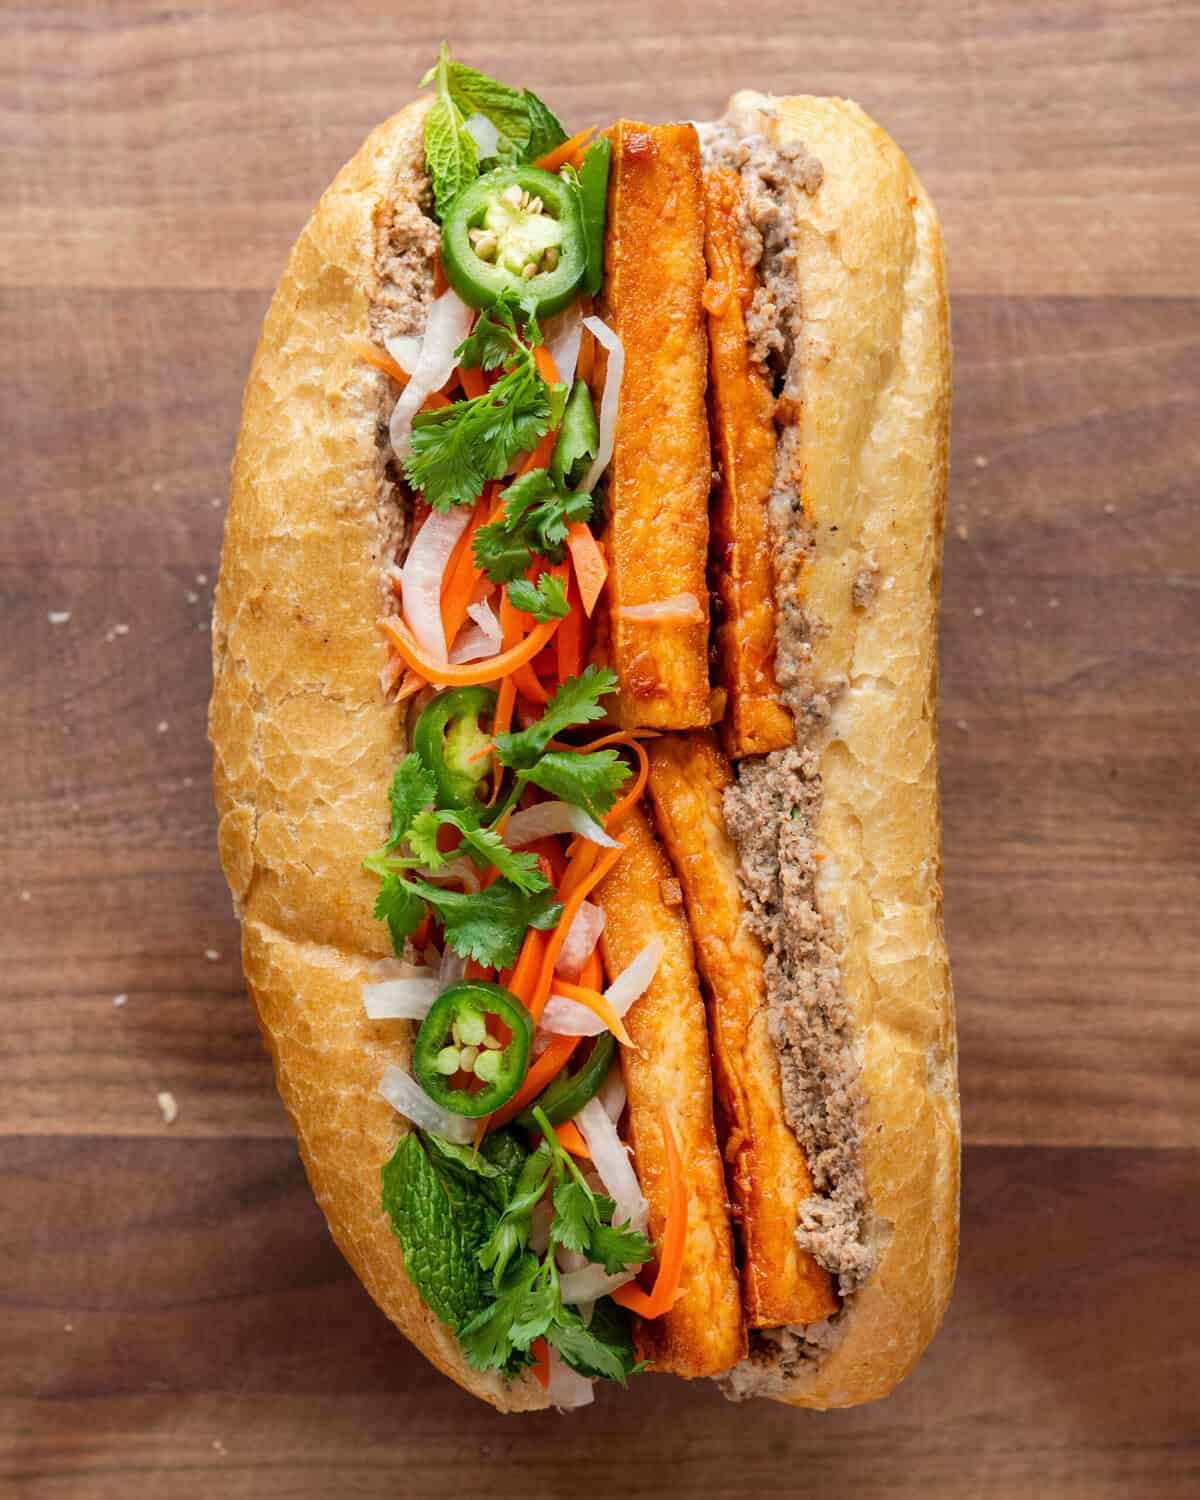
This plant-based version of a Vietnamese bánh mì is nothing short of heavenly: a delicately crispy roll spread with umami-infused mayo and an (optional) rich, mushroom-walnut pâté, layered with golden-crusted slabs of chili-lemongrass glazed tofu, and topped with signature pickled daikon and carrots, fresh herbs, and sliced chiles.
With all the flavor highlights that make the classic sandwich so beloved—salty savory richness, a bit of spice, herby freshness, and plenty of bright, pickle-y zing—the first bite will transport you straight to sandwich heaven.

The bánh mì framework
Celebrated Vietnamese food writer Andrea Nguyen of Viet World Kitchen said it best: “As long as you maintain the framework of crisp bread, succulent filling, tangy pickled vegetables, chile slices, cucumber, and herbs, you can feature practically anything else in it.”
Indeed, the genius of this iconic Vietnamese sandwich is its mix of components that work harmoniously together: a light, crispy-crusted bread roll, some sort of mayo spread, pâté, a protein, đồ chua (pickled vegetables), and herbs to finish.
To streamline this recipe, I’ve chosen to make the pâté optional. But if you have the time, it is SO worth it! And it can be made several days ahead of time.
🎥 There’s no better sandwich.

With over 100K views on Youtube in the first week, this banh mi recipe is a huge hit with my community. I hope you love it just as much!
The 6 components—and how to nail them
Component #1 – Bread
“Bánh mì” means “wheat bread” in Vietnamese—the fact that it’s both the name of the sandwich and the all-important vehicle holding it together speaks to the importance of this first element in the framework.
Traditional bánh mì are made with Vietnamese baguette-style rolls, which are soft on the inside but have airy, crackly crusts (and less dense than traditional French baguettes).
Where to buy: Find them at Vietnamese supermarkets/bakeries or Vietnamese restaurants (especially ones that serve bánh mì).
Substitute: There are plenty of American supermarket options that work well here, including soft-ish French or Italian loaves/rolls, ciabatta rolls, hoagie rolls, or mini slider buns. Look for relatively soft breads, nothing too crunchy, chewy, or dense (and steer clear of sourdough).
Component #2 – Pickled daikon & carrots (đồ chua)
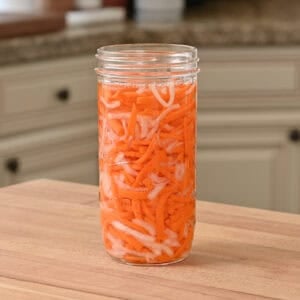
“Đồ chua” translates to “pickled things” or “sour things” in Vietnamese, and it’s possibly the most signature element of a bánh mì. Sweeter than Western-style pickles, their tangy-sweet punch and fresh crunch brighten the richer elements of the sandwich.
You’ll julienne carrots and daikon radish, then massage them with salt to encourage them to soften and release excess moisture, and finally pickle them in a simple vinegar-sugar-salt brine.
Ingredient tips: Find daikon radish at well-stocked supermarkets as well as Asian grocers. And no need for fancy vinegar here—cheap distilled white vinegar is ideal because its sharp edge cuts through fatty fillings really well.
Substitute: If you can’t find daikon radish, you can try using white turnips (it’s a bit earthier) or jicama (it’s sweeter, with no bite). Avoid “regular” red radishes, as they’re too peppery and assertive.
Component #3 – Mayo
Similarly, nearly every bánh mì features mayo, which adds an indulgent fatty richness which plays beautifully against the brightly sour pickles (element #5).
In this recipe, you’ll combine vegan mayo, Bragg’s Liquid Aminos, and plenty of black pepper for a 1-minute (but delicious!) umami-infused mayo.
Maggi seasoning is what’s traditionally used in bánh mì, but I personally prefer Bragg’s Liquid Aminos for its simpler ingredient profile (just vegetable protein from soybeans and purified water), plus its rich, salty-savory flavor tastes reasonably similar to Maggi.
Ingredient tips: Just Mayo and Follow Your Heart Vegenaise are my preferred brands of vegan mayo. Find Bragg’s Liquid Aminos in well-stocked grocery stores (or feel free to use Maggi seasoning if you prefer).
Substitute: If you can’t find Bragg’s Liquid Aminos, note that it is not interchangeable with coconut aminos, which are sweeter. Use soy sauce instead—but you’ll want to use more soy sauce, as it’s milder in effect.
Component #4 – Pâté (Optional but recommended)
Many classic bánh mì contain pâté, a spread typically made from pureed animal liver, which brings another layer of savory richness.
The good news—you don’t need animal products to make a killer pâté!
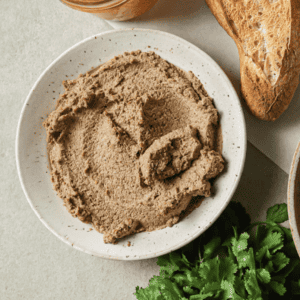
Taking inspiration from my lentil tacos—which features a killer combo of earthy lentils, meaty mushrooms, and umami-rich walnuts—this vegan pâté is so delicious that I shamelessly eat it by the spoonful. Here, it adds the quintessential richness and complex savory-slightly sweet flavor that make a bánh mì special.
To streamline this recipe, I’ve chosen to make the pâté optional. But if you have the time, it’s well worth making (and it can be made ahead of time)!
Component #5 – Protein
In the world of bánh mì, you’ll find lots of variation in this element, though pork is often featured.
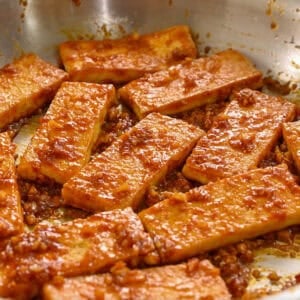
Our plant-based bánh mì is piled high with slabs of chili-lemongrass glazed tofu, a nontraditional but extremely fun centerpiece of the sandwich—and a dynamite flavor companion to all the other elements.
Ingredient tips: You can find fresh lemongrass at some well-stocked grocery stores, specialty grocers, or Asian grocers. Jump to the Tips section for how to prepare it!
Substitute: If you can’t find lemongrass, just omit it—there are so many other delicious flavors in both the tofu glaze and the sandwich overall!
Component #6 – Toppings
Fresh cilantro sprigs are classic and pretty much nonnegotiable (unless you have a genetic intolerance). I also like to add fresh mint and sliced chiles (predictable, I’m a spice fiend ❤️🔥). Optionally, feel free to add a few spears of cucumbers or other crunchy veg!
Substitute: Cilantro-hater? Skip it and just use mint. Not into spicy? Go easy on the fresh chiles, or omit altogether.
Step by step instructions:
For visual step-by-step instructions, watch the YouTube video!
- Element 1–Pickled Daikon & Carrots: Start at the 00:20 mark.
- Element 2–Vegan Pâté: Start at the 02:14 mark.
- Element 3–Chili-Lemongrass Glazed Tofu: Start at the 05:40 mark.
- Element 4 & 5–Bread & Umami Mayo: Start at the 09:09 mark.
- Assembling the Sandwich: Start at the 10:18 mark.
Tips for making this vegan bánh mì
Don’t skip the saltwater tofu soak
As I explain in more detail in my guide on how to cook tofu, soaking tofu in hot salty water draws out moisture from within the tofu block—even more efficiently than pressing the tofu! As an added bonus, it also seasons the tofu from within.
In my various recipe tests, we tried the tofu using the hot saltwater soak and using the classic pressing method, and the version with the hot saltwater soak was noticeably more flavorful.
Tofu Tip
You might notice the recipe calls for measuring out 24 oz (680g) of tofu. That’s because this is the maximum amount of tofu that can fit in one large frying pan (a 12” / 30 cm pan).
You have two options: (1) weigh out your tofu and slice off any excess until you get 24 oz (680g) of tofu; OR (b) slice each tofu block into ⅔” pieces, using no more than 6 blocks per slab.
Of course, if you don’t mind cooking the tofu in two batches, you can use more tofu than the recipe calls for.
How to prep lemongrass
If you’re lucky enough to find lemongrass, when prepping it, you only want to use the bottom part of the lemongrass stalk—the portion that feels softer and bendy.
- Remove the papery outer layers from the lemongrass
- Slice off the top hard section, roughly the top 1/2 or 2/3 of the stalk.
- Smash down on the remaining bottom portion of the stalk with a rolling pin or mallet (to release bright citrusy oils)
- Use a sharp knife to mince the remaining lemongrass
Tip: If you don’t want to waste the tough parts of the lemongrass, you can simmer them in water with fresh ginger to make lemongrass-ginger tea (or simmer them in a Thai curry or soup).
Make the pickled vegetables ahead of time
The pickled daikon & carrots (đồ chua) taste best once they’ve rested in the fridge for a bit. While it’s more traditional to wait 12 to 24 hours, even a 1- or 2-hour rest is great, as it softens the earthy flavors and allows the the flavors to mingle together.
Pick the right bread
In bánh mì, the bread itself is critical element of the sandwich.
- Don’t pick anything too dense or chewy: Jump to component #1 in the section “The 6 components” for tips on what kind of bread to use and where to buy it.
- Lightly toast it: That way, you get that lovely crisp-chewy contrast. Just be sure to cool the bread before assembling so it doesn’t melt the mayo or pâté!
- Don’t be afraid to hollow out the halves: Especially if you are using a denser, American-style bread, you’ll likely want to scoop out a bit of the bready interior first.
Shortcut options
While I would love for you to try the recipe as written at least once so you get the full experience, I understand there are several components of this sandwich and you may want to streamline it.
Shortcut Option 1: For this recipe, I made the pâté optional. If you skip it, increase the amount of the umami mayo so you have sufficient spread/sauce.
Shortcut Option 2: If you’re really short on time, when making the tofu, skip the garlic, ginger, and lemongrass. Just pour the chili glaze into the pan, wait until it thickens, then add the cooked tofu to coat.
Frequently Asked Questions
This vegan bánh mì is great for meal prepping because almost everything can be made or prepped ahead of time.
Pickled daikon and carrots: These are actually ideal for making ahead of time, since they are most delicious after a 12- to 24-hour rest in the fridge. They’ll stay good in the fridge for about 1 week.
Vegan pâté: This stays good in an airtight container in the fridge for up to 5 days.
Umami mayo: This stays good in the fridge for up to 1 week.
Chili-glazed tofu: I recommend pan-frying the tofu on the day of assembling the sandwiches, but you can prep most of it ahead of time.
(1) Slice the tofu, soak it in its salt water bath, and pat it dry –> store in the fridge for 1-2 days.
(2) Chop the garlic, ginger, and lemongrass –> store in the fridge for 2 to 3 days.
(3) Stir the glaze together –> store in the fridge for 2 to 3 days.
Jump to the section on “The 6 components” for tips on where to find some of the ingredients, as well as options for acceptable substitutions!
The pickled daikon and radish are great in rice bowls or noodle bowls (and so. many other Vietnamese dishes).
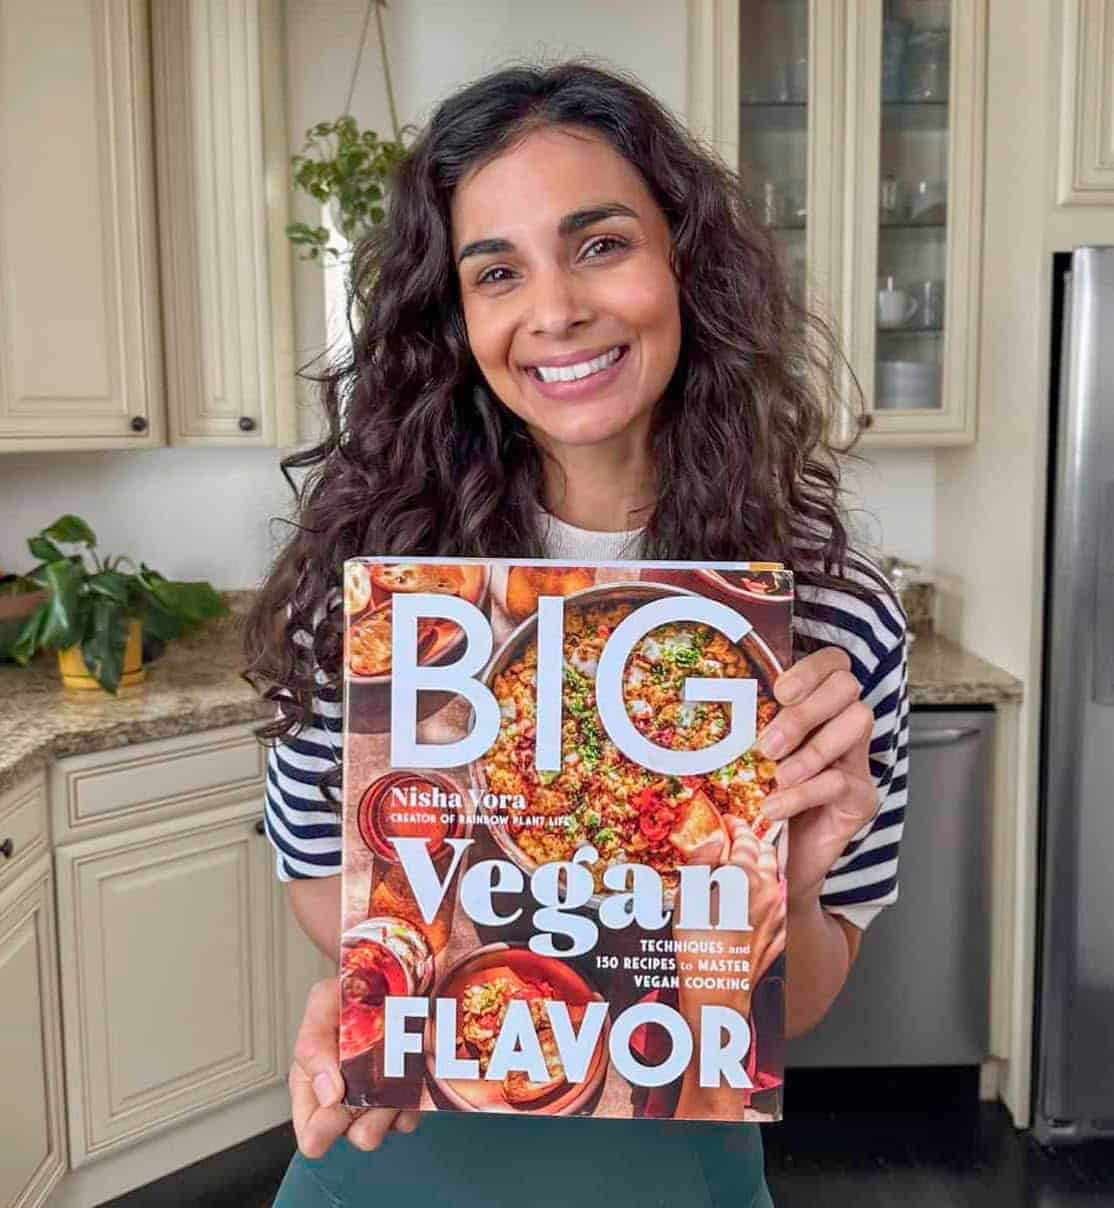
For a bánh mì-inspired bowl, toss rice noodles with a simple dressing made of soy sauce (or vegan fish sauce), lime juice, and agave nectar, then top with the pickled vegetables, baked tofu or fried tofu, cilantro and mint sprigs, and avocado. Or, if you have a copy of my cookbook Big Vegan Flavor, use the Sesame Baked Tofu on page 270 for an epic combo!
Or, add the pickled vegetables to this noodle salad with veggies or serve it alongside a peanut dipping sauce with cold Gỏi Cuốn (summer rolls).
You can use the leftover pâté as a dip for crackers, crostini, or crudités.
Did this bánh mì blow you away (and possibly ruin all other sandwiches for you, forever)?! Leave a rating and review below—I always love reading your comments! 🥰
Introducing
Big Vegan Flavor
Techniques and 150 recipes to master vegan cooking.
Tofu Bánh Mì

Ingredients
- Pickled Daikon and Carrots (aka Đồ Chua, see 2nd recipe card)
- Vegan Pâté (optional but recommended, see 3rd recipe card)
- Chili-Lemongrass Glazed Tofu (see 4th recipe card)
- 4 to 6 Vietnamese baguette-style rolls, French or Italian loaves/rolls, ciabatta rolls, or hoagie rolls (see Note 1)
Simple Umami Mayo
- ¾ cup (168g) vegan mayo (see Note 2)
- 1 ½ teaspoons Bragg’s liquid aminos (for alternatives, see Note 3)
- ~15 twists of freshly cracked black pepper
Toppings
- Several handfuls of cilantro sprigs (remove tough stems)
- A few handfuls of fresh mint leaves (optional but delicious)
- Jalapeños, serranos, or Fresno peppers, sliced (for a kick!)
- Sliced cucumber spears (optional)
Instructions
- Make the Pickled Daikon and Carrots (Đồ Chua) at least 1 hour in advance (or a few days in advance). Make the Vegan Pâté (up to a few days in advance). Make the Chili-Glazed Tofu.
- Make the Simple Umami Mayo: In a bowl, use a fork to whisk together the mayo, liquid aminos, and black pepper until smooth and well combined. Taste and add more black pepper or liquid aminos as desired. Refrigerate until ready to use.
- Lightly toast the bread: Preheat the oven to 325ºF/160ºC. Add the bread to the oven rack and toast for 3 to 5 minutes or until lightly crisp. Allow to cool (so it doesn’t melt the mayo or pâté).
- Slice the bread: Lay the baguette or roll flat on a cutting board, seam side down if there is one. Using a serrated knife, slice along the length of the bread, but stop before cutting all the way through, leaving the back edge intact so the two halves stay connected (i.e., cut the bread "hot dog style").If there’s a lot of dough inside, scoop out a bit of the soft interior to make room for fillings.
- Assemble: Spread the Simple Umami Mayo across both sides of the bread. Top with the Vegan Pâté on both sides (I like to be generous with it). Add the Chili-Glazed Tofu followed by the Pickled Daikon and Carrots. Top with cilantro sprigs and other optional toppings. Close the sandwiches, then slice in half for easier eating.
Notes
- Bánh Mì is best with softer, less artisanal breads. Don’t use something very crusty like sourdough or anything too chewy/dense.
- For vegan mayo brands, we love JUST Mayo, as well as Follow Your Heart Vegenaise. If you aren’t making the pâté, you may want to increase the umami mayo quantity so you have enough spread for the sandwiches: start with 1 cup (225g) vegan mayo, 2 teaspoons Bragg’s liquid seasoning, and ~20 twists of black pepper.
- Maggi seasoning is traditionally used so you can use that if you prefer (start slowly), but Bragg’s liquid aminos is a pretty good substitute (both are rich, salty umami-rich products made via hydrolyzed proteins). It’s NOT the same as coconut aminos, which is quite sweet. If not available, use soy sauce (though you’ll likely want to use more than the amount listed, as it’s milder in effect).
- As always nutritional calculations are automatically calculated and should be used only as an estimate. The calculations do not include the optional pâté.
Nutrition
Nutrition information is automatically calculated, so should only be used as an approximation.
 Love this? Leave a rating below!
Vietnamese Pickled Daikon and Carrots (Đồ Chua)
Ingredients
- ~ 9 ounces (255g) carrots (4 to 5 medium carrots)
- ~ 9 ounces (255g) daikon radish (see Note 1)
- Fine sea salt
- ½ cup (120 mL) filtered water
- ¼ cup + 3 tablespoons (105 mL) distilled white vinegar
- 4 ½ tablespoons (56g) organic cane sugar
Instructions
- Peel and wash the carrots and daikon radish.Using a sharp knife, slice the carrots and radish crosswise into 2 to 3” pieces (5 to 7.5 cm), then slice each piece lengthwise into planks. From here, slice each plank into matchstick pieces ⅛” to ¼ (3 to 6 mm) thick (see Note 2). The goal is to have roughly 1 pound (450g) of peeled, julienned vegetables (~5 cups worth). I like to have a 50:50 ratio of carrots and daikon, but you don't need to be precise.
- Measure out the salt for step 3.If you have a scale: Weigh the julienned vegetables in grams, then multiply the total weight by 2% (.02).Example: If the julienned vegetables weigh 450g → 450 x .02 = 9 For 1 pound / 450g julienned vegetables, this is 9g of or 1 ½ teaspoons of fine sea salt.
- Add the julienned vegetables to a large bowl with the 2% sea salt. Massage the salt into the vegetables for 2 minutes, or until there’s a fair amount of liquid pooling at the bottom and the vegetables are glistening.
- Let the vegetables rest for 15 minutes, then drain them and rinse well. Working in handfuls, use your hands to squeeze out as much moisture from the vegetables as you can.
- Transfer the vegetables to a glass jar and pack them in tightly (a 24-oz / 700 mL jar works well or two smaller jars).
- Bring the ½ cup (120 mL) water to a boil in a saucepan or kettle, then combine the boiling water, vinegar, sugar, and 1 teaspoon (6g) sea salt. Whisk very well to dissolve the sugar and salt.Pour the brine over the vegetables until they’re submerged (you may not need all the brine).
- Seal the jar and refrigerate for at least 1 to 2 hours, ideally for 12 to 24 hours. These will stay good in the fridge for about 1 week.NOTE: Since radishes contain sulfur, there will be a relatively strong aroma once you open the jar. To minimize this, you can unseal the jar and let it sit at room temp for a few minutes, then eat.
Notes
- You can find daikon radish at well-stocked supermarkets as well as Asian grocers. It brings a juicy, subtle radish flavor and a nice crunch. If it’s not available, you can try substituting with white turnips (a bit earthier) or jicama (sweeter, with no bite). I would avoid “regular” red radishes, as they’re too peppery and assertive.
- Thicker pieces will take longer to pickle but will have more bite/crunch. To speed things up a bit, you can use a julienne peeler, or a julienne blade on a mandoline or food processor; these may yield thinner pieces, which won’t have as much bite/crunch.
Nutrition
Nutrition information is automatically calculated, so should only be used as an approximation.
Love this? Leave a rating below!Vegan Pâté
Ingredients
- 8 ounces (227g) cremini mushrooms (or mushroom variety of choice )
- 2 tablespoons (28g) neutral-flavored oil of choice
- 1 small yellow onion, diced (5 to 6 oz / 160g once diced)
- 1 heaping cup (130g) walnuts, broken into pieces
- 4 garlic cloves, smashed down to remove peels and slightly flatten
- 2 tablespoons (28g) vegan butter (or more oil)
- ¼ teaspoon white pepper
- ⅛ teaspoon ground cinnamon
- ⅛ teaspoon cayenne peper optional
- Pinch ground cloves optional
- 1 cup (160g) canned or pre-cooked lentils (see Note 1)
- 1 ½ to 2 tablespoons soy sauce (or tamari for gluten free)
- ½ to 1 teaspoon brown sugar (or cane sugar / agave)
Instructions
- Rub off any dirt from the mushrooms, then slice them, discarding any tough stems. Set aside.
- Heat a large (12” / 30 cm) frying pan over medium heat until hot, then add the 2 tablespoons (28g) oil. Once shimmering, add the onions. Stir occasionally until softened, 3 to 4 minutes. Add the walnut pieces and smashed garlic. Stir frequently for 4 to 5 minutes, or until the walnuts are golden brown and smell toasty and the onions are browned in spots.Transfer to a bowl to cool.
- Give the pan a quick wipe and return it to medium-high heat with the butter. Once melted, add the mushrooms and cook for 5 to 8 minutes, stirring frequently, or until golden brown and moisture has been drawn out.Reduce the heat to low and add the white pepper, cinnamon, plus cayenne and cloves if using. Stir constantly for 15 to 20 seconds. Remove from the heat and let it cool a bit.
- Blend the Pâté: In a food processor, combine the cooked onion-walnut mixture, the cooked mushrooms, lentils, 1 ½ tablespoons soy sauce, and ½ teaspoon sugar. Blend until you have a smooth spread like pâté, scraping down the sides as you go. Taste, adding the remaining soy sauce or sugar until it tastes savory, salty, and a little sweet. Add a pinch of salt as needed.
- Store leftovers in the fridge for up to 5 days.
Notes
- If you don’t have canned lentils, you could also use canned chickpeas, though the flavor will be a bit less earthy/savory. Or, cook dried green or brown lentils until soft (you’ll only need to cook a heaping 1/3 cup / 80g of dried lentils).
Nutrition
Nutrition information is automatically calculated, so should only be used as an approximation.
Love this? Leave a rating below!Chili-Lemongrass Glazed Tofu
Ingredients
- 24 ounces (680g) extra-firm tofu, drained (see Note 1)
- 1 ½ tablespoons (15g) Diamond Crystal kosher salt
- 2 ½ tablespoons (35g) neutral-flavored oil of choice
- 1 knob of fresh ginger
- 4 fat garlic cloves
- 3 to 4 stalks fresh lemongrass (omit if not available)
- 2 tablespoons (34g) soy sauce (tamari if gluten free)
- 2 tablespoons (34g) vegan-friendly Sriracha
- 1 tablespoon + 1 teaspoon (20 mL) freshly squeezed lime juice
- 1 tablespoon + 1 teaspoon (17g) brown sugar (or cane sugar / agave)
Instructions
- Bring 4 cups (960 mL) of water to a boil.
- Slice each block of tofu crosswise into ⅔” thick slabs (1.75 cm), 6 slabs per block (see Note 1). Add the tofu to a large bowl.
- Soak the tofu: Pour the boiling water into a large measuring cup or heatproof bowl and stir in 1 ½ tablespoons Diamond Crystal kosher salt, stirring to dissolve.Pour the hot saltwater over the tofu, cover the bowl, and soak for 10 minutes. NOTE: If using table salt or sea salt, use the same amount of salt in weight, i.e., 15 g, about 2 ½ teaspoons salt. After 10 minutes, use a slotted spoon to transfer the tofu to a clean dish towel. Gently pat dry until the tofu no longer feels wet.
- While the tofu soaks, prep the aromatics. Grate or finely chop the ginger to get 4 teaspoons. Finely chop the garlic.If using lemongrass: Peel away the papery outer layers and slice off the top part of the stalks until you have just the tender bottom section left. Pound the lemongrass with a rolling pin or other heavy tool to lightly break it up and release aroma. With the tender inner core, chop it very finely or mince.
- Make the chili glaze. Whisk together soy sauce, sriracha, lime juice, and sugar. Set aside.
- Cook the tofu. Line a large plate with a few layers of paper towel. Heat a large (12” / 30 cm) nonstick* frying pan over medium-high heat with 2 1/2 TBSP (35g) oil for 2 minutes, then carefully add the tofu slabs and spread out in a single layer as much as possible (they will be tightly packed). *See Note 3 if using a stainless steel pan.
- Cook undisturbed for 6 to 8 minutes or until the bottoms develop a golden brown crust. Carefully flip (a small silicone or offset spatula helps) and cook for 4 to 7 minutes until the bottoms are golden brown and crisp. Transfer tofu to the paper towels.
- Let the pan cool for a few minutes, then return it to medium-low heat. Use any remaining oil in the pan, or add another drizzle as needed to lightly coat.Add the garlic, ginger, and lemongrass if using. Stir frequently for 90 seconds to 2 minutes, or until aromatic and garlic/ginger no longer smell raw.Pour in the chili glaze and simmer for 2 minutes, stirring frequently, until thickened a bit.
- Add all of the cooked tofu to the pan, gently tossing until well-coated in the glaze, then remove from the heat. Allow to cool slightly before using in the sandwich.
Notes
- If your tofu blocks weighs more, I recommend slicing off excess so that you use no more than 24 oz (680g), as this is the maximum amount of tofu that will fit in a large frying pan. You can use more tofu, but you’ll need to fry it in two batches.
- If using a stainless steel pan: Heat the pan over medium-high for a few minutes, or until a droplet of water glides across the pan (see video explainer). Then add the oil, slightly lowering the heat to prevent the oil from smoking. Add the tofu and cook undisturbed until it’s time to flip. Don’t try to flip the tofu early, as it will stick!
Nutrition
Nutrition information is automatically calculated, so should only be used as an approximation.
Love this? Leave a rating below!








I measured my radish and carrots carefully. I split into two 12 oz jars but the brine only covered one jar to the top. I made a second vinegar batch for the other jar. I am wondering/concerned what might be wrong that you thought it would be too much brine and I didn’t have enough. Please advise.
Hi Kimberly! Thanks for writing in, and please don’t worry. Nothing went wrong, and you did the recipe correctly.
The recipe says “you may not need all the brine” because the amount you need depends on how tightly the vegetables are packed, how thin they’re cut, and the shape of your jars. The brine only needs to cover the vegetables, not fill the jar to the top. If the first jar was filled to the top, there may not have been enough left for the second, which is a very common thing to run into when splitting a batch between two jars.
Making a second batch of brine was a great fix. As long as it used the same ratio as the recipe, your pickles will be just fine. Keep them refrigerated and enjoy within about a week.
Next time, try dividing the brine between the jars as you pour, and stop once the vegetables are submerged. It’s fine to leave a little space at the top. If any pieces float, press them down with a spoon. Cheers!
Incredibly flavorful and delicious, worth all the prep, which was done over a couple of days. The vegan pate is also wonderful on a cracker. LOVED this sandwich!!
Hi Victoria, Thank you so much for such a fantastic review! Appreciate you taking the time!
This sandwich is so tasty! As a tofu fan who isn’t vegan, I will be making this recipe again. The mushroom walnut pate should be requirement not optional! It seriously stole the show in a good way. I used chickpeas instead of green lentils. I also pickled the veggies in advance to save time. I included jalapenos and cucumbers in my pickling process.
Thanks for sharing, Renee! 🙂
This is now one of our go to tofu recipes. We have it in sandwiches, with rice or just as a grab and go snack. Makes a tasty salad topper as well!
This recipe is insanely delicious! I espeacially love the pâté. Do you think it would freeze well? Or will the texture and flavour be off?
Hi Maryam, so glad you loved it, and the pâté really is the sleeper hit of that sandwich.
We haven’t frozen it ourselves, but since it’s a cooked, blended spread with no mayo in it, our best guess is it should freeze pretty well. Portion it into small containers, thaw overnight in the fridge, and give it a quick whirl in the food processor (or a good stir) to bring the texture back before serving. Let us know how it goes!
Thank you for your lovely comment, Katy! It makes us happy to know that you enjoyed the recipe.
This recipe was a labor of love as I am a bit of a slower cook in the kitchen. But my goodness it was worth all the effort! I ended up having carrots & red radishes and didn’t find the peppery flavor overwhelming. I may omit the cinnamon in the pate nex time. The tofu was delicioussss. I will be making it on repeat – I found the step of soaking it with salted boiling water to make a difference & improve the flavor & texture. Thank you for an amazing recipe!
Thanks for your thoughtful review, CT! It’s great to hear the prep and cook time was all worth it 🙂
This is the third recipe from your website that I’ve made (the sauteed tofu with corn starch [with the hot water treatment] and fennel/sausage pasta sauce). Three for three. This was perhaps the most labor intensive but not hard. And while I made a mess while eating (as expected), it was absolutely delicious (FYI- I made this w/o lemon grass and, actually, without the radish since I couldn’t get one- just pickled carrot). Thank you so much! I look forward to working my way through more recipes.
We appreciate all of the support, Daniel! It’s great to hear you’re enjoying all of the recipes 🙂
Phenomenal sandwich. Everything comes together perfectly. It took me a super long time to make everything, but it was well worth it. I will definitely be making this again.
I need to make this one for myself very soon after reading all of these wonderful comments. Thank you, Julie!
This was a WINNER! My daughter and I made it together so we could split the tasks. The final product was a divine mix of flavors that all worked together so well. I have enough pate, mayo, and pickled radish/carrots so I will only need to make the tofu. If you are making it by yourself, it is probably best to make the pickled veggies and pate at least one day before so you have less on your plate. Thank you, Nisha.
Thanks for the detailed review, Kimberly! It makes us so happy to hear this recipe was loved by both of you. 🙂
Oh my goodness, incredibly delicious. I made each part of the recipe over the last three days. This would not be a weekday meal for full prep, but once you make the different parts of the recipe you have ingredients for multiple days of meals. Definitely will be in our rotation.
Susan, thank you for your thoughtful review! We’re so happy to hear that you enjoyed the banh mi 🙂
This is just so delicious! I didn’t have fresh ginger so used ground ginger, and no siracha so used Harrisa paste. I have made this twice now and my taste buds are v happy. Thank you!
Thanks for sharing, Kelly! 🙂
The sandwich was packed with flavor and excellent in every way. It is, however, a project that takes quite a few hours, but each component is pretty easy and fun to make. Nothing is hard, there is just a lot to do!
I think getting the right bread is important. If you are near a Mexican bakery, as I am, the rolls they use for tortas (teleras and bolilos) I think are perfect for this sandwich.
Hi JJO, it’s great to hear you had success with the recipe. Thanks for the review!
Absolutely delicious recipe! And probably the most gorgeous sandwich I’ve ever made.
I love vegan Banh Mi and have tried quite a few from authentic Vietnamese restaurants—this one is definitely up there with the best!
I made the entire recipe with all the components, and it was 100% worth the effort. I prepared the pâté and the pickled vegetables a couple of days in advance to cut down on prep time, which I highly recommend doing.
I had to make a few tweaks based on what I had in my fridge: I pickled white onion instead of daikon, used regular vegan mayo without amino acid, and went with sesame tofu. It still turned out incredible!
Hi Florence, Thank you so much for such a fantastic review! Appreciate you taking the time!
This is hands down the best banh mi I have ever had!
Here in Australia, Vietnamese bakeries usually serve banh mi with fresh grated carrot, cucumber, coriander, and red chili, and instead of mayo, a schmear of margarine.
Your pate seriously takes this sandwich over the top – thanks (as always!) for such an awesome recipe.
I pan-fried some tempeh instead of tofu, and it also worked wonderfully with the sauce.
My partner and I have been having this banh mi at least every second day since the video came out on YouTube. Such a satisfying meal.
We’re so happy that the Bánh Mì turned out well for you and is a new favorite, Stacy. Thank you for taking the time to leave a comment and for trying out the recipe!
A little extra work (I would advance prep components next time) but this was absolutely amazing! Didn’t make the pate as I thought it would be a bit too filling for our tastes, but it definitely sounds worth a try on its own.
Hi Jacquie, it’s great to hear you had success with the recipe. Thanks for the review!
Can white wine vinegar or apple cider vinegar be used instead of the distilled vinegar?
Hi Regine, I think either would work, though they are less sharp so I would start with less sugar, then taste the brine or a vegetable in the brine, and add more as needed.
I’ve only made the walnut pate so far. I had it on some cauliflower steaks for dinner last night and it was delicious. I’ll try making the tofu today. This is definitely a sandwich you have to plan ahead for.
This looks really good, can’t wait to make it. I have everything except fresh mushrooms and want to get started right away.
Can I leave them out, or substitute?
Hi Kristy, glad you’re excited to make it!
While I haven’t tried this, I think you have a few options.
If you happen to have dried shiitake or porcini, use about 1 oz (25g), rehydrated in warm water until plum, then squeeze dry. That would be the closest swap.
Otherwise, a small eggplant, diced and browned in the vegan butter until very soft, gives you that same silky texture, though since eggplant soaks up oil, you may need to stir more frequently or add a splash of oil. Since eggplant doesn’t have natural umami in the way mushrooms do you, may want to add 1 to 2 teaspoons of white miso when you blend the pate.
If you don’t have either substitute, try bumping up the lentils up to 1½ cups, add a little miso when blending, and if needed, thin the pâté with a few tablespoons of water while blending (the mushrooms provide a lot of the moisture, so it’ll be stiff without them). Let me know how it turns out!
Hi Nisha, thanks so much for taking time to give me these suggestions. In the end I used your idea to just bump up the lentils and add some extra water and umami! It was incredible (as always)!.All those elements together were tops. Will be repeating this for sure, next time with mushrooms!
This pate would be delicious on many different sandwiches. I prefer the Tofu marinated as well. Very good recipe with so many options to an adventurous chef. Thank you for the ‘Big Flavor’. I struggled with WFPB No Oil until you showed me the way to flavor my creations. Your recipes are easily adapted to oil free.
We appreciate your feedback and support, Laara. Thank you for leaving a review!
Well, I took the advice and made the pate with walnuts even though do not like walnuts. You were right A do not taste the walnuts. The pate is great and the bahn mi was absolutely terrific!
That’s so great to hear, Lola! Thank you for trying the recipe as-written 🙂
Not fond of walnuts. What substitute is recommended?
Hi Lola, you can try sunflower seeds! I will say that the pate doesn’t taste like walnuts at all, it just adds a rich nutty umami flavor (walnuts are naturally high in umami).
Too many ingredients! I’m sure it’s good though.
Girl are we missing the tofu in this recipe?
Hi Cheryl, the Chili-Lemongrass Glazed Tofu recipe is in the last recipe card on the page (the 4th recipe card).