This Instant Pot Cheesy Buffalo Cauliflower Dip is one of the best inventions ever. I don’t know if recipes qualify as “inventions,” but let me tell you, you’re gonna love this recipe SO much.
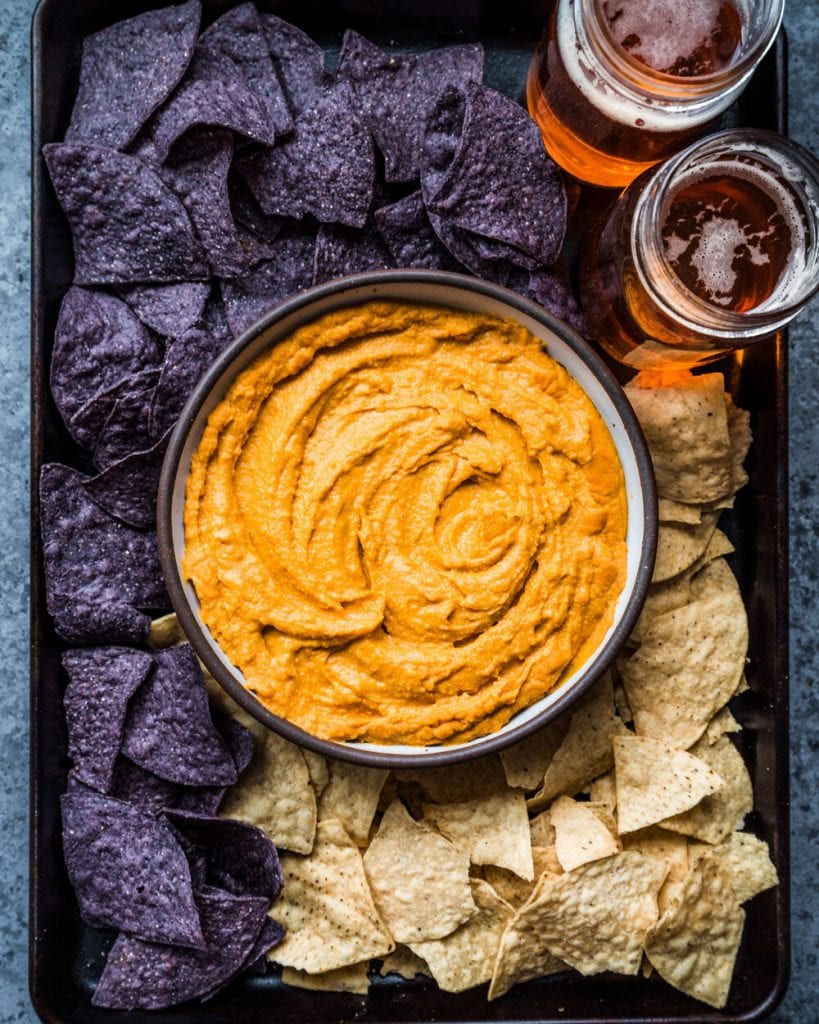
Why you’ll love this buffalo cauliflower dip
Easy
This might be the easiest recipe on my blog. All you do is dump 10 ingredients into the Instant Pot, give it a quick stir, and turn on the Pressure Cook setting. When the time is up, perform a quick pressure release, and add the contents to a blender. Blend until smooth and creamy, and voila!
Seriously, that’s it. No hands-on cooking.
Quick
As you can imagine, this recipe is also quick. The only prep work involved is cutting up some cauliflower into florets, and chopping up half an onion and a few garlic cloves. This should take no more than 5 minutes.
And then the you pressure cook it in the Instant Pot for 7 minutes! Of course, it does take some additional time for the Instant Pot to build pressure, but since there’s minimal liquid in this recipe, it comes to pressure pretty quickly. And then you perform a quick pressure release (no waiting time there), and it takes a minute to blend.
That’s just 20 minutes, start to finish! And unlike many vegan sauce/dip recipes that use cashews, you don’t even have to soak the cashews in this recipe! The high pressure of the Instant Pot will soften those babies up on its own!
10 Ingredients
Yes, there are only 10 ingredients in this recipe, and nothing is an exotic or difficult-to-find ingredient!
Healthy
I know, something that has CHEESY BUFFALO in the title doesn’t sound healthy, but it is! It’s vegan, gluten-free, and even oil-free! It’s made with cauliflower, onions, garlic, and gets thick and creamy from a combination of cashews, cannellini beans, and plant-based milk.
Disclaimer: while this recipe is, in my opinion, healthy, it is fairly high in sodium, almost exclusively due to the buffalo hot sauce. If you are on a very low-sodium diet, this might not be the best recipe for you, or limit yourself to just a spoon or two.
Also, as I mention in the Tips section below, this dip is quite spicy as written, so you can always reduce the amount of hot sauce, and that will also reduce the overall sodium content.
PS: Looking for more buffalo flavored snacks for game day? Try these Vegan Buffalo Cauliflower bites!

Introducing
Big Vegan Flavor
Techniques and 150 recipes to master vegan cooking.
Instant Pot Cheesy Buffalo Cauliflower Dip

Ingredients
- A drizzle extra virgin olive oil (or neutral oil)
- 1/2 medium white onion, chopped
- 4 garlic cloves, roughly chopped
- 1 cup (140g) raw cashews
- 1 3/4 cups (440g) cooked cannellini beans, or 1 (15 oz/425g) can cannellini beans, drained and rinsed
- 1 1/2 cups (160-170g) cauliflower florets
- 3/4 cup (156g) Frank’s Redhot Original Cayenne Pepper Sauce or Xtra Hot Sauce (see Note 1)
- 1 tablespoon coconut sugar or brown sugar
- 1 teaspoon smoked paprika or regular paprika (see Note 2)
- 3/4 cup (180mL) unsweetened plain almond milk or other nondairy milk
- 1/2 cup (40g) nutritional yeast
Optional Toppings
- Chopped cilantro and/or green onions
For Serving
- Tortilla chips or crackers
Instructions
Instant Pot Directions
- Lightly grease the inner pot of the Instant Pot with a bit of oil or cooking spray. This is to make cleanup easy and prevent sticking.
- Place the chopped onions, chopped garlic, cashews, cannellini beans, cauliflower florets, hot sauce, coconut sugar, paprika, almond milk, and nutritional yeast in the inner pot of Instant Pot and stir well to combine.
- Secure the lid and set the Pressure Release to Sealing. Select the Pressure Cook/Manual setting and set to high pressure for 7 minutes.
- Once the 7-minute timer has completed and beeps, perform a quick pressure release by switching the Pressure Release knob from Sealing to Venting and open the pot.
- Open the pot and, and carefully transfer the mixture to a blender. Be sure to remove the center cap from the blender lid to vent steam, but cover the hole with a kitchen towel. Blend until the dip is smooth, thick, and creamy. Alternatively, you can use an immersion blender, but it will take several minutes, and the texture will be chunkier and not as smooth.
- Allow to cool for at least 15 to 20 minutes before serving. Top with chopped cilantro and scallions, if using, and serve with tortilla chips or crackers.
Stovetop Directions
- Soak the cashews. Cover the cashews in boiling water and soak for 1 hour. Alternatively, you can soak them in cold water overnight or for 8 hours. Drain and rinse with fresh water.
- Sauté the onions and garlic. Heat a nonstick frying pan over medium heat. Add 2-3 teaspoons of olive oil or cooking oil of choice. Once hot, add the onion and a pinch of salt. Cook for 5 minutes, or until the onion has softened. Add the garlic and stir frequently for 2-3 minutes to prevent the garlic from burning. Turn off the heat.
- Steam the cauliflower. Bring about 1/4 inch of water to a boil in a large frying pan. Then add the cauliflower florets. Cover the pan and steam until very soft and tender, about 7-9 minutes. Drain any remaining water to prevent the dip from becoming watery.1. You can also steam cauliflower in the microwave or in a steamer basket. For the microwave.
- Assemble the Dip. Place the sautéed onions, soaked and drained cashews, and steamed cauliflower in a blender. Add the remaining ingredients—drained cannellini beans, hot sauce, sugar, paprika, plant-based milk, and nutritional yeast. Be sure to remove the center cap from the blender lid to vent steam, but cover the hole with a kitchen towel. Blend until the dip is smooth, thick, and creamy.
- Allow to cool for at least 15 to 20 minutes before serving. Top with chopped cilantro and scallions, if using, and serve with tortilla chips or crackers.
Video
Notes
- If you are sensitive to spicy food or trying to reduce sodium intake, use less hot sauce, about 1/2 cup (120 mL). If you can’t find Frank’s hot sauce, you can use Cholula, Tabasco, or any hot sauce of your preference, though it will have a different flavor.
- The smoked paprika brings a very subtle smoky flavor, but I’ve also made this recipe with regular paprika and it’s great either way.
Nutrition
Nutrition information is automatically calculated, so should only be used as an approximation.




This turned out great! If you haven’t used nutritional yeast in a lot of recipes – I recommend trying unfortified. I found it tastes so much better than the fortified options. (Sari Foods and Anthony’s are 2 brands I like)
My kids and I loved the taste of this recipe. We served with tortilla chips, crackers and celery. Very easy to make.
Didn’t like the flavour (I’m being nice) . Positives – texture / easy to cook .
I made this recipe for a party and it was a big hit! One party goer in particular said it was his absolute favorite thing and he couldn’t stop eating it! A couple of notes for y’all, I doubled the recipe because I have a large instant pot and I didn’t want to get the burn notice. I also didn’t mix the ingredients together once I put it in the instant pot and I left the Frank’s hot sauce on the top because many years ago I received an article from my sister, which I cannot find which explained that by mixing the ingredients and letting the red or tomato based items get to the bottom of the pot can cause a burn notice . Well, it worked like a charm without a problem! I also used rice cauliflower from Costco, which made it really easy to prepare and easy to blend in the instant pot using an immersion blender. It came out smooth. I’ve been enjoying the leftovers and last night made a pita sandwich with leftover dip, falafel, and tabouli, and it was delicious. This is a keeper!
Thanks for the thorough review, Eileen! 🙂 Happy to hear the recipe was a success!
Made this for a party and everyone loved it. I liked it so much that I came home and made it again and have been putting it on everything all week since.
We’re so happy that the dip turned out well for you, Kitty. Thank you for taking the time to leave a comment and for trying out the recipe!
Oh my goodness! This is so good. I reduced the heat by using 1/4 cup of franks hot sauce and 1/2 cup of vege broth. No burn issues and the end result was so delicious. I put it on some vegetables for dinner (roast potato, steamed cauliflower, broccoli and carrot) and it’s definitely going to be in the rounds! Thanks for making vegan taste so much better than anything omnivores can cook up!
Thank you for your lovely comment, Amanda! It makes us happy to know that you enjoyed the recipe.
The worst website experience
I used this as a spread between the soft outer flour tortilla and the harder inner corn tortilla in a veggie taco. The crowd went wild for them! So easy to make as well. I used an immersion blender stick and pureed it in under a minute.
Sounds lovely, Evan! Thanks for sharing!
Ohmygosh this is good!! Even the non vegans loved it! Super easy and quick, I was able to make it in time to enjoy with the game. Looking forward to putting it in a wrap with some crispy garbanzos. This will definitely be part of the rotation for game nights.
Your positive feedback is the best reward for our hard work. Thank you, Kim!
Wow! So good. Very versatile, loved it on my loaded lunch salad.
Hi Sonja, Thank you so much for such a fantastic review! Appreciate you taking the time!
Love this! And easy to make!