

Preserved lemons are one of the best-kept secrets of wildly flavorful cooking.
With their incomparable salty-savory-tangy boldness and lemony brightness, they’re a game-changing ingredient that will instantly level up your home cooking.
The best part? They’re so easy to make.
Plus, preserved lemons can be used in so many different ways (jump to this section for ideas, and don’t miss the two bonus recipes included at the bottom of the post!).
In this post:
🎥 Video: How to make and use preserved lemons
Watch and be amazed at how simply and quickly these come together! Featuring a slew of my favorite ways to use this superstar ingredient—from making jazzy dressings to elevating avocado toast, and more!

With over 240K views on YouTube, this video was a smash hit with my audience. I hope you love it just as much!
What are preserved lemons?
Preserved lemons have long been used as a traditional preservation technique and as a condiment in North African cuisine (Morocco, Algeria, Tunisia), as well as in South Asian cuisine.
All you’re essentially doing is curing lemons in salt, so this is a two-ingredient recipe (lemons + salt) that takes a mere 10-15 minutes to prep. Time and fermentation do the rest—you’ll let them sit in your pantry for three weeks, where they’ll turn into a glorious ingredient that will last 6 months to a year!
The salt tames and softens the lemon peel into a salty-tart, umami-packed treat. Just a small amount of this ingredient supercharges meals with a delightfully funky umami flavor that is hard to describe in words but impossible to resist.
Ingredients & equipment
Lemons. Not all lemons are created equally! I prefer small, thin-skinned Meyer lemons (for more on why, jump to the Tips section). If you can’t find Meyer lemons, use the thinnest-skinned regular lemons you can find.
Salt. Not all salt is created equally either! I use Diamond Crystal kosher salt (my go-to salt in the kitchen) because it tastes great, is easy to pinch, and is inexpensive. You can also use sea salt, though keep in mind that it is saltier than kosher salt. Steer clear of iodized salt, as the iodine may interfere with the fermentation process.
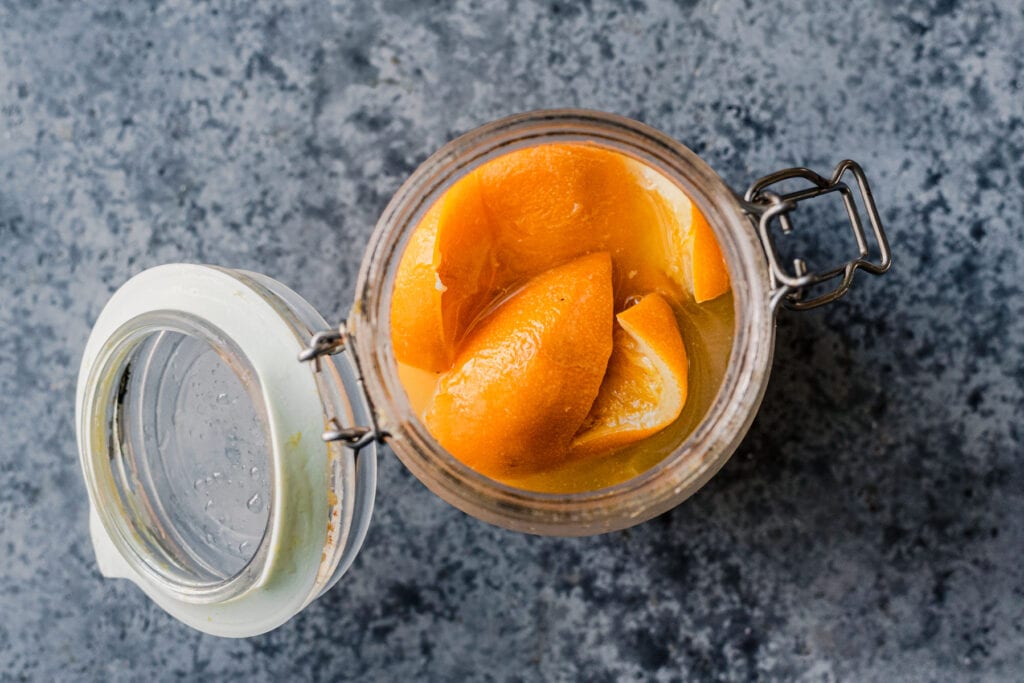
A sterilized glass jar. Pick your jar size based on how many lemons you want to preserve. The lemons will get smashed down and packed in tightly, so the jar will hold more lemons than you think. I prefer a jar with a rubber gasket like this to prevent the acidity from oxidizing (rusting) the lid.
A muddler, large wooden spoon, or pestle. You’ll need to press down on the lemons in the jar so that their juices cover them (and so you can jam in as many lemons as possible!). A muddler or tamper work great.
Fermentation weight (optional). While you shouldn’t need anything to hold the lemons down if there’s sufficient juice, you can add a fermentation weight on top of the lemons just to be safe.
Step-by-step instructions
Scrub and wash your lemons well. You’ll be eating the peel, so this step is important.
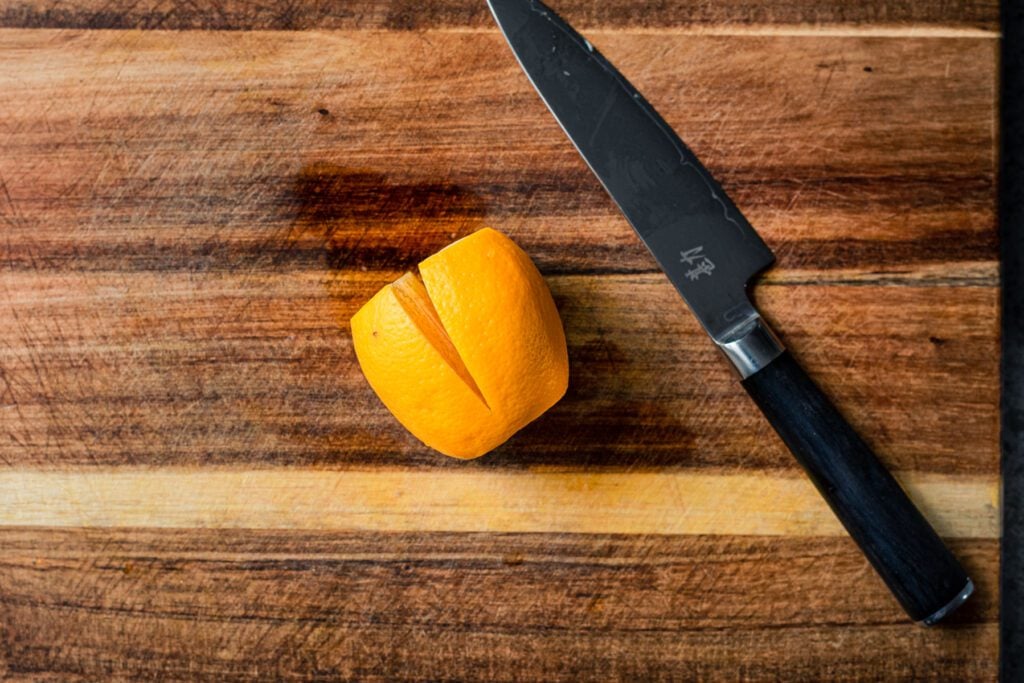
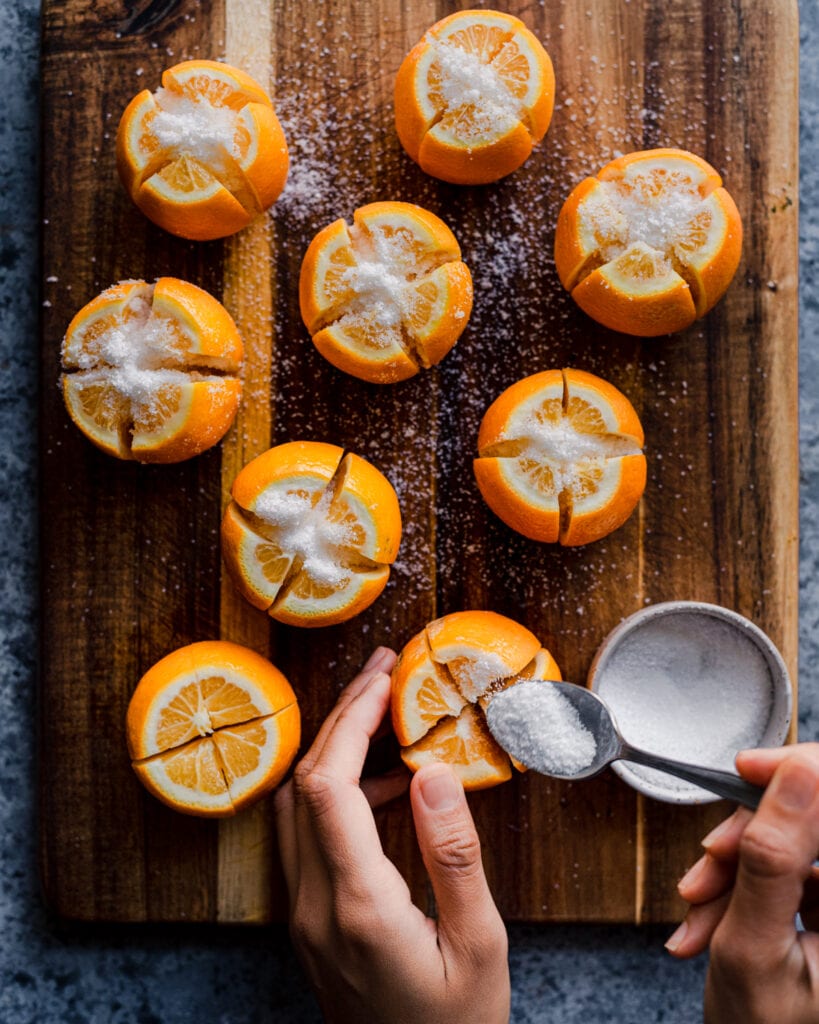
Lay each lemon on its side. Cut off a thin slice from each end to create a flat surface.
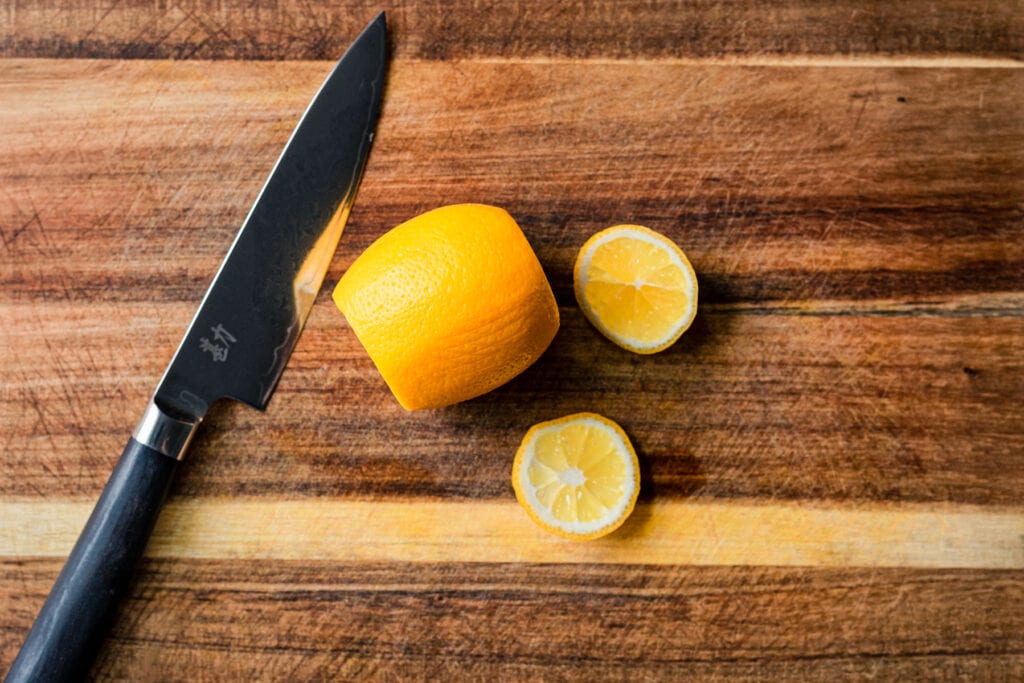
Stand the lemon up and slice down vertically, as if you were going to half the lemon, but don’t cut all the way through.
Cut about 80% through to keep it attached at the base.
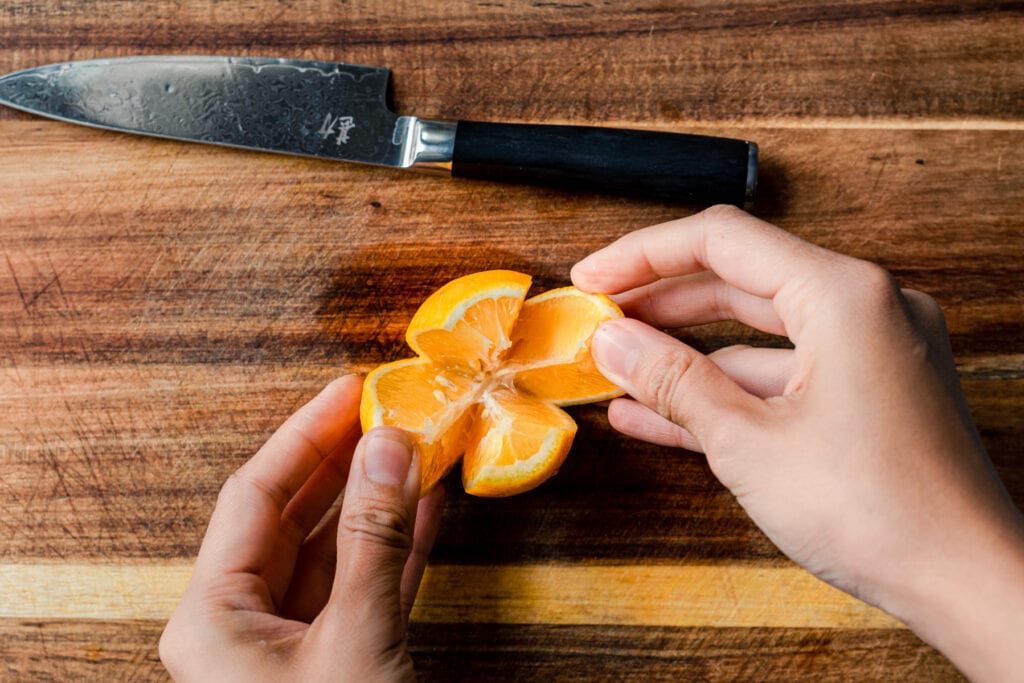
Flip the lemon by 90º and repeat, as if you were going to quarter the lemon into wedges, but don’t cut all the way through.
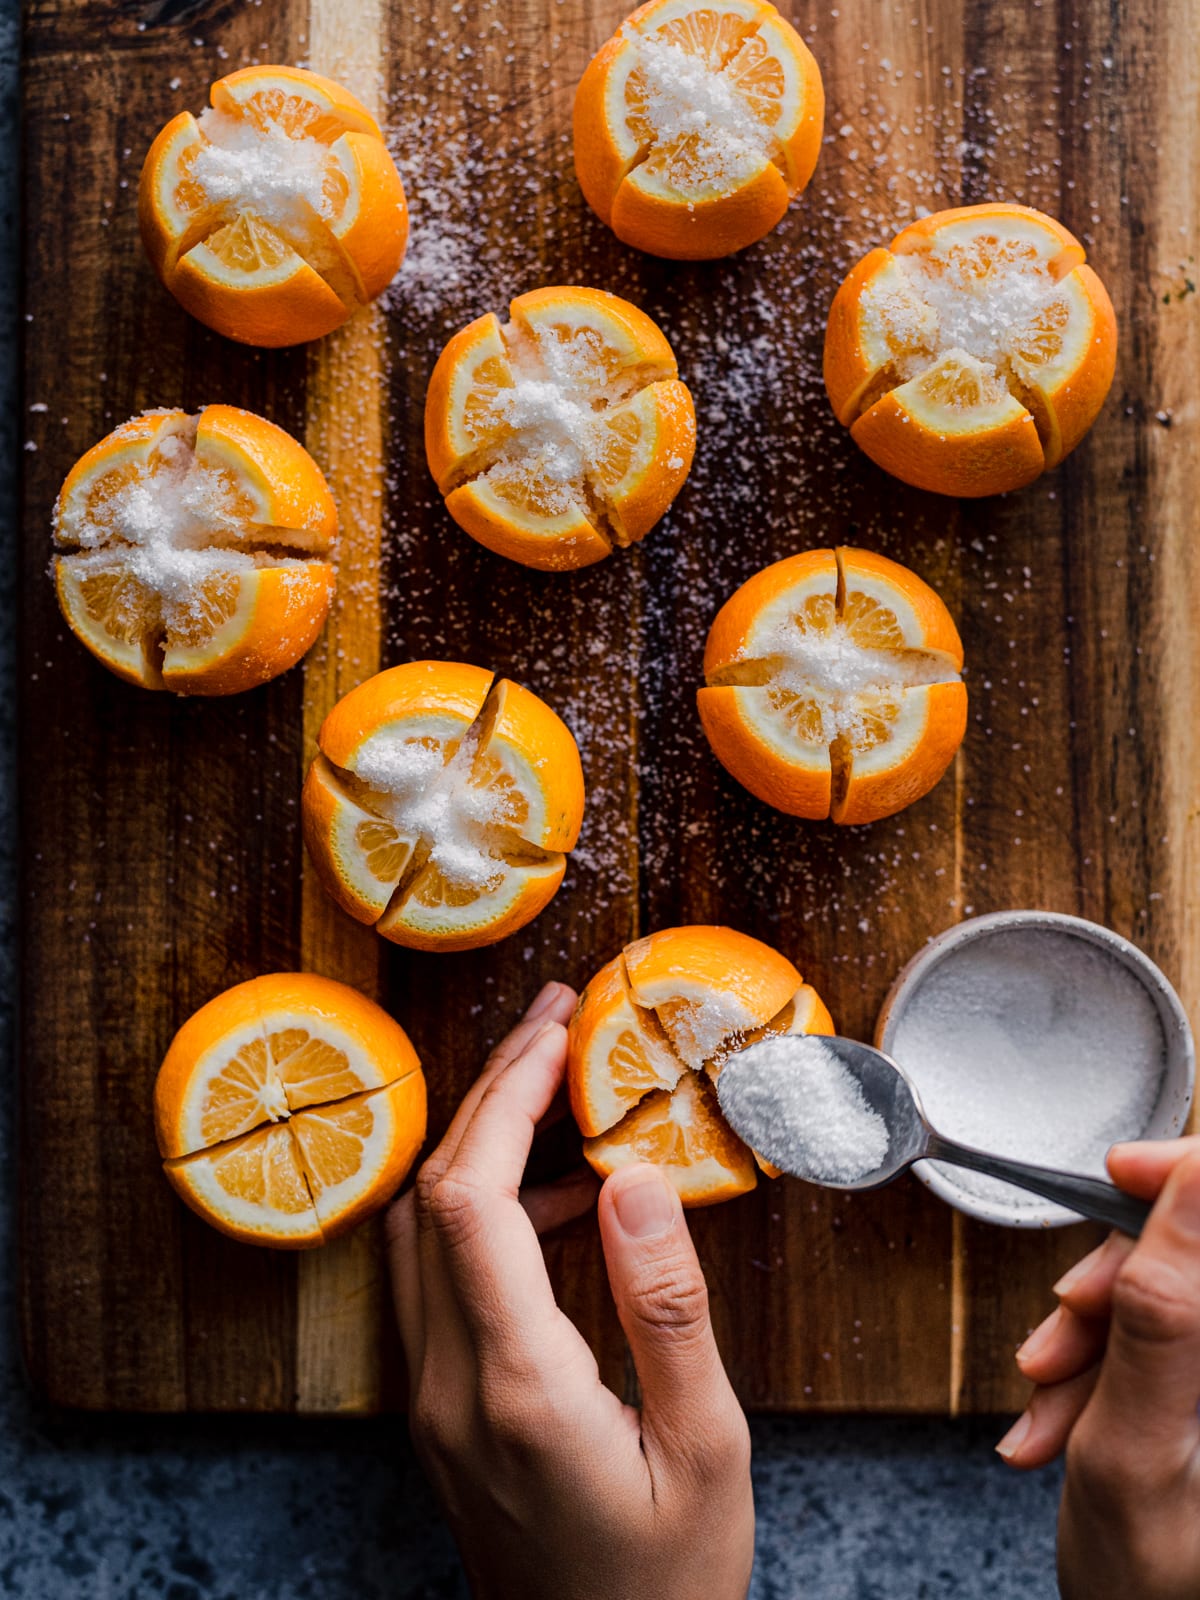
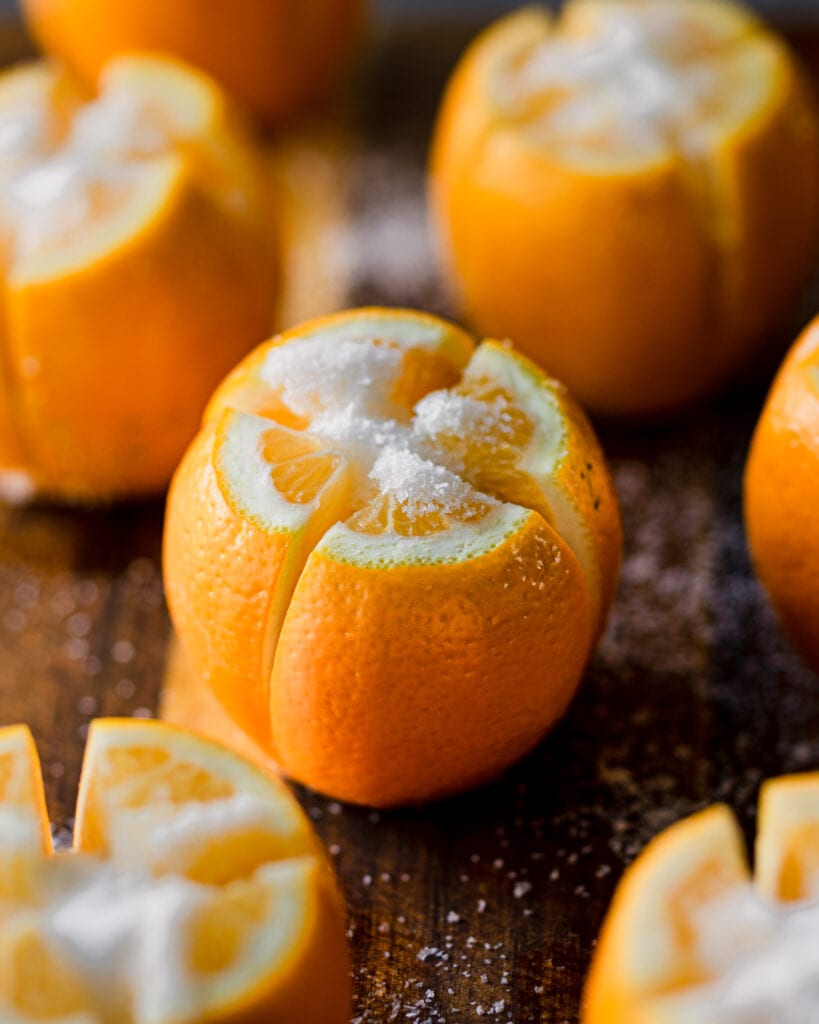
Pry open the lemon but do not detach it.
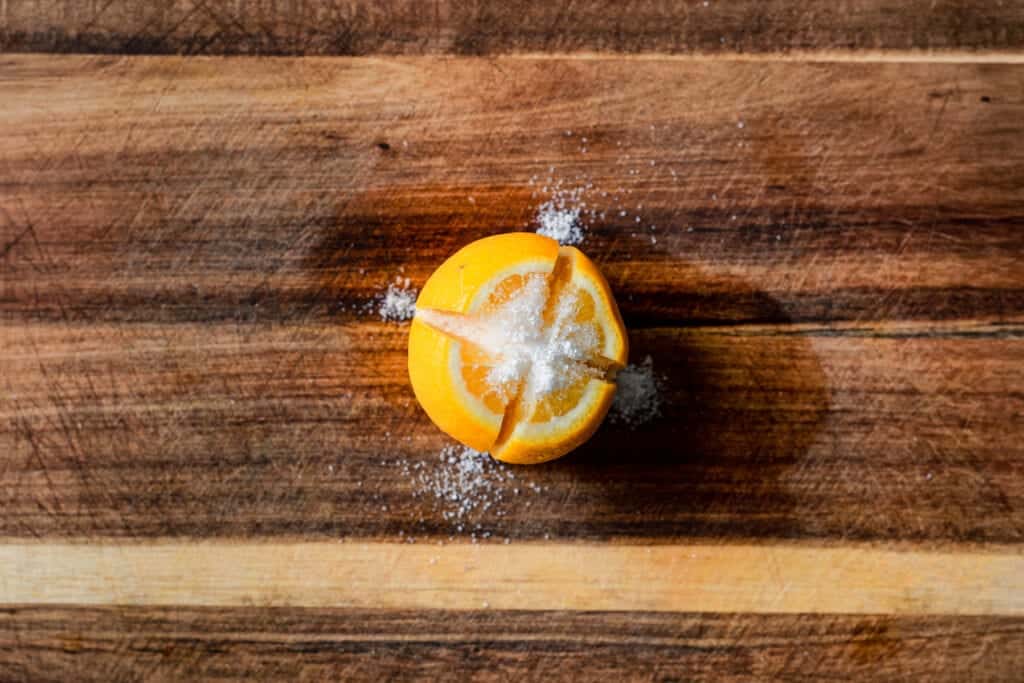
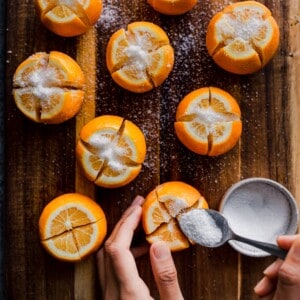
Pour a generous amount of salt and pack the salt into the crevices. I never measure this, but I’d estimate about a generous tablespoon of kosher salt per lemon.
Squeeze the lemons shut as best you can. Repeat with the remaining lemons.
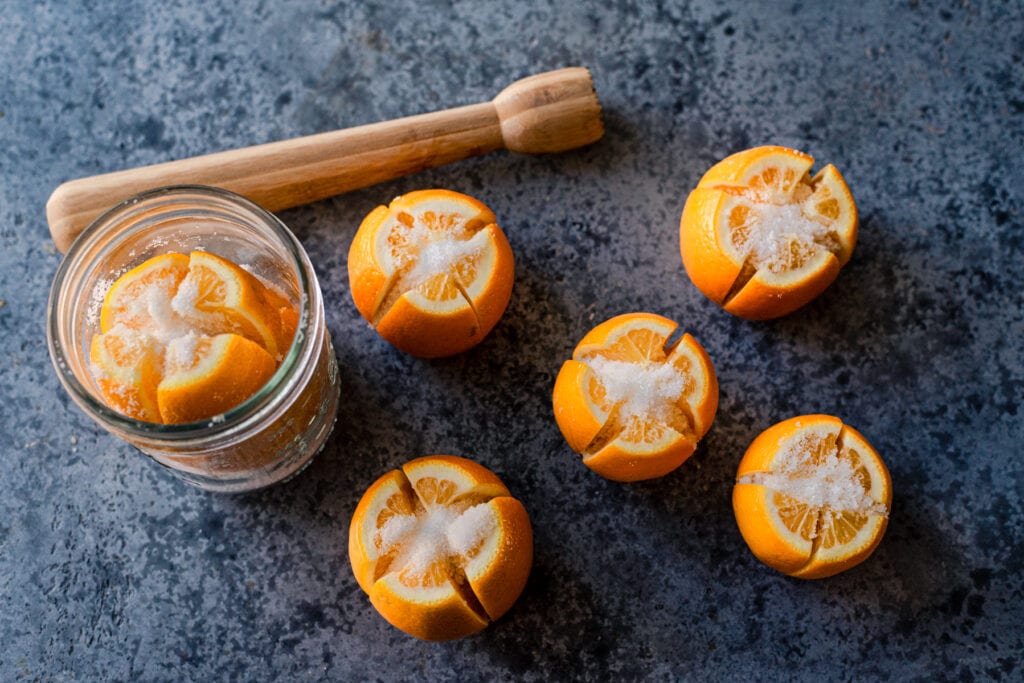
Add 1 to 2 tablespoons of kosher salt to your glass jar to cover the bottom (1 tablespoon if using a smaller jar).
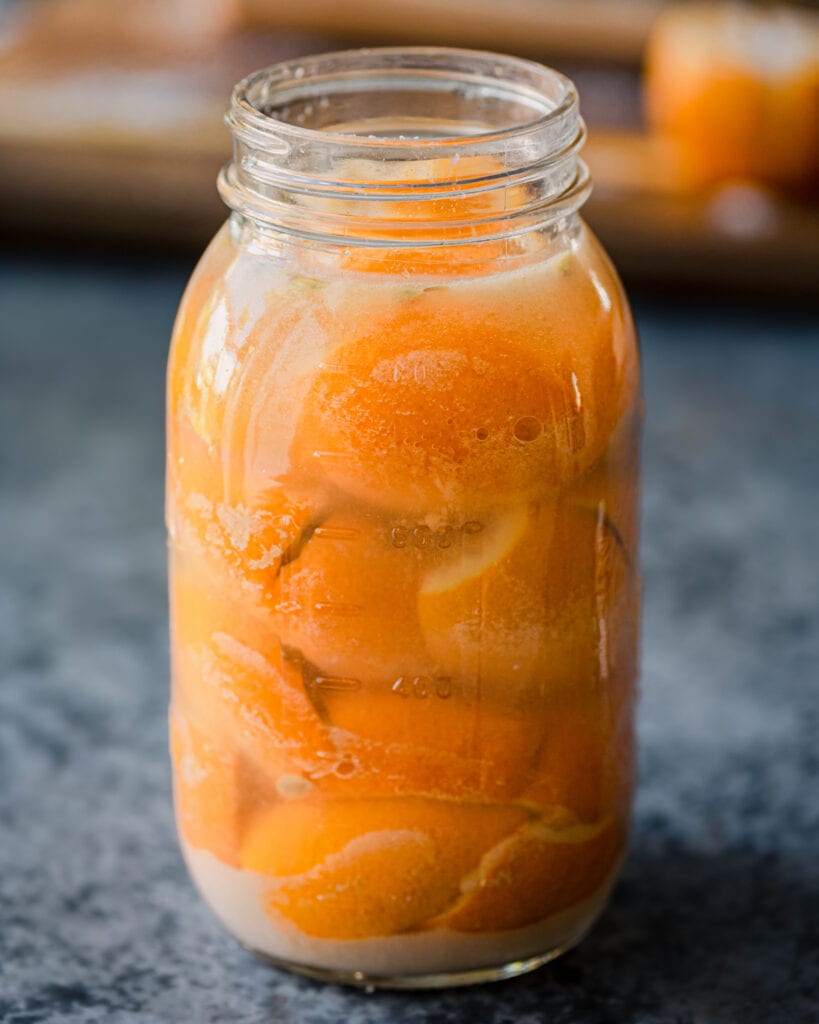
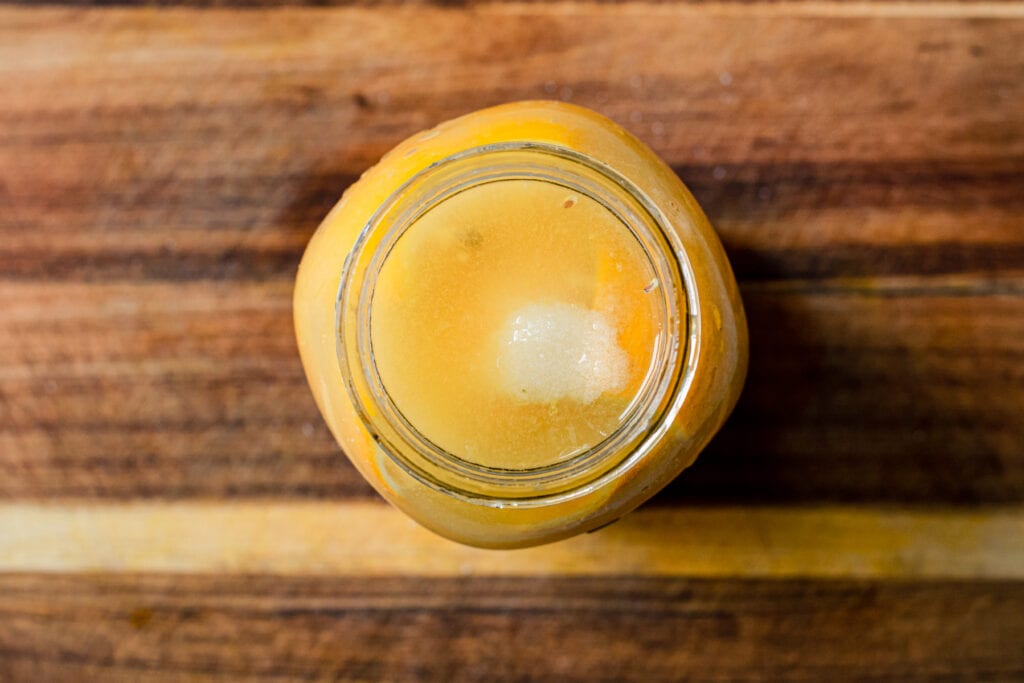
Add a few lemons to the jar, then start pressing down on them with your muddler/spoon/pestle. The juices should start to flow out.
Tip: Pack the lemons in the jar as tightly as you can. This is key to proper fermentation. If there is too much room in the jar, the uppermost lemons will not be covered in juices and can develop mold.
If lemons are not covered in their juices, squeeze some fresh lemon juice on top to cover.
Sprinkle with 2 tablespoons of kosher salt (1 tablespoon is fine if using a small or medium jar).
Seal the jar and transfer to your pantry, a cabinet, or on the counter.
During the first two weeks: once a day, gently tip the jar upside down once or twice.
Leave to ferment for at least three weeks (or longer).
Once the lemons have softened, transfer the jar to the fridge.
They will stay good for a very, very long time (6 months to a year, maybe longer).
Tip: It’s all about the peel!
Once the lemons are preserved, it’s most common to use just the peel in recipes. The flesh is quite mushy and very salty, though you can rinse it well and toss into soups or stews as a flavor-infusing ingredient if you prefer.
I usually use a paring knife to get the peel away from the flesh. Then, depending on the recipe, I chop or mince the peel, or slice it very thinly into strips.
Tips for making preserved lemons
Smaller, thin-skinned lemons are best
The varieties of lemons traditionally preserved in Morocco are doqq, beldi, or boussera, all of which are small varieties. In the U.S., Meyer lemons make a good substitute, as they’re less sour and more fragrant than regular lemons and typically have a thinner skin.
If you can’t find Meyer lemons, use the thinnest-skinned lemons you can find, ideally organic. Thick-skinned varieties will not adequately soften (I tried using the large, thick-skinned lemons from my backyard lemon tree and they never fully softened).
Tightly pack the lemons and cover with juice
It’s important to (1) pack the lemons tightly so air pockets don’t develop and (2) submerge the salted lemons in their juices. This prevents too much air exposure, which causes mold to develop.
In case your lemons aren’t very juicy, keep 2 extra lemons on hand for juicing at the end. If the juices don’t cover the lemons, you’ll need to squeeze extra lemon juice on top.
While you shouldn’t need anything to hold the lemons down if there’s sufficient juice, we have also added a fermentation weight on top of the lemons just to be safe.
Use kosher salt (or sea salt) and be generous
I use kosher salt because it’s cheap and tastes good, but you can also use sea salt (keep in mind: it is pricier and saltier than kosher salt).
Do not use iodized table salt, as the iodine can interfere with fermentation.
And you will need to use more salt than you think, as a salty environment is what helps the lemons ferment instead of rot. Not sure how much salt? Check out the YouTube video for a visual.
How to use preserved lemons
Once your preserved lemons have fermented, there are so many ways to use them!
Stews and soups
This is perhaps the most common way to use preserved lemons, particularly in North African cuisine and in Moroccan stews. Adding preserved lemon peel infuses hearty stews, tagines, and soups with a contrasting brightness and background depth of flavor that is, again, hard to place but delicious.
Soups and stews to try with preserved lemon:
- Mediterranean Lentil Soup: the brightest lentil soup you’ll ever eat, thanks to preserved lemons.
- Try folding in a tablespoon of minced or slivered preserved lemon into this Vegan Chickpea Tagine, Creamy White Bean Soup with Kale, or Red Lentil Soup! Add them with the broth/liquid ingredients.

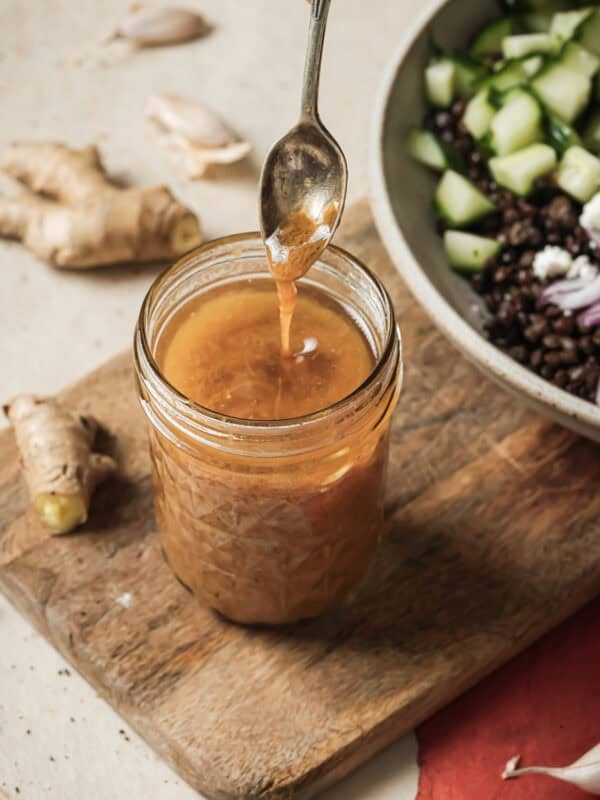
Salad dressings/vinaigrettes
I’m a sucker for citrus vinaigrettes, and adding minced preserved lemon peel takes everything up another notch.
- Elevate red wine vinaigrette or lemon-tahini dressing by adding a teaspoon or two of minced preserved lemon.
- Fold preserved lemon into gremolata for a twist (I’ve included a recipe for just that in this gremolata post).
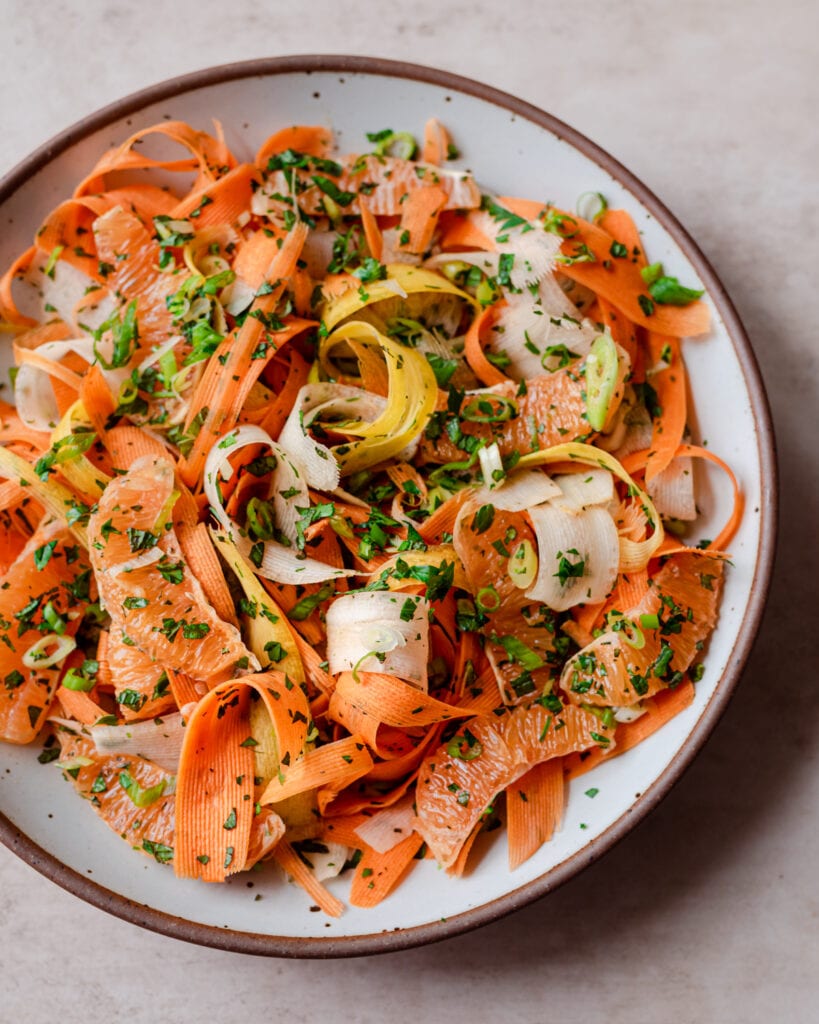
- Try the preserved lemon vinaigrette with carrot salad at the bottom of this blog post!
Grain salads, pastas, and rice dishes
Preserved lemons are lovely in grain dishes and grain salads (think rice, couscous, farro, or bulgur), as well as lentil and chickpea salads.
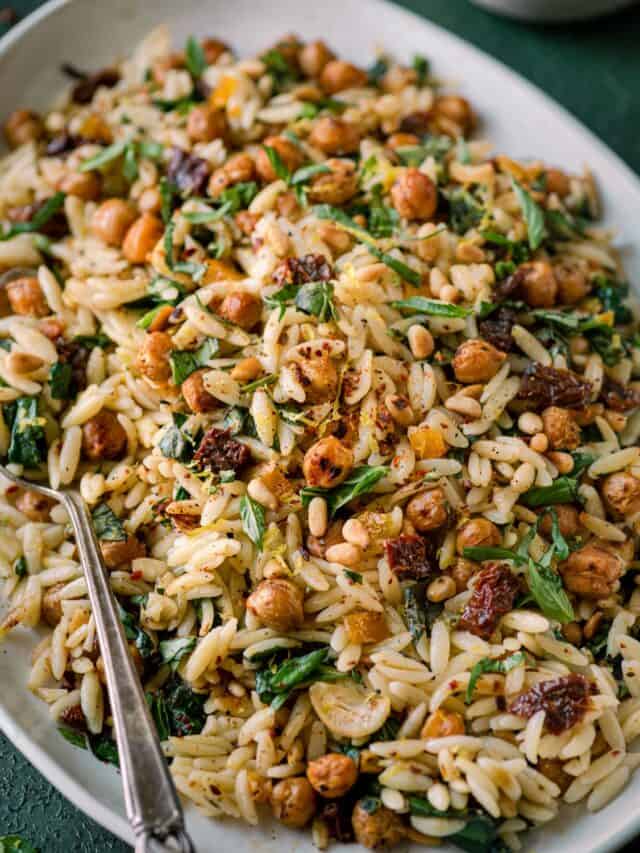
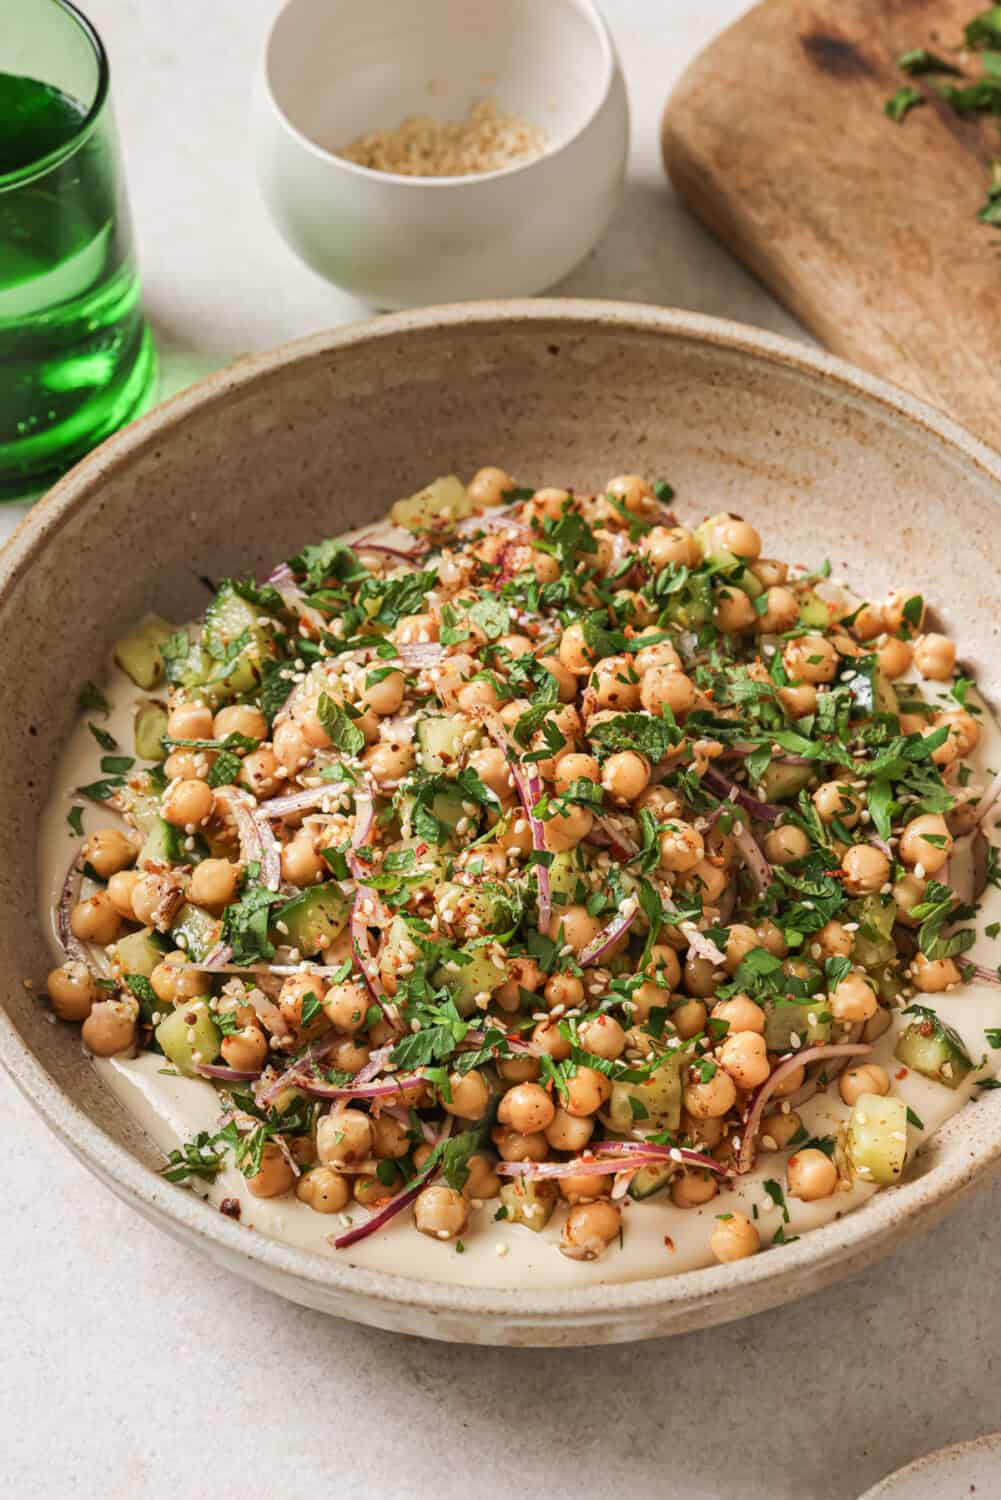
- For crowd-pleasing summer potluck dishes, try this Lemon Orzo Pasta Salad or Mediterranean Chickpea Salad.
- From my cookbook Big Vegan Flavor: The ridiculously easy Pearl Couscous & Chickpea Salad with Preserved Lemon on p. 323 is perfect for picnics and potlucks.
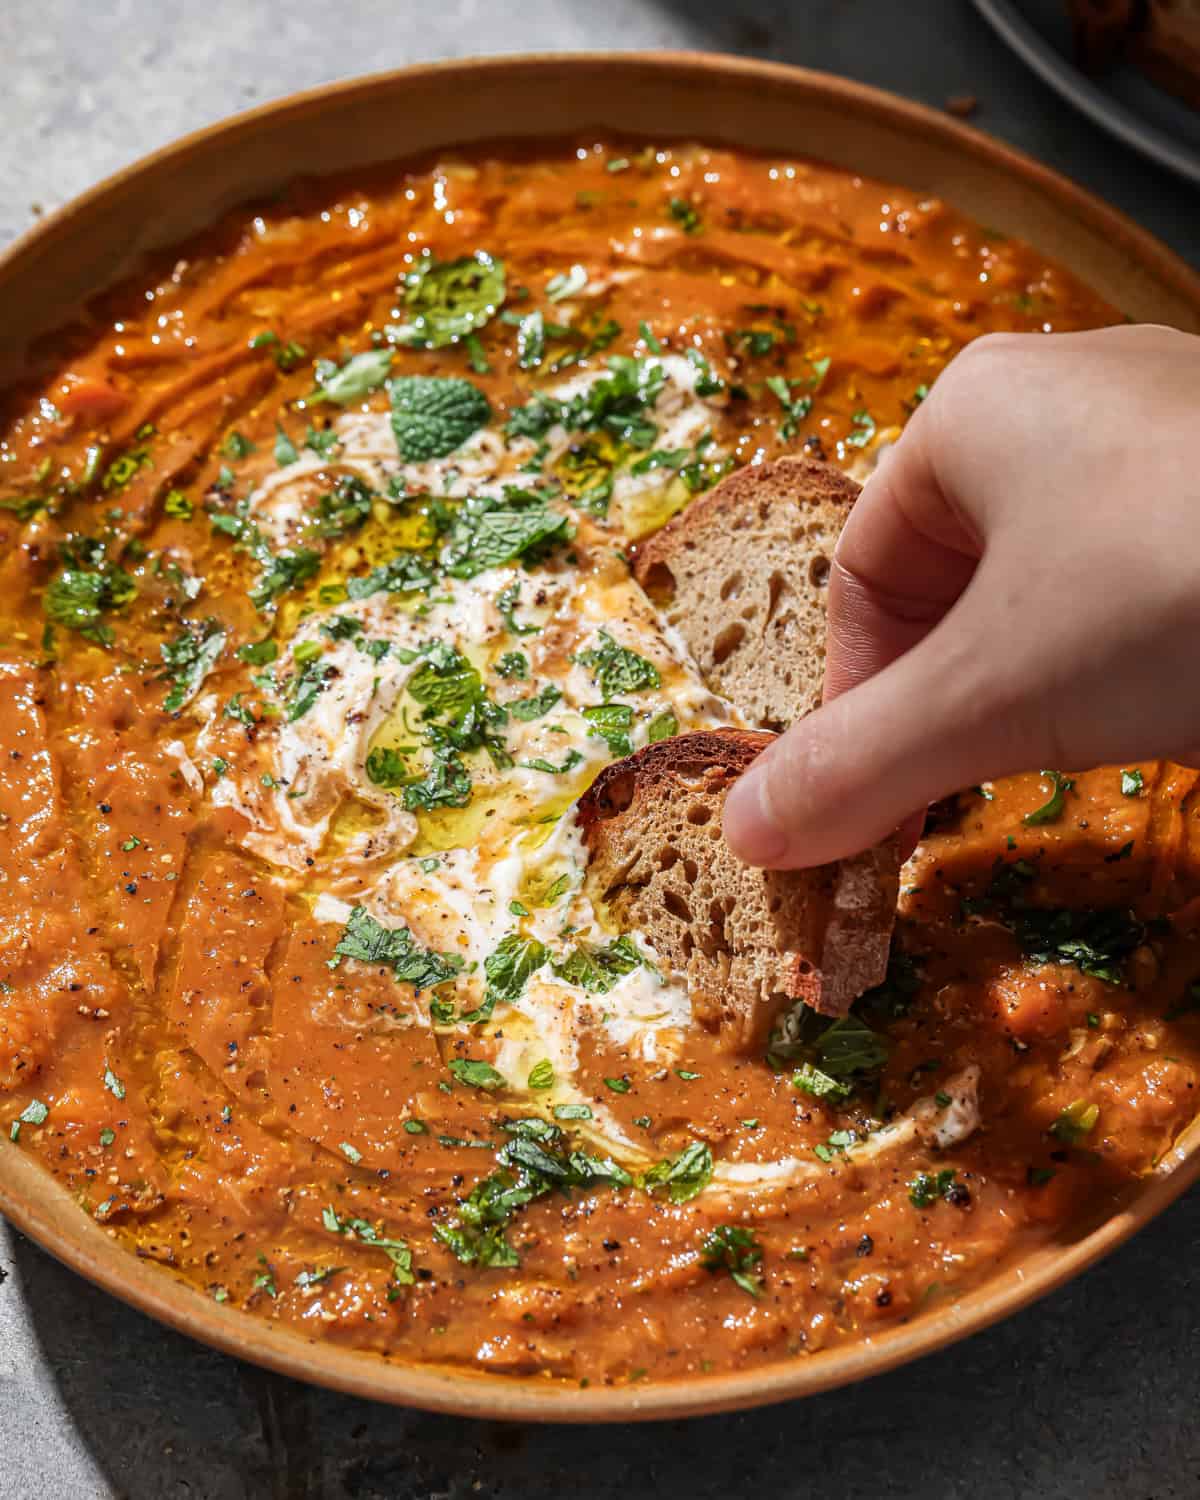
Sauces, dips, and spreads
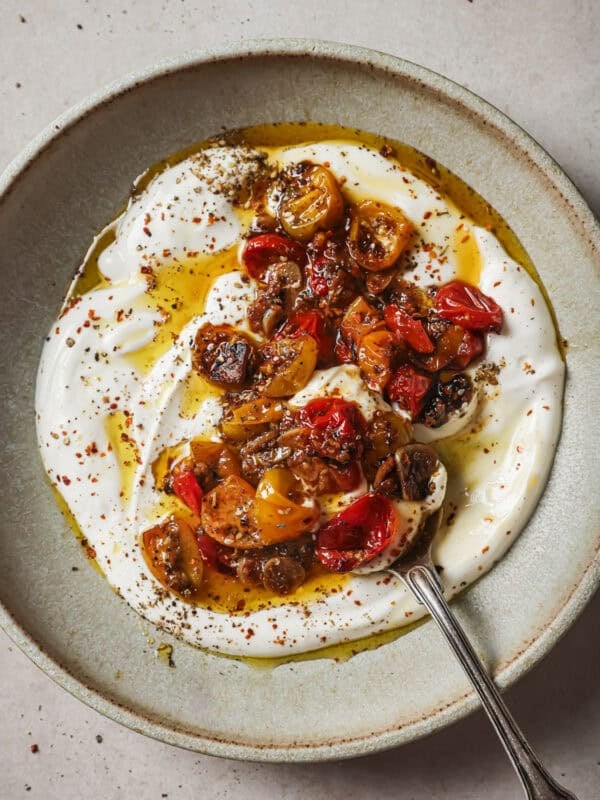
Similarly, preserved lemon peel can amp up the flavors in lots of sauces. I particularly love it in yogurt-based and tahini-based sauces, which are common in Middle Eastern cooking.
- Next time you make homemade hummus, add a quarter or half preserved lemon peel and puree it into the hummus for something a bit different.
- Try the preserved lemon yogurt sauce recipe at the bottom of this post. Pair it with lentils and beans, falafel, roasted potatoes, or as a dip with pita chips.
- Make a fun spin on aioli. Fold preserved lemon into vegan aioli. For every ½ cup of mayo, use 1 to 1 ½ tablespoons of chopped preserved lemon peel. Great for sandwiches, burgers, or even potato/macaroni salad!
Avocado toast
Make avocado toast less basic by mashing your avocado with preserved lemon!
For one medium avocado, start with 1 teaspoon of minced preserved lemon peel (also add lemon juice, salt, pepper, crushed red pepper flakes, etc.). Taste, and add more as desired.
Frequently Asked Questions
At least six months, but they can last up to one year! Store the lemons in the same jar in which you fermented them, with the preserving liquid.
Sure, though I usually keep them neutral-flavored so they’re more versatile.
You could try adding any of the following: 1 cinnamon stick; 1/2 teaspoon of black peppercorns; 1/4 to 1/2 teaspoon coriander or fennel seeds; 3 to 4 whole cloves; or 1 bay leaf.
Make sure to cover the optional flavoring agents with lemon juice and salt before sealing.
I typically don’t, but if you’re adding them to a dish that’s already quite salty or perhaps a beverage where you don’t want to add salt, it’s helpful to rinse them to remove excess salt.
Yes, you can, but you’ll want to use a smaller jar (perhaps a 16 ounce jar).
That’s all you need to know about how to make and use preserved lemons! If you try out the method, please be sure to leave your feedback below.

Introducing
Big Vegan Flavor
Techniques and 150 recipes to master vegan cooking.
How to make Preserved Lemons
Ingredients
- 7 to 10 Meyer lemons (or regular lemons if not available), plus 1-2 extra lemons for juicing (See Note 1)
- Kosher salt (lots of it)
Instructions
- Grab a large canning jar that is just large enough to hold the lemons (a 32-ounce jar will hold about 7 to 10 Meyer lemons; if you want to halve this recipe, use a smaller jar). Cover the bottom of your canning jar with 1 to 2 tablespoons of kosher salt.Note: I like to use a canning jar with a rubber gasket to prevent the lid from corrosion.
- Rinse the lemons and scrub them really well. Set aside 1 or 2 lemons for juicing at the end.
- Cut off a thin slice from both ends of each lemon so they have a flat bottom. Stand the lemon up and slice lengthwise, almost all the way through but keep the lemon attached at the base. Flip the lemon by 90º and slice lengthwise again, as if quartering the lemons into wedges, but not all the way through.
- Gently pry the lemons open but do not detach them. Fill each crevice with a generous amount of kosher salt (a generous tablespoon in my estimation). Seal the lemons up to close.
- Add a few lemons to the jar. Press them down with a muddler, a pair of tongs, a pestle, or a sturdy spoon so that they release their juices and you can make room for more lemons. Pack the jar as tightly as you can with the salted lemons, pressing down to cover them with their juices. NOTE: If the juice released does not cover the lemons, squeeze the juice from the reserved 1 or 2 lemons on top. If covered by their juices and you have a little extra space, you can salt the remaining lemons and add them to the jar.
- Cover the lemons with 2 tablespoons of kosher salt (and any optional flavorings). Seal the jar and let it sit at room temperature (I store it in my pantry) for at least 3 weeks, or until the lemon rinds are very soft. Gently shake the jar every day, turning upside down, for the first 2 weeks.
- When ready to use, you can use the entire lemon, but it’s more common to scoop out the flesh and use only the peel. If desired, wash the lemon peel before using to make slightly less salty (I don't typically do this).
Video
Notes
- If your lemons are very small, you’ll need more of them. Regular lemons tend to be a bit bigger than Meyer lemons, so you might not need as many. If organic lemons are available, choose those since you’ll be eating the peel.
- For optional flavoring ideas, see the Frequently Asked Questions section
Nutrition
Nutrition information is automatically calculated, so should only be used as an approximation.
Carrot Salad with Preserved Lemon Vinaigrette

Equipment
- Wide vegetable peeler
Ingredients
- 1 ½ pounds carrots, peeled
- 1 cup fresh mint leaves, finely chopped (See Note 1)
- 1 ½ cups fresh parsley leaves, finely chopped
- 6 scallions, sliced very thinly on a bias (top ½-inch and end roots trimmed off)
- 1 navel or Cara Cara orange, sliced into segments
Preserved Lemon Vinaigrette
- ¼ cup (60 mL) freshly squeezed lemon juice
- 1 teaspoon maple syrup
- 1 tablespoon preserved lemon rind
- 1 clove garlic, minced or crushed with a press
- ½ a medium shallot, minced
- ¼ cup (56 mL) extra virgin olive oil
- 2 tablespoons fresh mint, finely chopped
- ¼ to ½ teaspoon sea salt, plus more to taste
- Freshly cracked black pepper
Instructions
- Using a wide (Y-shaped) vegetable peeler, peel the carrots vertically in ribbons until you get to the point where you can’t peel anymore. Laying the carrot flat on a cutting board helps to get the most ribbon. Save any inner carrots for snacks or for another recipe (such as pickled carrots).
- In a bowl, combine the carrot ribbons with the mint, parsley, scallions, and oranges. Sprinkle with a pinch of salt.
- Make the vinaigrette: In a bowl, whisk together the lemon juice, maple syrup, preserved lemon, garlic, and shallot. Stream in the olive oil, whisking as you go. Stir in the chopped mint and season with the salt and pepper to taste. Or, add all of the ingredients to a jarred lid and shake vigorously until emulsified.
- Drizzle the vinaigrette on top of the carrot salad and toss gently.
Notes
- To make the prep quicker, you can add the mint, parsley, and scallions to a food processor and pulse repeatedly until finely chopped.
Nutrition
Nutrition information is automatically calculated, so should only be used as an approximation.
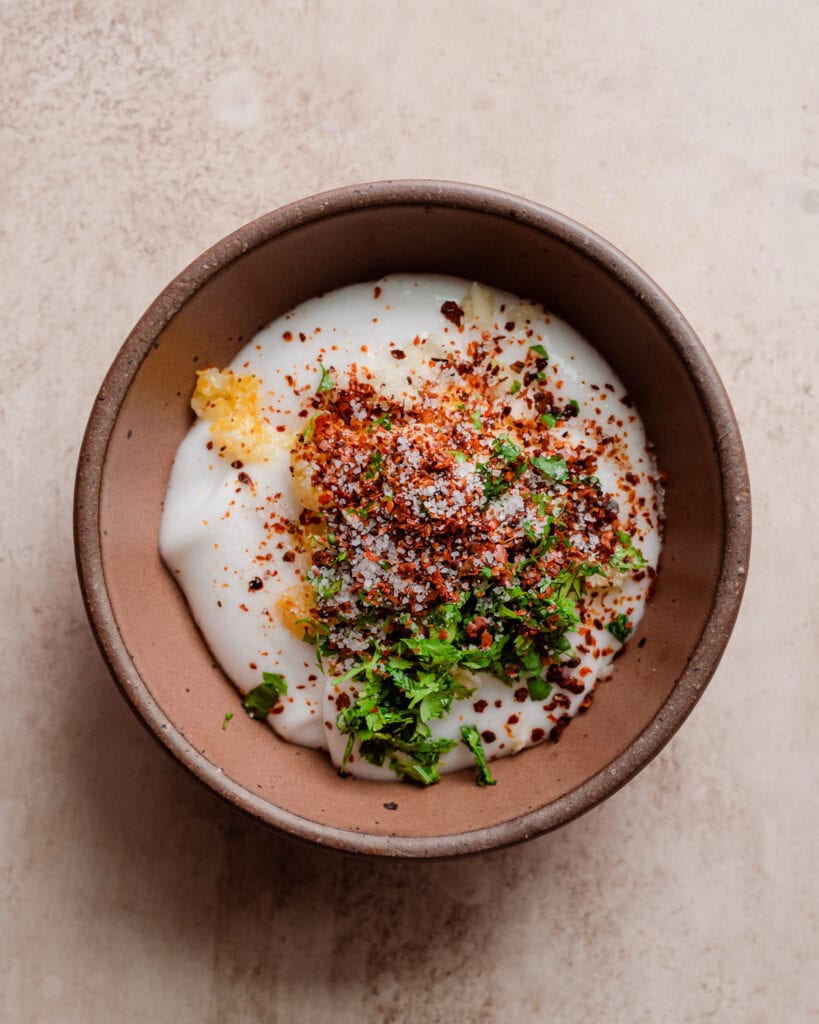
Preserved Lemon Yogurt Sauce

Ingredients
- 1/2 cup (113g) good-quality unsweetened coconut yogurt
- 1 to 1 ½ tablespoons preserved lemon rind, minced
- ¼ cup (3g) cilantro leaves, finely chopped and divided
- 1 large clove garlic, grated or crushed with a press
- 1 teaspoon Aleppo pepper (or 1/4 to 1/2 teaspoon crushed red pepper flakes)
- Sea salt to taste
Instructions
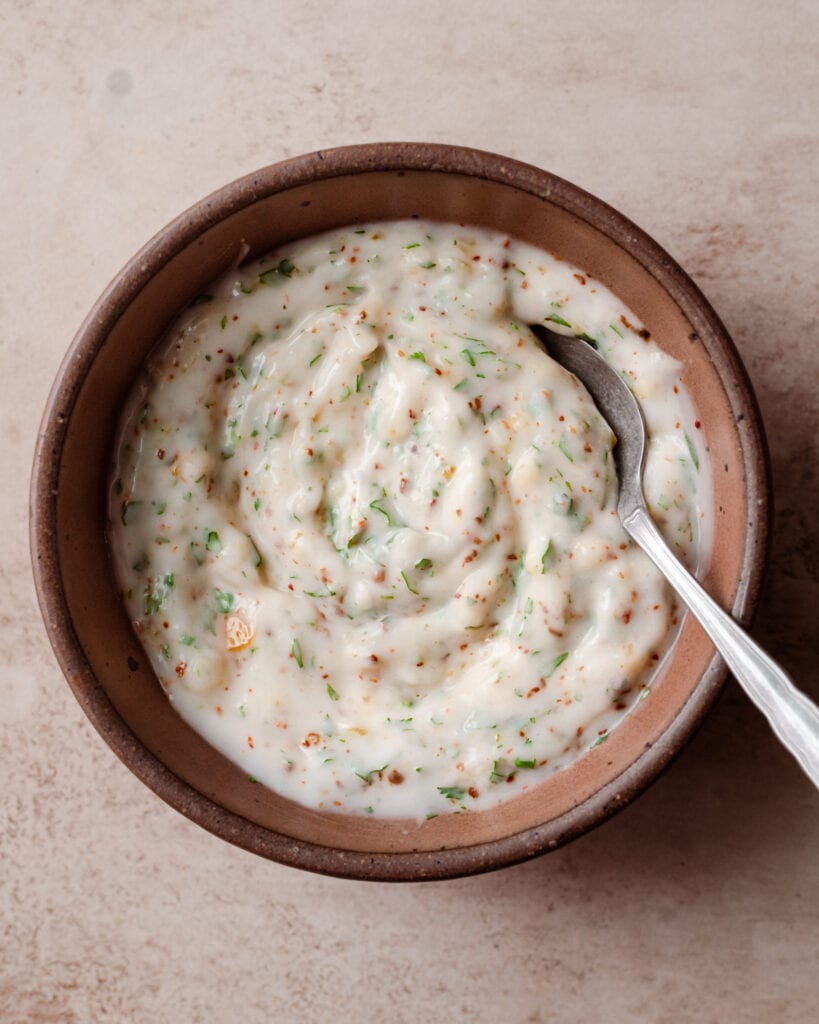
- Mix together the yogurt, 1 tablespoon of preserved lemon peel, cilantro, garlic, and Aleppo pepper. Season to taste with salt. Taste, and add more preserved lemon peel or salt as desired.
Nutrition
Nutrition information is automatically calculated, so should only be used as an approximation.


Easy least recipe. Made one ordinary salted jar and one containing cinnamon sticks and cloves. Now to find out if I can leave them long enough to mature!!!
Hi Janet, thank you so much for your kind review!
Thanks for all the tips for preserving lemons and all your ideas for using preserved lemons. Just made my first jar and am eager to try some of these recipes.
We appreciate your feedback and support, Susan. Thank you for leaving a review, and we hope you enjoy your preserved lemons!
Thank you for a great and simple preserved lemon recipe and recipes to use them in. I just learned about preserved lemons and fell in love.
You’re very welcome, Kathleen! Thanks for the lovely feedback!
I made preserved lemons for the first time last December, and I am still surprised by how often I use them. Pasta, soups, stews, dressings, the list goes on. One of the most useful things I have learned from Nisha’s website – thanks again for your enthusiasm and great explanations!
Your review made our day, Pamela! Thank you for taking the time to share your thoughts and for trying out the recipe.
What is the shelf life once they have sat for the required time?
Hi Kathy, after they have fermented, transfer to the fridge and you can store them in the fridge for at least six months.
What an amazing recipe!
I just got a small fermenter to start fermenting at home which allows to ferment at a certain temperature for a defined time, have you also tried doing this recipe in a fermenter?
Hi Sina, we’re delighted you enjoy the preserved lemons! We aren’t familiar with fermenters unfortunately, so we aren’t sure we can be of much help to you in that department!
This is a minimalist version of preserved lemons. The Egyptian style is to add copious amounts of Nigella seed and Safflower into the crevices of the lemon in order to enhance the bouquet and taste.
Thank you!
You’re welcome, Mayra! Happy to hear you had success with the recipe!
Your style is really unique compared to other folks
I have read stuff from. Thanks for posting when you have the opportunity, Guess I’ll just bookmark this web
site.
Hi there, thanks for the lovely comment!
Love preserved lemons and I have a lovely lemon tree growing in my garden a myer, from which we use it for lot’s of fresh and preserved recipe’s.
Is your pottery East Fork? Looks like ours. Thank you for your thorough post. I am making this today with Meyer Lemons from our orchard in Southern California.
Hi Carmen, yes, you know it! And that sounds lovely, I hope the preserved lemons turn out beautifully!