

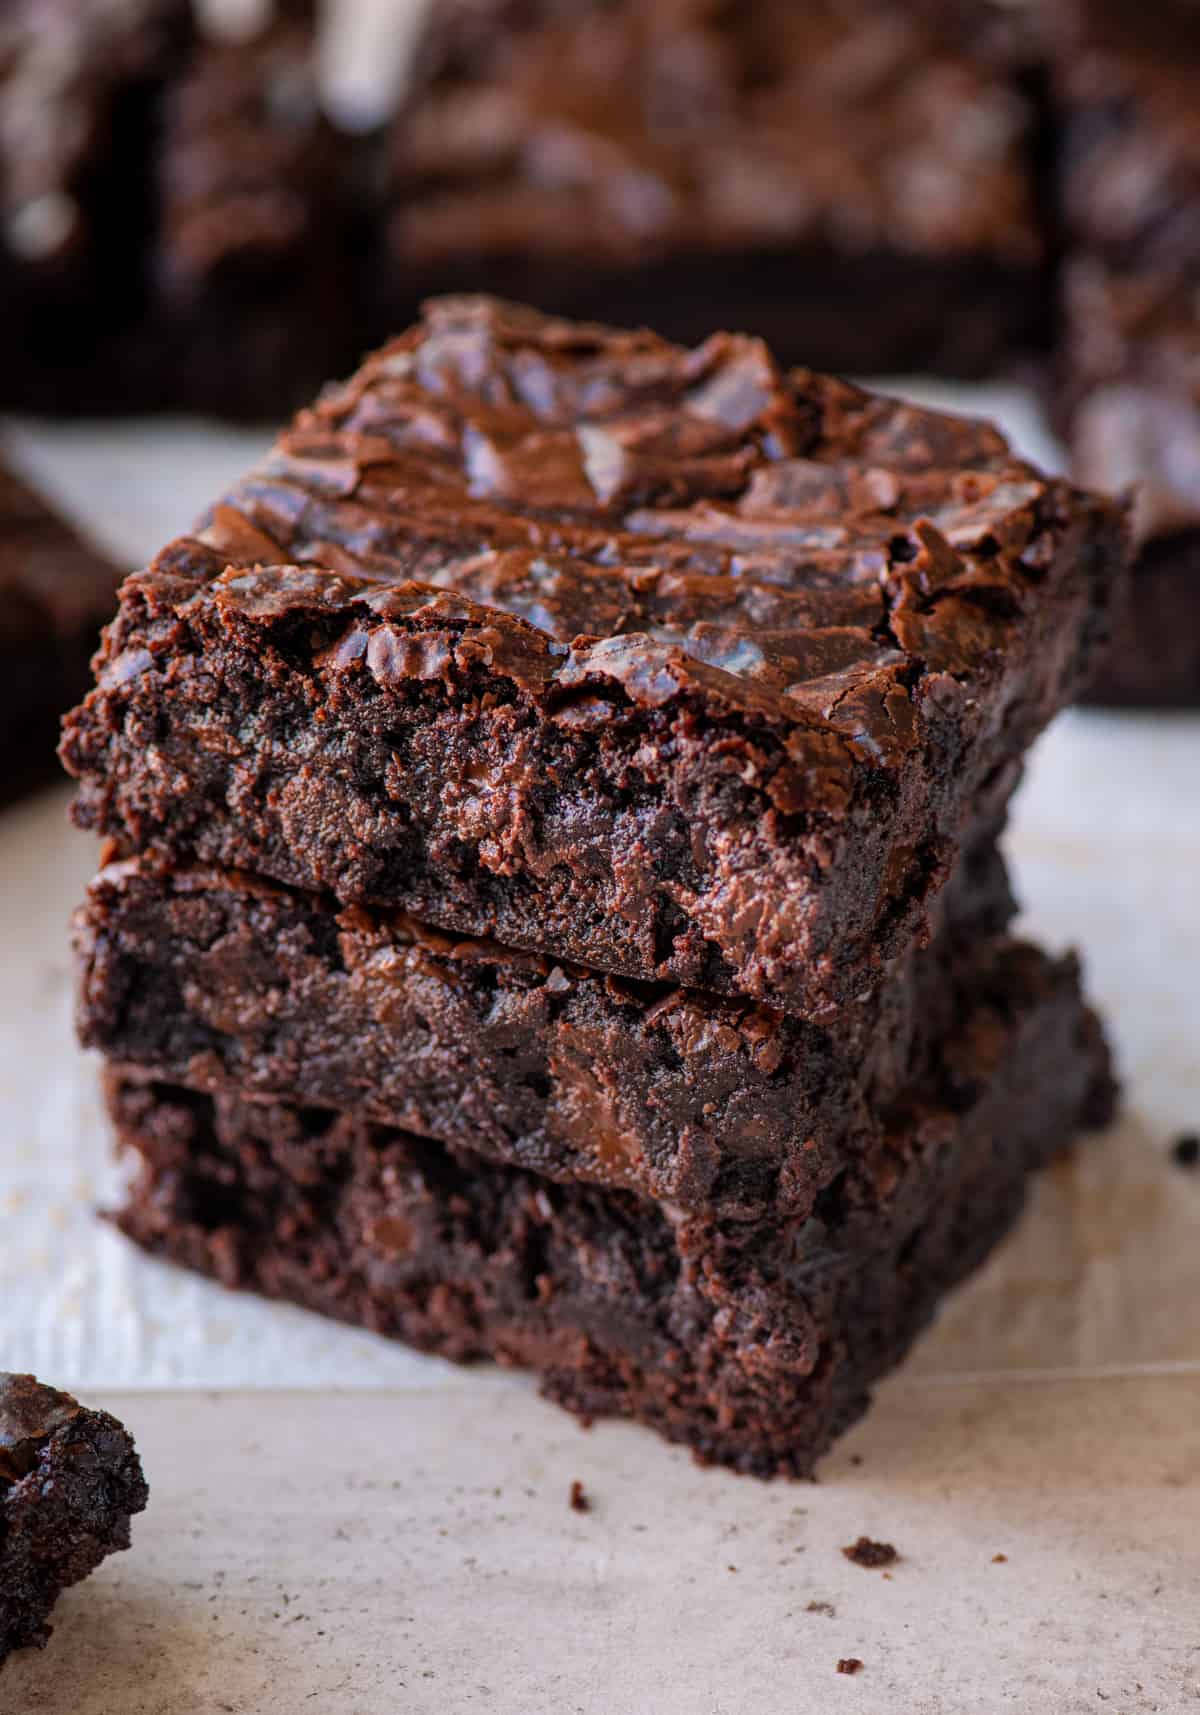
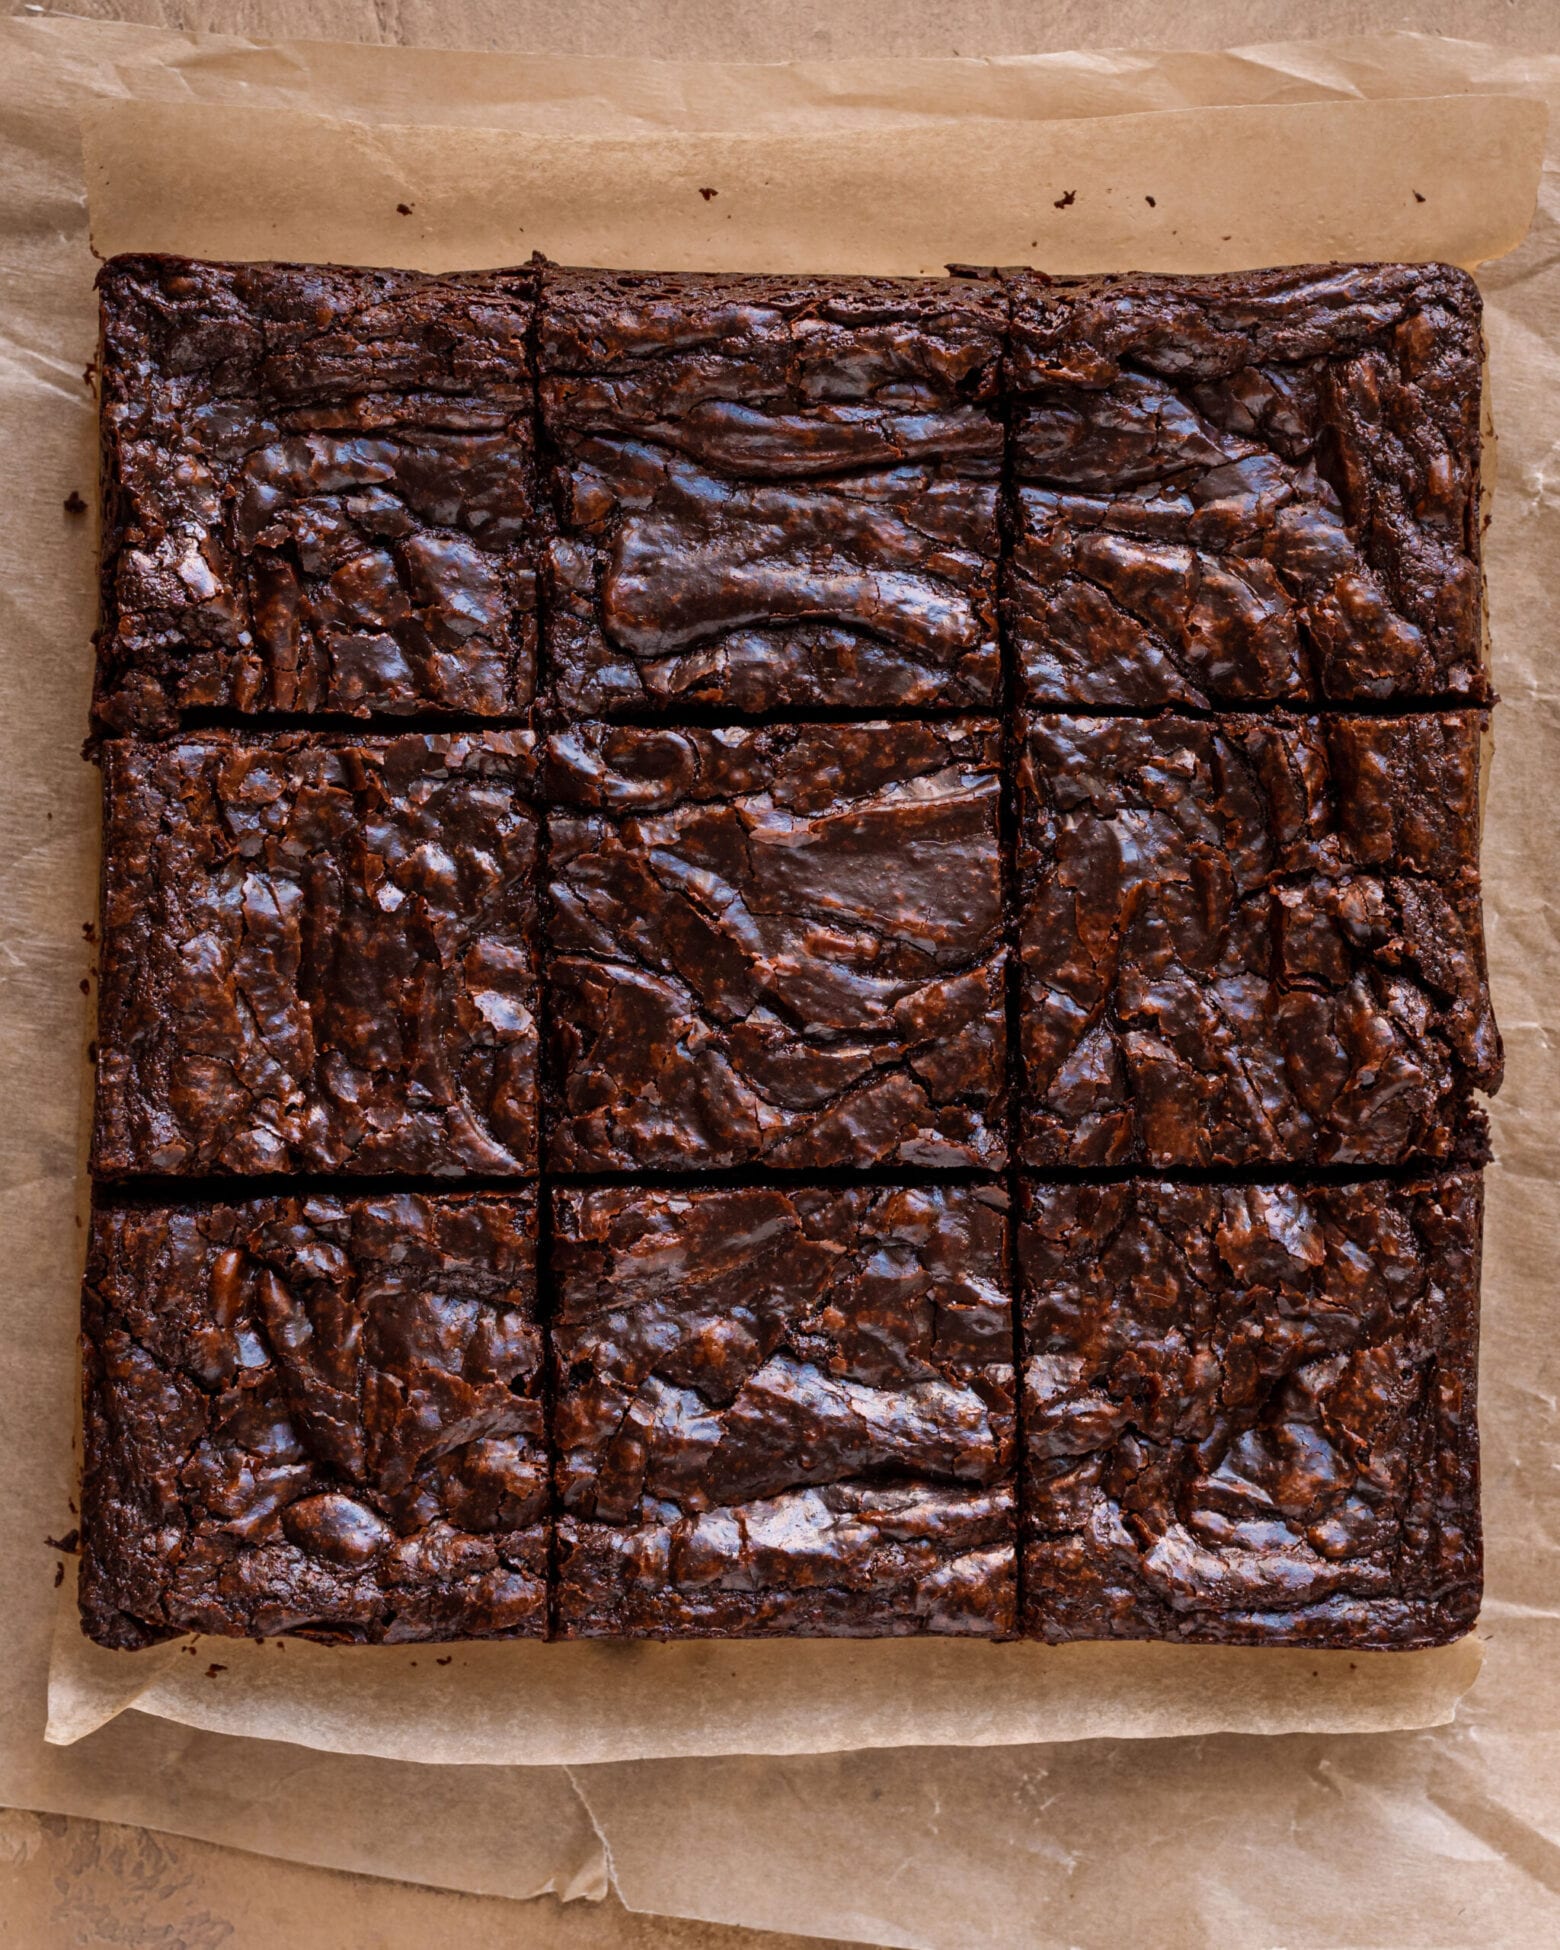
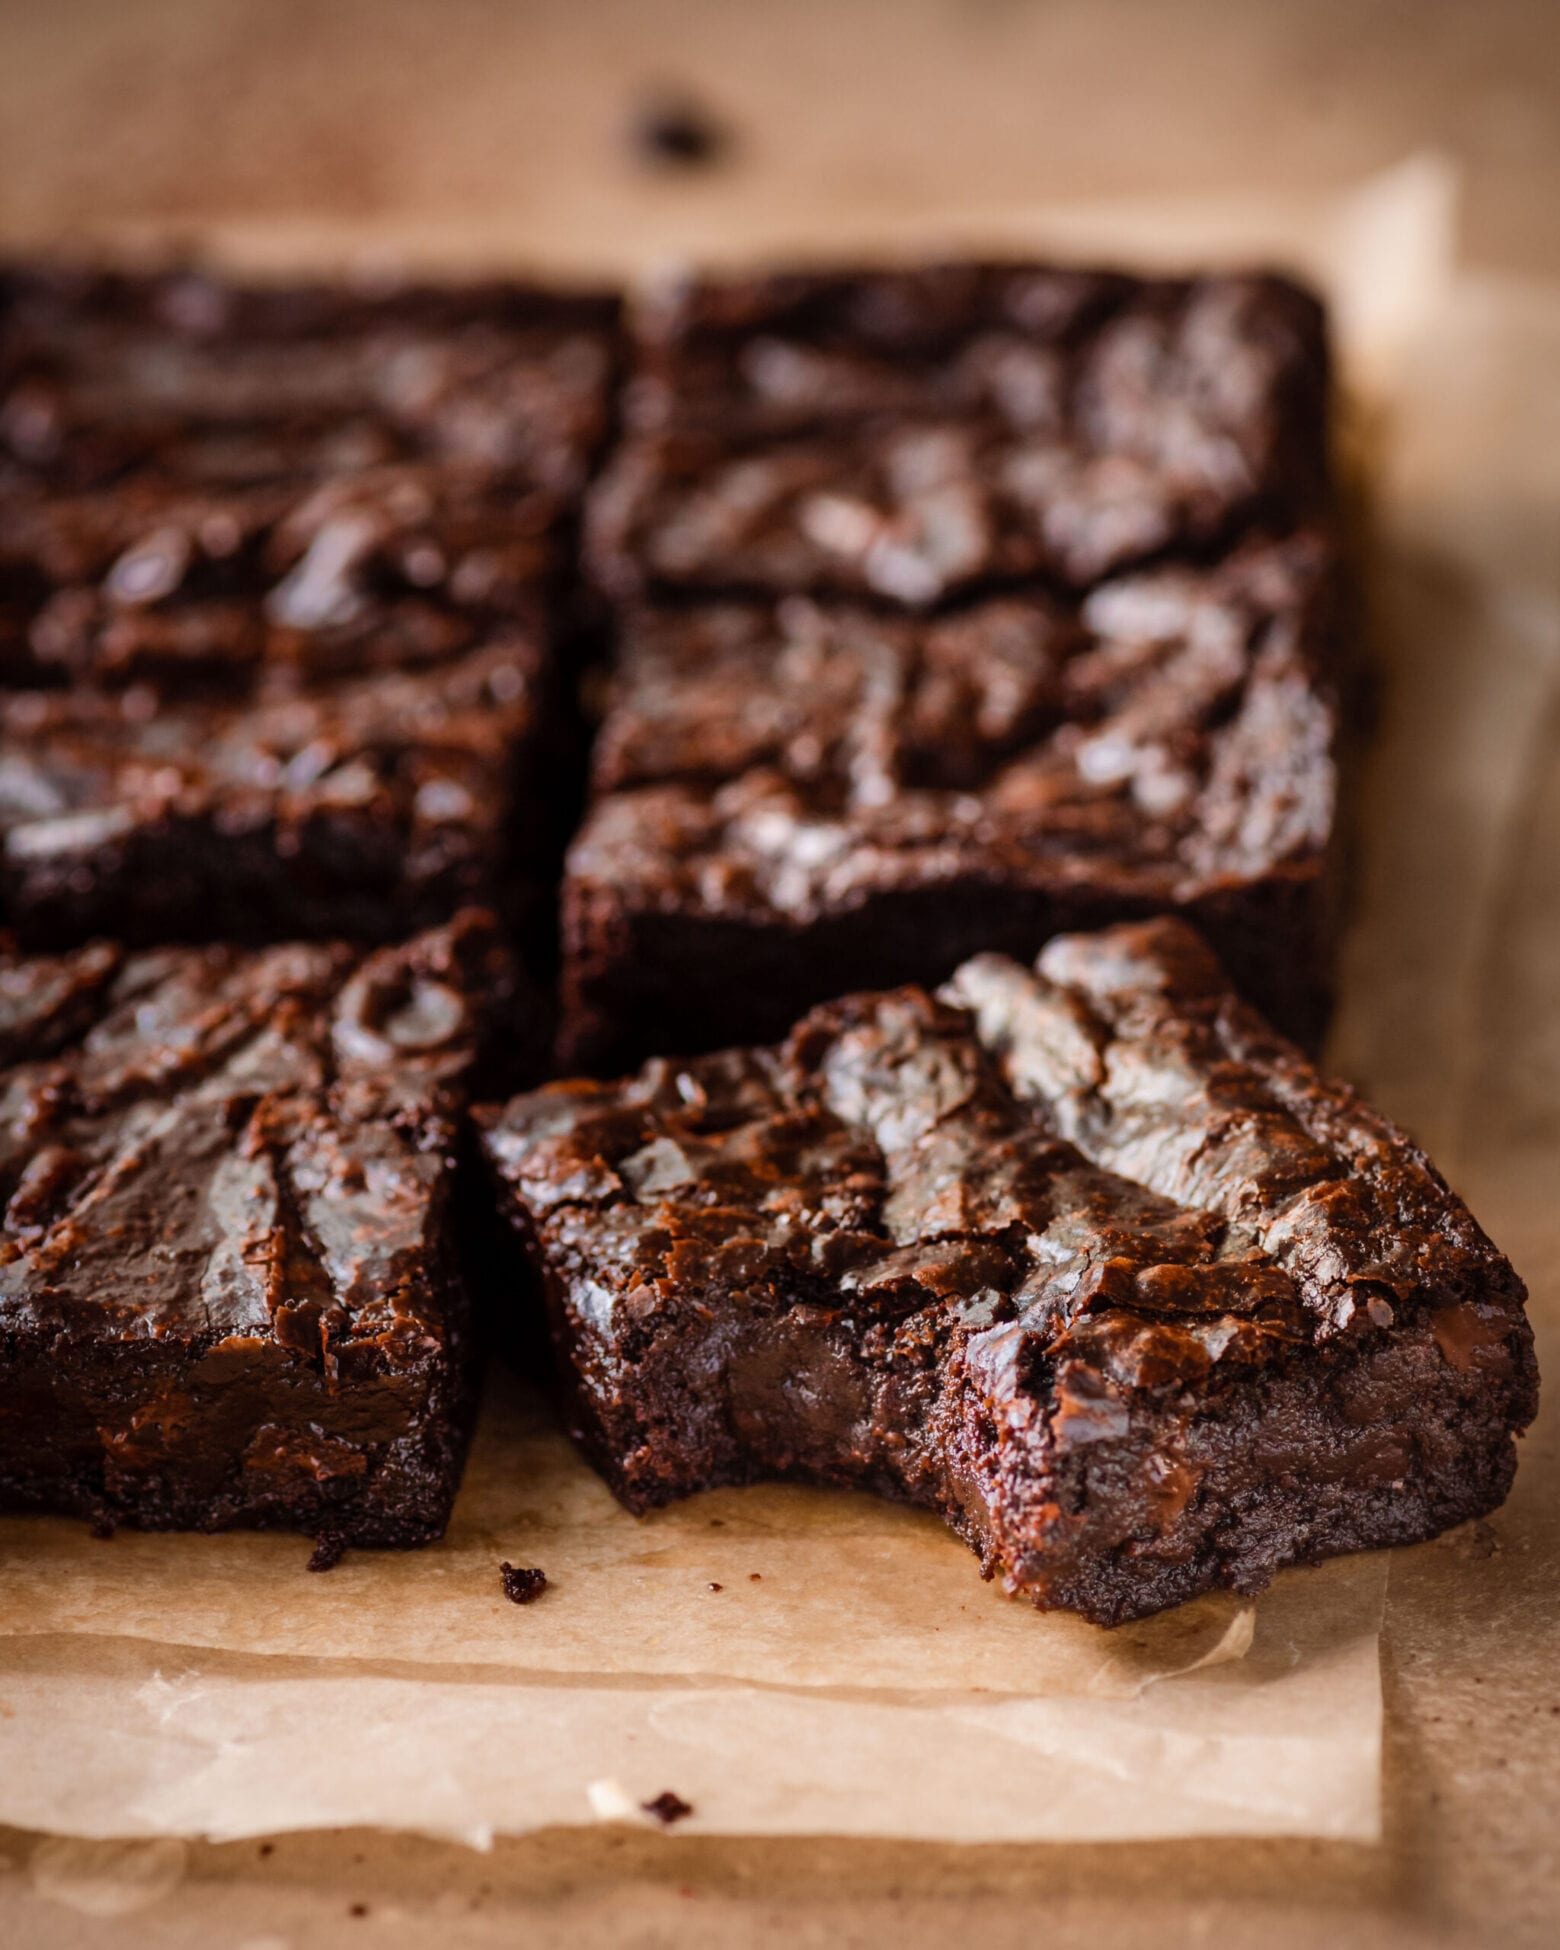
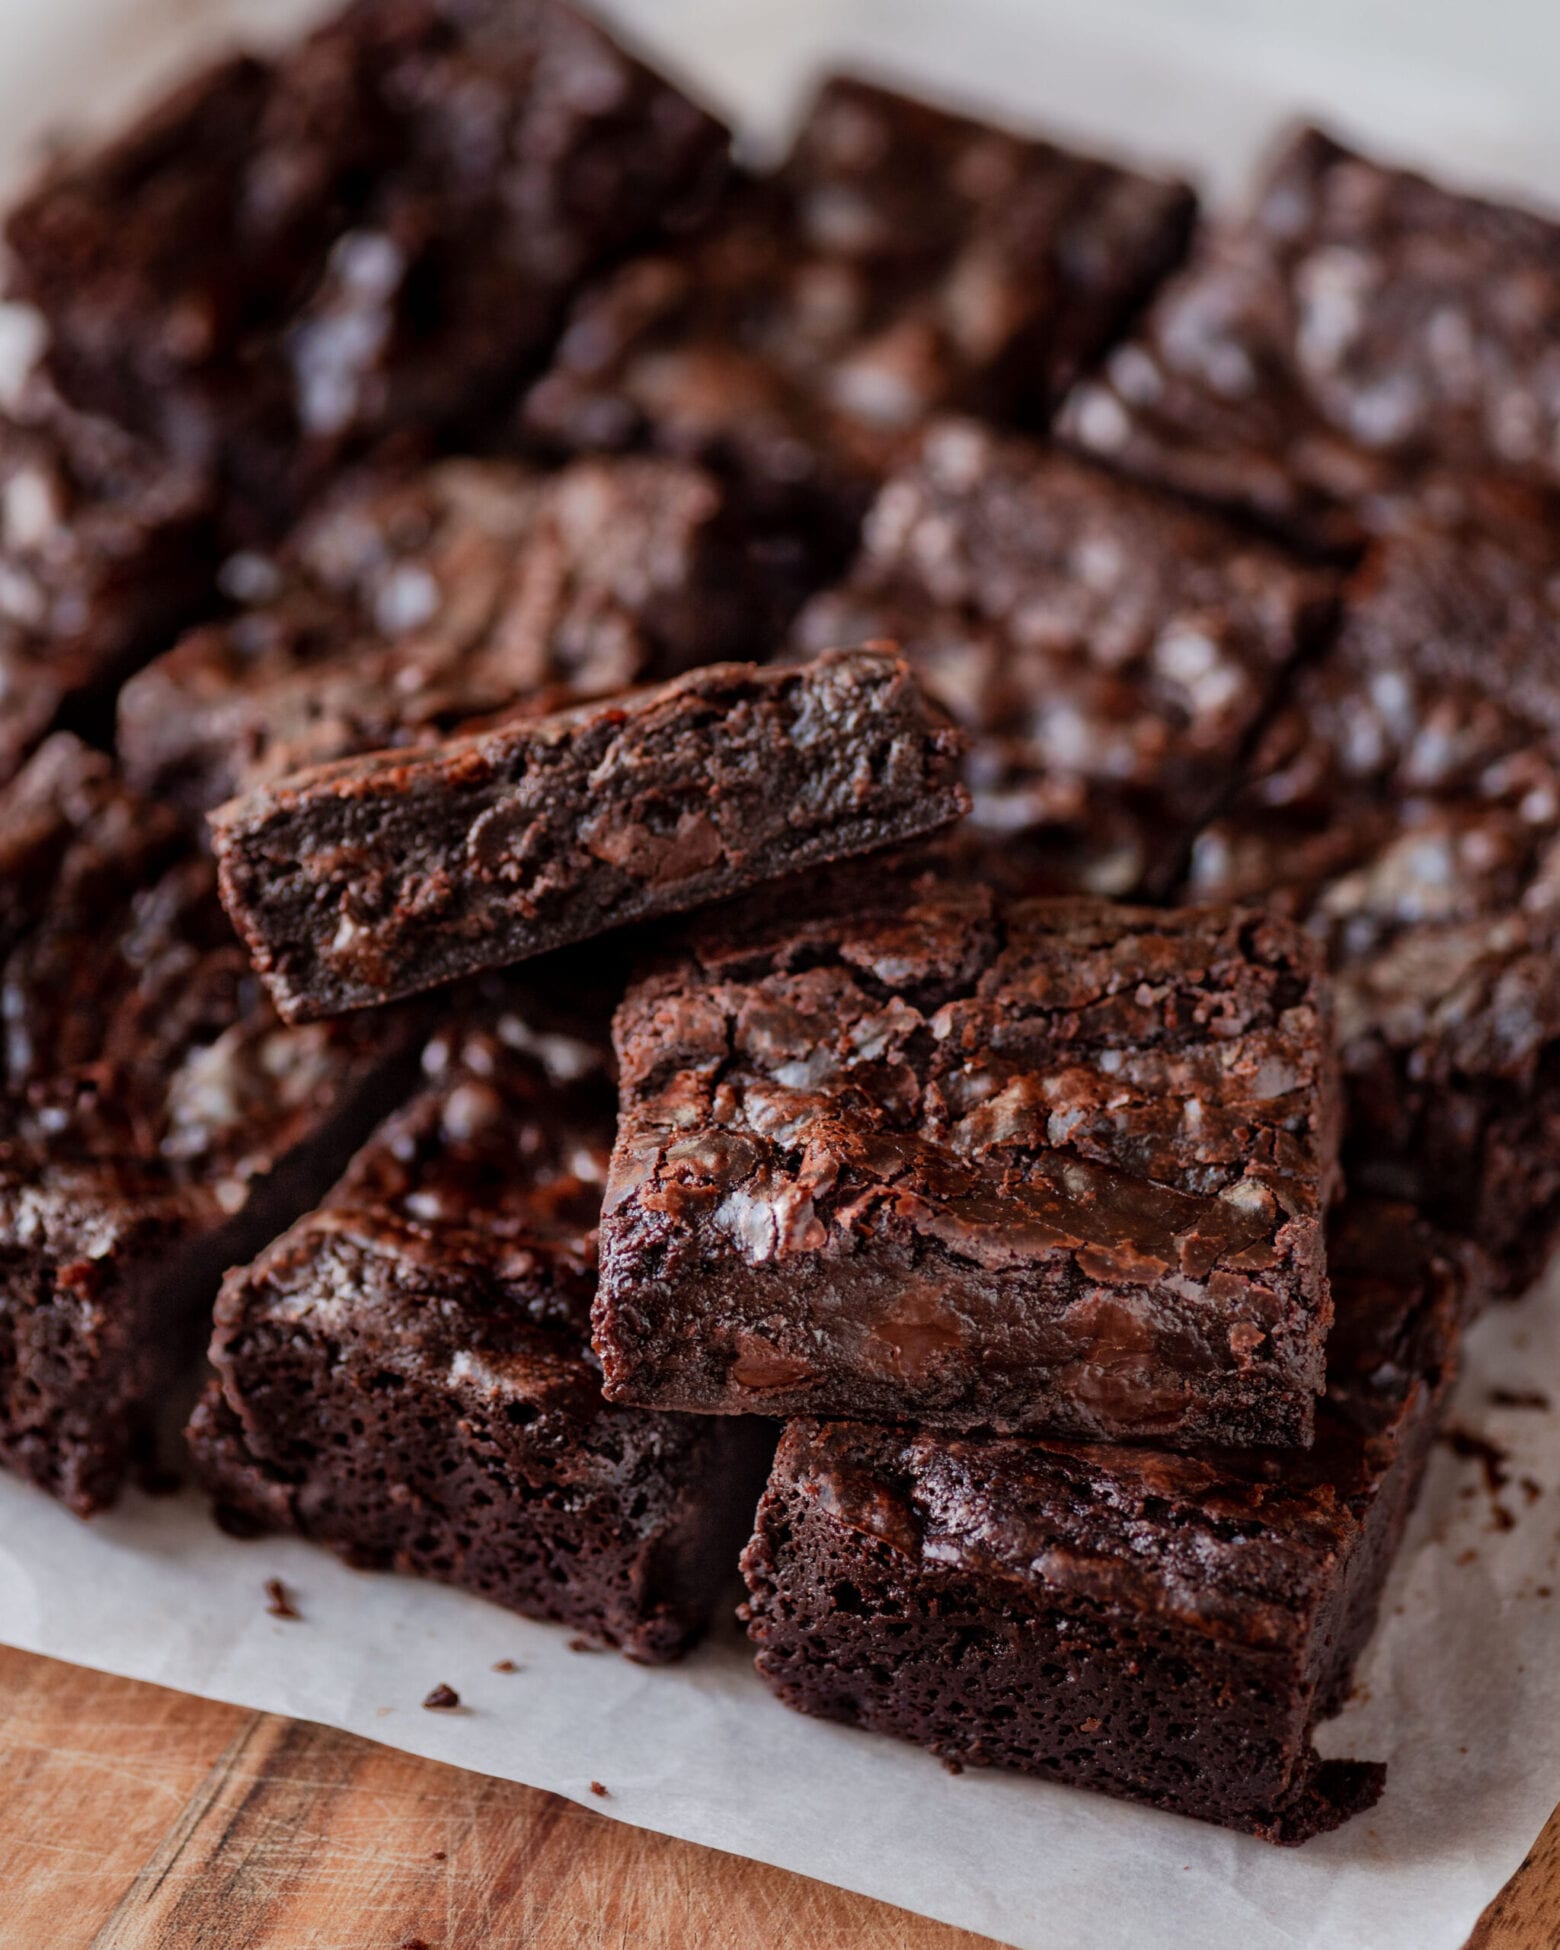
Life is too short for sad, one-dimensional brownies. That’s why you need the absolute best vegan brownies in your life… brownies that are the perfect mix of fudgy and chewy, and with an irresistible crinkle top.
You’ll have a hard time believing these brownies are vegan. It’s because they don’t have the dry, crumbly texture and underwhelming flavor most vegan brownies end up with. Instead, these brownies are:
- Deeply chocolatey thanks to real dark chocolate and Dutch process cocoa powder.
- The perfect mix of chewy and fudgy and 100% decadent, like any amazing brownie.
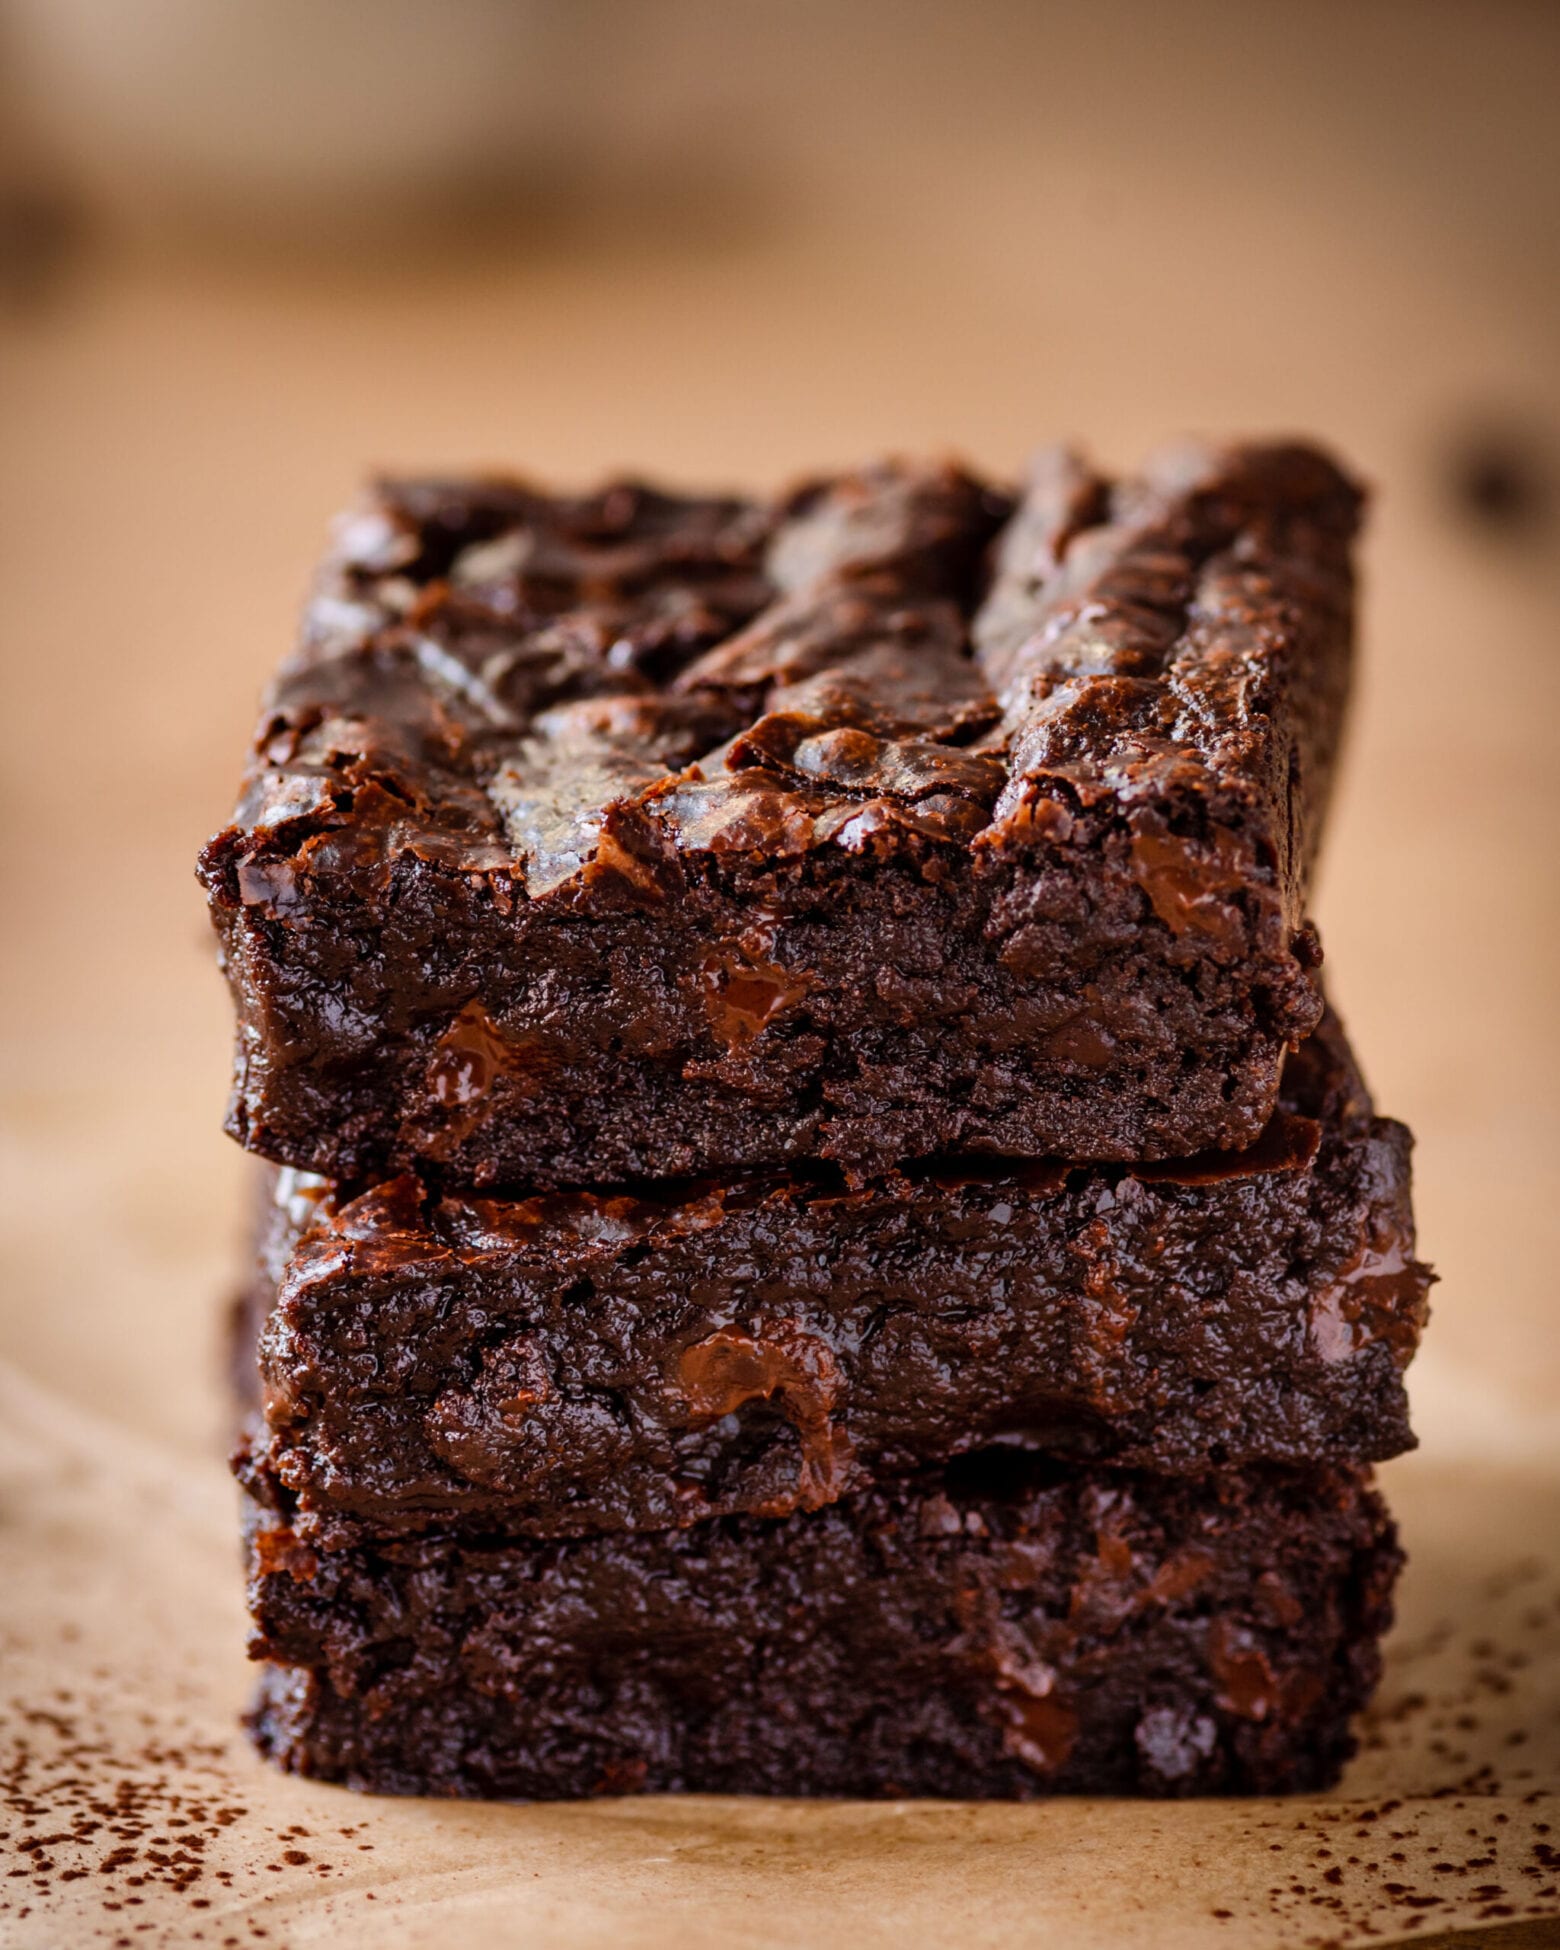
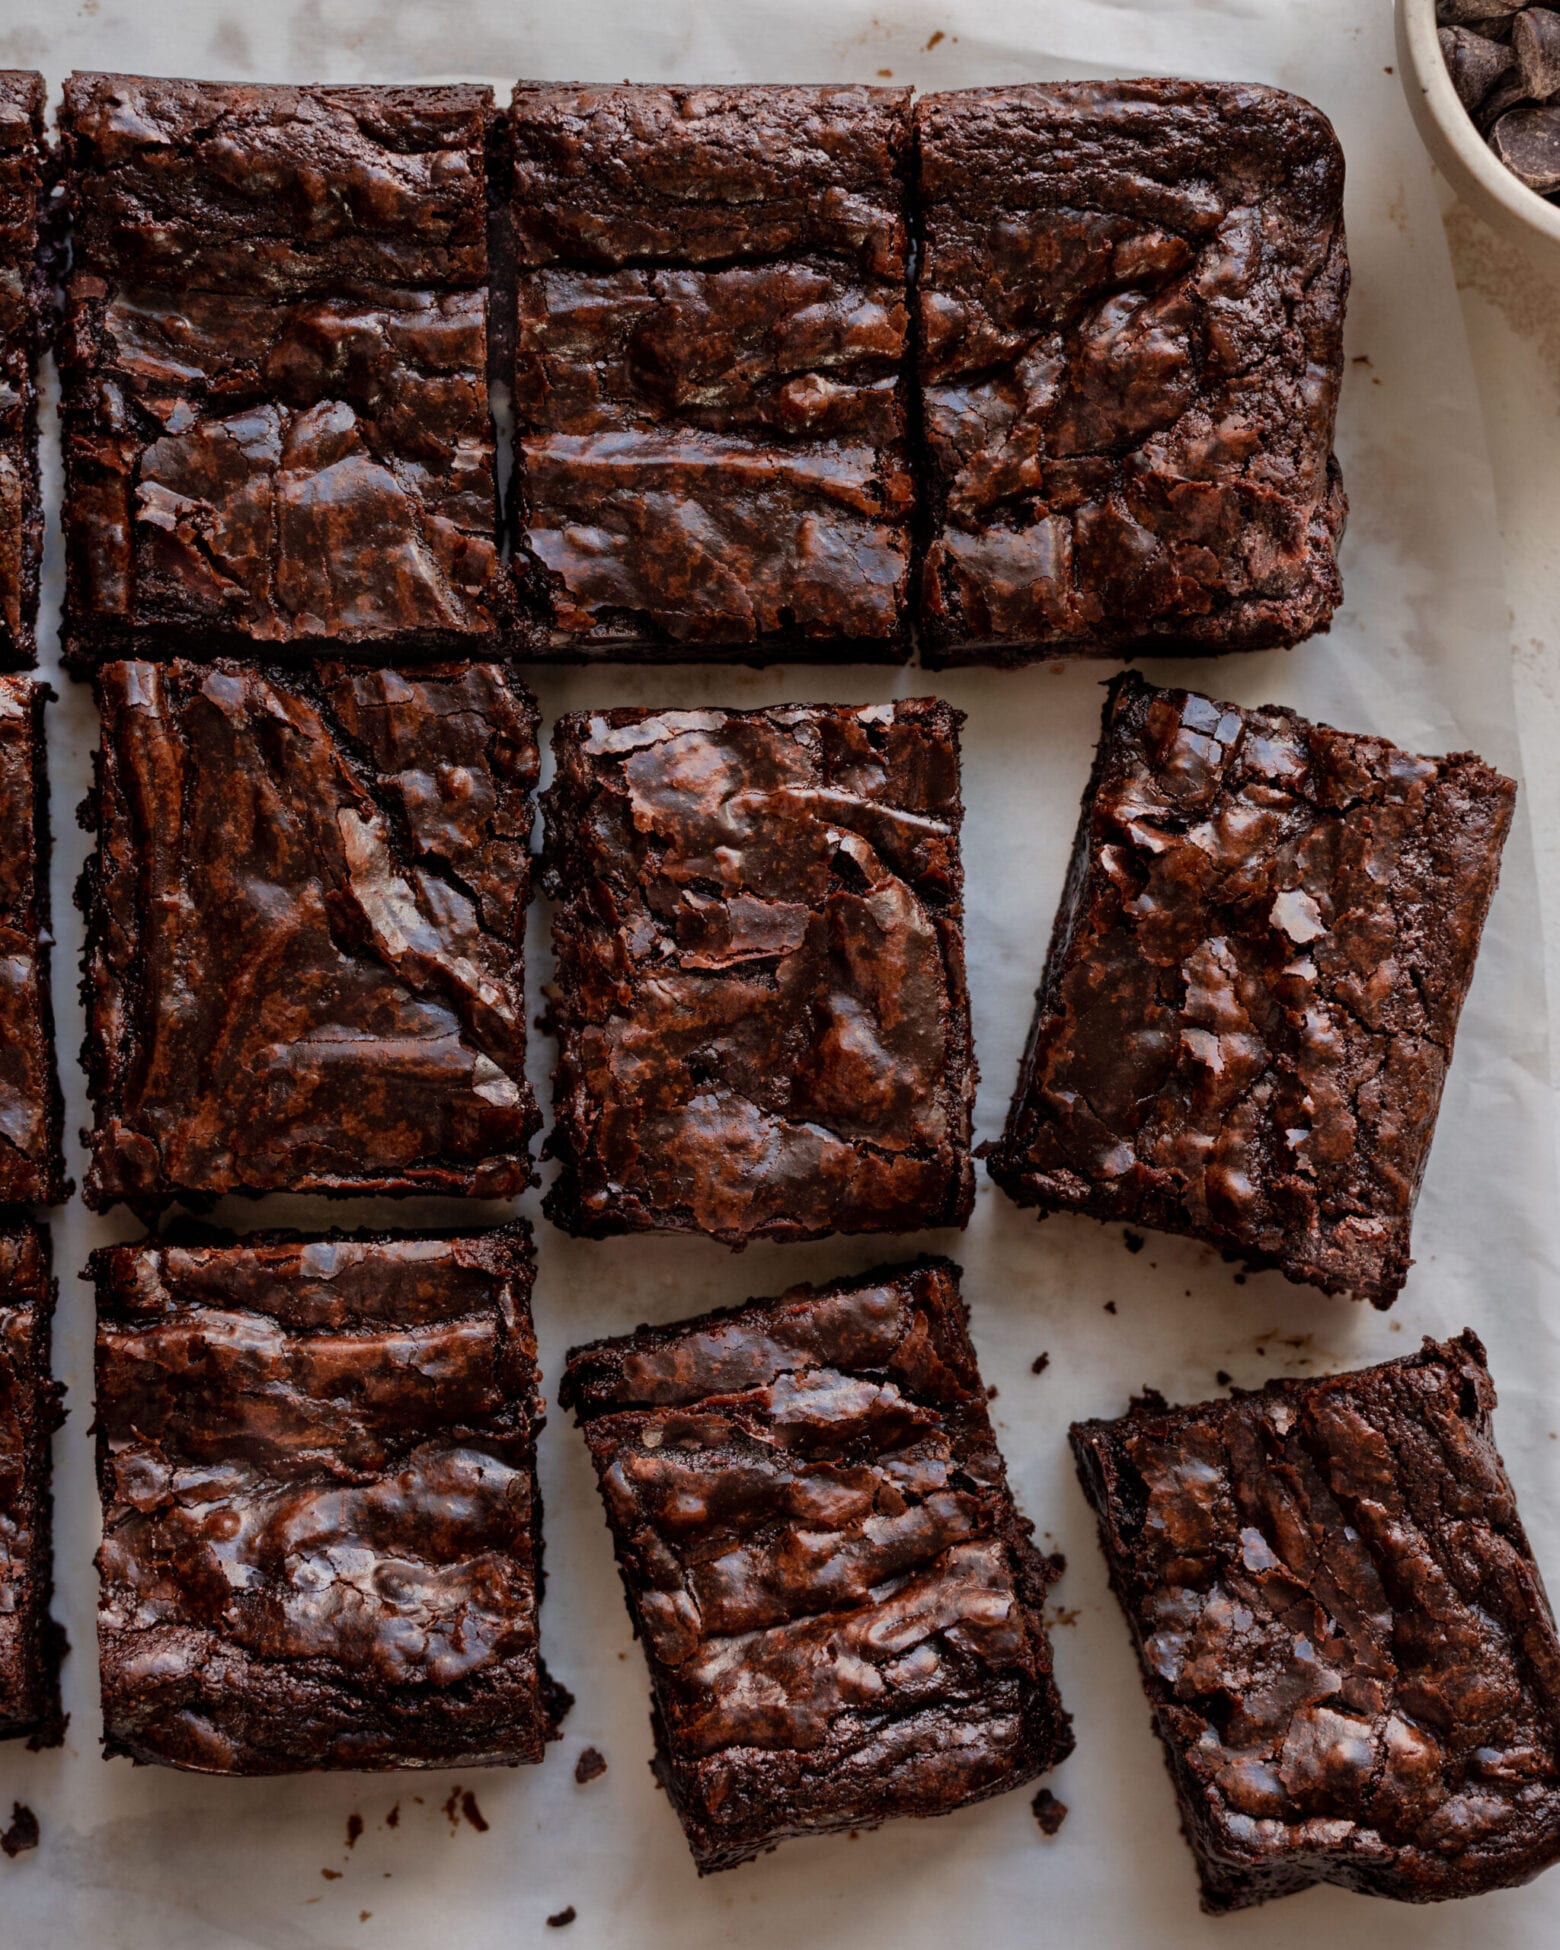
- Shiny and crinkly on top (something you thought was only possible with non-vegan boxed brownies!).
I can’t wait for you to try them! These brownies plus my Ultimate Chocolate Chip Cookies are pretty much the only classic American dessert recipes you’ll ever need (:
Table of Contents
1. Why this recipe works
2. Ingredient notes
3. Step-by-step instructions
4. Tips for making this recipe
5. Frequently Asked Questions
6. Recipe Card
Why this recipe works
A chocolate lover’s dream
You’ll find three layers of chocolate in these brownies: (1) Dutch process cocoa powder, (2) good dark chocolate, and (3) vegan chocolate chips. All three result in an intense chocolatey flavor that is unreal.
Special shout out to Dutch process cocoa powder. It’s alkalized, meaning the natural acidic flavor has been washed away. Its flavor is pure, rich, and deeply chocolatey.
An ultra-enticing and shiny crinkle top
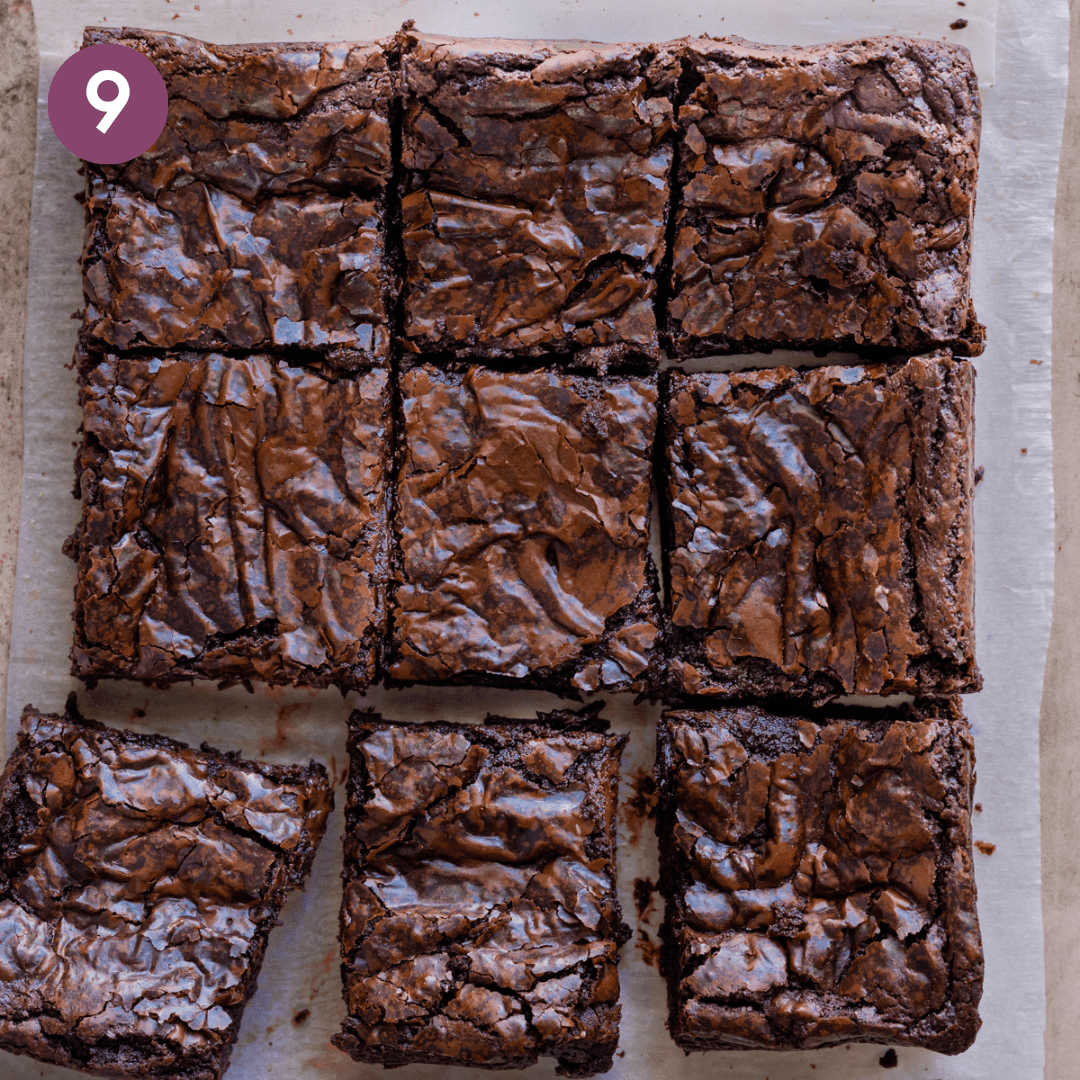
Once you get a glimpse of crinkle top brownies, you know you can’t hold back. The texture is delightful: wispy, delicate, ridged, and flaky. When paired with a fudgy interior, the contrast is too good to describe in words.
Unfortunately, this is almost never found in vegan brownies.
Typically, the secret to the flaky crinkle top on brownies comes from eggs. But I discovered you can achieve the same results by whipping aquafaba and sugar together.
I tested this method 11(!) times and ended up with a crinkle top every time. Can other vegan brownie recipes say the same? I don’t think so!
PS: These brownies even work gluten-free! Head to the FAQ section for tips!
Because you said so!
I don’t call these the “best vegan brownies” lightly. It’s proven by the more than 390 five-star reviews!
Here’s what readers are saying:
Jennifer says, “They are THE BEST EVER BROWNIES I have had in my entire life, vegan or not!!”
Jackie says, “Hands down BEST brownies I have ever eaten. No joke. I followed the recipe to the T and it couldn’t have been more perfect. I can’t believe these are vegan.”
Tamara says, “I cannot believe how fudgy, chewy, and delicious they are. Like a million other commenters on here, I never thought I’d find good brownies again after going vegan. They’re amazing and totally live up to the hype.”
Ingredient notes
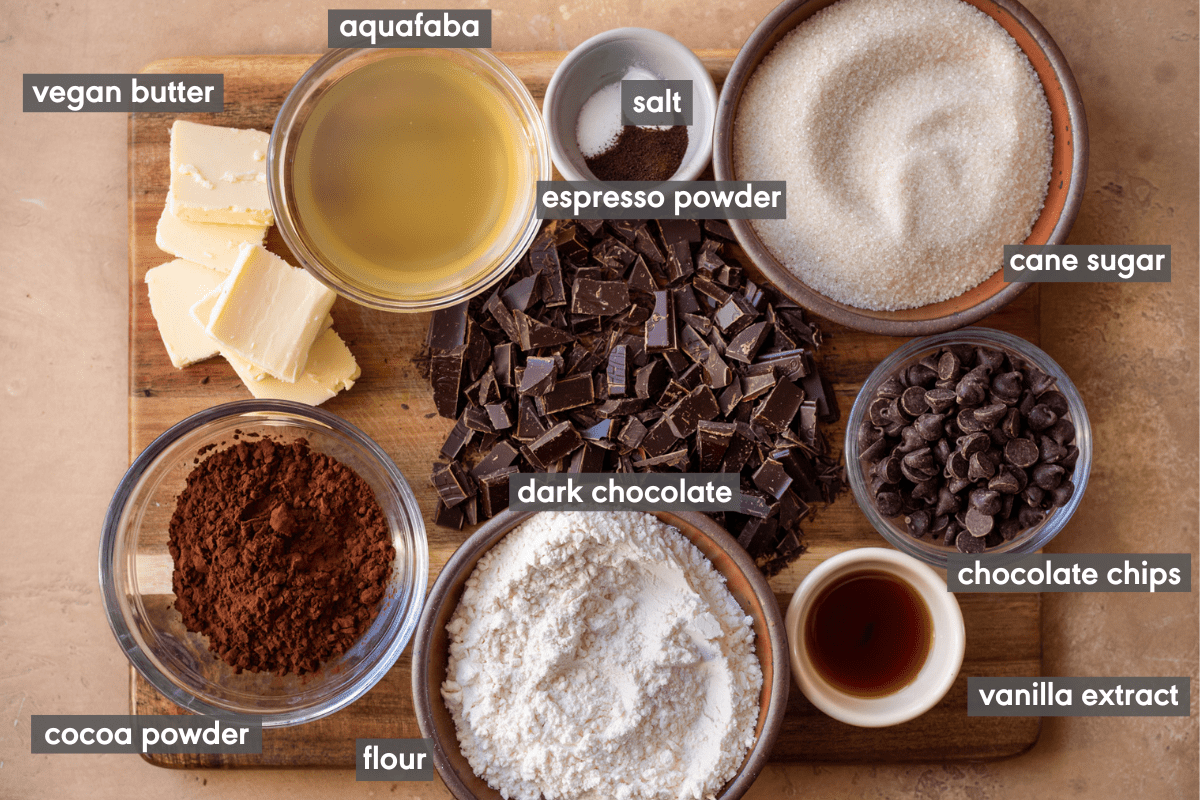
Aquafaba. The liquid from a can of chickpeas. After some trial and error, I discovered that you can get vegan brownies with a shiny, crinkle top by vigorously whipping aquafaba and sugar together for several minutes before adding it to your wet ingredients.
It’s an unconventional ingredient in a brownie recipe but it works amazingly well here. My fan favorite banana bread is another vegan baked good that uses aquafaba to great effect.
Substitute: We don’t recommend substituting this, as it’s a key ingredient in making these so special.
Cane sugar. I use a fair amount of cane sugar for the above reason and because it gives the brownies structure (often missing in crumbly vegan brownies).
If you’re worried about the brownies being too sweet, use a dark chocolate with a higher cocoa percentage. The natural bitter flavors will help balance the sweetness from the sugar.
Vegan butter. In our testing, vegan brownies made with just oil turned out oily and bland in flavor. Brownies benefit greatly from a rich, buttery taste, and vegan butter works great. We have had great results with Earth Balance buttery sticks.
Substitute: Some folks have asked if they can use margarine. We haven’t tested this, but keep in mind:
(1) If you’re strictly vegan, margarine in the U.S. often contains trace amounts of dairy.
(2) Vegan butter brands are usually formulated to mimic dairy in baking in a way that margarine isn’t. So if you have access to a product marketed as vegan butter, use that.
Dark chocolate. I like to buy a 65% to 75% dark chocolate bar and roughly chop it. The chocolate is melted with vegan butter to create a beautifully smooth chocolate sauce.
Tip: Don’t use semisweet chocolate, or the brownies will be too sweet.
Dutch process cocoa powder. You will get better results with Dutch processed cocoa powder vs. natural cocoa powder. The brownies have a purer, more intense chocolate flavor with a smoother taste.
Substitute: If you can’t find Dutch cocoa, natural cocoa powder still works. PS: For European folks, Dutch cocoa is just the standard cocoa available!
Espresso powder. Espresso + chocolate are a dream team. It deepens and intensifies the chocolate flavor without making the brownies taste like coffee.
Substitute: If you don’t have instant espresso powder, you can substitute with instant coffee powder (use slightly more, about 1 1/4 to 1 1/2 teaspoons).
Step-by-step instructions
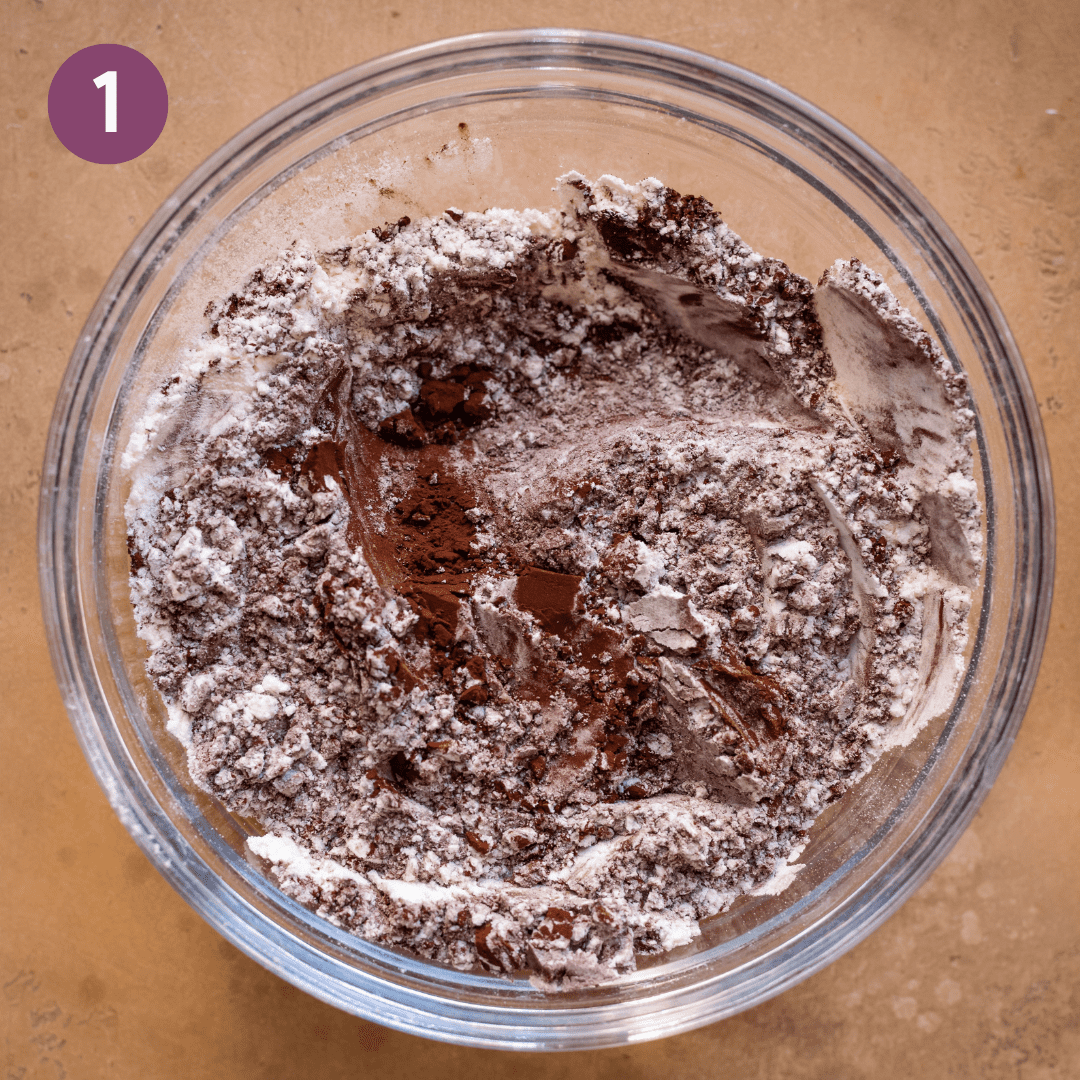
Sift the dry ingredients. Sift the flour and cocoa powder together in a medium bowl to prevent lumps.
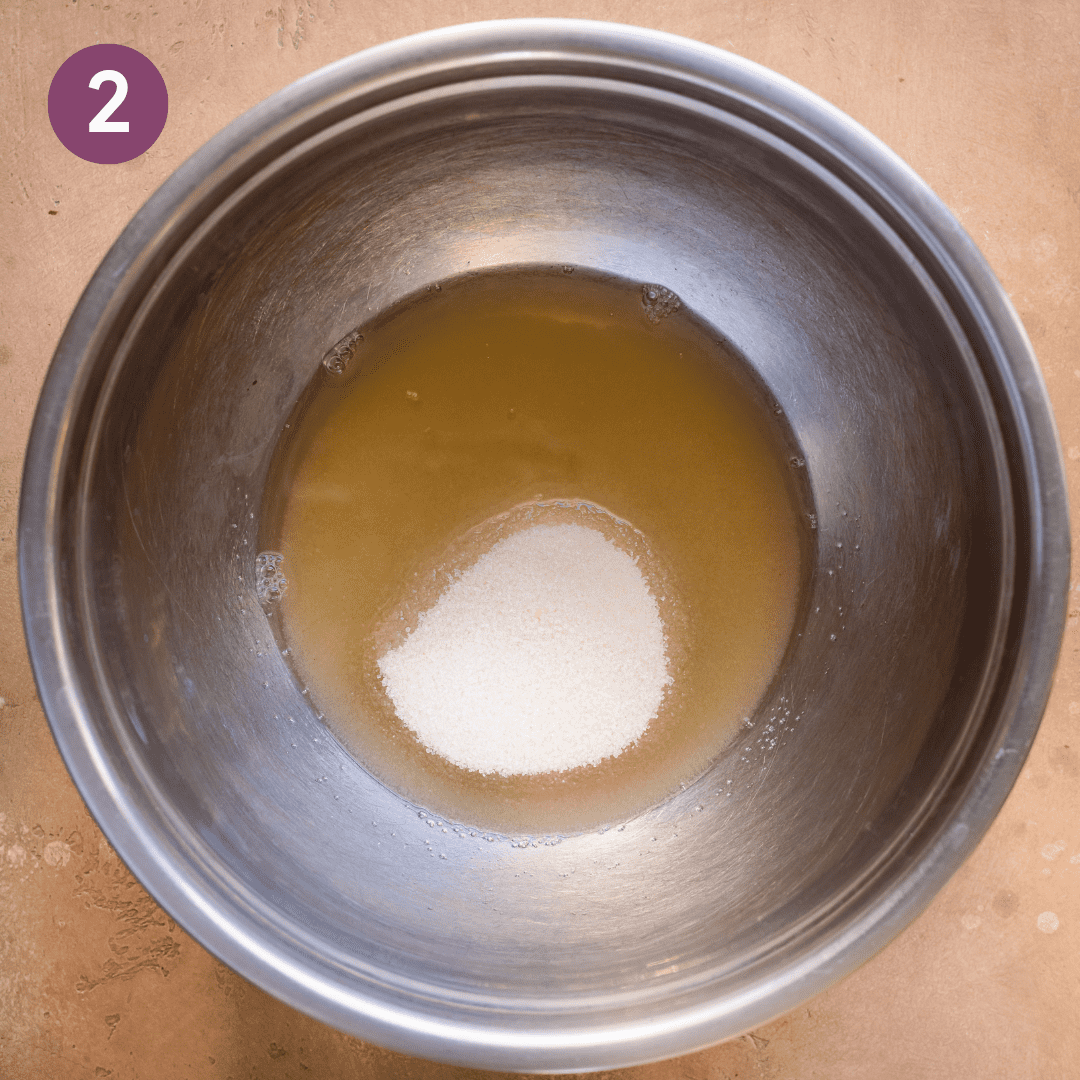
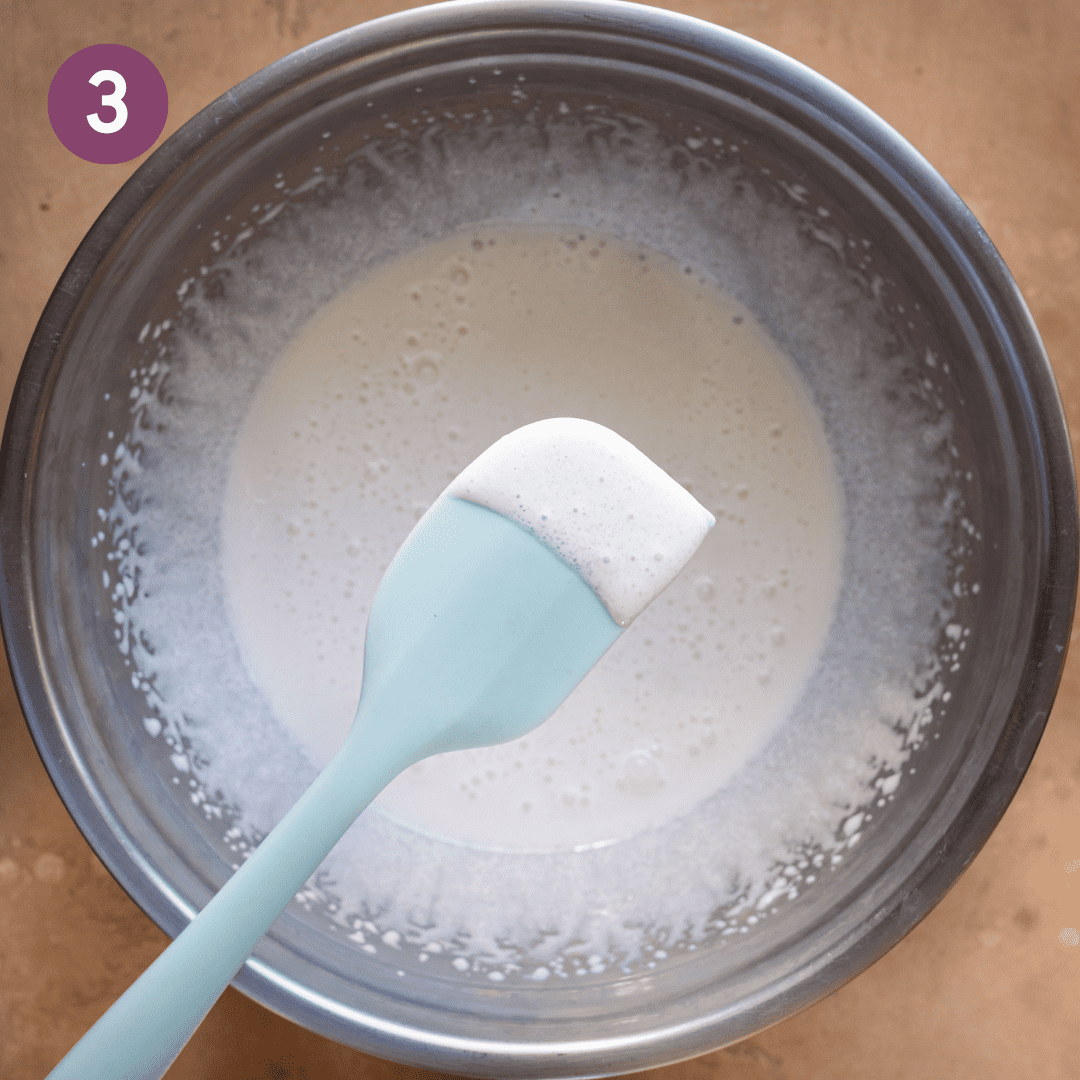
Mix the aquafaba and sugar. Add the aquafaba and sugar to a bowl. Use a handheld or standing mixer to beat the two together. You’ll know it’s done when the mixture looks thick, glossy, and has wavy ribbons.
Now you can fold the vanilla, salt, and espresso powder into the aquafaba mixture.
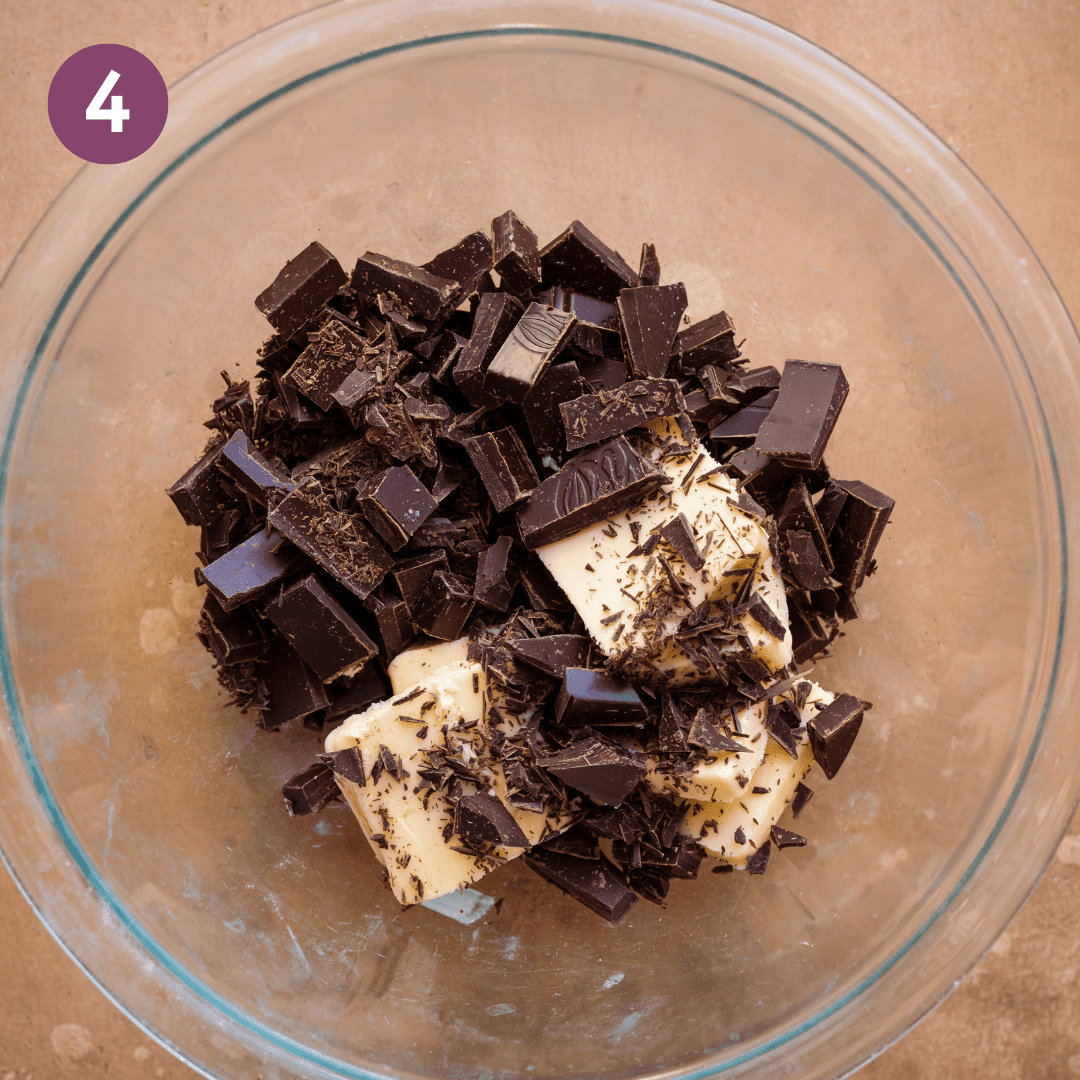
Melt the chocolate. Place a heatproof bowl on top of a saucepan filled with a few inches of water. Place the chopped chocolate and vegan butter in the bowl and heat the water until it’s at a rapid simmer. Stir until the chocolate has melted.
Or, melt the chocolate and butter in the microwave on high power in 30-second intervals, stirring after each round.
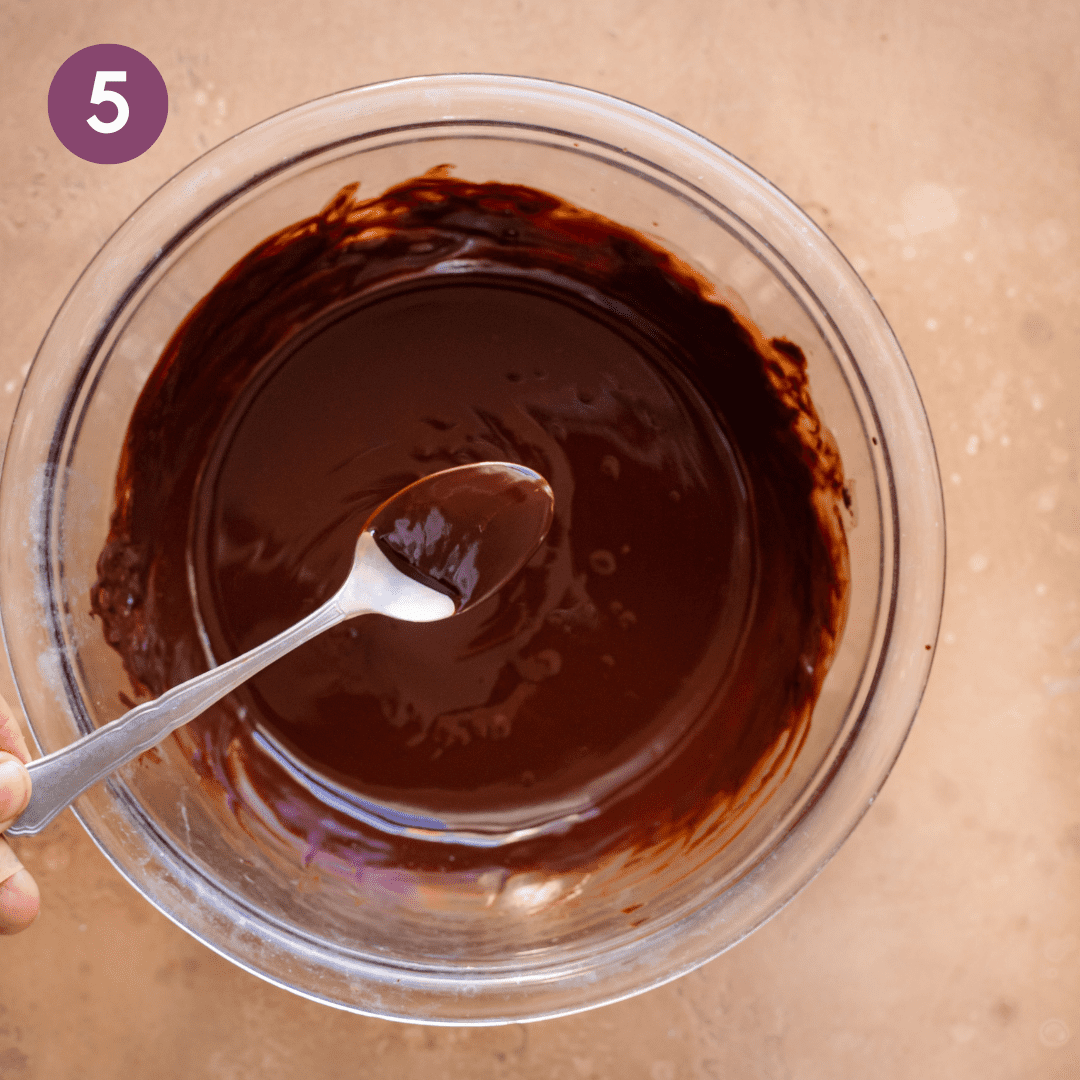
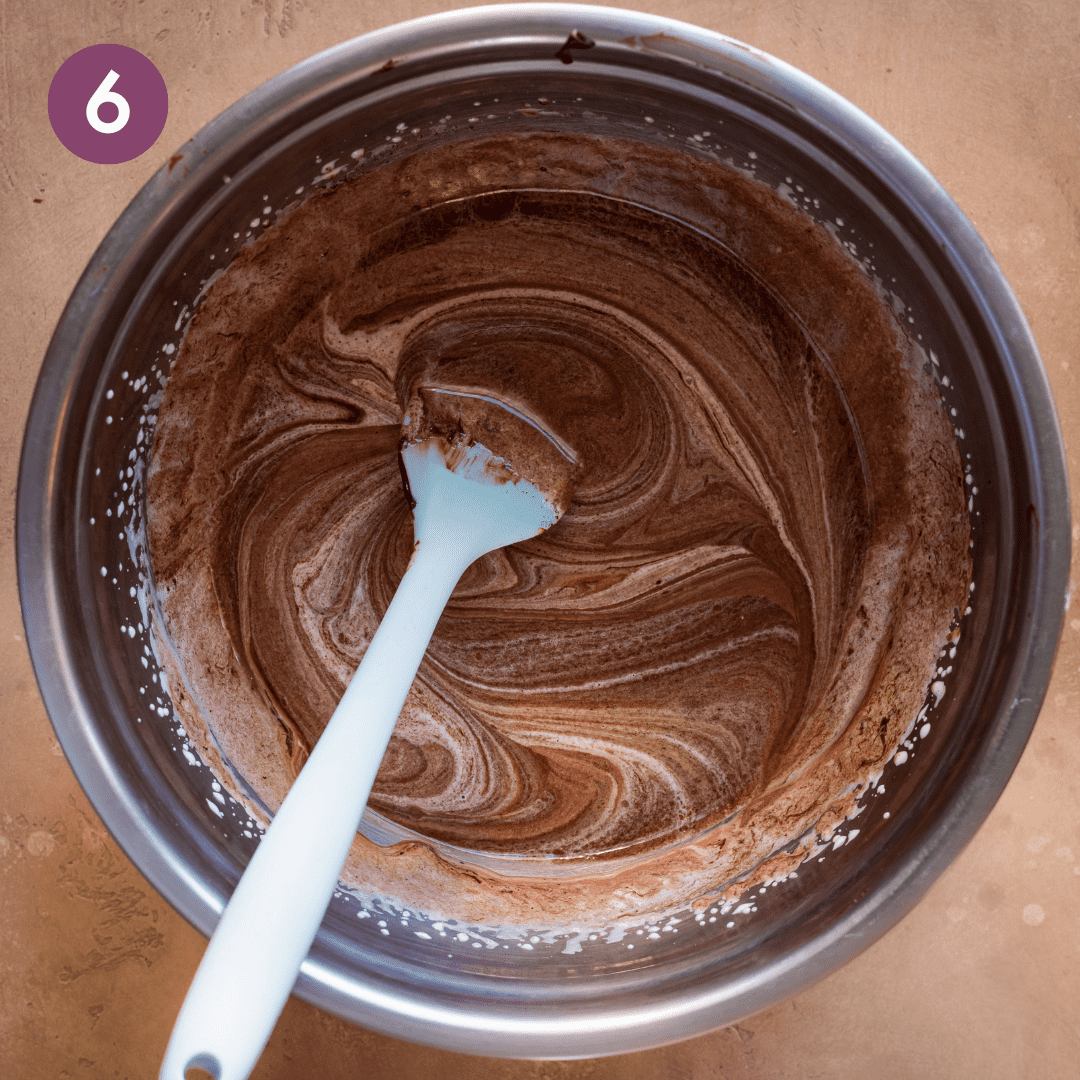
Fold the melted chocolate mixture into the aquafaba mixture until well combined.
Finish the batter. Gently stir the dry mixture into the wet ingredients until just combined and no dry flour remains. Fold in the chocolate chips.
Note: The batter will be quite thick, much more thick than a standard brownie batter.
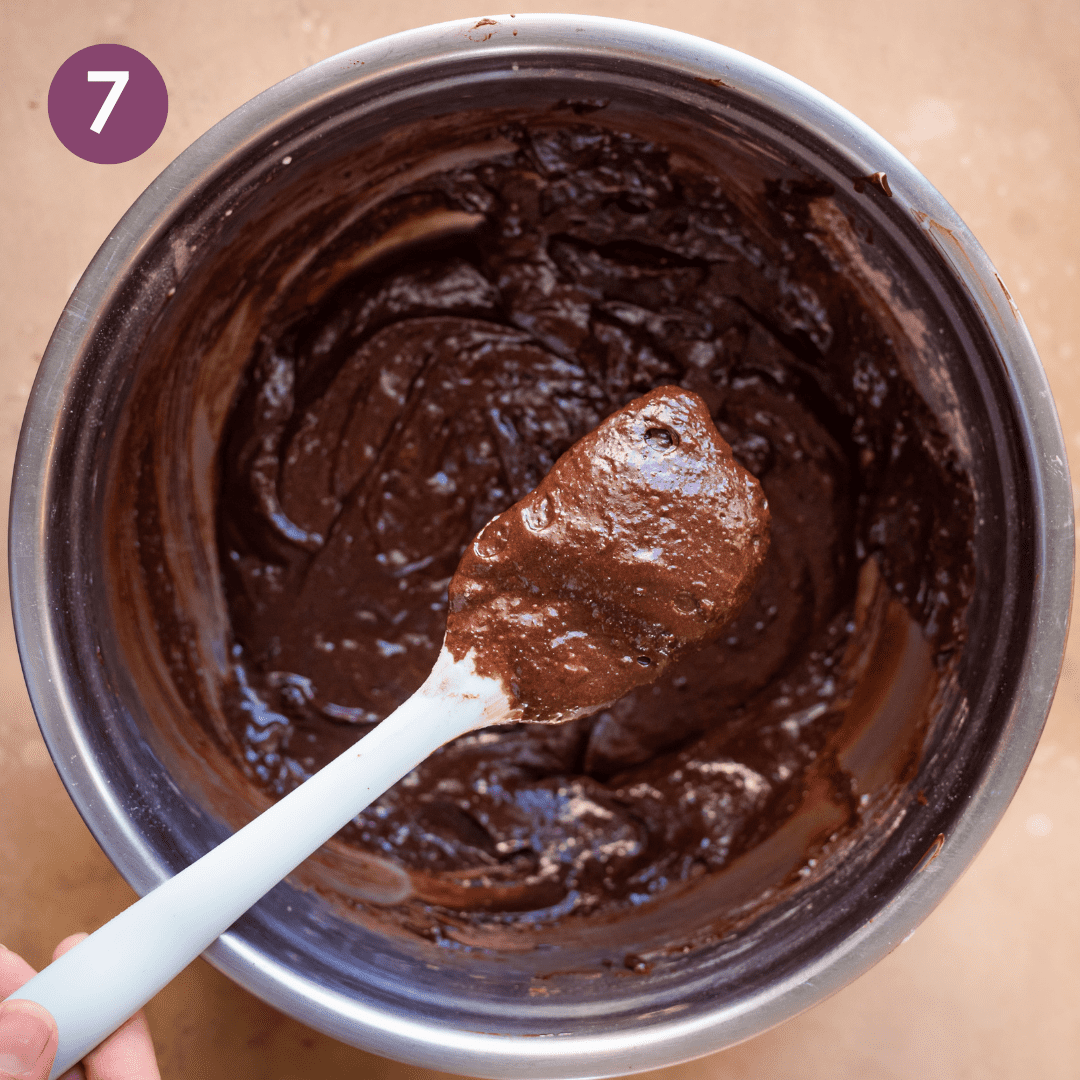
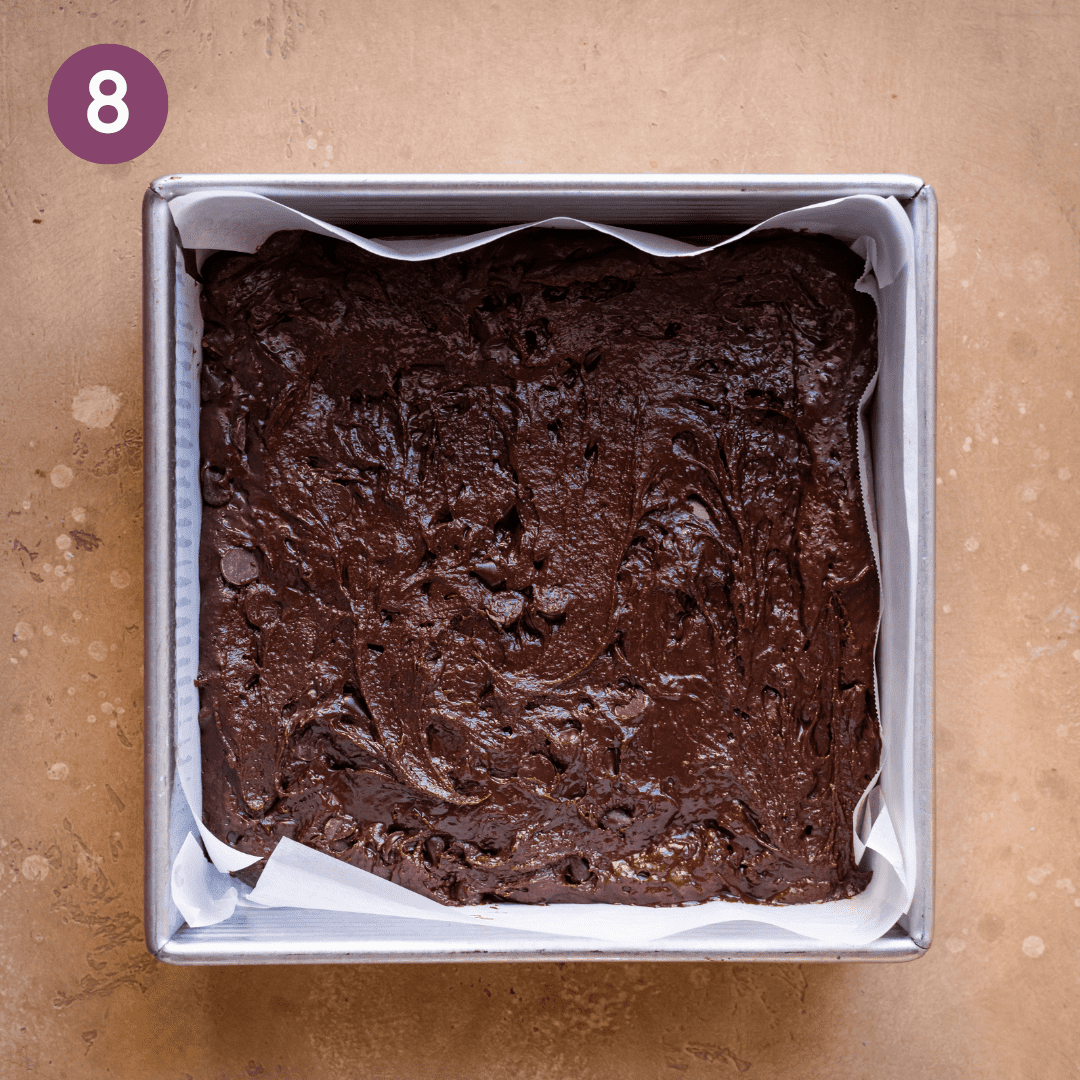
Transfer the batter into your lined 8×8-inch (20×20 cm) baking pan and smooth out the surface with a spatula.
Bake. Bake the brownies for 34 to 37 minutes until a toothpick inserted in the middle comes out with some moist crumbs.
Tip: If it comes out with runny batter, the brownies aren’t done yet. If the toothpick comes out clean, the brownies have baked a bit too long. Tips on how to avoid this are in the FAQs section.
Let them cool before slicing (seriously though). Transfer the pan to a wire rack and cool for 30 minutes, or longer. Once they’re completely cool, slice and enjoy!
Tips for the best vegan brownies
Better quality chocolate = better tasting brownies.
Try to use the best quality chocolate you can find and afford: (1) for cocoa powder, Dutch process cocoa; (2) for the solid chocolate, use a chocolate you enjoy snacking on. 70% dark chocolate is a great place to start because it isn’t too bitter but will still produce decadent results.
Serious Eats has an entire list of amazing dark chocolate brands for you to peruse. Otherwise, stroll through the grocery store or artisan market to see what other options you can find (most good dark chocolate brands don’t contain milk, but always read the label!).
Measure accurately.
I use a digital scale for all baking and highly recommend it for the most precise results (baking + precision are best friends).
Note: If you don’t have a digital scale, do not scoop the flour straight out of the bag or container. This always results in getting too much flour in your measuring cup, and too much flour = dry brownies.
Instead, use the spoon and level method. Spoon your flour out of the bag/jar into the measuring cup until almost full, then use a butter knife to level it off.
Overmixing = dry brownies.
Overmixing the dry and wet ingredients aerates the batter, resulting in dry or cakey brownies. Instead, fold everything together until they’re JUST combined and you no longer see dry streaks of flour.
Check your oven thermometer.
Home ovens can be all over the place when it comes to temperature, so if you have an oven thermometer, check that it’s accurate before baking.
Don’t slice the brownies too early.
They continue to cook after they come out of the oven, which is why it’s important to let them cool completely first. They’ll be a gooey mess if you slice into them too early.
Note: There are two ways to speed up the cooling process.
After resting in the pan for 20 minutes, (1) carefully transfer the pan to a large shallow pan filled with an inch or two of ice cold water; or (2) transfer the pan to the fridge for 20 to 30 minutes.
Frequently Asked Questions
The best way to tell is to stick a toothpick in the center of the batch. If it comes out with some moist crumbs, the brownies are done. If the batter is liquidy or runny, they need ~5 more minutes.
Is the toothpick completely clean? Unfortunately, that means they’ve been baked too long and will likely taste dry. Brownies continue to bake as they cool, so to avoid this, err on the side of underbaking and check the brownies 5 minutes before you think they’ll be done.
Yes!
We tested these brownies with ¾ cup (82g) oat flour and ¾ cup (100g) all-purpose 1:1 gluten-free flour, and baked for 37 to 39 minutes with lovely results. The brownies have a bit less structure, but after they are refrigerated, the texture is great.
Many readers have also had success doing a straight 1:1 swap with King Arthur, Bob’s Red Mill, and Cup4Cup Ancient Grains gluten-free flour blends, but we haven’t tried this ourselves.
Baking the brownies with less sugar makes us nervous because they might lose their wonderful texture.
Instead, try adding chocolate with a higher percentage of cacao to help balance the sweetness.
Or, scale down by just 25% of the sugar. You can read more about reducing sugar in baking from Food52 experts here.
First, use a large knife (I use an 8-inch chef’s knife). Slice the brownies in one fell swoop instead of dragging the knife back and forth. The dragging method leads to more crumbs and uneven slices.
Also, you can try dipping your knife in hot water and drying it off with a kitchen towel before slicing. Repeat this process between every slice. I find that this method in conjunction with cooling the brownies on top of an ice cold sheet pan (see the Tips section) yields the cleanest slices.
First, try to slice only as many brownies as you need (or want). This is the best way to keep them as moist as possible. The leftover block of brownies can be stored in an airtight container for 3 to 4 days at room temperature of 8 to 10 days in the fridge.
If you don’t have a container big enough to fit the unsliced brownies, slice and and store the pieces in an airtight container.
Yes, they freeze very well. Keep the sliced brownies separated with pieces of parchment paper in an airtight container.
Freeze for up to 3 months. Let them defrost at room temperature when it’s time to eat.
More Classic Desserts Veganized
Watch! How to make the best vegan brownies!

If you love these best-ever Vegan Brownies as much as we do, please be sure to leave a rating and review below 🙂 And as always, I love seeing your remakes on Instagram!
Introducing
Big Vegan Flavor
Techniques and 150 recipes to master vegan cooking.
The Absolute Best Vegan Brownies
Ingredients
- 1 ½ cups (180g) all-purpose flour
- 7 tablespoons (42g) Dutch process cocoa powder (see Note 2)
- 1/2 cup (120 mL) aquafaba (liquid from a can of chickpeas, see Note 1)
- 1 ½ cups (290g) organic cane sugar or pure cane sugar
- 6 ounces (170g) 65-75% dark chocolate, roughly chopped
- 8 tablespoons / 4 ounces (112g) vegan butter, cubed
- ¾ teaspoon fine sea salt
- 1 tablespoon pure vanilla extract
- 1 teaspoon espresso powder (see Note 3)
- 3 ounces (85g) dark or bittersweet chocolate chips, or finely chopped dark chocolate
Instructions
- Line an 8×8-inch (20×20 cm) square metal baking pan with parchment paper and ensure there is some overhang on the sides (this will make it easy to lift the brownies out of the pan). Preheat the oven to 350°F (175°C).
- Sift the flour and cocoa powder together in a medium bowl (sifting ensures there are no flour or cocoa lumps in the batter).
- Add the aquafaba and sugar to a large mixing bowl. Use an electric handheld mixer or a stand mixer on high speed and beat the mixture for 2 to 3 minutes until thickened, glossy, and wavy ribbons frequently appear in the bowl (see the YouTube video at 04:27 for the desired texture).
- Add in the vanilla, salt, and espresso powder, and fold with a silicone spatula until well combined (the espresso will continue dissolving into the mixture as it rests).
- Assemble a double boiler (see Note 4). Grab a heatproof bowl that can be nestled into a saucepan. Fill the saucepan up with a few inches of water—but not so much that the bottom of the bowl would touch the water. Heat the water on the stove and keep at a rapid simmer.
- Melt the chocolate and butter. Add the chopped dark chocolate and cubed vegan butter to the bowl on top of the saucepan. Melt gradually, turning down the heat if the water starts to boil, whisking occasionally until smooth and the chocolate is completely melted. Once the chocolate is completely melted, turn off the heat but keep the bowl on the saucepan for an additional 30 to 60 seconds to further warm through.
- Pour the warm butter-chocolate mixture over the aquafaba-sugar mixture and fold together with the silicone spatula.
- Add the flour-cocoa mixture to the wet ingredients and stir until just combined (stop mixing once the flour traces are gone). Fold in the chocolate chips with the spatula. Pour the batter into the lined baking pan and smooth out the surface with the spatula so the batter is in an even layer as possible (for even baking).
- Bake the brownies for 34 to 37 minutes (if your oven runs hot, start checking at ~30 minutes). Test for doneness: Insert a toothpick in the middle of the brownies—it should come out with some moist crumbs and/or a tiny bit of thick batter (the latter could be the melted chocolate chips). However, if the batter on the toothpick is liquidy or runny, the brownies need a few more minutes in the oven. TIP: To avoid overbaking and since every home oven varies, I err on the side of underbaking and check the brownies 5 minutes before I think they're going to be done.
- Transfer the brownies to a wire rack to cool for 30 minutes. Then carefully lift out of the pan using the parchment paper handles onto the wire rack. Cool for a further 20 to 30 minutes before slicing. Slice the brownies and enjoy!NOTE: The brownies will set up even more as they rest longer. If you accidentally underbaked them, you can refrigerate them and they'll firm up.
Video
Notes
- I’ve made these with cans of unsalted chickpeas and salted chickpeas, and they both come out great.
- I included the measurements in grams for the Dutch process cocoa powder brand I used (Valhrona), but the exact weights may vary slightly across brands.
- If you don’t have espresso powder, you can substitute with instant coffee powder (use slightly more, about 1 1/4 to 1 1/2 tsp). I like using this espresso powder or this espresso powder (also available at Target, Whole Foods, and Walmart).
- Don’t want to assemble a doubler boiler? Melt the butter and chocolate in the microwave on high powder in 30-second intervals, stirring after each round to prevent burning.
Nutrition
Nutrition information is automatically calculated, so should only be used as an approximation.
 Love this? Leave a rating below!








I’m not in the habit of leaving reviews of recipes, but I’ll make an exception for this one. I’m a long time baker and I was skeptical of the use of aquafaba in replacement of eggs and the use of vegan butter. I was convinced this would end up a waste of perfectly good Swiss chocolate.
I was WRONG!
These brownies are insanely good and I’ve had multiple people say they might be the best brownies they’ve ever had! People, the science is sound. Do not be put off by the unusual ingredient and be happy to put that can of chickpeas to extra work. 5/5, 10/10, 100/100
Your review made our day, Mary! Thank you for taking the time to share your thoughts and for trying out the recipe.
Fantastic brownies. I love to make these to impress non-vegan friends and family 🙂
That’s what we like to hear, Camille! Thanks for taking the time to leave a review!
these are the best brownies ever. I did use whole grain flour, but followed the recipe exactly besides that. i had to pull them out of the oven way early because of the flour drying them out, but they still turned out amazingly. honestly I’d just like to say thank you to RPL for always posting the best recipes. I’ve made dozens between her website and cook books and I have never ever had a recipe fail me. it’s a big win for veganism having such a talented creator on our side.
Thanks for your stellar review, Karah! And for being such a supporter of RPL. We truly appreciate it!
Incredible! I’ve made this recipe countless times any whoever tries them always says they’re the best brownies ever, and can’t believe that they’re vegan.
Your review made our day, Mieke! Thank you for taking the time to share your thoughts and for trying out the recipe.
Made this for my coworkers and it was a hit ! it’s so rich, they were surprised it was vegan. I had to explain that veganism is not really about health, which led to an interesting discussion 🙂
I also want to say THANK YOU for putting accurate metric measurements in your recipes, it makes it so much more enjoyable to follow !
We’re so happy everyone loved the brownies, Lucile 🙂 And we’re glad you found the metric measurements helpful. We find them completely necessary, at least in baking recipes!
Hi, I really loved this recipe! I only would’ve wished for a bit more precise instructions or photos on how to tell when the brownies are ready. I kept mine in the oven for far too long cause the dough seemed so raw even when I took them out of the oven. Gladly they were still delicious!
I would love to make similar fudgy and chewy brownies with white chocolate. Do you have any tips on what changes to make to the recipe for them to succeed? Thanks!
The name says it all! They are moist chewy fudgy and chocolatey………just as you want a brownie to be!! And the best part they are vegan!!
Hi, I really loved this recipe! I only would’ve wished for a bit more precise instructions or photos on how to tell when the brownies are ready. I kept mine in the oven for far too long cause the dough seemed so raw even when I took them out of the oven. Gladly they were still delicious!
I would love to make similar fudgy and chewy brownies with white chocolate. Do you have any tips on what changes to make to the recipe for them to succeed? Thanks!
Hi there, so glad you loved them, and that they still turned out delicious!
The cue to trust is the toothpick, not the look of the center. Poke it into the middle and you want a few moist crumbs, maybe a little melted chocolate clinging to it. If it’s wet and runny, give it about five more minutes. If it comes out totally clean, that’s the sign they’ve gone a touch too long. Since ovens vary, it helps to start checking around five minutes before the timer is up.
It might also help to see it. Nisha shows what the brownies should look like during this process this part of the video.
As for a white chocolate version, what a fun idea, though baking is pretty sensitive to a swap like this one. White chocolate behaves very differently from dark. It has no cocoa solids, just cocoa butter and sugar, so subbing it straight into this recipe likely wouldn’t set up the same fudgy, chewy way, and it would come out quite sweet without the dark chocolate and cocoa to balance it. A true white chocolate bar is really more of a blondie, which is built differently from the ground up. If you want to stay close to these brownies, one possibility is to keep the recipe as written and fold white chocolate chunks into the batter, so you get creamy white pockets without changing the structure.
Hope that helps, and happy baking!
Kaitlin
Thank you for your lovely comment, Pamin! It makes us happy to know that you enjoyed the recipe.
Really good instructions and tips, found these brownies very easy to make and they are delicious. Followed the recipe exactly and they came out looking exactly as the photo.
That’s exactly what we love to hear, Jo! Thanks for the review 🙂
Do not hesitate to use this recipe. This is a good brownie recipe. Be mindful of differences between European vs US vegan butter. I used European Rama vegan butter (specifically for baking goods), lindt chocolate (80% dark) and also used regular 60% percent dark chocolate. Initially when melting the butter and chocolate together, its exactly like Nora stated, in some cases, the oil seperates and is not smooth. After I used an emersion blender to get it super smooth. Everything went well. The batter flows thick and smoothly. After baking you get a fudgy brownie with minimal rise. As long as you follow the fat: flour: sugar ratios, you should be fine. P.S if it’s tough to dissolve the sugar and aquafaba, try heating the aquafaba. I used the recipe in 2x volume and decided to use a mix of aquafaba and boiling hot water (1:1 ratio) the sugar melts in well with no grains and you get a super glossy top. A really good recipe, as a novice baker I would recommend. Will definitely try again.
Did you double the recipe ? How was the result using larger pan ? Baking time ?
Thanks for sharing your experience, R! It’s great to hear the recipe was a success.
I apologize for not having made it yet. I need to purchase the ingredients. I was inquiring about the ingredients.
I’m thrilled to share that I finally made the best brownie I’ve ever tasted! Nisha, I apologize for asking you about the ingredients. After reading all the notes and general tips, I figured out which ones you used. Unfortunately, those specific ingredients aren’t available to me. I bought all my ingredients at my local organic supermarket. I was pleasantly surprised to find such a simple vegan dark chocolate option. The brownie turned out a bit firm, but it was still delicious. Next time, I’ll bake it for a shorter time. Thanks again for your wonderful recipes!
Thanks for sharing your experience, Elizabeth! We’re delighted you enjoyed the brownies 🙂
Hi Nisha, could you please share the brand of dark chocolate, Dutch process cocoa powder, and espresso powder we should buy to make this delicious brownie?
These look great! Do you think the liquid from home cooked garbanzos would work as well?
Thanks, Ann! That should work, but you’ll need to simmer the aquafaba in a saucepan for quite a while to thicken it up, as canned chickpea aquafaba is more viscous and thick than homemade chickpea cooking liquid. The consistency of canned aquafaba is pretty close to what egg whites look like.
Do you have recommendations for making it gluten free? I know some recipes say to substitute GF flour but unless you make some other subtle changes it usually doesn’t turn out the same (e.g. using more liquid or less flour, adding xanthan gum or baking soda etc.).
thank you
Hi Sheila, yes the brownies can be made GF! You can find the answer to your question in the FAQ section, but I will paste it here for your convenience:
“We tested these brownies with ¾ cup (82g) oat flour and ¾ cup (100g) all-purpose 1:1 gluten-free flour, and baked for 37 to 39 minutes with lovely results. The brownies have a bit less structure, but after they are refrigerated, the texture is great.
Many readers have also had success doing a straight 1:1 swap with King Arthur, Bob’s Red Mill, and Cup4Cup Ancient Grains gluten-free flour blends, but we haven’t tried this ourselves. “
Can you use dates as the sweetener instead of the sugar?
Hi Elm, this is designed to be a classic brownie recipe and the sugar, when whipped with the aquafaba, plays a key role in the texture and in achieving the shiny crinkly top. We haven’t tried this with dates so I can’t recommend it. Some users have used half the sugar and have had good results. Or, you can try coconut sugar (again, we have not tried that but I think it would work better than dates).
Yummy!
Thanks for the lovely feedback, Karen!
Hi! Thanks for sharing. I don’t see a baking temp in the recipe. Can you share that? Thanks again.
Hi JC, the temperature can be found at the end of step 1 of the instructions: “Preheat the oven to 350°F (176°C).”
Enjoy the brownies! 🙂
thanks so much. I don’t know how I missed that. lol
Amazing recipe! They came out great and were so easy to make. Will definitely be making these again
We appreciate your feedback and support, Tina. Thank you for leaving a review!
Can you make this ahead of time and freeze?
Hi Clémence, you can find the answer to your question in the FAQ section, but I will paste it here for your convenience!:
“Yes, they freeze very well. Keep the sliced brownies separated with pieces of parchment paper in an airtight container.
Freeze for up to 3 months. Let them defrost at room temperature when it’s time to eat.”
Enjoy!
thanks! I typically read through the recipe and the notes, and I didn’t go through the article. I appreciate you pointing me in that direction.
No problem! 🙂
I’ve made this recipe many times! Foolproof and delicious!!
Sid, thank you for your thoughtful review! We’re so happy to hear that you are a fan of the brownies.
Amazing outcome. Thank you!
Thanks for the lovely feedback, Fanni!
The brownies are good, they taste like normal brownies in a good way. But for me they were a bit oily- like oil coating my entire hand when eating them (3 hours after they came out of oven). While I enjoyed these, I wouldn’t make them again and would just choose an easier vegan brownie recipe. I made one using olive oil last year and it was just as tasty without the oily finish.
Hi Lisa, I’m so glad you enjoyed the flavor of the brownies, but I’m sorry to hear they left you with such an oily finish! That definitely shouldn’t happen.
Since you mentioned they felt greasy even 3 hours later, it sounds like the emulsion may have broken during the process. Here are the three most likely culprits:
1. Temperature of the Chocolate/Butter: If the melted mixture was too hot when added to the other ingredients, it can cause the fat to separate rather than incorporate, leading to that oily residue.
2. Over-mixing: Over-mixing the batter can sometimes ‘weaken’ the structure, causing the oil to leak out during baking.
3. Oven Temp: If the oven was running a bit low, the brownies may not have set quickly enough to ‘trap’ the fats inside the crumb.
We totally understand wanting a reliable, easy go-to recipe, but if you ever feel like giving these another shot, letting the melted base cool a bit longer usually does the trick! Thanks so much for the honest feedback.
Thank you, I appreciate your reply with the tips!!!!
You’re welcome! 🙂