

Thanks to #bakingscience, over two dozen tests, a careful blend of ingredients, and a little baking magic, we’ve arrived at the perfect Vegan Chocolate Chip Cookies.
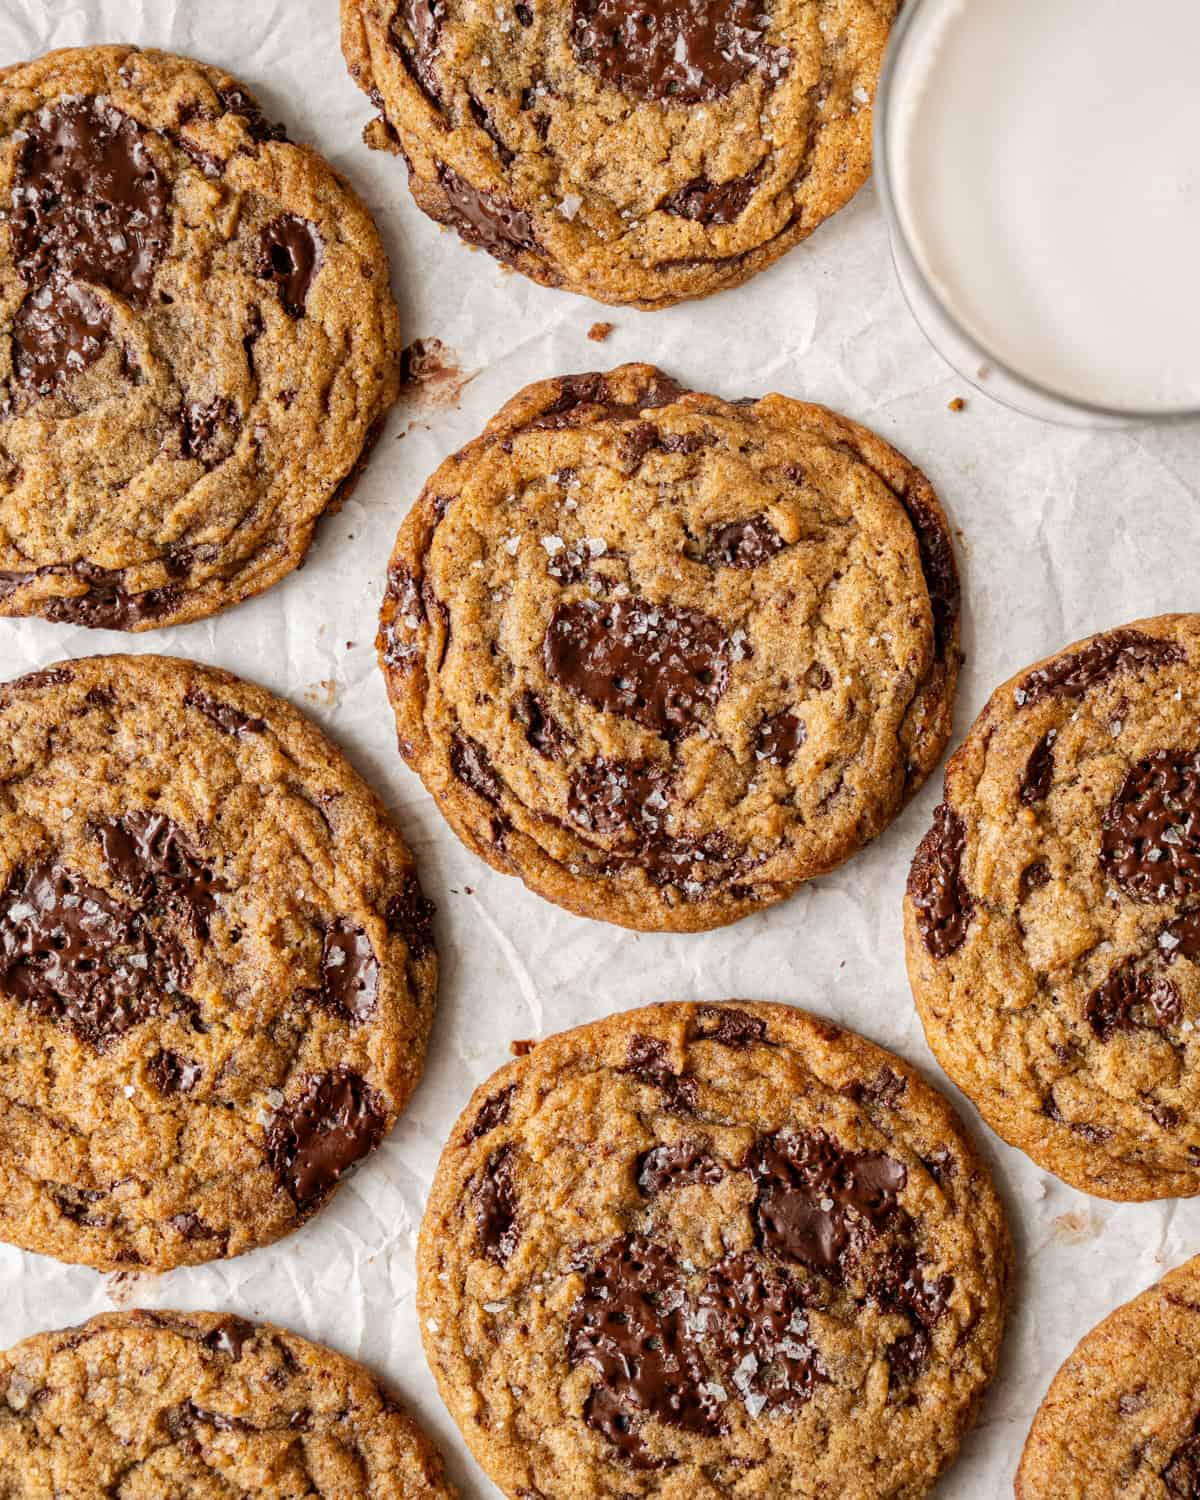
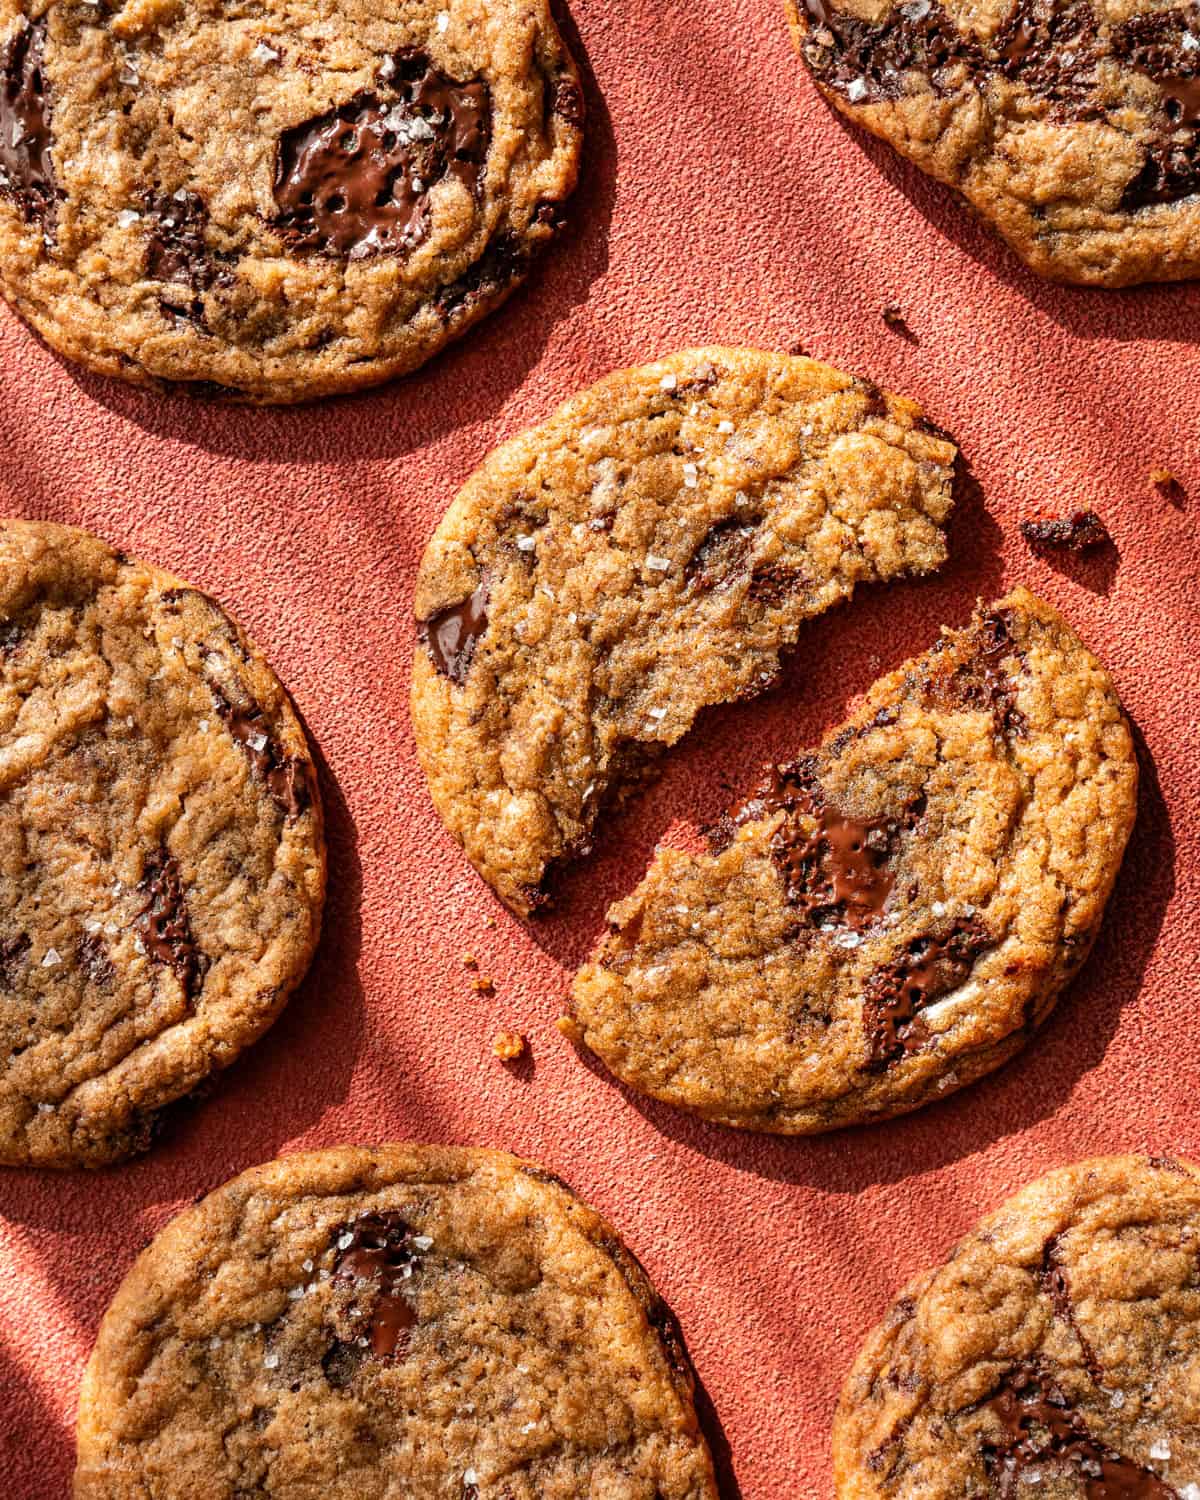
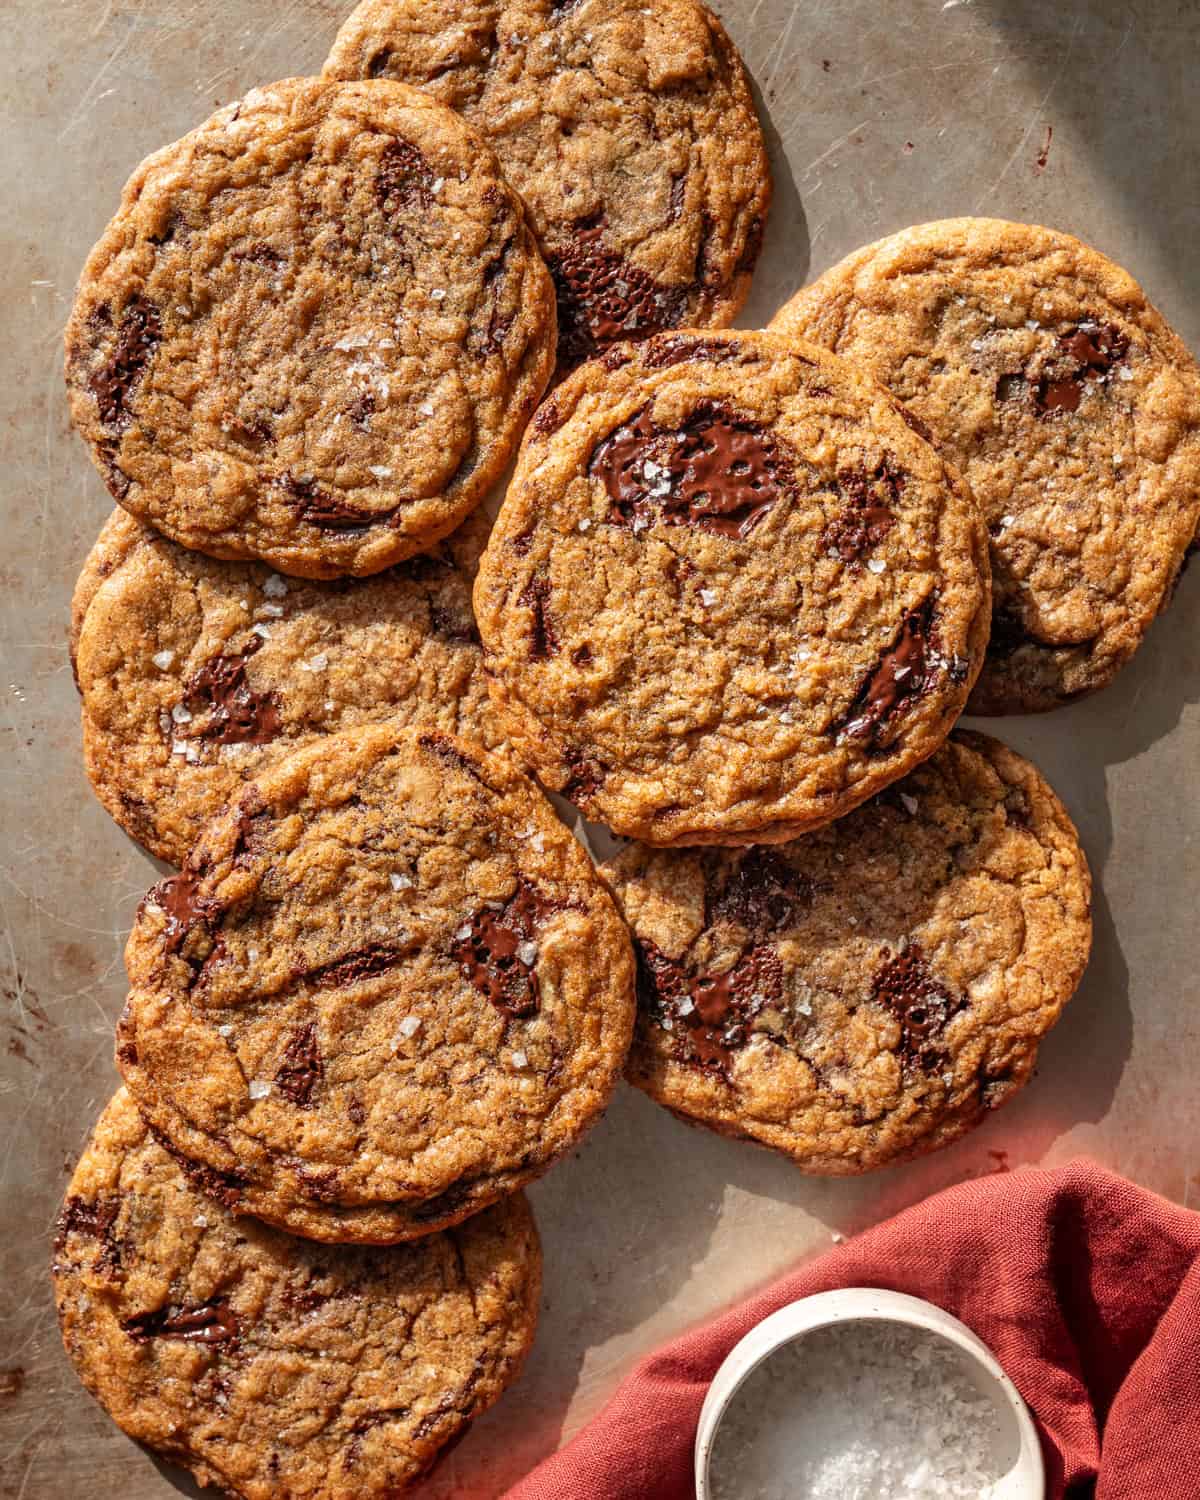
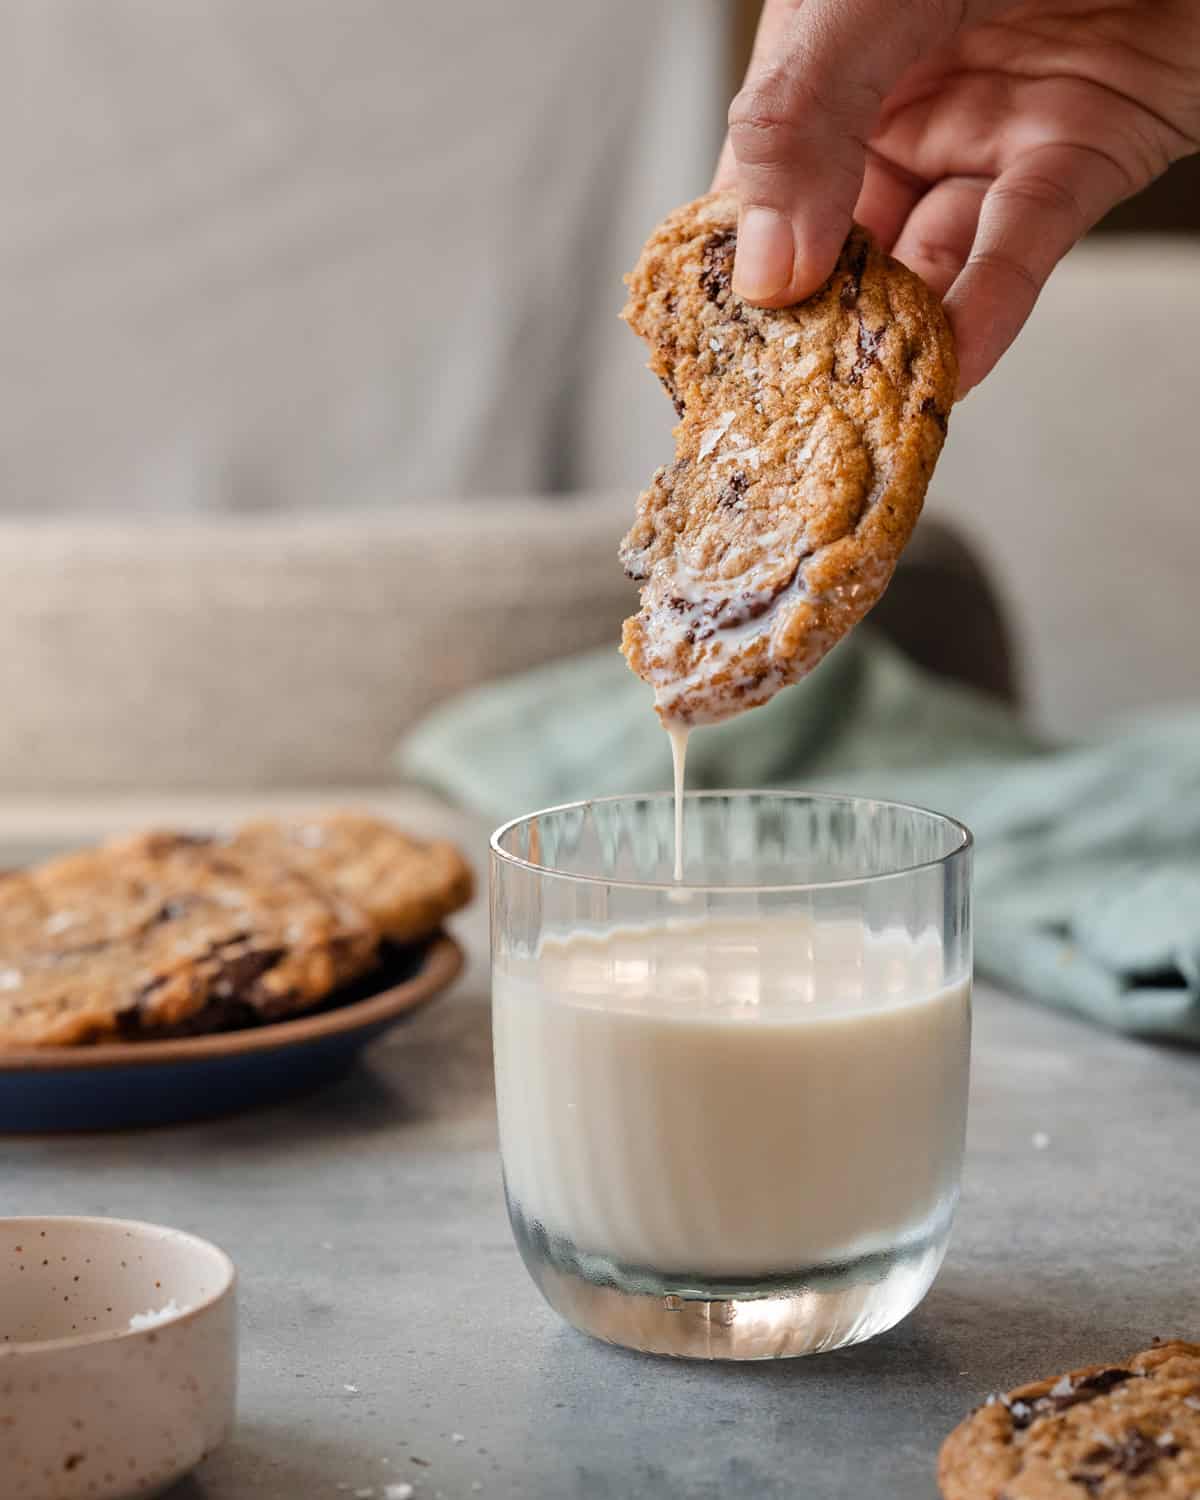
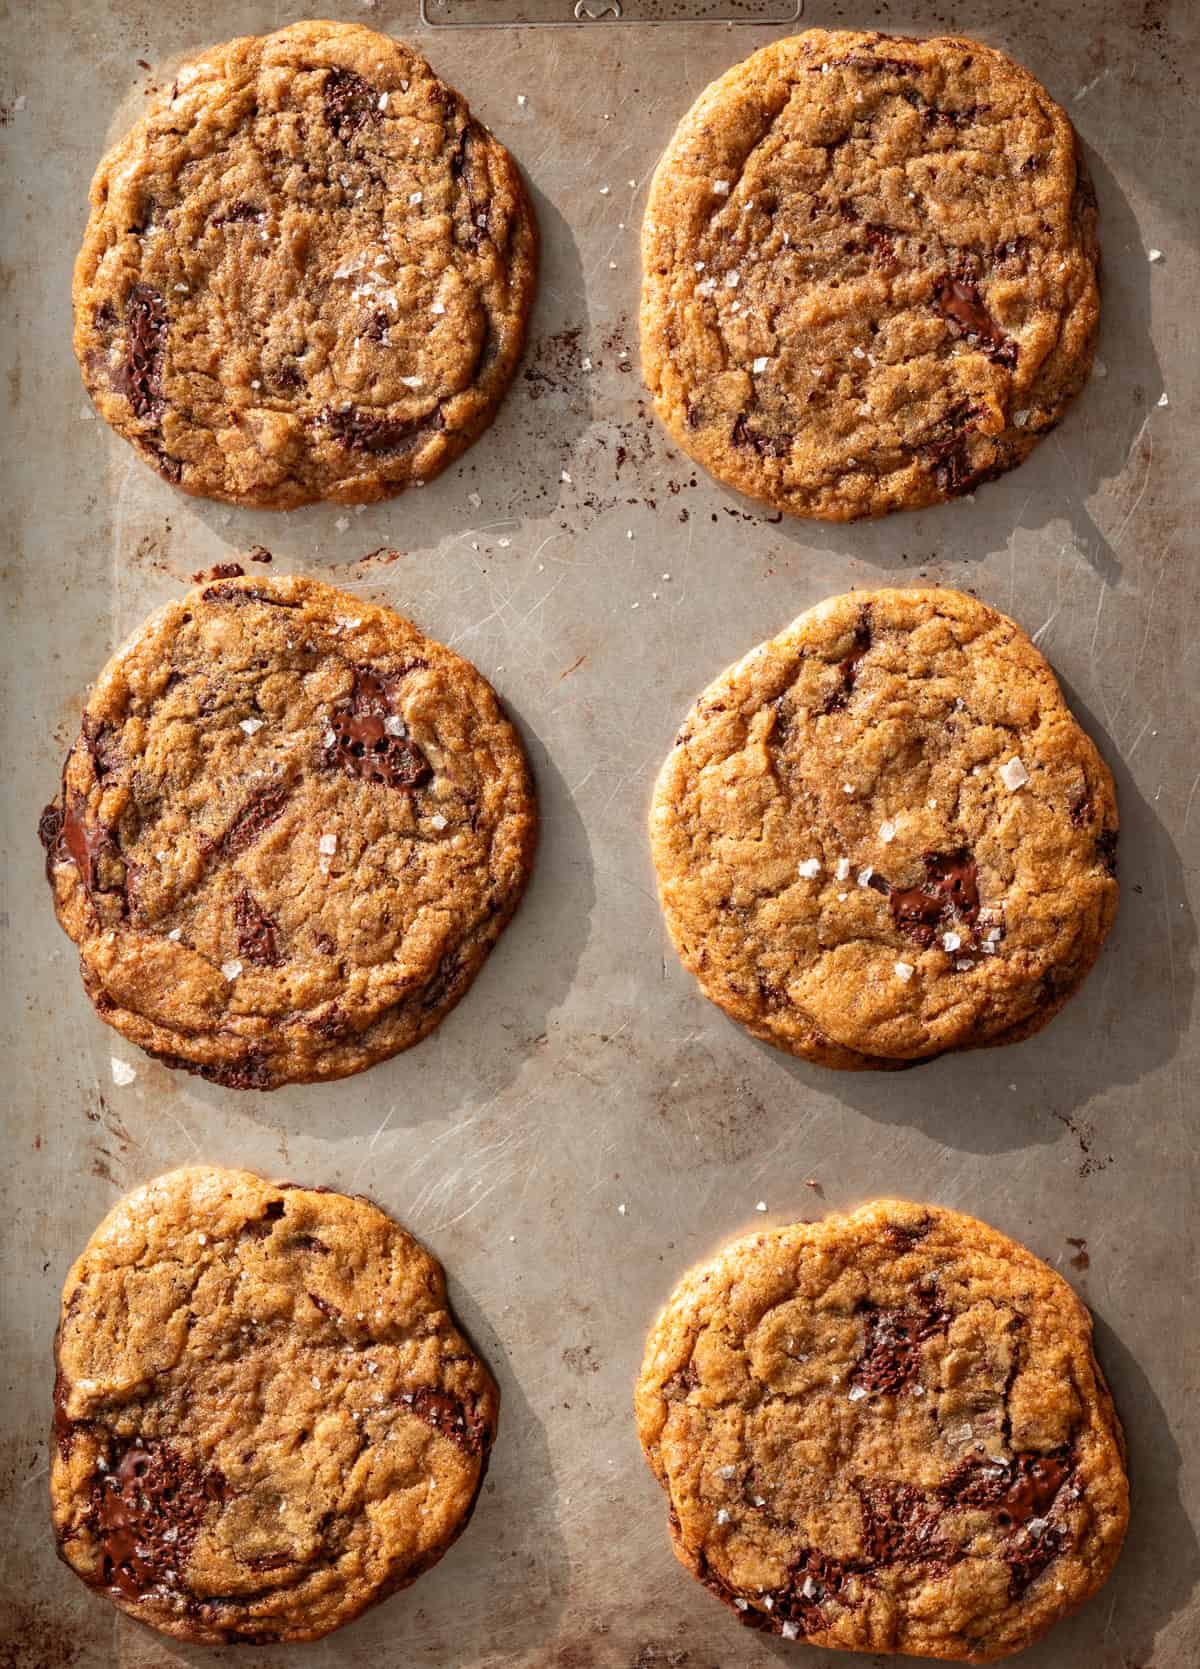
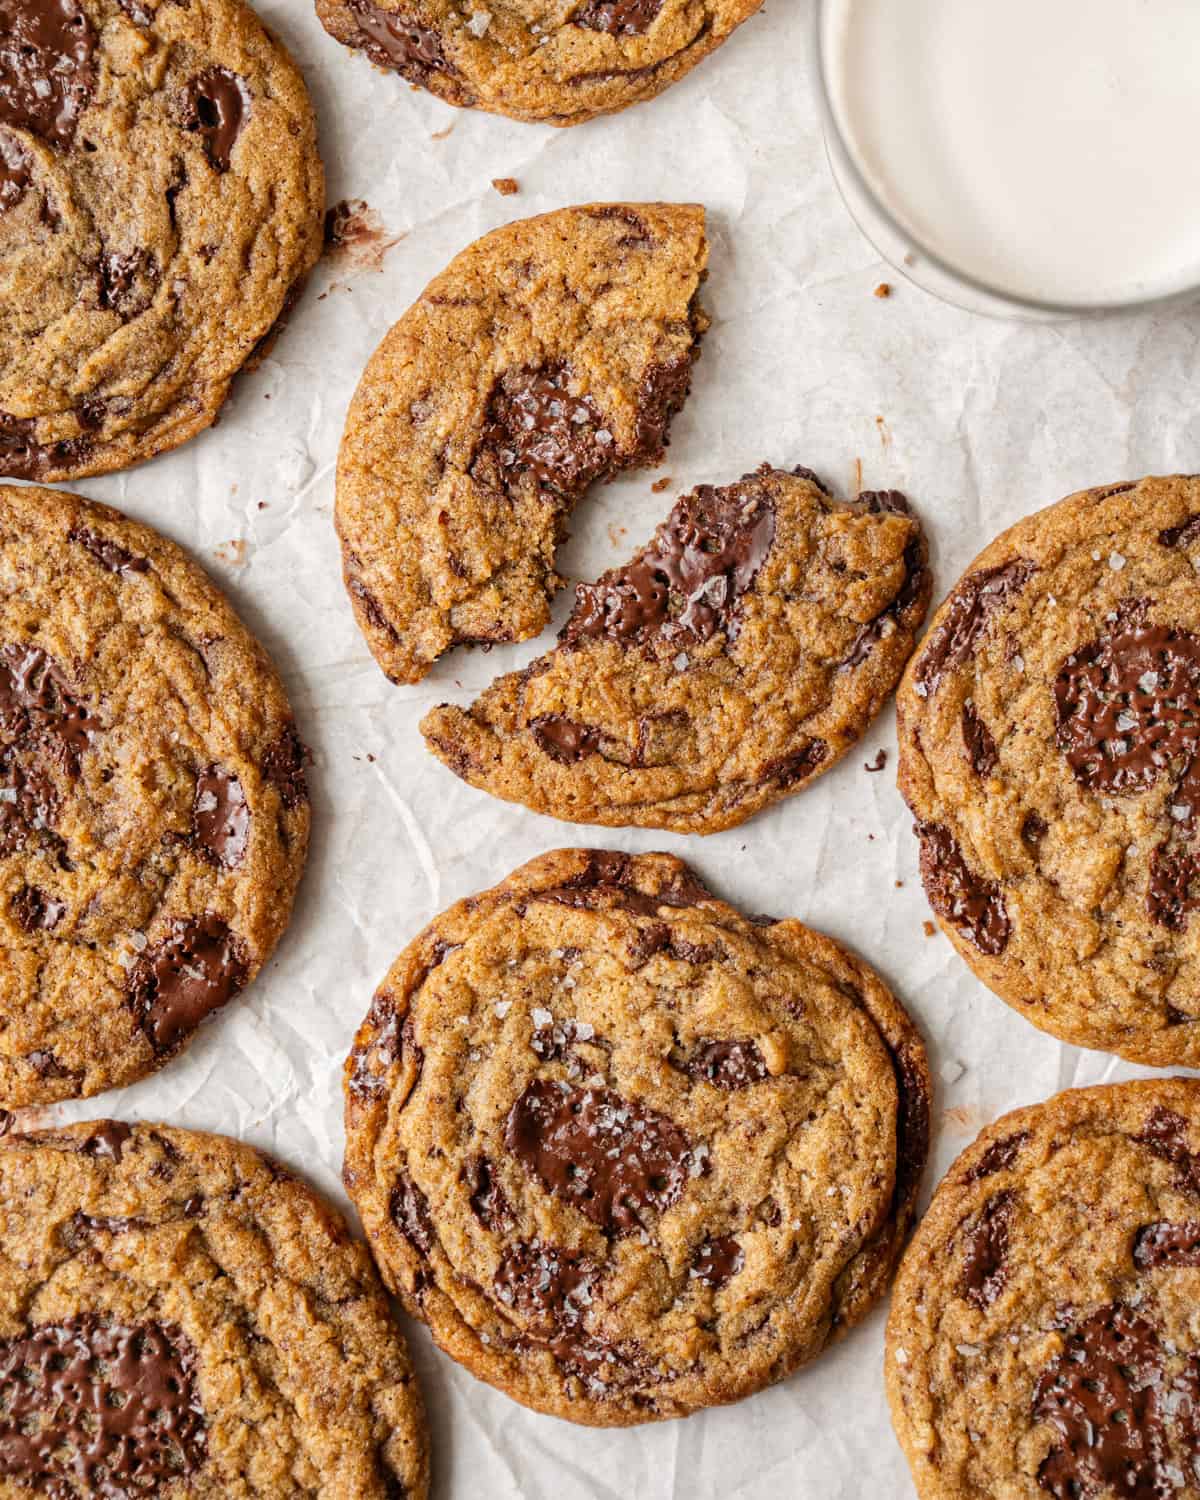
Every bite is textural heaven, with soft and gooey middles, crisp edges, and a serious chewiness throughout.
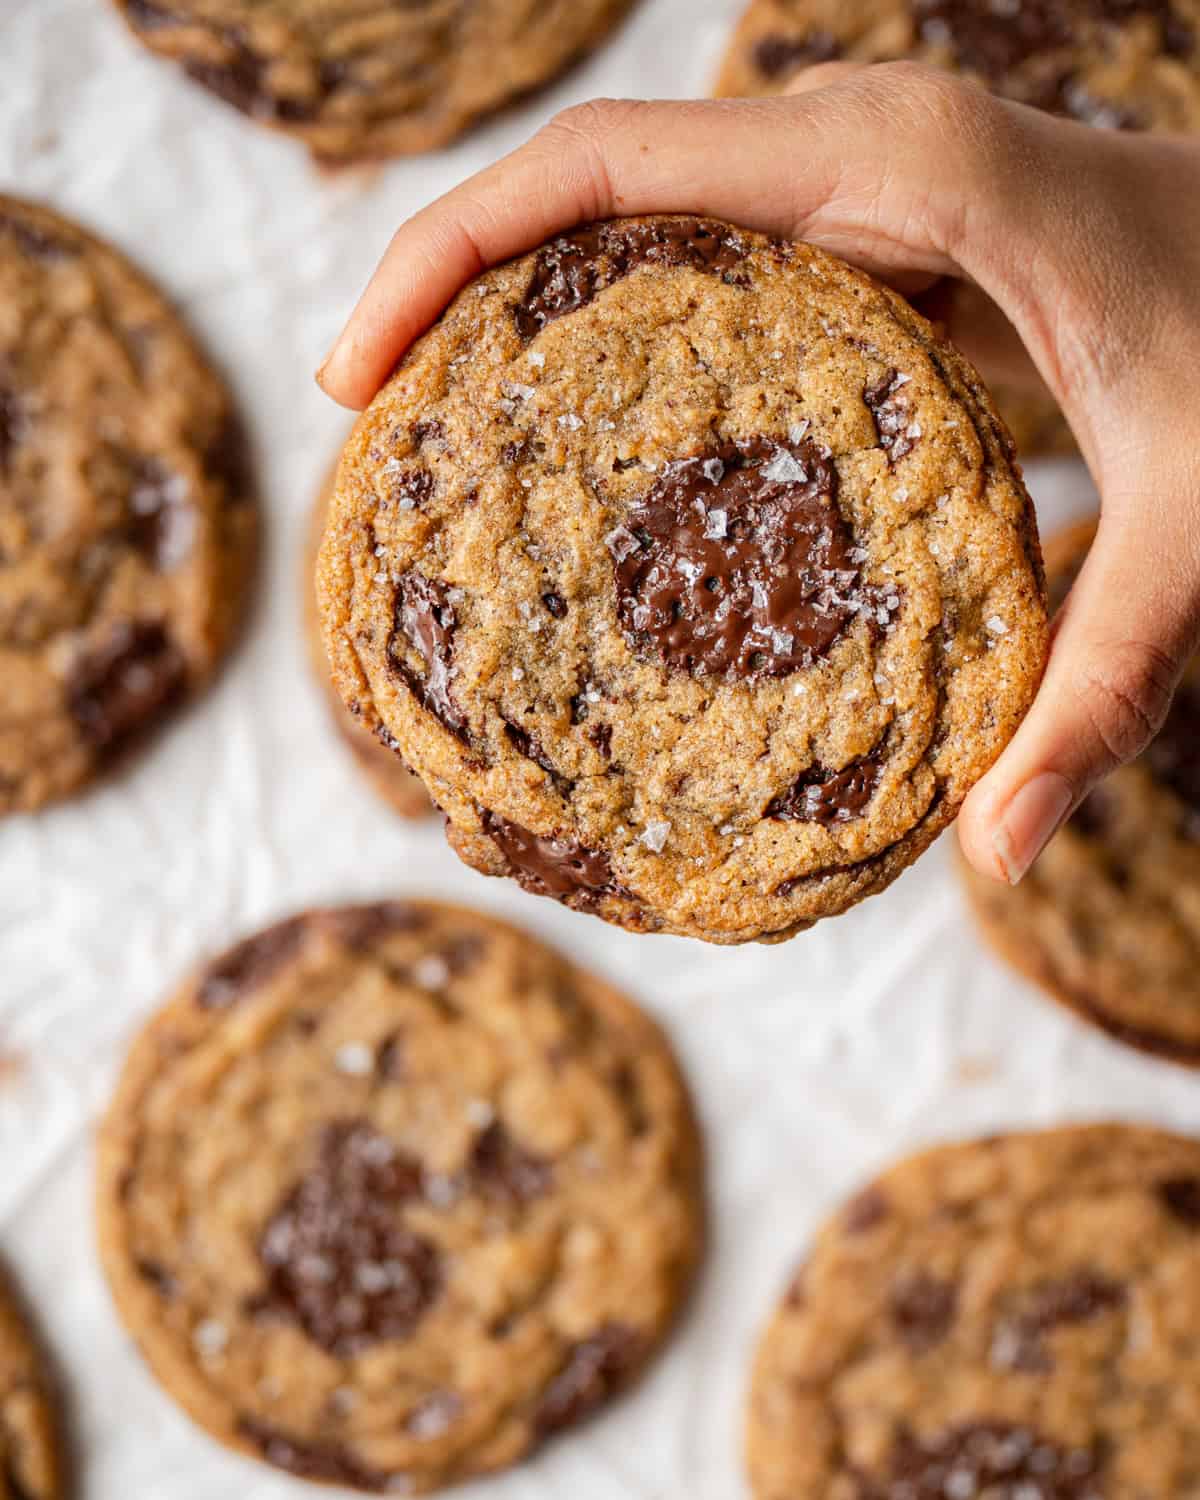
And their flavor? These cookies are rich and buttery, with notes of caramel interspersed with melty pools of dark chocolate and flaky sea salt.
I can’t think of anything better. It’s truly my ultimate chocolate chip cookie! And they can even be made gluten-free, YAY!
Table of Contents:
1. Why this recipe works
2. Ingredient notes
3. Step-by-step instructions
4. Tips for making this recipe
5. Frequently Asked Questions
6. Recipe card with notes
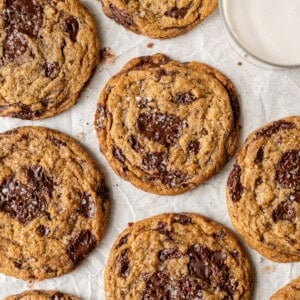
Watch: How to Make Amazing Vegan Chocolate Chip Cookies

With over 135K views on YouTube, these chocolate chip cookies are a huge hit with my audience. I hope you love them just as much!
Baking Science = The Perfect Cookie
Cookie Chemistry at Its Finest
No shortage of research and testing went into this vegan chocolate chip ccookie recipe. I spent days if not weeks reading about cookie science from the experts and playing around with ratios of all kinds: sugar to butter, flour to baking soda, butter to (vegan) eggs, you name it.
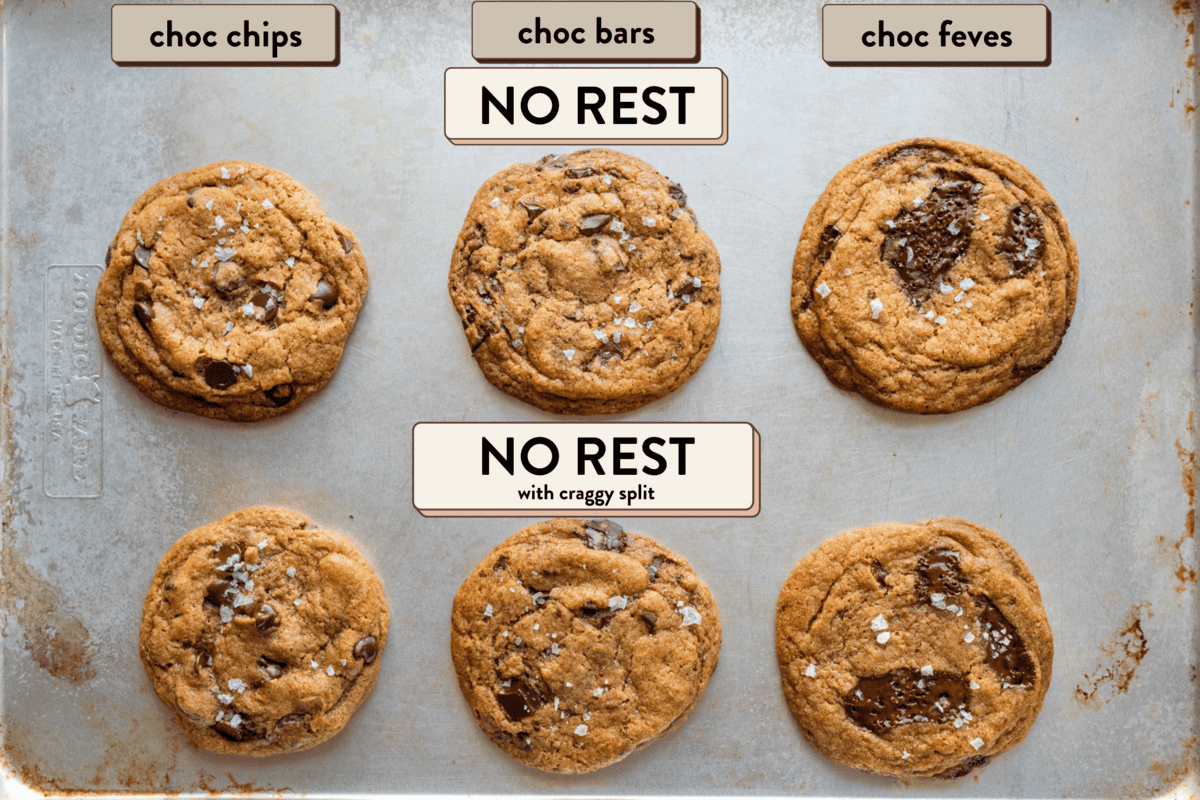
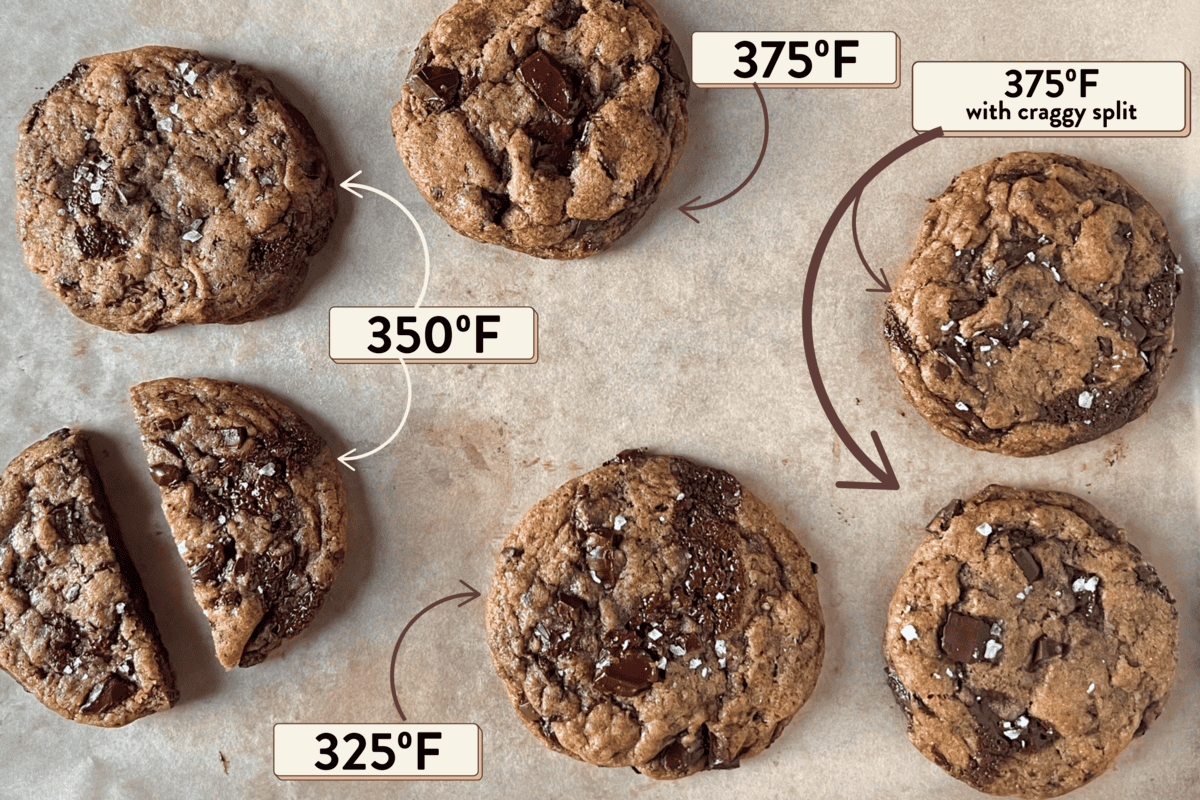
Armed with research, my recipe tester Callie and I tested every practical variable: chocolate chips vs. chopped chocolate vs. chocolate feves, browned butter vs. creamed butter, brown sugar vs. white sugar, the ideal time to rest cookie dough before baking, various oven temperatures, gluten-free alternatives, and more than I can list.
All in all, we baked nearly 300 cookies to develop our perfect grown-up chocolate chip cookie.
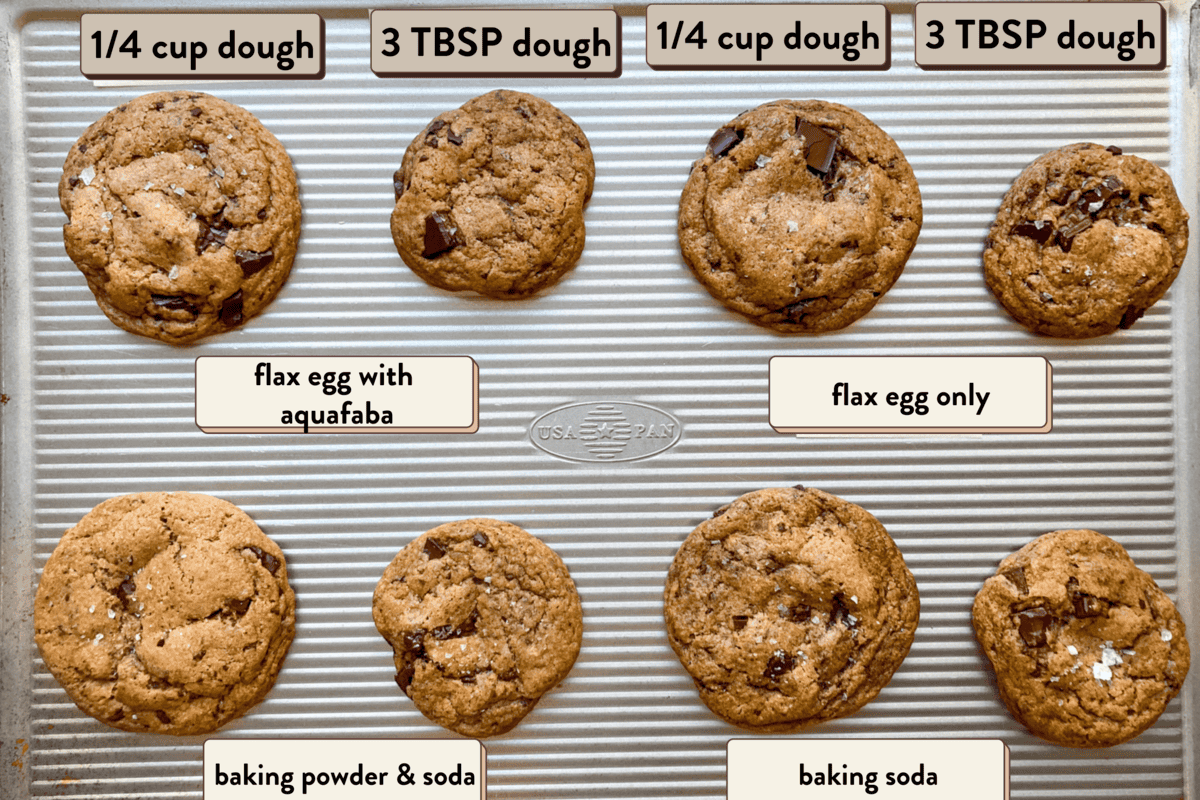
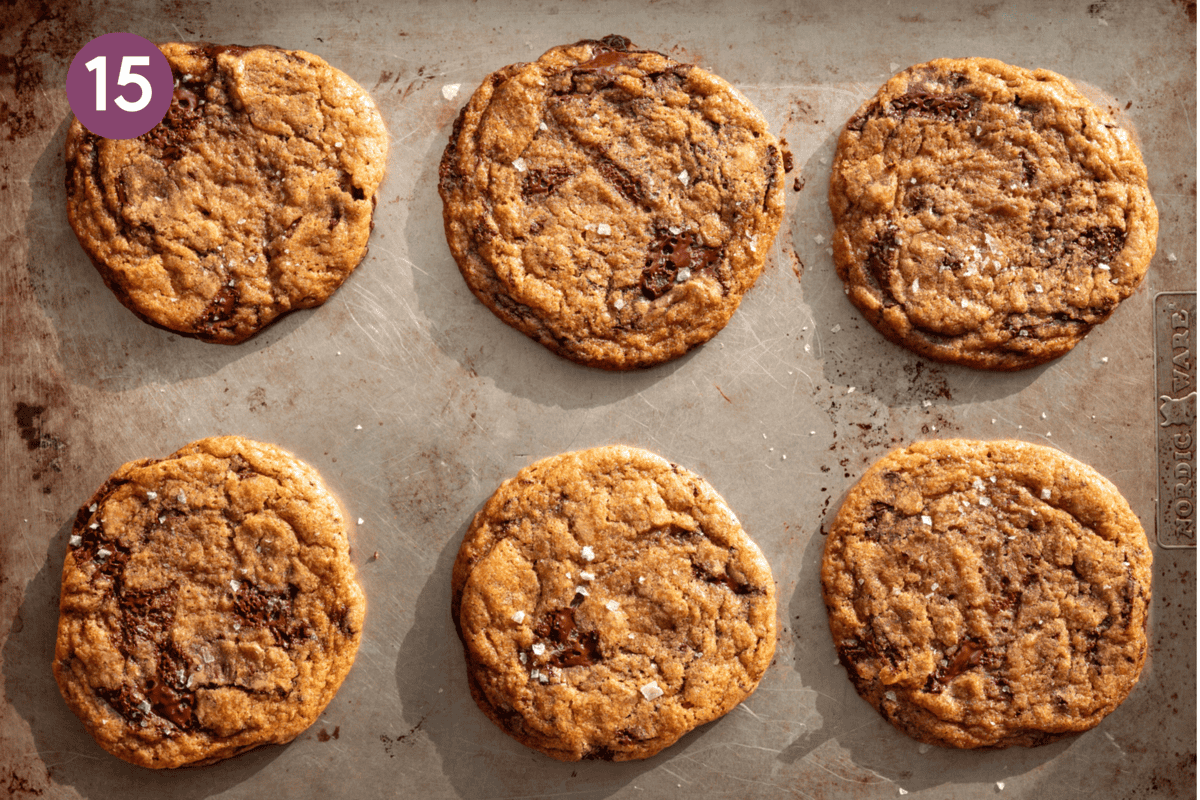
Here’s just a very small sampling of some of the variables we tested.
All the good textures!
We all have different preferences when it comes to cookie texture. Some like it softer, others chewier, while some prefer dense gooey and others crispy.
To me, the perfect cookie has all of those traits.
And after lots of trial and error, I’m proud to report that these cookies have a soft and almost gooey middle (but not too soft where it’s like you’re eating cake), lovely crispy edges (but not too crispy where it’s like a cracker), and a wonderful chewiness throughout (the kind you can really sink your teeth into).
Rich and buttery, just like cookies should be
These are as addictive as classic chocolate chip cookies but with more pizazz and depth of flavor, making them extra special.
They’re infused with vegan browned butter, which lends nutty caramel notes. And dark brown sugar, with its nearly double molasses content, amps up these notes, adding a rich, caramel-esque flavor.
We also quickly realized that regular chocolate chips weren’t going to cut it in these grown-up cookies. We needed big, melty pools of chocolate, which you can achieve by roughly chopping up a (dark) chocolate bar.
A sprinkle of flaky sea salt adds the perfect finishing touch, lending an addictive balance of sweet, salty, and chocolatey flavors.
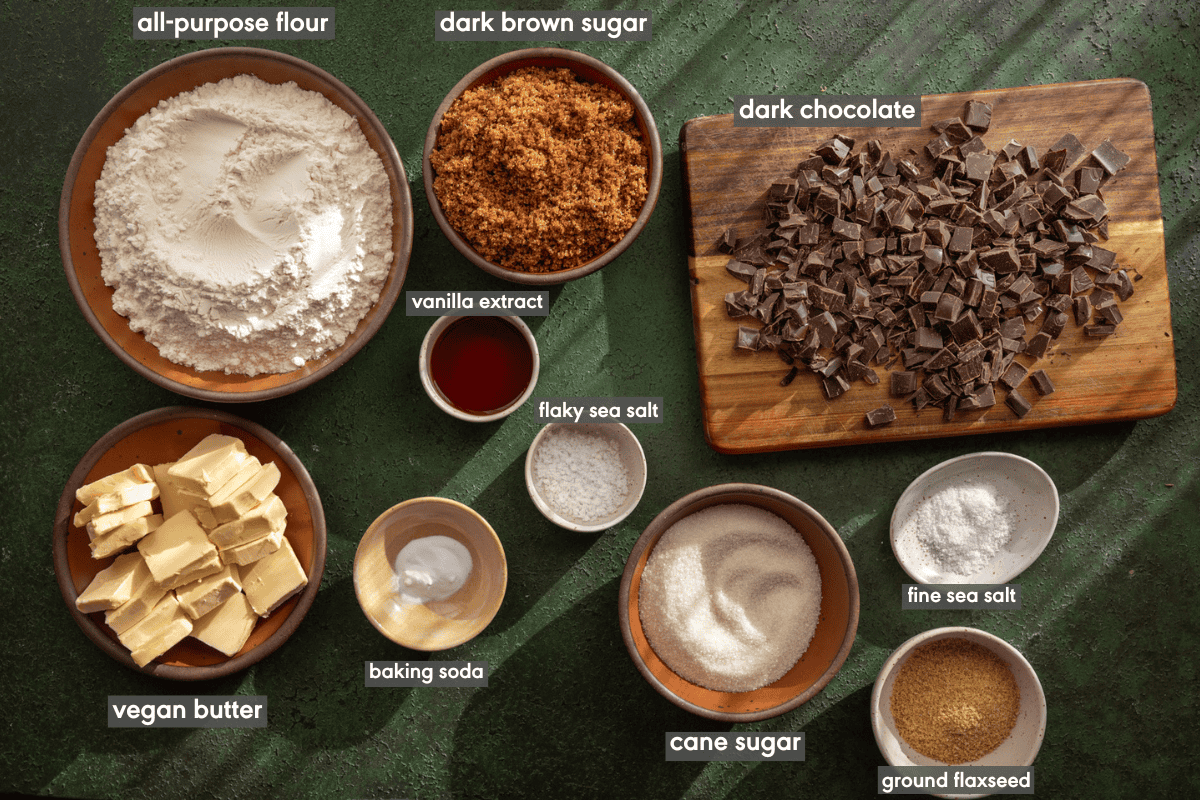
Ingredient notes
Melted (browned) vegan butter
You’ll rarely find a chocolate chip cookie recipe without butter…and a lot of it. Most cookie recipes either use creamed & softened butter or melted butter…or a variation of melted butter: browned butter.
In our tests, browned butter was the clear winner.
Melting butter, as opposed to creaming it, produces a more pronounced chewy texture. Taking the melting a step further to browning adds a more mature, nutty, and caramelized flavor.
We recommend butter sticks, not in a tub (the sticks are formulated to mimic dairy-based butter better). If your butter is unsalted, use a bit of extra salt, a heaping ¾ teaspoon instead of ½ teaspoon.
Tips for browning vegan butter
Vegan butter doesn’t brown the same way as dairy butter because it doesn’t contain milk proteins, but it will still become slightly darker in color and nutty in aroma after 5 to 7 minutes, depending on the brand used.
Use a stainless steel or light-colored skillet or saucepan so you can see the color change.
After many rounds of testing, our clear favorite brand for these cookies is Violife salted butter (soy-, nut-, gluten-free). It contains a little fava bean protein, which aids in browning. If you have access to this brand, seek it out!
If you don’t have this brand, you can try adding a teaspoon of almond butter or cashew butter to the butter in the pan, as the protein helps with browning and nuttiness.
If using Miyokos butter, keep in mind that it browns very quickly (in less than 3 minutes). Earth Balance buttery sticks are widely available, but they don’t change much in color; that said, the flavor is nuttier than if purely melted, and is a totally fine option to use.

Flax egg
We tested these cookies with a few other vegan egg replacers and found that flax eggs (ground flaxseed mixed with water) worked the best. They bind the dough together and, when baked, give the cookies a delightful chewiness, which is typically what eggs do.
All-purpose flour
No fancy flour is needed here. All-purpose flour worked best at giving the cookies a classic chewy-soft texture.
Gluten-free? Check out the FAQ section to find out which flour substitutions work best.
Dark brown sugar + cane sugar
There’s a reason why most chocolate chip cookies combine brown sugar and white sugar; white sugar only yields thin and crispy cookies, and brown sugar only prevents the cookies from spreading, yielding a soft or cakey middle.
Here, a 2:1 ratio of dark brown sugar to cane (white) sugar delivers soft centers, chewiness throughout, and nicely crisped edges.
Sugar Tips
If you find yourself tempted to reduce the quantity of sugar, resist the urge. Sugar not only adds sweetness, but it lends structure and moisture. Reducing the amount of sugar will impact the texture of these cookies…and not in a good way.
For strictly vegan cookies, buy organic sugars (at least in the US, where conventional sugars are typically processed with animal bone char). If you can’t find dark brown sugar, light brown sugar still works well.
Baking soda
Baking soda helps the cookies spread while baking, leading to evenly baked cookies that aren’t too thick.
We tested a variation of this recipe with baking powder as a substitute, and it gave us cookies that were puffy and cakey—no thanks!
Baking Soda Tips
Not sure if your baking soda is still fresh? Combine ¼ tsp baking soda + 2 teaspoons vinegar in a small bowl. If it bubbles immediately, it’s still fresh. If you see no bubbles or only slight bubbles, it’s time for new baking soda.
Be sure to use baking soda (AKA bicarbonate of soda), not baking powder.
Bittersweet or dark chocolate
In our many tests, the best cookies were made not with chocolate chips but with dark chocolate bars, somewhere in the 60% to 75% cacao content range.
Here’s why:
- Most chocolate chips contain melt-resistant chocolate, which means you only get individual tiny pockets of chocolate. In our tests, cookies with chips yielded thicker cookies that didn’t spread as much.
- Using chopped chocolate bars gives you (1) melty chocolatey pools dispersed throughout the cookie = more chocolate in each bite (yum!); (2) melted chocolate = more moisture = cookies spread a bit more = no thick or cakey cookies (phew!).
- Also, dark chocolate prevents the cookies from being overly sweet; its slight bitterness balances the sugar.
Chocolate Tips
I recommend using 65-75% dark chocolate bars for a balanced, not-too-sweet taste. If you prefer things a bit sweeter, use 60% dark chocolate. If you prefer less sweet desserts, use chocolate in the 75+% to 80% range.
Pure vanilla extract and sea salt
I always pair vanilla and salt together in desserts because they work together to bring out the other layers of flavors. I use the duo to enhance my Vegan Apple Crisp and here, it enriches the chocolate, buttery, and sugary flavors of the cookies. Without them, the flavor would be a bit flat.
A little flaky sea salt sprinkled on top of the freshly baked cookies also balances the sweetness and enhances the dark chocolate flavor. We love Maldon flaky salt—just a little goes a long way!
Step-by-step instructions
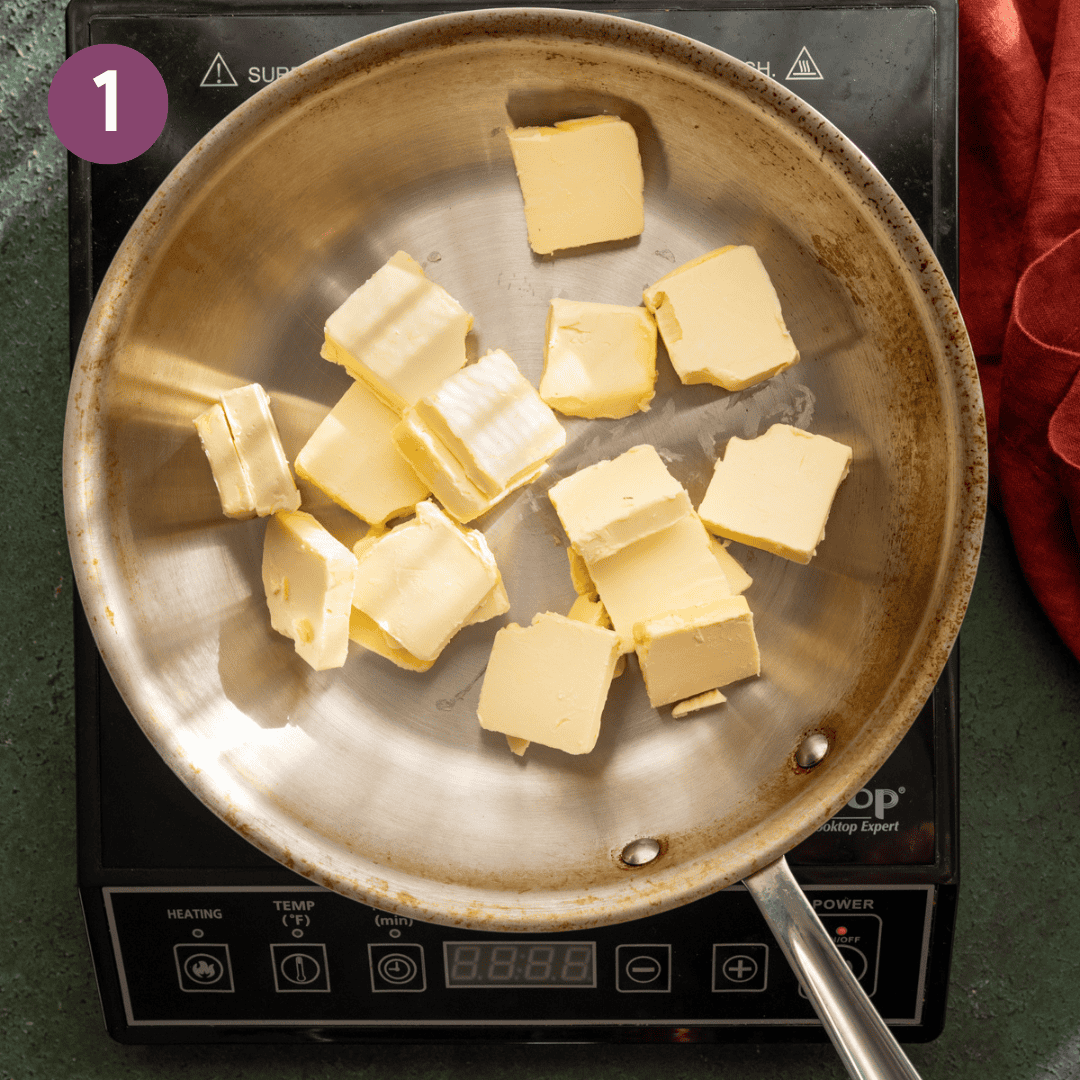
Add the vegan butter to a stainless steel or light-colored skillet or saucepan. Turn to medium heat and allow the butter to melt, stirring occasionally.
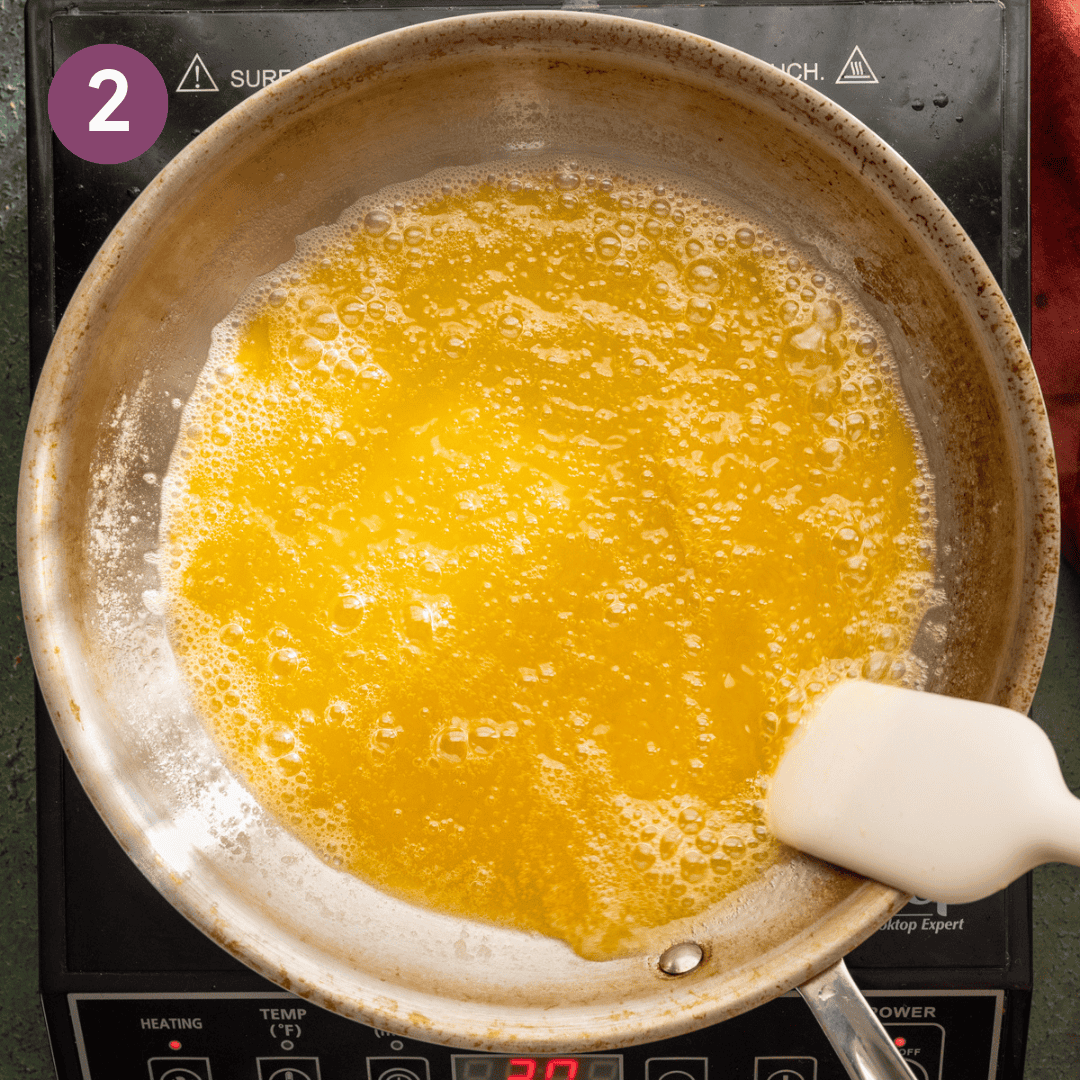
Once foamy and at a bubble, stir or swirl the pan frequently, or until it gives off a nutty aroma and is slightly darker in color. Immediately pour it into a bowl, then refrigerate for ~30 minutes so the butter can cool to room temp.
Tip: If your butter is still warm, the dough will be too sticky!
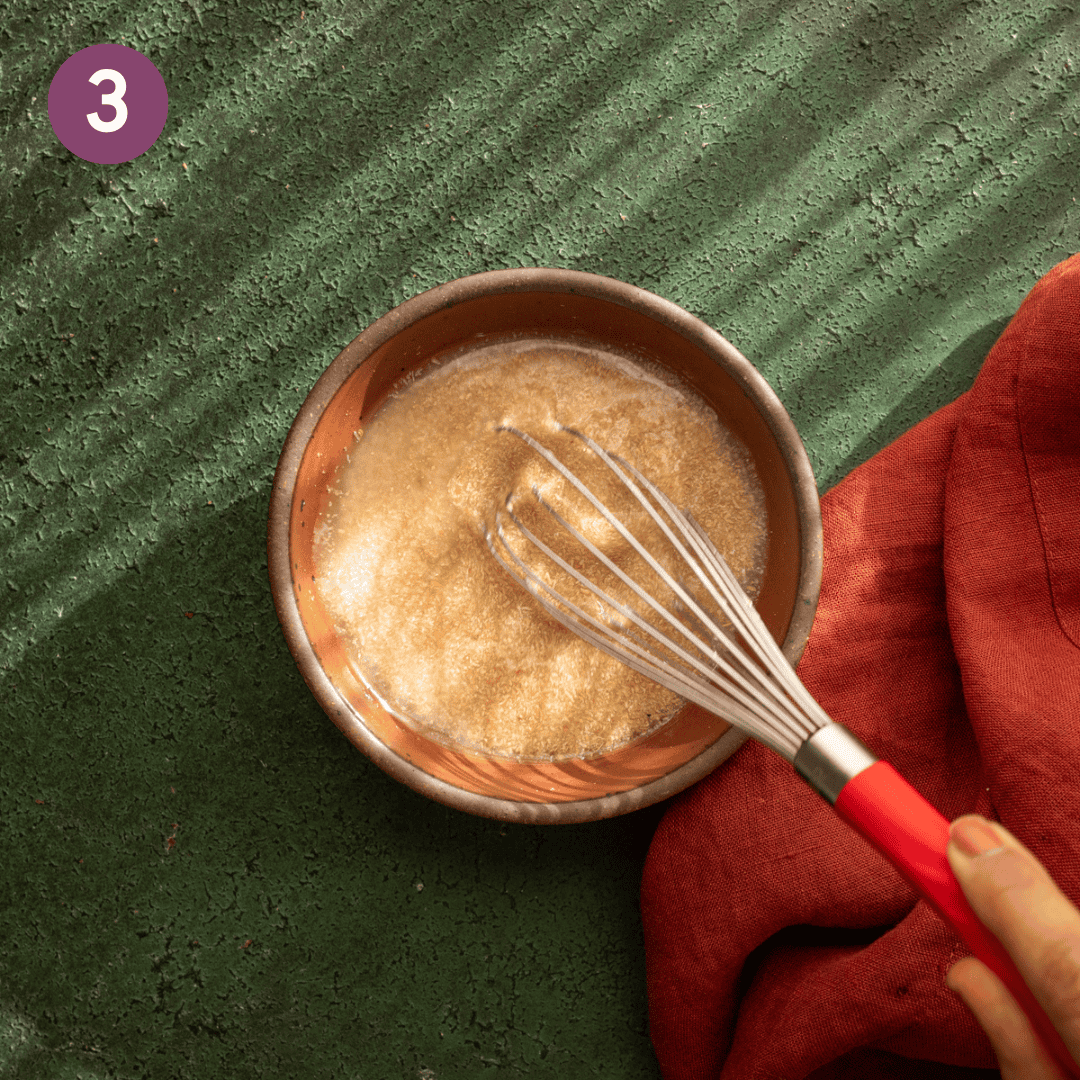
Next, make the flax eggs: whisk the flaxseed meal with warm water. Set it aside to gel.
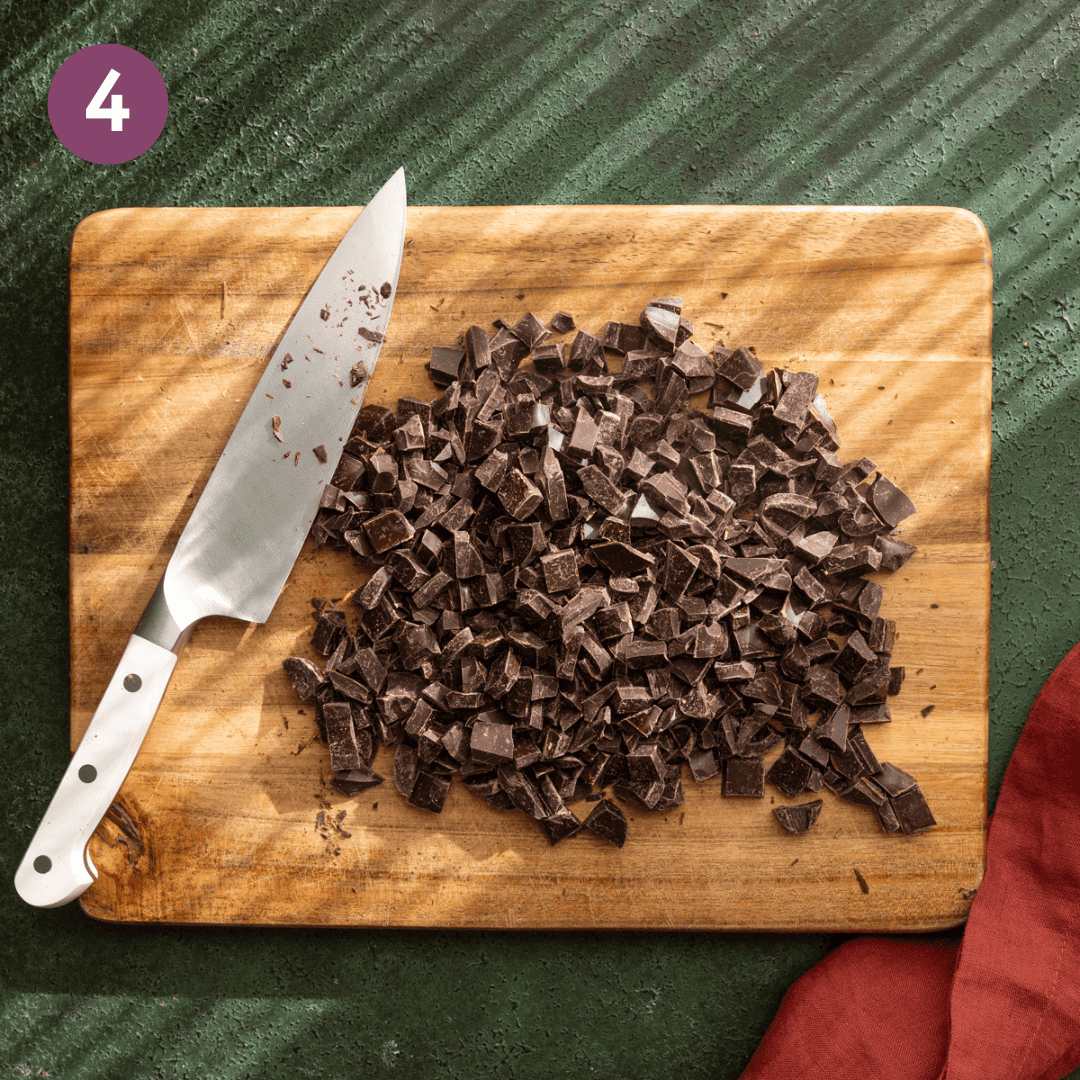
Meanwhile, coarsely chop the chocolate.
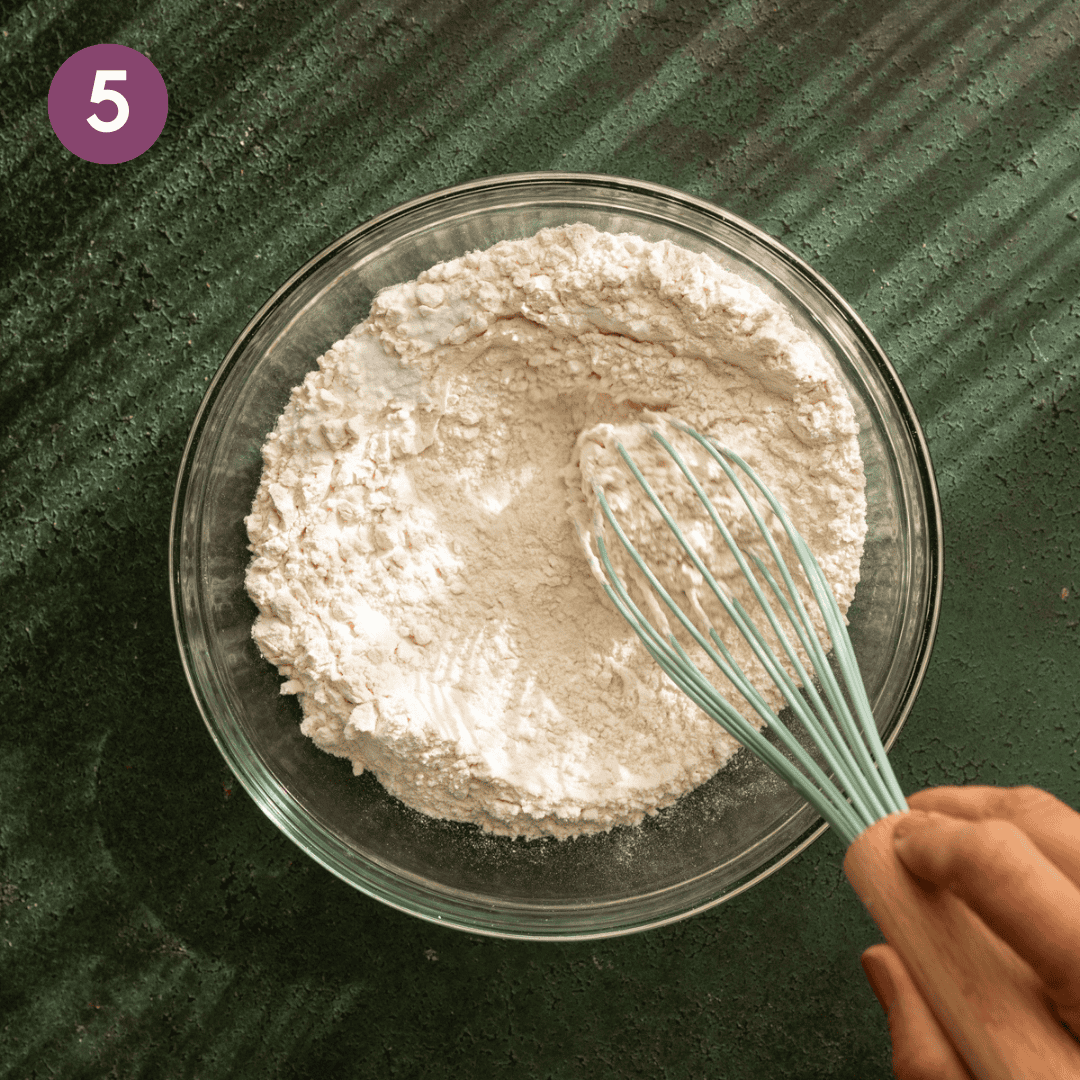
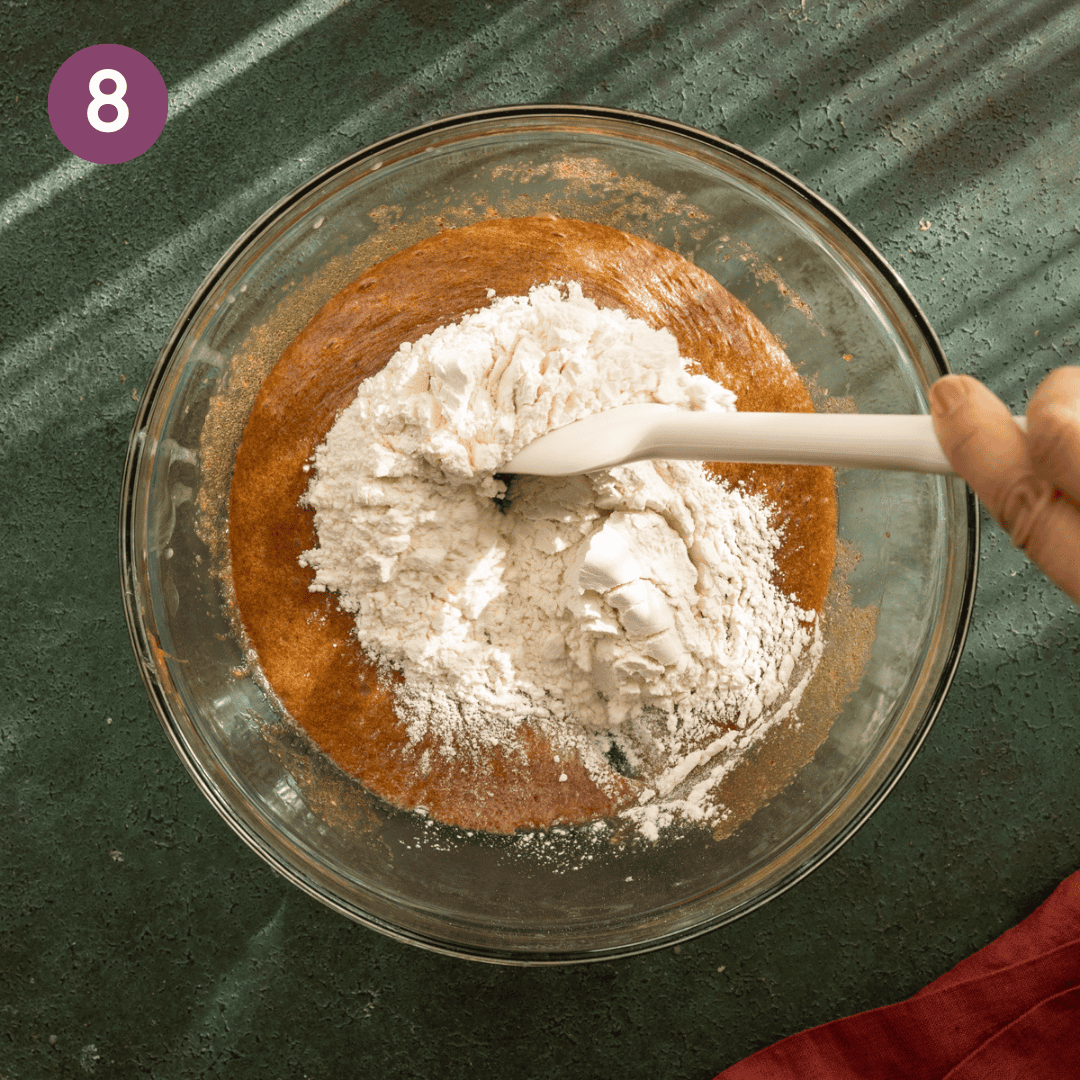
Combine the dry ingredients: Whisk the flour, salt, and baking soda in a medium bowl.
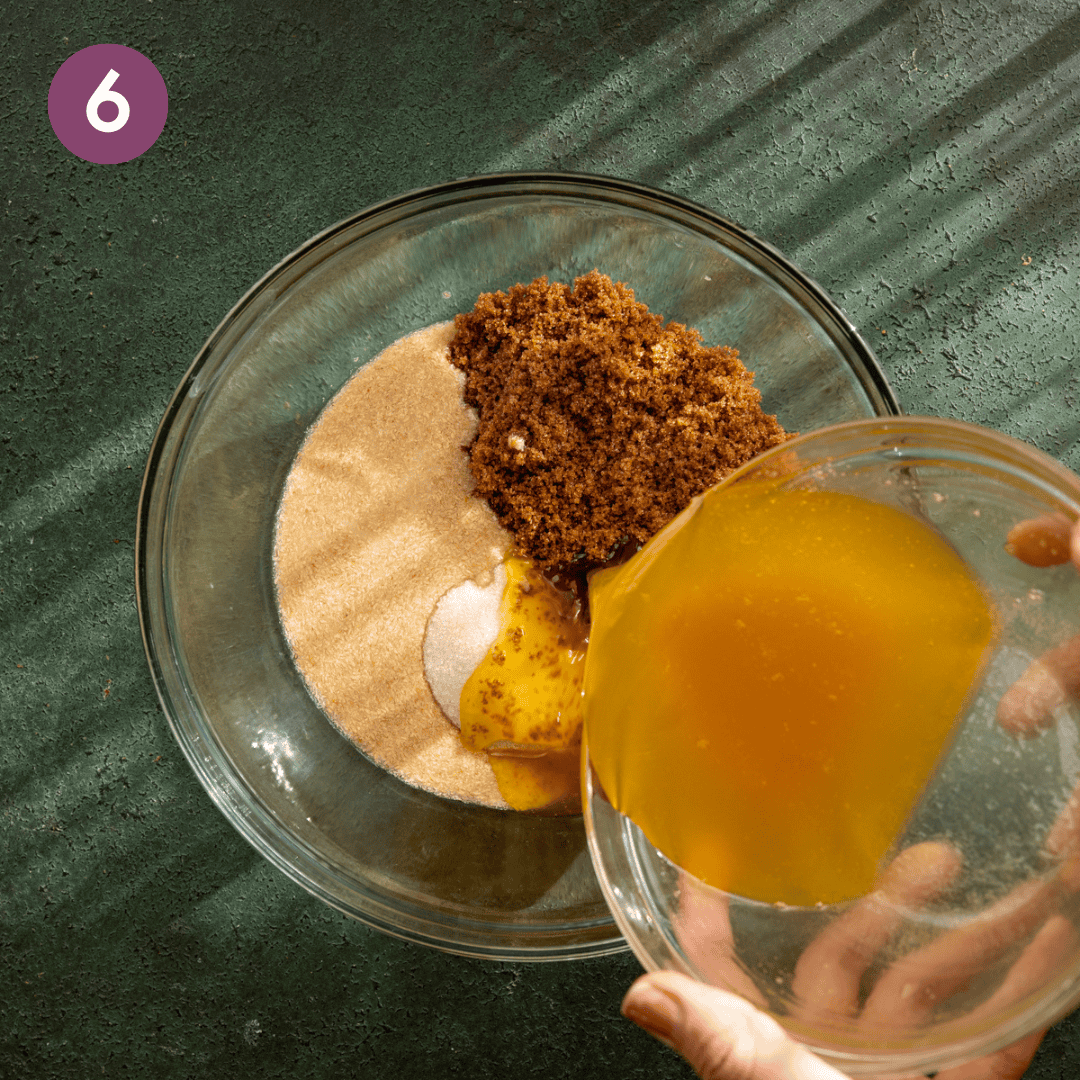
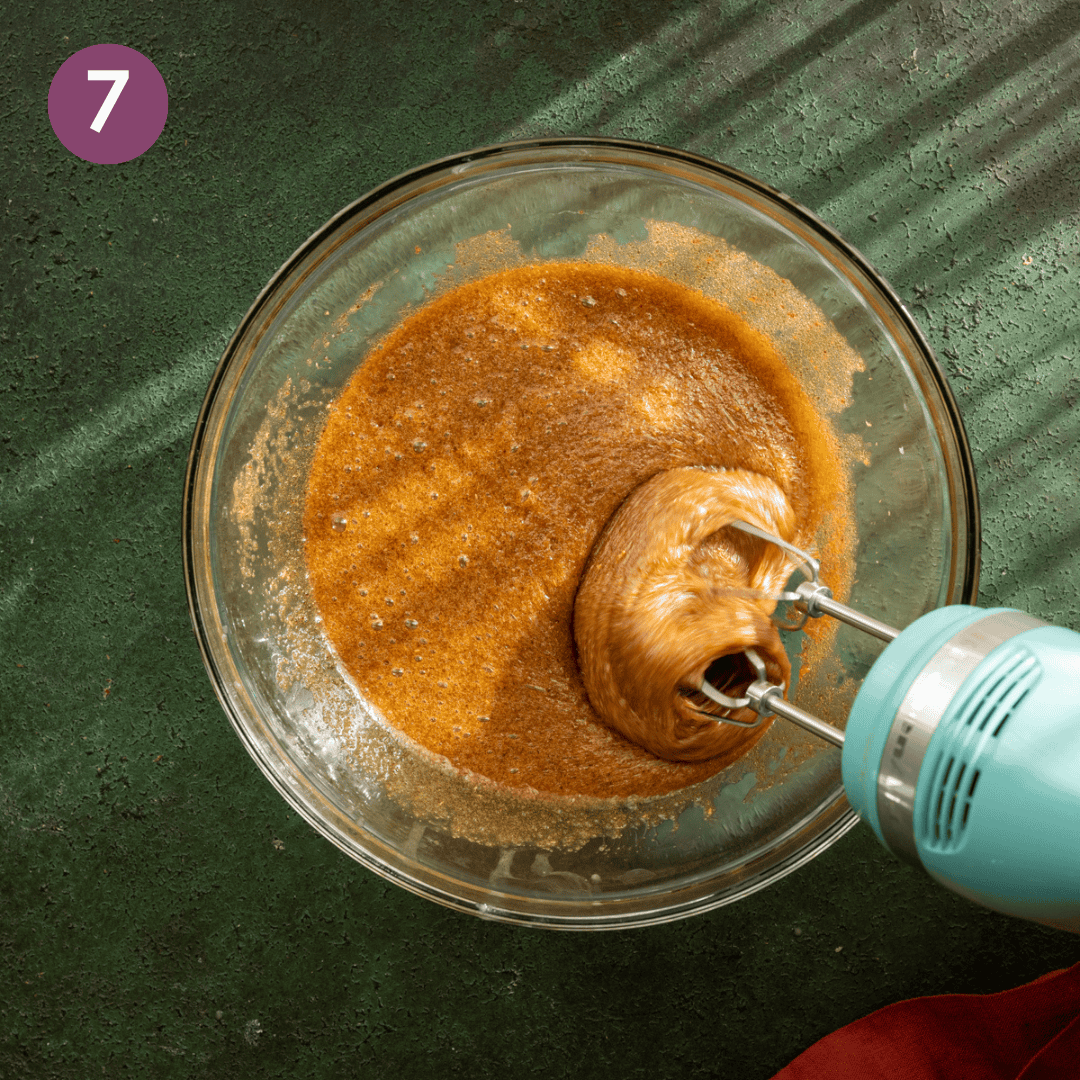
In a large bowl, combine the gelled flax eggs, cooled brown butter, brown sugar, cane sugar, and vanilla.
Beat the liquid ingredients with an electric mixer until well combined and fluffy.
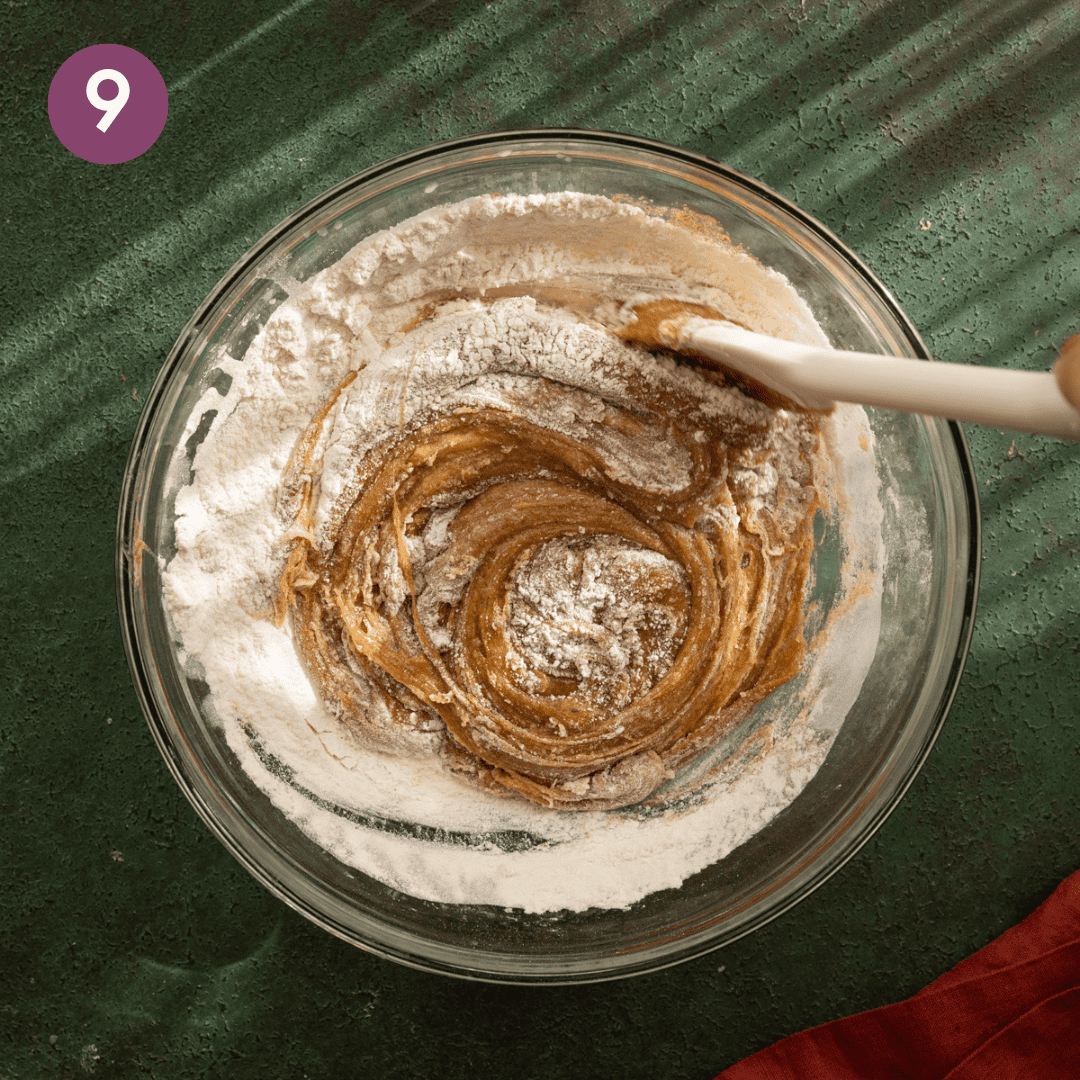
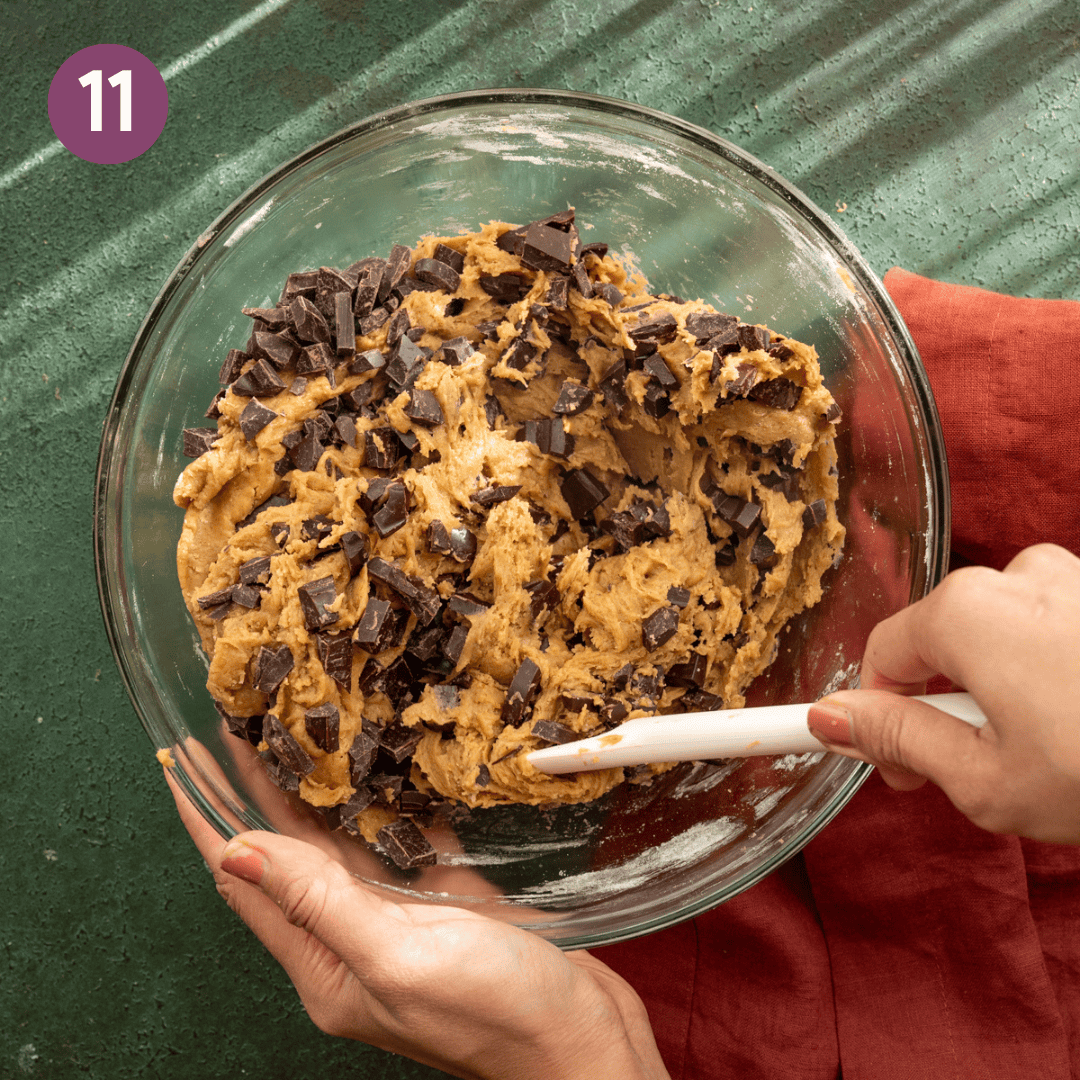
Use a silicone spatula to fold half of the dry ingredients into the fluffy wet mixture until no dry spots remain.
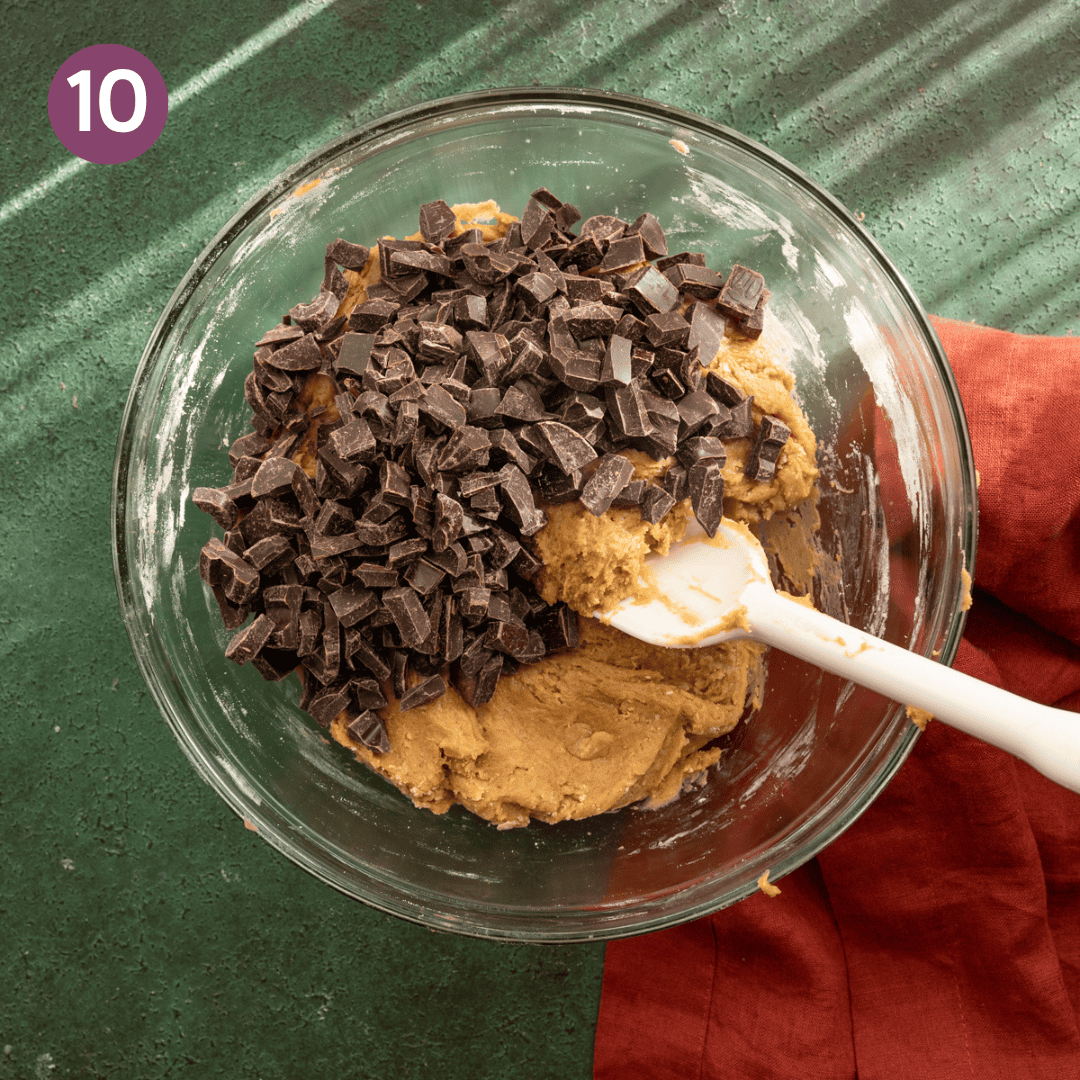
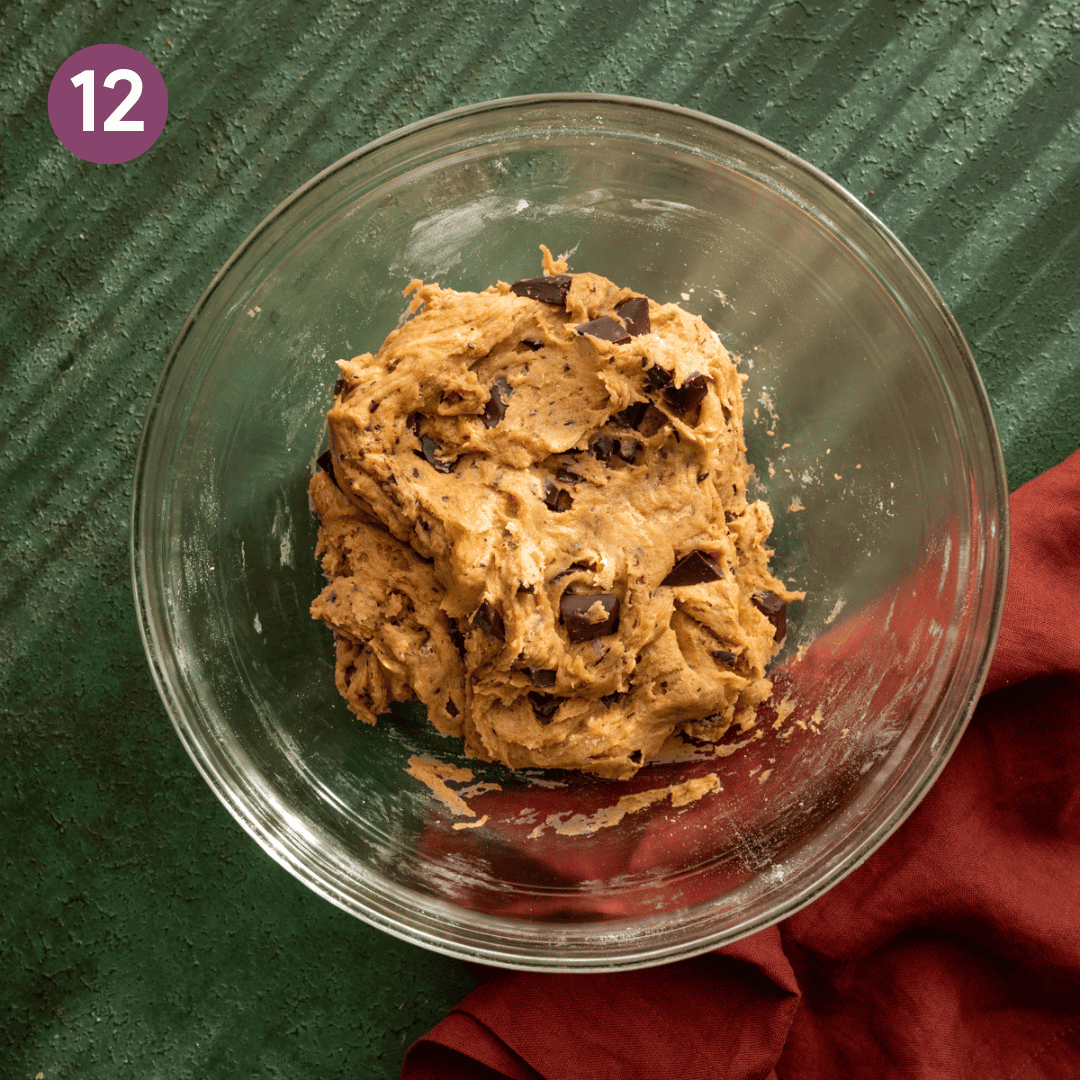
Repeat with the other half of the dry ingredients and the chopped chocolate.
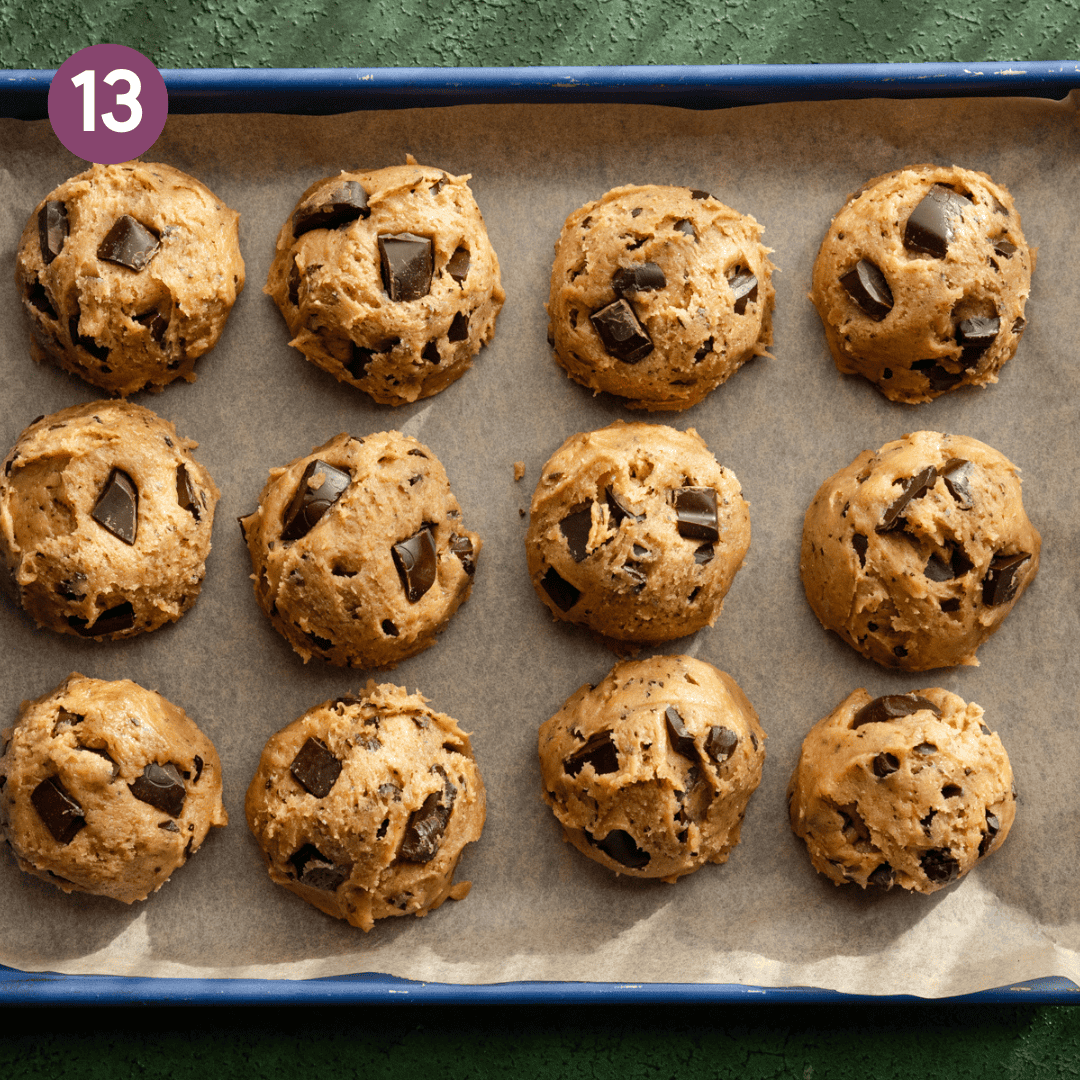
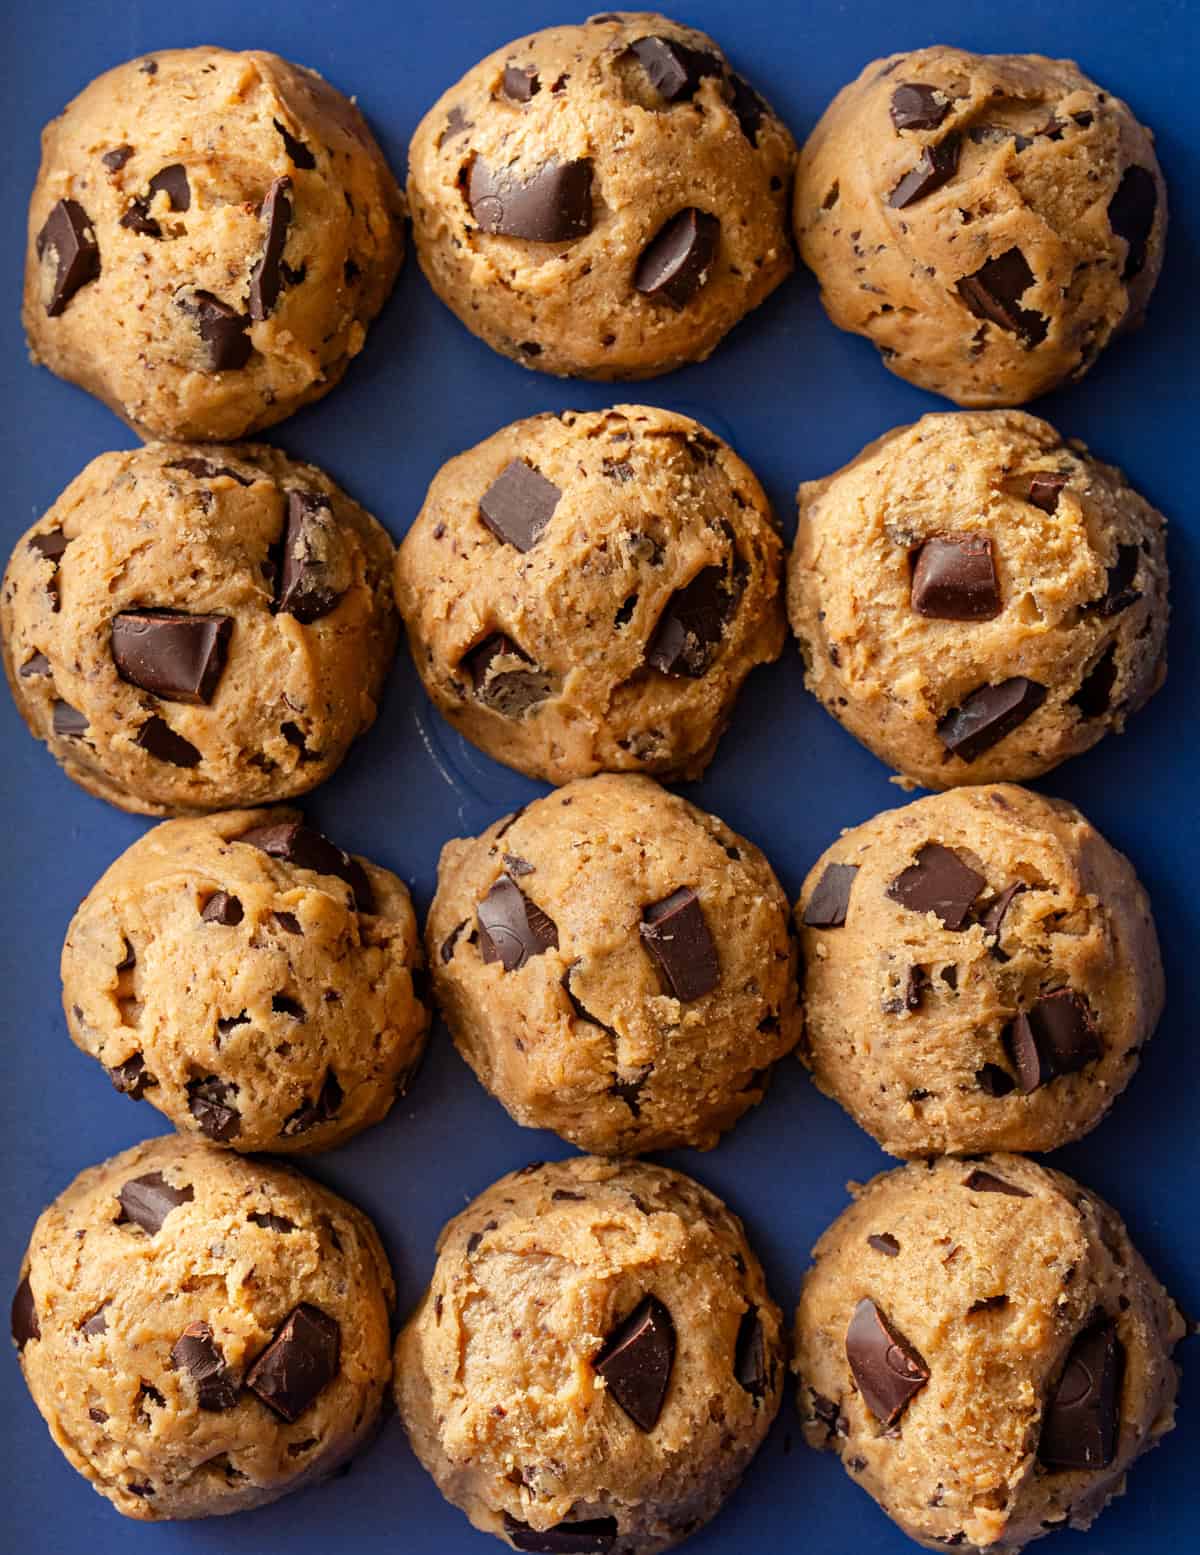
Scoop out cookie dough rounds with a ¼ cup measuring cup (or a large cookie scoop like this or this) onto a parchment paper-lined baking sheet. No need to space them out since they’re going to chill.
Refrigerate the pan until cookie dough balls are set. Afterward, you can transfer them to a reusable bag or container and refrigerate for 24 hours or up to 72 hours.
When it’s time to bake:
Preheat your oven and line a sheet pan with parchment. Space 6 cookie dough rounds on the pan, leaving 3 inches (7.5 cm) of space in between each (these babies are going to spread).
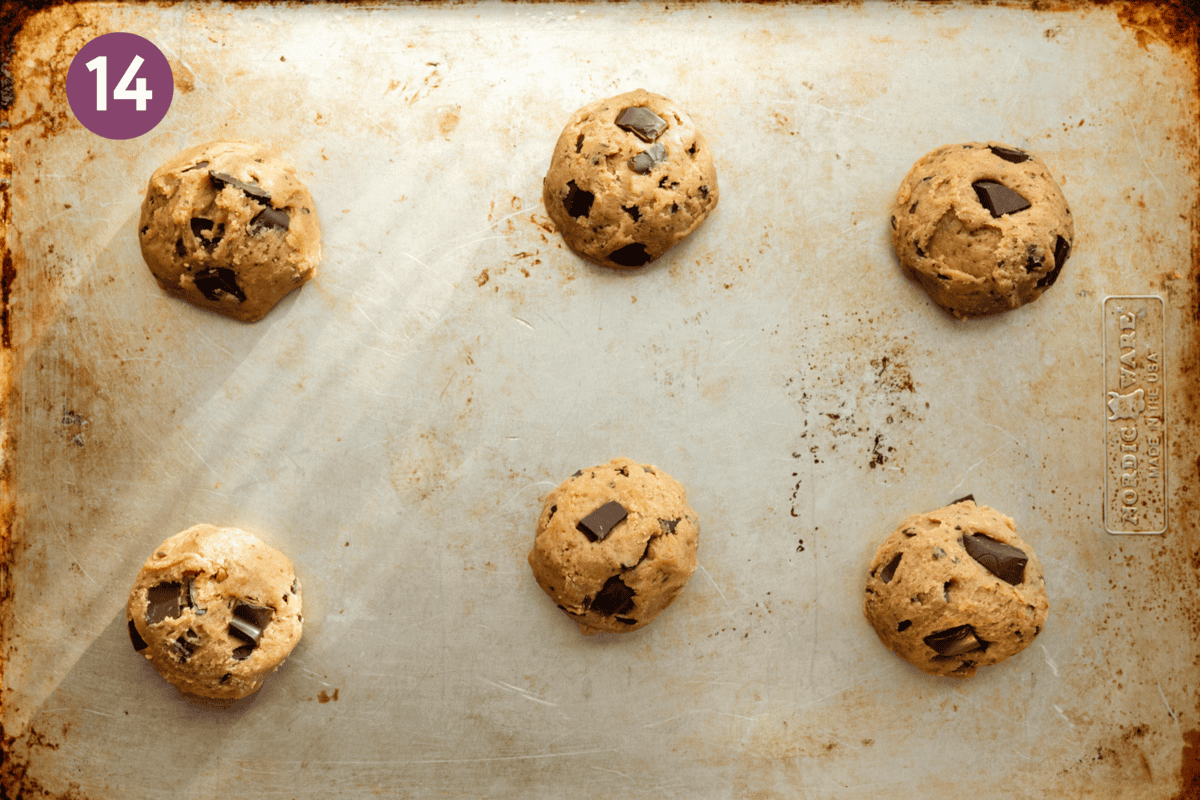
Bake the chocolate chip cookies until the edges are golden brown and a bit set but still gooey and soft in the center, 15 to 16 minutes.
Top freshly baked cookies with a little flaky sea salt. Cool for 10 minutes, then transfer to a wire rack. Enjoy!
Tips for nailing this recipe
The best cookies have two important features: (1) chopped chocolate (not chips) and (2) the dough has rested in the fridge for ~24 hours.
Lots of science in the next two tips, so here’s the big summary:
(1) If you don’t have time to refrigerate the cookie dough, it’s even more important to use chopped dark chocolate over chocolate chips.
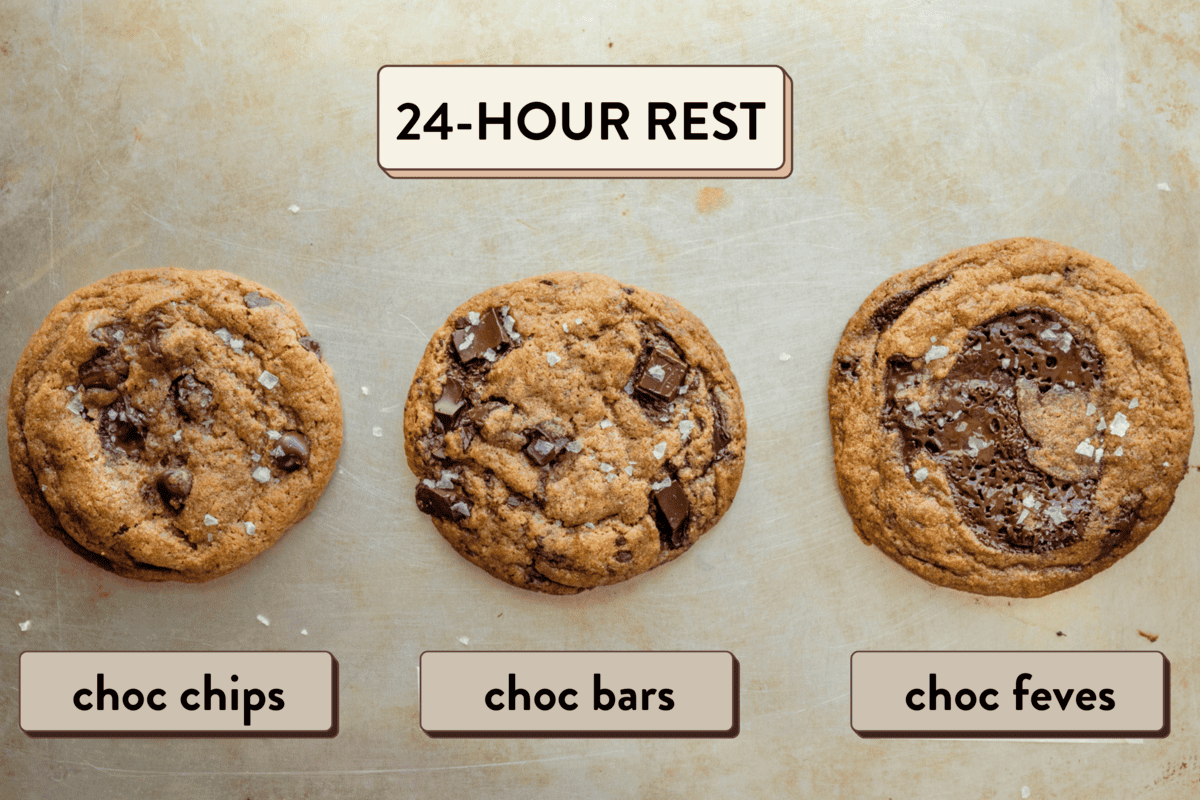
(2) If you only have access to chocolate chips, not dark chocolate bars, it’s even more important to rest the dough for 24 hours.
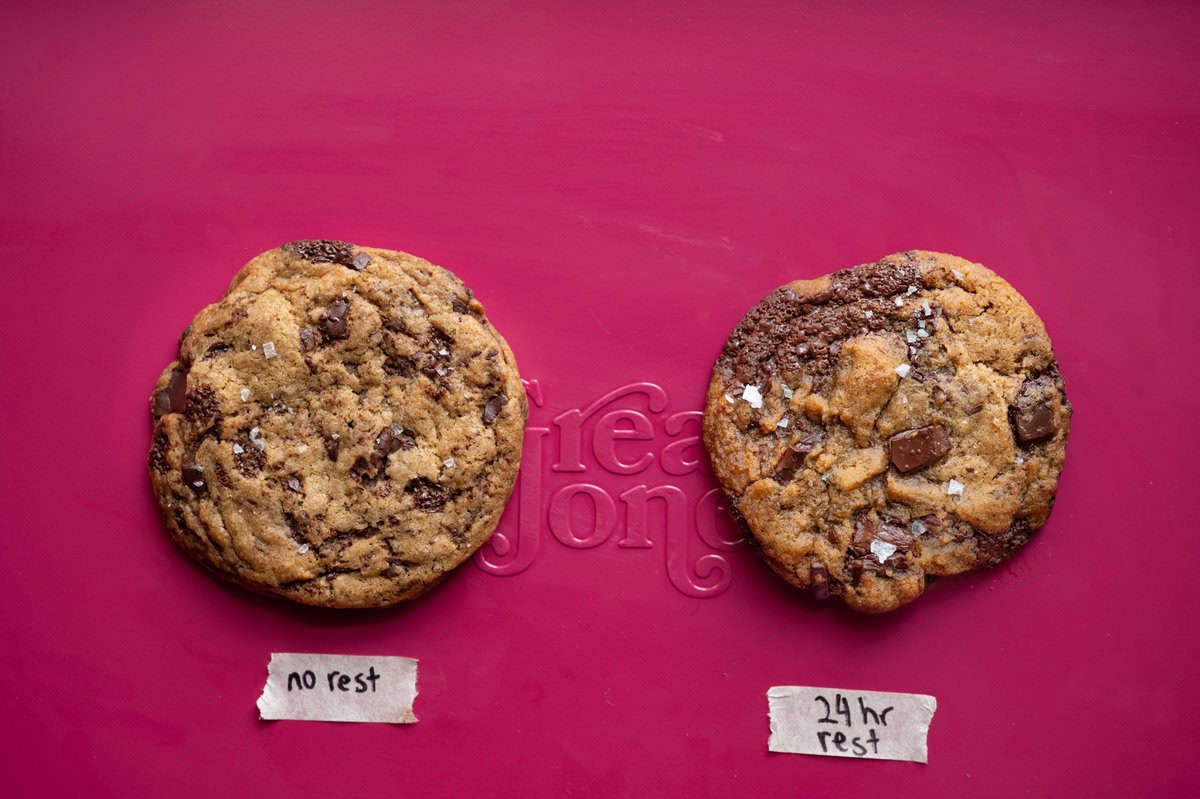
Let the dough rest (it’s the most important thing you can do)
I know, I know. You want cookies now! But in our two dozen tests, letting the dough rest in the fridge for ~24 hours was the biggest game-changer. Here’s why:
When the cookie dough rests in the fridge, the flavors meld together and the dough gets hydrated. This results in a cookie with better flavor (more developed and complex, richer, caramel-like) and significantly better texture (the crispest edges and the chewiest, gooey-ist center; not at all cakey or thick).
Waiting for cookies can feel like a chore, but it’s absolutely worth the wait and the experts–the likes of Kenji López-Alt, Jacques Torres, dessert queen Claire Saffitz.
Tips for resting cookie dough
If you’re really short on time, even a shorter rest of 8 hours (or even 2 to 4 hours!) makes a significant difference. Or, if a 12 hour rest works better for your schedule, that’s totally fine.
You can refrigerate the cookie dough for up to 72 hours. Any longer than that, and the rested cookie dough should then go into the freezer.
Life hack: Really need a cookie, like, right now? Bake one cookie after making the dough but save the rest of the cookie dough rounds for tomorrow or the next day.
Use dark chocolate bars (not chocolate chips)
We tested this recipe with many dark chocolate bars and found that bars with few ingredients and between 65-75% dark or bittersweet chocolate gave us the best result.
If you really want to use chocolate chips, a few important notes:
(1) use dark chocolate chips (anything below 60% cacao, and these will be too sweet);
(2) you must refrigerate the dough for ~24 hours.
This is because cookies baked with chocolate chips that did not rest at all = underwhelming in flavor and with a thick and puffy, not chewy-gooey texture. Luckily, after a 24-hour rest, though, the cookies had improved A LOT.
Large cookies > small cookies (by a long shot)
When it comes to chocolate chip cookies, size really does matter. Shaping your cookies with ¼ cup (~72g) of dough creates large cookies that beat their smaller counterparts in every way.
Here’s why: larger cookies don’t bake through as quickly, which means you get gooey, soft centers paired with irresistibly crisp edges—a perfect balance of textures. On the other hand, small cookies bake too evenly, resulting in a uniform texture that lacks excitement and depth. And the fine folks at America’s Test Kitchen agree.
Worried the big cookies are too much for one sitting? No problem! Share with a friend, or slice them in half for a smaller treat. Trust me, this is infinitely more satisfying than settling for a batch of tiny cookies.
Measure with a digital scale
If you have a kitchen scale, use it to measure all of the ingredients. Not only is it more precise than measuring cups, but you will have fewer dishes to wash (win-win!).
Don’t overmix
Only fold the dry ingredients into the wet ingredients until everything just comes together and no dry flour remains. This method prevents the dough from being overmixed into a thick, gluten-ey dough, which would make your cookies dense and bread-like.
Skip the parchment paper for crispier edges
In our tests, cookies baked on naked sheet pans produced slightly crispier edges. But the pans need to be somewhat well-worn aluminum or nonstick sheet pans. Otherwise, the cookies will stick too much.
If you’re not sure, bake your first batch half on parchment paper and half without, and see which you prefer.
Don’t use warm pans
Let your sheet pan cool to room temp before putting more cookie dough balls on the pan. Warm sheet pans will cause the cookies to spread more. To speed things up, simply run your pan under cool water.
Resist the urge to overbake
Pull the cookies out of the oven when the edges are just starting to set, but when the middle is still soft and gooey. They’ll continue to bake a bit on the pans for ~10 minutes before you transfer them to a cooling rack.
Double the recipe 🙂
These cookies are so good you’ll want to double the recipe! The good news is that after you rest your cookie dough in the fridge, you can transfer it to the freezer.
And leftover baked cookies also freeze great. See the FAQ for instructions.
Frequently Asked Questions
As much as I want you to indulge in these cookies as quickly as possible, letting the dough rest for 24 hours really does make a big difference (check out the Tips section for more on this).
Even an 8- or 12-hour rest makes a big difference. Really short on time? In our tests, even a 2-hour rest yielded a better cookie than a cookie baked immediately.
And cookies rested for 48 hours taste even better, so you can always “prep” the cookie dough and bake them a couple days later.
If you can’t bake the cookies with 72 hours of refrigeration, though, you should freeze the cookie dough.
We recommend using vegan butter sticks, as they are formulated to mimic dairy butter in baking better than the margarine or butter in tubs.
After many rounds of testing, our clear favorite is Violife salted butter (soy-, nut-, gluten-free), so use that if you have access to it!
Use the same amount of refined coconut oil (12 tablespoons / ~150g) instead.
The cookies won’t have the same amazing flavor without the browned butter and won’t be as chewy with crisp edges, but they’ll still be tasty (and will NOT taste like coconut if you use refined coconut oil).
I’d also recommend using good-quality dark chocolate to compensate for the loss of flavor and texture.
The coconut oil will harden in the dough, so before baking, let the cookie dough balls sit at room temperature for 20 minutes, or until pliable. If the dough balls have lost their shape, reshape them into balls before baking.
Good news! Our gluten-free test worked out very well!
Replace the 2 cups of all-purpose flour with 1 ⅓ cups (192g) of gluten-free all-purpose flour and ⅔ cup (76g) of oat flour (certified gluten-free).
It’s also important that your gluten-free flour blend contains xanthan gum, something like Bob’s Red Mill 1:1 Baking Flour or King Arthur’s Measure for Measure GF Flour (affiliate links).
In our testing, we also found that the gluten-free dough was a bit sticky, so you will likely need to refrigerate it for 10 to 20 minutes before shaping it into balls.
Bake the cookies for 13 to 15 minutes.
Baking one pan of cookies at a time yields the best texture. This is because hot air doesn’t circulate as efficiently in an overcrowded oven.
That said, if you’re in a real rush, you can arrange a rack in the upper-middle and lower-middle of the oven. Bake the cookies for 8 minutes. Remove one pan from the oven (closing the door in between to avoid too much heat escaping), then remove the other pan.
Switch the pans’ positions on the racks for even baking and browning, and bake for another 8 minutes, until the edges are golden brown and a bit set but still gooey and soft in the center.
There could be a few potential reasons for this.
(1) Your baking soda isn’t fresh. To test if it’s fresh: combine ¼ tsp baking soda + 2 teaspoons vinegar in a small bowl. If it bubbles immediately, it’s still fresh. If you see no bubbles or only slight bubbles, it’s time for new baking soda.
(2) You accidentally used baking powder instead of baking soda.
(3) You didn’t chill the browned butter for long enough. Make sure it’s not warm!
Recommendation: After baking, if your cookies don’t appear to have spread very much, you can try the “pan banging” technique to encourage spreading. Lift up the pan a few inches and gently bang it down on your kitchen counter. Repeat a couple times.
If eating within one day, store the cookies in an airtight container or sealed ziploc bag on the kitchen counter.
Any longer than a day, and these cookies are best stored in the freezer. Stack the cooled cookies in a freezer-safe container, separating each one with a piece of parchment paper.
Take as many cookies as you want to eat out of the freezer. Defrost by setting each cookie on a paper-towel, without the cookies touching. They defrost in ~10 minutes and taste almost identical to the freshly baked cookies.
To reheat the cookies in the oven, place them on a sheet pan (lined with parchment paper for easier cleanup) and heat at 350ºF (175ºC) for 3 to 5 minutes, or until warm.
You can microwave the cookies but I think the texture isn’t as good.
Absolutely. Shape the dough into balls, chill in the fridge for 24 to 72 hours per the recipe, then freeze any dough balls you don’t bake.
Freeze the balls on a tray until solid, then transfer them to a freezer-safe bag or container.
Yes, but for the best results, first defrost frozen cookies in the fridge until softened (about 24 hours). If they have thawed but are still a bit hard, let them sit at room temp for 15 to 30 minutes, then bake.
If you don’t have the time to defrost and need to bake from frozen, let the frozen cookie dough balls sit out at room temp for 30 minutes, then bake for 16 minutes, or a bit longer.
I think this is overrated, but if it’s important to you, get a large biscuit cutter like this (5″ minimum, but 6″ is ideal). As soon as the cookies come out of the oven, work the biscuit cutter around the edges of the cookie in swirling, circular motions. Video instructions here.
There are a few levers you can pull to make your cookies crispier.
1) Use more cane sugar (white sugar) than brown sugar. For this recipe, use 3/4 cup (167g) cane sugar. And ¼ cup + 2 TBSP (78g) dark brown sugar, tightly packed.
2) Use 3 tablespoons of dough (54g) per cookie instead of 1/4 cup (72g).
3) Lower the oven temperatuer to 325ºF / 165ºC.
4) Don’t use parchment paper on your baking pans.
There are a few levers you can pull to make your cookies softer and fluffier.
1) Use all brown sugar, no cane/white sugar. Since dark brown sugar can be a little potent in flavor, I recommend ~ half light brown and half dark brown.
2) Add 1 1/2 teaspoons cornstarch to the dry ingredients.
3) Use 3 tablespoons of dough (54g) per cookie instead of 1/4 cup (72g).
You may need to refrigerate the dough before scooping into rounds.
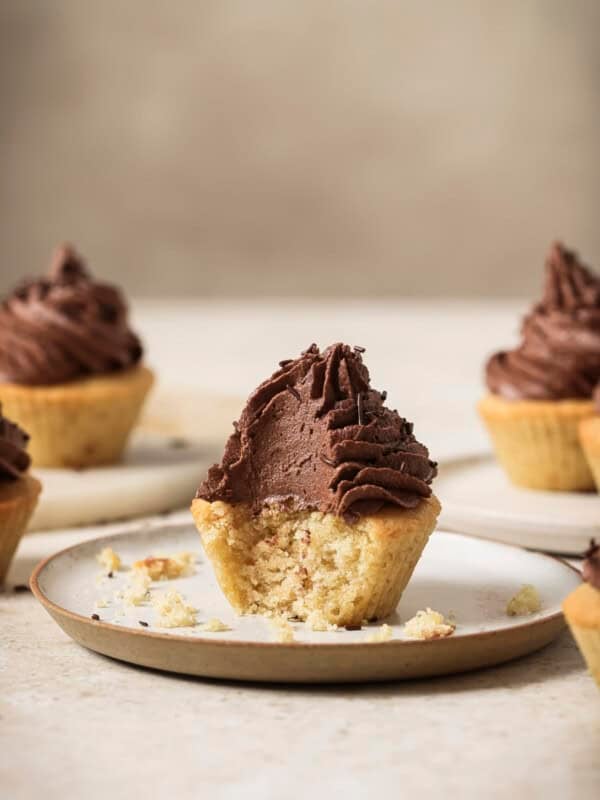
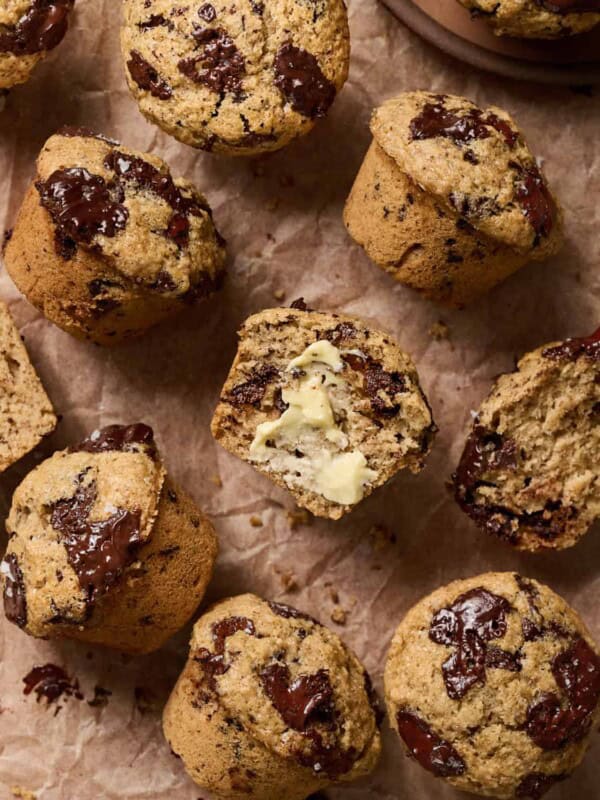
More delicious vegan cookies!
If you loved these Ultimate Vegan Chocolate Chip Cookies as much as we do, please give the recipe a rating and review below! And of course, tag me with your remakes on Instagram!

Introducing
Big Vegan Flavor
Techniques and 150 recipes to master vegan cooking.
Ultimate Vegan Chocolate Chip Cookies
Ingredients
- 12 tablespoons (168g) vegan butter, sliced into thick pats (see Note 1)
- 2 tablespoons (14g) ground flaxseed meal
- 5 heaped tablespoons (70 mL) warm water
- 6 ounces (170g) 65% to 75% dark or bittersweet chocolate (see Note 2)
- 2 cups (250g) all-purpose flour (see Note 3 for GF)
- ½ teaspoon fine sea salt
- ¾ teaspoon baking soda (make sure it's fresh, see Note 4)
- ¾ cup (155g) organic dark brown sugar, tightly packed (see Note 5)
- ¼ cup + 2 tablespoons (80g) organic cane sugar
- 1 tablespoon (15 mL) pure vanilla extract (not imitation extract!)
- Flaky sea salt for finishing
Instructions
- Brown the butter before doing anything else, as it needs time to cool: Add the sliced butter to a stainless steel or light-colored skillet or saucepan. Turn to medium heat. Swirl the pan or stir with a silicone spatula occasionally until melted, foamy, and at a bubble (it should take 2 to 3 minutes).Heat for 2 to 3 more minutes, stirring frequently with a silicone spatula until nutty in aroma and slightly darker. Turn off the heat before it starts foaming up the sides of the pan.Immediately pour into a medium heatproof bowl to stop cooking, scraping out all of the butter from the pan with the spatula.Refrigerate for 30 minutes or until no longer warm (warm butter = sticky cookies).
- Line a large plate or mini sheet pan with parchment paper and place in the fridge to chill.
- Make the flax eggs. In a small bowl, combine the flaxseed meal with 70 mL warm water (this is 5 heaped tablespoons). Whisk well to combine and rest for 15 minutes, whisking again halfway through and once more at the end of the 15 minutes.
- While waiting for the butter and flax egg, coarsely chop the chocolate–some texture variation in small/large pieces is nice. Set aside. If desired, reserve 12 pieces of chopped chocolate to press into each cookie.
- Dry ingredients: In a medium bowl, whisk together flour, salt, and baking soda until well incorporated.
- Wet ingredients: Once flax eggs have gelled and brown butter has cooled, add both to a large bowl. Add the brown sugar, cane sugar, and vanilla. Use an electric mixer on medium to mix everything together until well combined and small ribbon-like waves appear, about 30 seconds (or use a whisk and arm power for ~45 seconds).
- Remove the beaters and switch to a silicone spatula. Add half of the dry ingredients into the wet. Fold with a silicone spatula until just combined. Add the rest of the dry ingredients and chopped chocolate (minus reserved 12 pieces for topping). Fold together just until no dry spots remain. The dough should be thick but somewhat soft, not stodgy.
- Scoop out cookie dough rounds. Use a large cookie scoop to measure out ~72g per cookie dough round (or use a ¼ cup measuring cup, leveling off the top & using a small silicone spatula to get the dough out of the measuring cup). Place the cookie dough rounds on the lined pan/plate from the fridge, but no need to space them out, as they'll chill first. If desired, press a piece of reserved chopped chocolate into the top of each cookie. Tip 1: Don't make smaller cookies (see Note 5). Tip 2: If the dough is too sticky to handle, refrigerate for 15-20 minutes, then shape.
- Once the cookie dough balls have set, you can transfer them to a ziploc bag or container and refrigerate. Chill for 24 hours, or up to 72 hours. If you're short on time, I still recommend chilling for as long as you can (even 2 hours will give you a better cookie than baking immediately).
- When ready to bake: preheat the oven to 350ºF / 175ºC and arrange a rack in the center of the oven. If your rimmed sheet pan is not well-worn or not made of aluminum or nonstick, it's essential to line with parchment paper to prevent sticking (see Note 7). Add five or six cookie dough rounds, spacing them 3 inches (7.5 cm) apart, as they’ll spread a lot.
- Bake for 14 to 16 minutes, until edges are golden brown and a bit set but still gooey and soft in the center (16 minutes for a slightly crispier edge). While still warm, sprinkle cookies with a little flaky sea salt. See Note 9.
- Cool in the pans for 10 minutes (5 minutes if lined with parchment), then transfer to a cooling rack to cool for a few more minutes.
- Bake the remaining batch (or freeze the cookie dough to bake later).
Video
Notes
- For our recommended butter brands, check out the Ingredient Notes.
- Chopped dark chocolate bars = much better than choc chips. For more details & substitutions, check out the Ingredient Notes and Tips sections (tips #1 and #2).
- Check out the FAQ for gluten-free instructions.
- If the baking soda is not fresh, your cookies won’t spread. Combine ¼ tsp baking soda + 2 tsp vinegar in a small bowl. If it doesn’t fizz up immediately, it’s no longer fresh.
- If you can’t find dark brown sugar, light brown sugar still works well.
- Smaller cookies turn out drier and overall less good. Stick with 1/4 cup or 72g per cookie.
- If you can’t refrigerate the dough for 24 hours, a shorter rest is still better than nothing. Even 2 to 8 hours produced better cookies than no rest at all.
- Unlined sheet pans yield crisper edges. But if your pan is new or not made of aluminum or nonstick, line the pan with parchment paper; otherwise, the cookies stick.
- If your cookies don’t appear to have spread very much, you can try the “pan banging” technique to encourage spreading. Lift up the pan a few inches and gently bang it down on your kitchen counter. Repeat a couple times.
Nutrition
Nutrition information is automatically calculated, so should only be used as an approximation.


The best chocolate chip cookies I have ever had. The rest of the family agrees. They are delicious. So delicious.