


Move over, Chana Masala. There’s another Indian bean dish that deserves some spotlight.
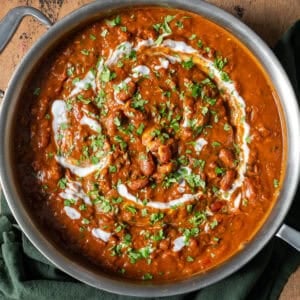
Meet Rajma Masala, the lesser-known curry with larger-than-life flavor that’s about to rock your world.
I like to think of it as India’s version of chili; big, bold flavors, layered and simmered so they meld, mingle, and mature into something velvety, rich, and deeply comforting.
Make room in your heart because it’s time to fall in love with this luxurious, restaurant-quality Rajma Masala (that happens to be gluten-free, nut-free, soy-free, and packs in 26 grams of fiber per serving!).
Where’ve you bean all my life? Continue your love affair with Indian bean/legume dishes and try a few more faves from the RPL archives, like my creamy chickpea curry, braised Indian chickpea stew, dal palak (spinach dal), or red lentil curry!
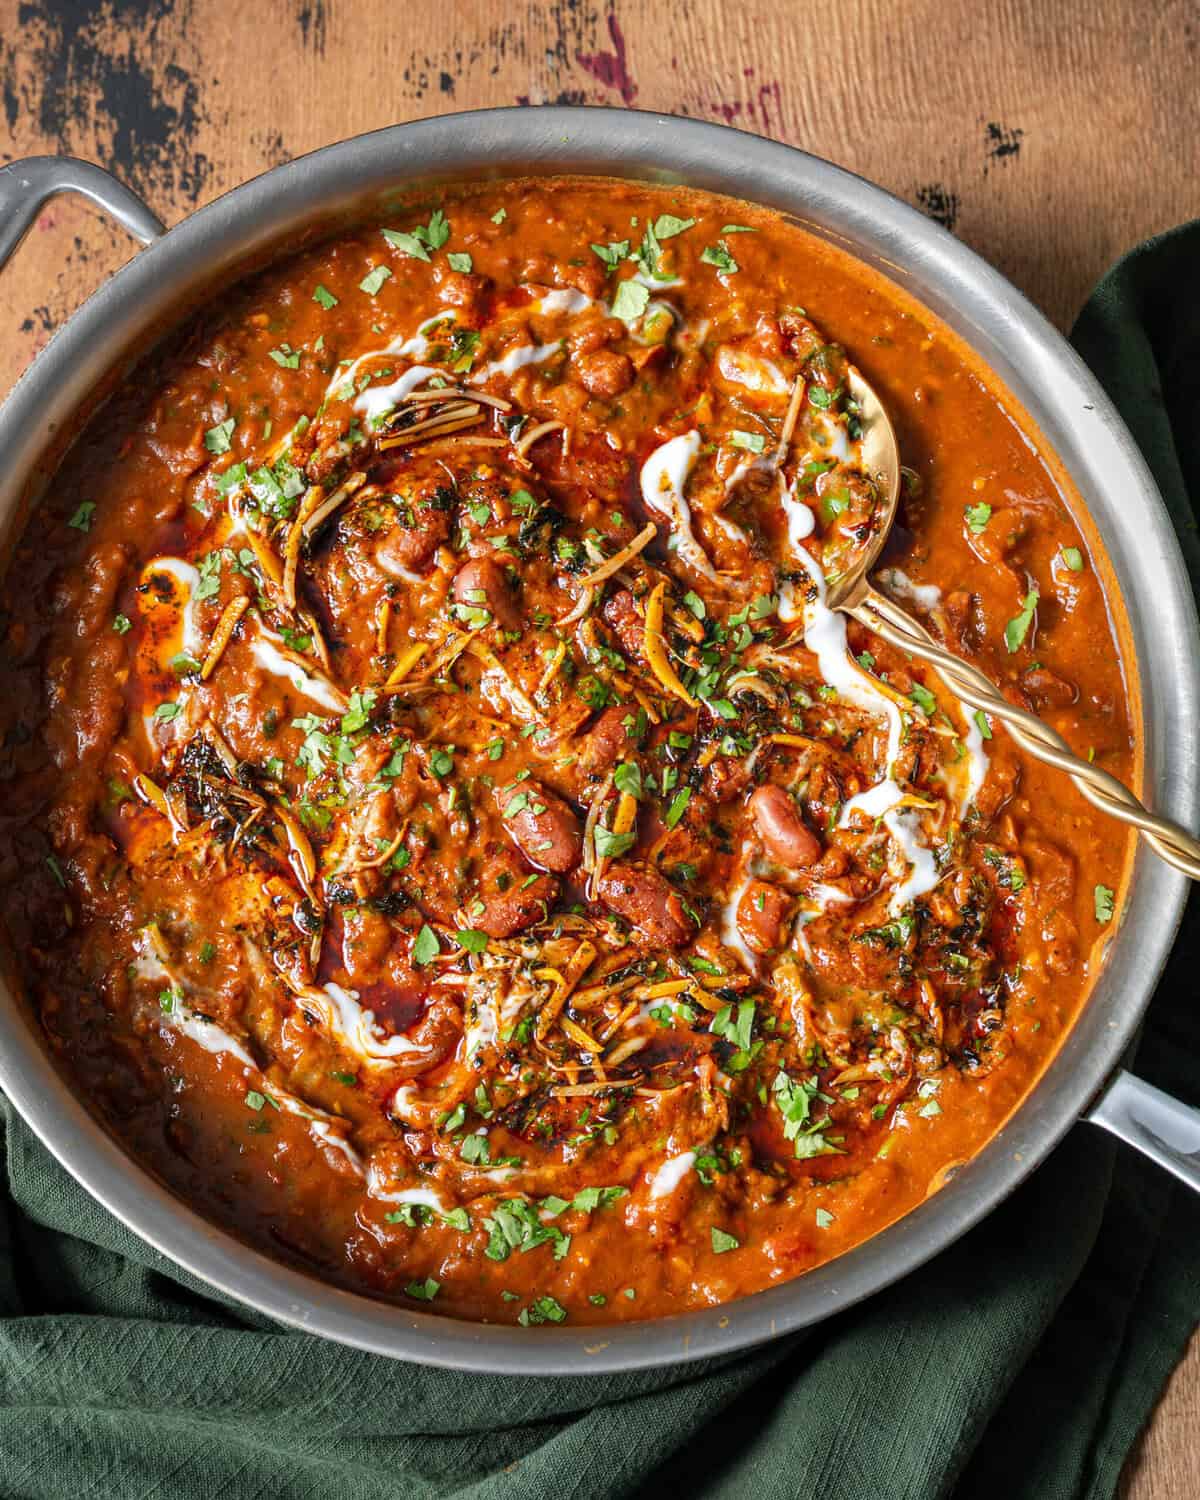
Rajma Masala 101
Originating in North India, particularly in the Punjab region, rajma masala is a kidney bean curry (rajma means “kidney beans” in Hindi).
The process of making rajma masala boils down to three steps plus an optional fourth step, each with an associated “key to success” which takes the final dish from “good” to “life-changing.”
1. Cook the kidney beans
Key to success: Cook dried beans from scratch.
Why? The velvety texture of rajma masala is a hallmark of the dish—you simply cannot get it with canned beans. Dried beans release their starches into the liquid as they cook, making the beans creamy and the cooking liquid rich and thick.
2. Make the tomato-onion masala
Keys to success: Dice finely or puree, and take the time to cook both the onion and tomato down.
Why? Finely-diced onions melt into the masala, and browning them adds sweet-savory depth to the masala. Pureeing the tomatoes helps them melt into the masala and cooking them down concentrates their flavor.
3. Combine the beans and the masala
Key to success: Toss the beans in the masala first, then add the cooking liquid.
Why? Adding the beans by themselves allows them to get coated in the flavors of the masala before being doused in liquid. Also, it’s what my mom does for similar dishes, and she is always right.
4. Finish with a tadka (optional)
⭐Key to success: Keep things stirring to prevent burning!
Why? Finishing this dish with a tadka—a tempered spiced oil—takes this dish from really good to really great. Just make sure you stir very frequently so the aromatics and spices don’t burn in the hot oil.
Keep reading for a walkthrough of the steps in detail and my tried-and-true tips for rajma masala magnificence!
Ingredient notes and substitutes
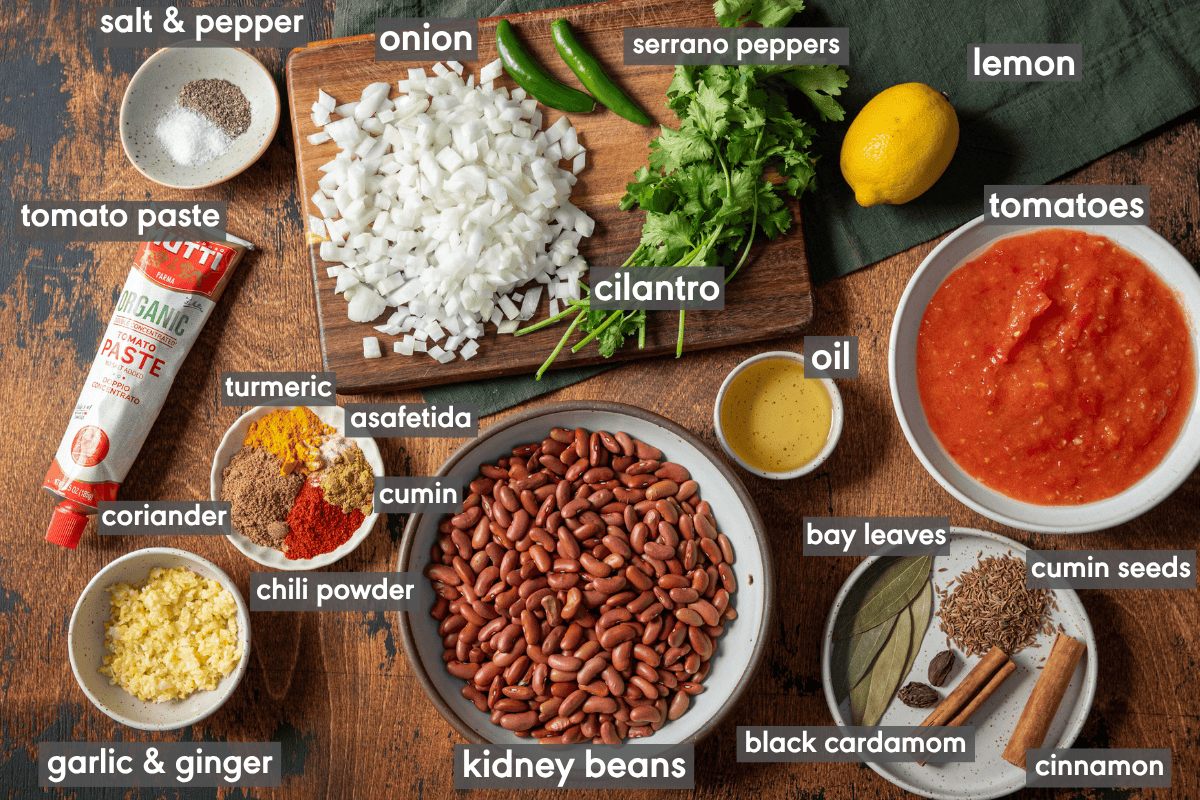
- Dry kidney beans: Canned beans are a great convenient choice for so many recipes—but this is not one of them. The only way to achieve the signature texture and flavor of rajma is to cook dry kidney beans. As they cook, the beans get infused with the flavor of whole spices AND they release their starches into that liquid, making the resulting dish rich and flavorful. Plus, canned beans are too firm, so you’d have to simmer them until really soft anyways.
- The Holy Quaternity of Indian Cooking: If you’ve made my Indian recipes before, you may recognize that this refers to onions, garlic, ginger, and green chilies. They form the base of the masala and add tons of flavor.
- Fresh tomatoes + tomato paste: We utilize both in the masala. The tomato paste adds a base layer of concentrated sweet-savoriness, and the fresh tomatoes get blitzed into a puree to add rajma’s signature tangy flavor.
- Whole spices: The dried beans get cooked with a cinnamon stick and Indian bay leaves (AKA tejpatta), and these same spices are used in the masala—plus cumin seeds and black cardamom pods, if you can find them! Black cardamom is often used in Punjabi-style rajma to add a slight smokiness and unique robustly savory flavor, though it’s optional here. Finally, dried fenugreek leaves (AKA kasuri methi) are used in the tadka, which adds a robustly savory finishing flavor.
- Ground spices: Some staples here: ground coriander, cumin, turmeric, Kashmiri chili powder, and, optionally, a few pinches of asafetida (AKA hing), which contributes an umami onion-garlicky flavor when cooked. And finally the classic finishing spice used in most North Indian gravy-style dishes, garam masala, gets added in the tadka.
Substitutes
You can find all of the spices in this recipe at your local South Asian grocer or online, but here are some substitute options.
- Don’t have Indian bay leaves / tejpatta? Use regular bay leaves.
- Can’t get black cardamom? Omit it (there’s no close substitute).
- Can’t handle spicy food? This recipe is designed to be moderately spicy. If you want zero heat, omit the chile peppers. If you want mild heat, use one pepper.
- Fresh tomatoes not in season? Use canned whole peeled tomatoes and give them the same blitz in the food processor.
- No dried fenugreek leaves? There’s no real sub here, but you can double the amount of garam masala in the tadka.

Step-by-step instructions
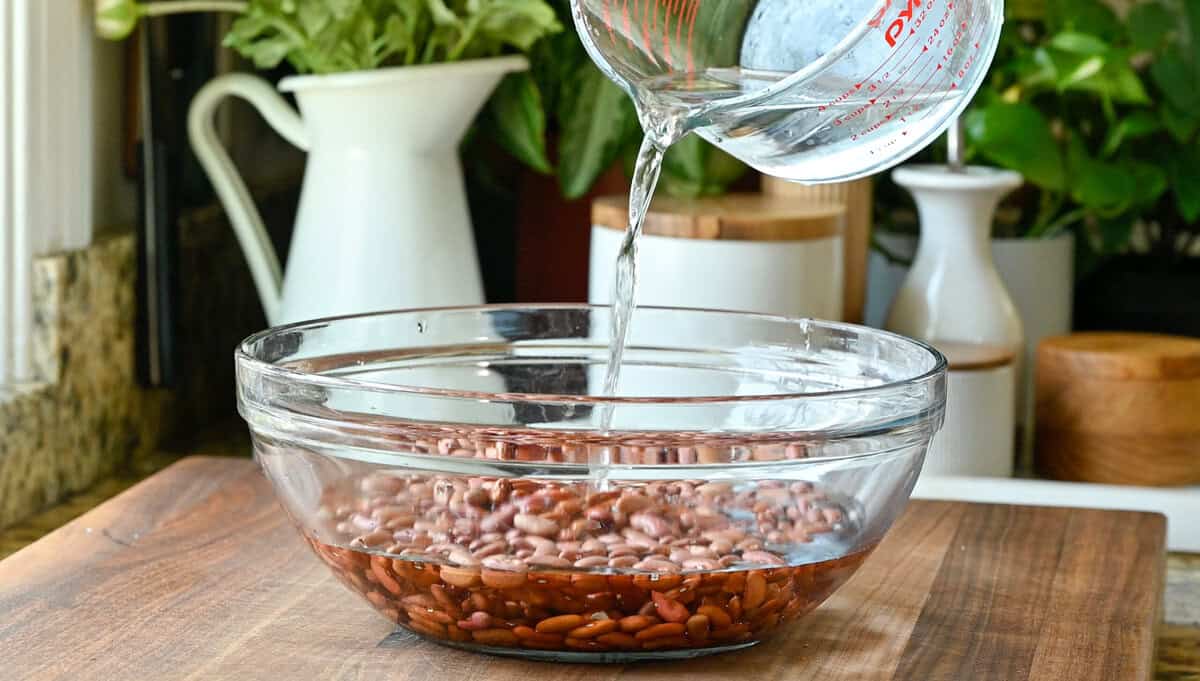
- Soak the beans: Cover with plenty of water and stir in 1 ½ TBSP kosher salt. Soak at room temp for 8 to 12 hours.
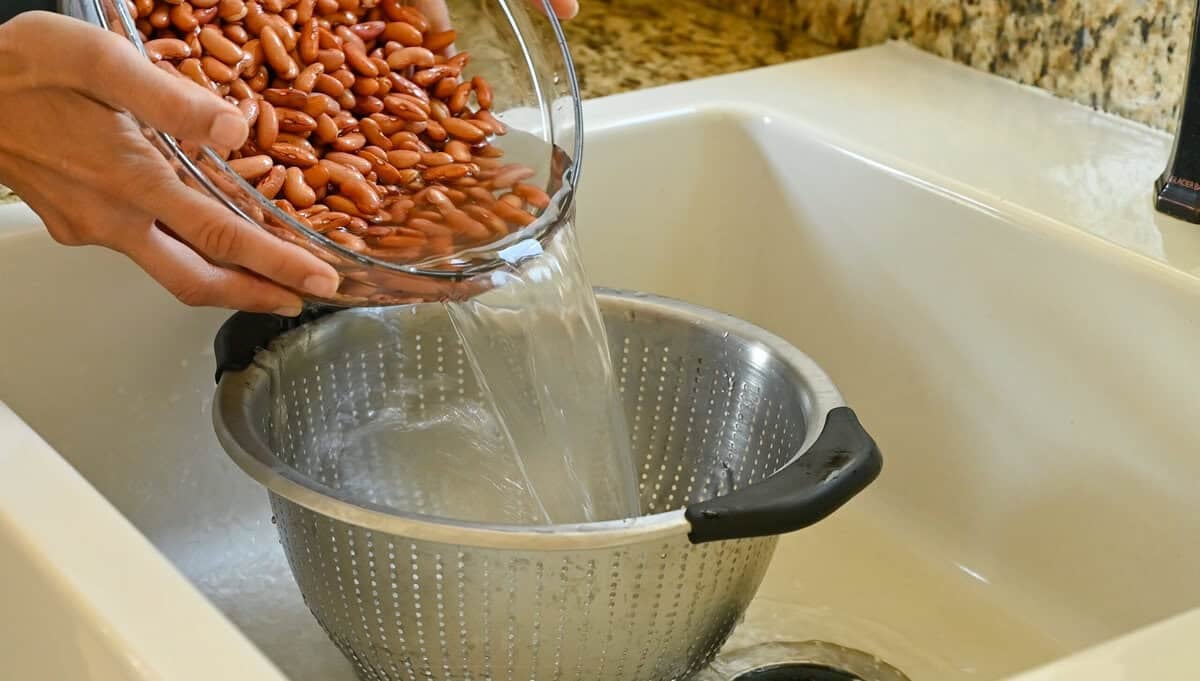
- Drain the soaked beans and rinse well.
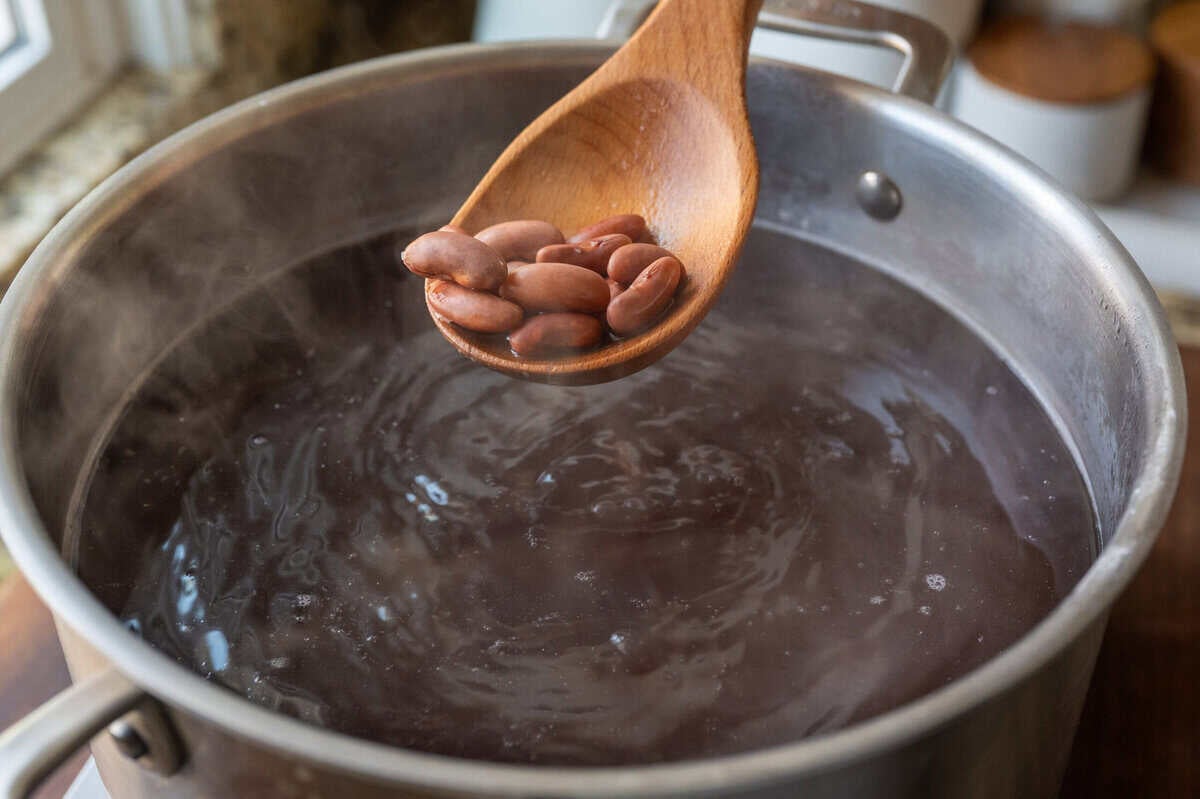
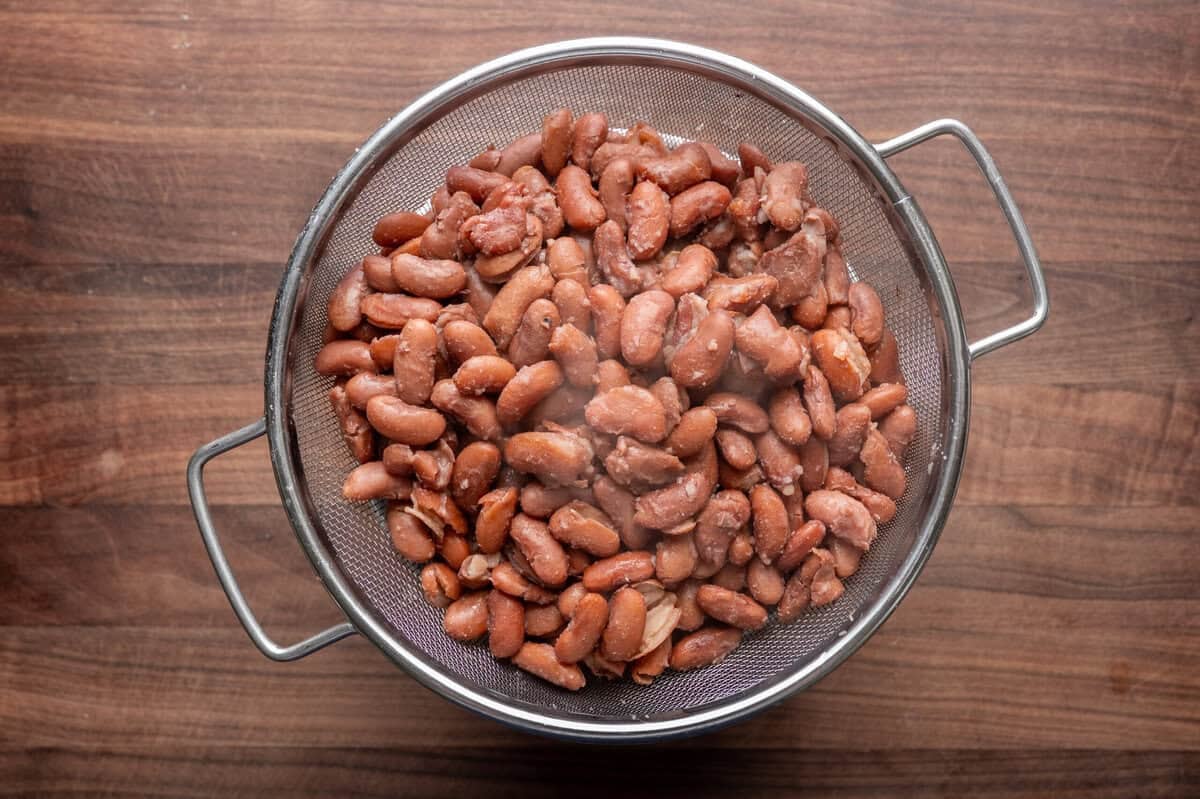
- Cook the beans: Add the beans to a large saucepan with 9 cups (2.1 L) water, baking soda (optional), and oil. Skim off any thick foam as the beans come to a boil. Partially cover and boil for 10 minutes.
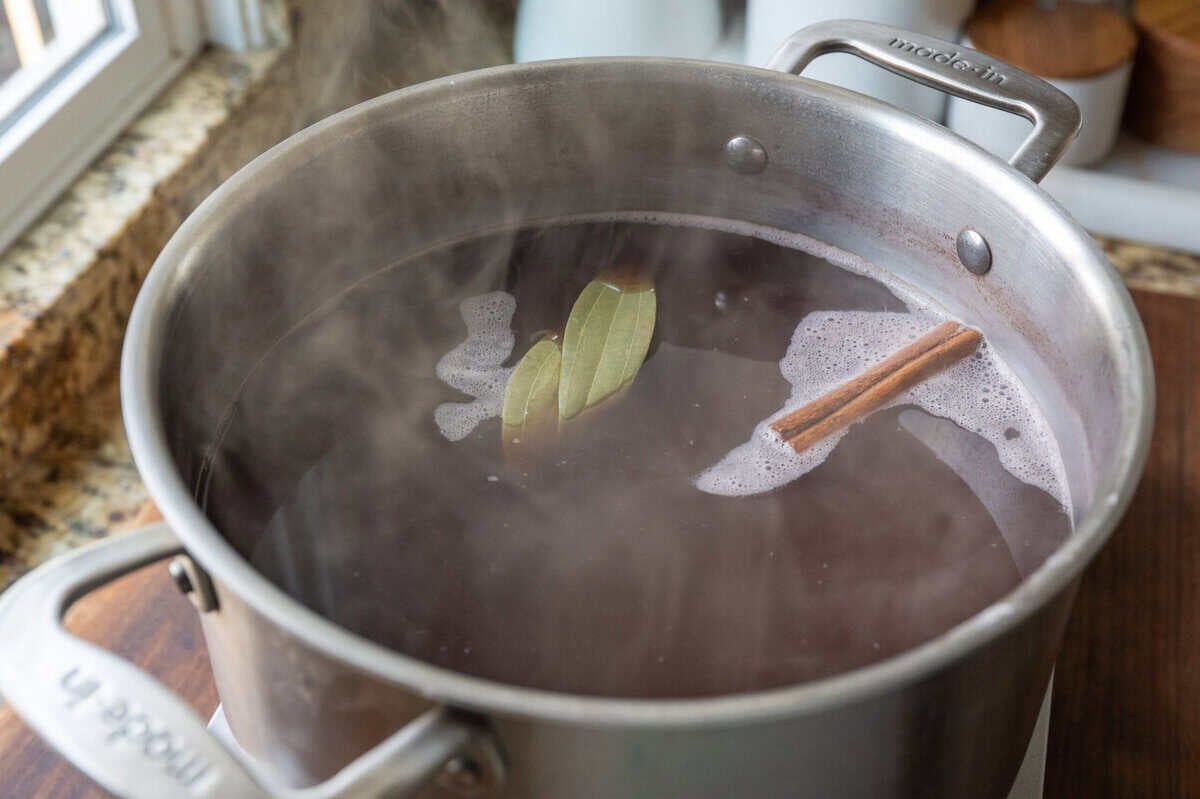
- Reduce the heat and stir in 2 teaspoons kosher salt, the cinnamon stick, and bay leaves.
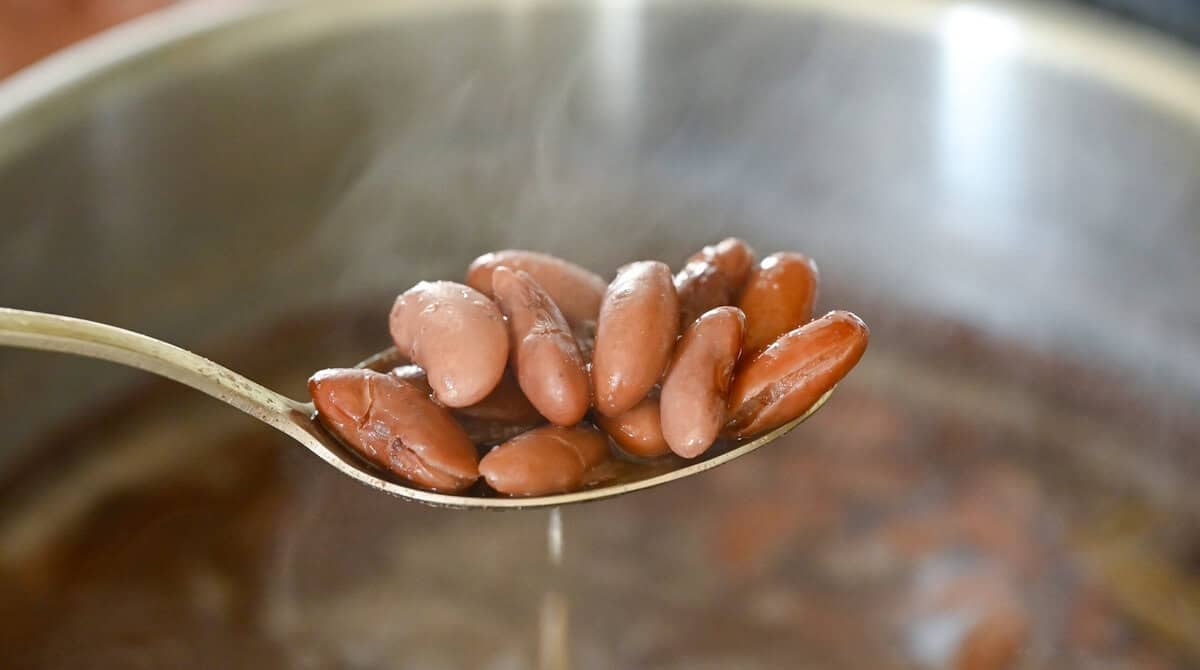
- Cook uncovered at a gentle simmer until the beans are tender and squishable between your fingers, but not mushy.
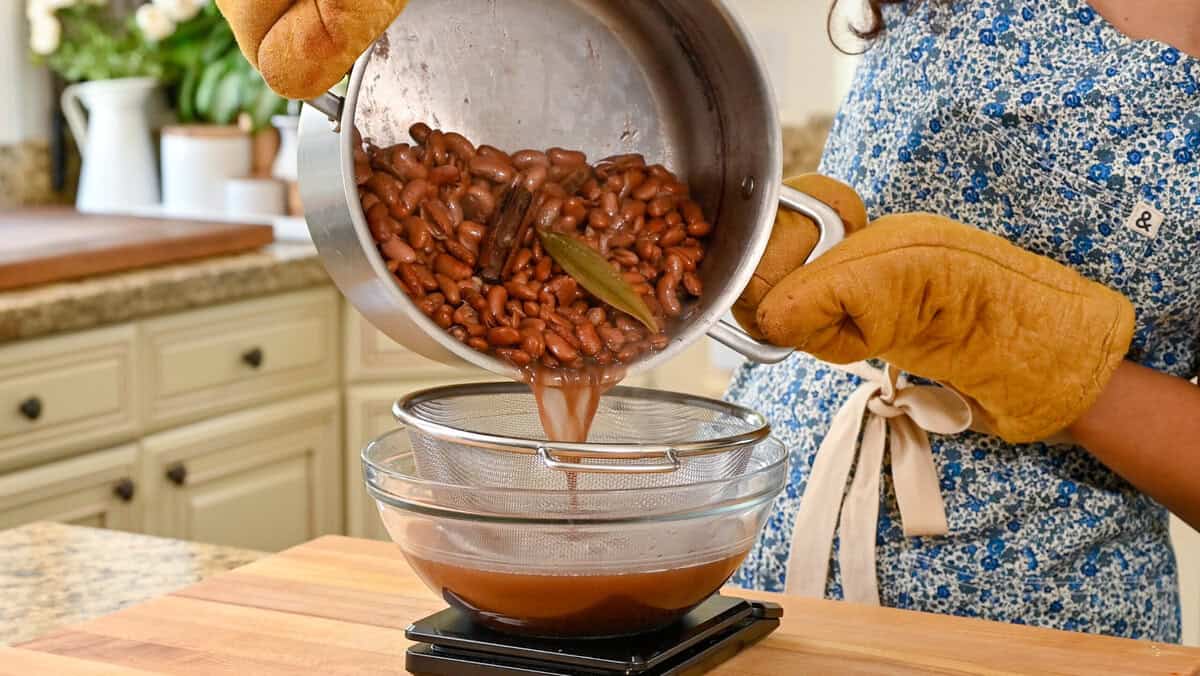
- Strain the beans from the cooking liquid but keep the liquid (discard the spices).
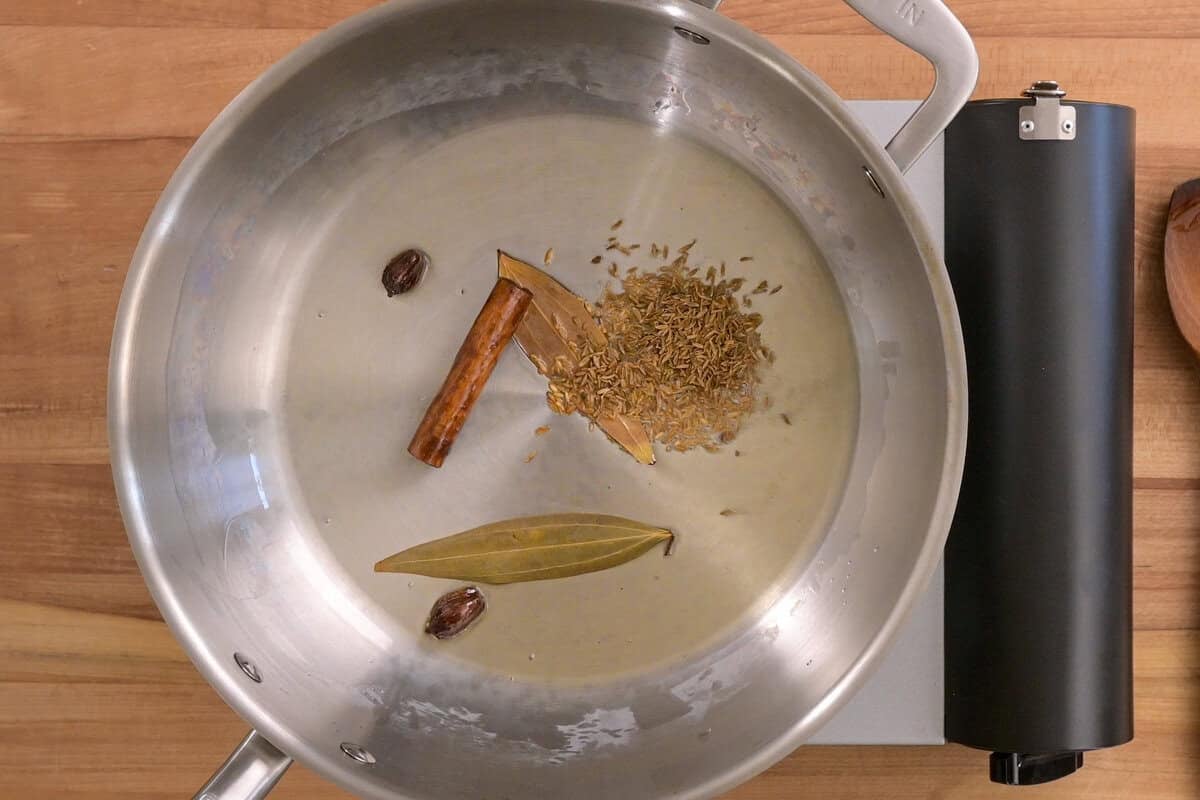
- Make the masala: Heat the oil in a large saute pan over medium, then add the cinnamon stick, bay leaves, and black cardamom (optional). Stir for 30 to 45 seconds, then add the cumin seeds for 10 seconds.
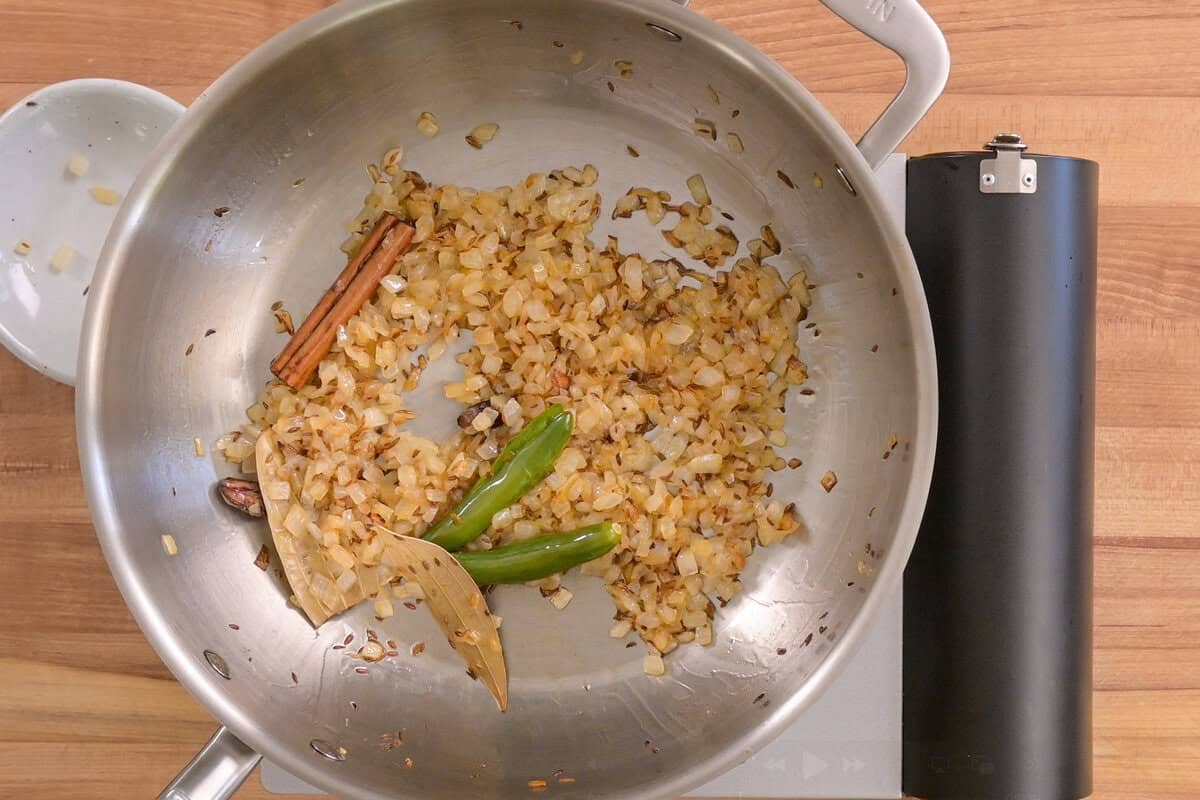
- Add the onion and serrano peppers and stir occasionally until the onions are browned, 12 to 15 minutes.
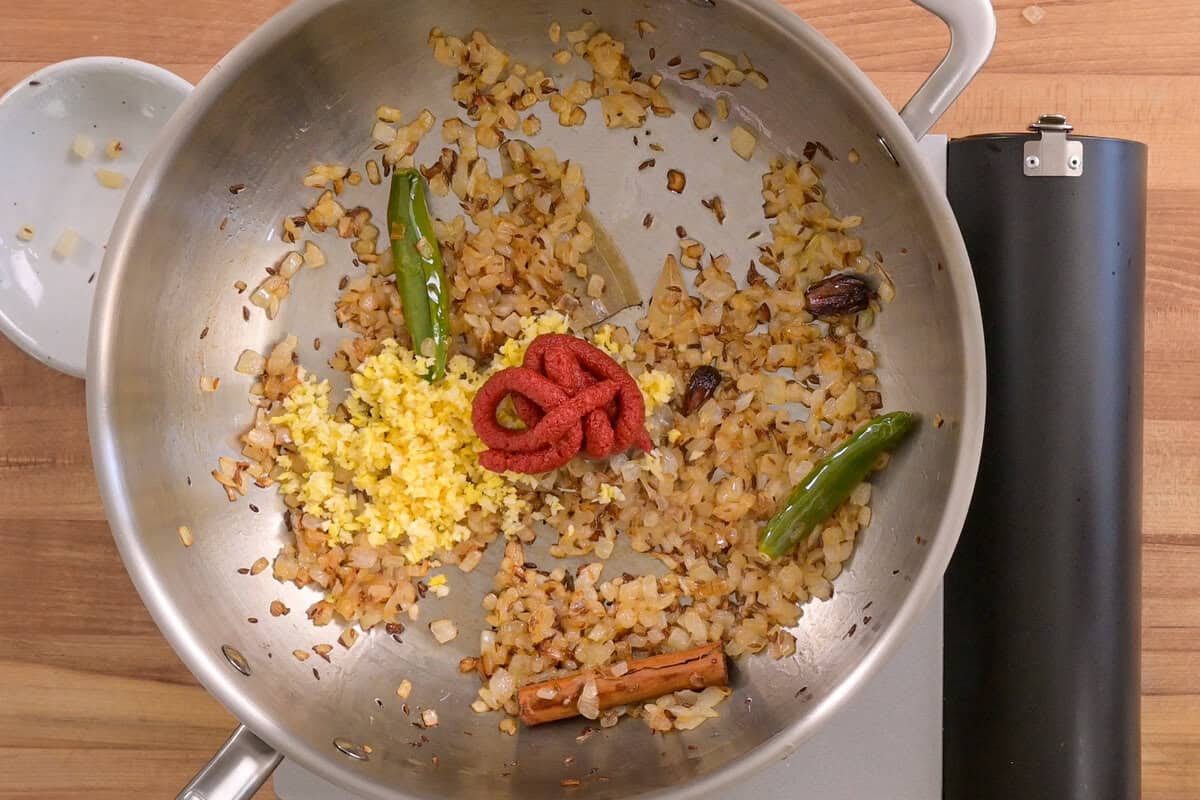
- Add the garlic-ginger paste and tomato paste.
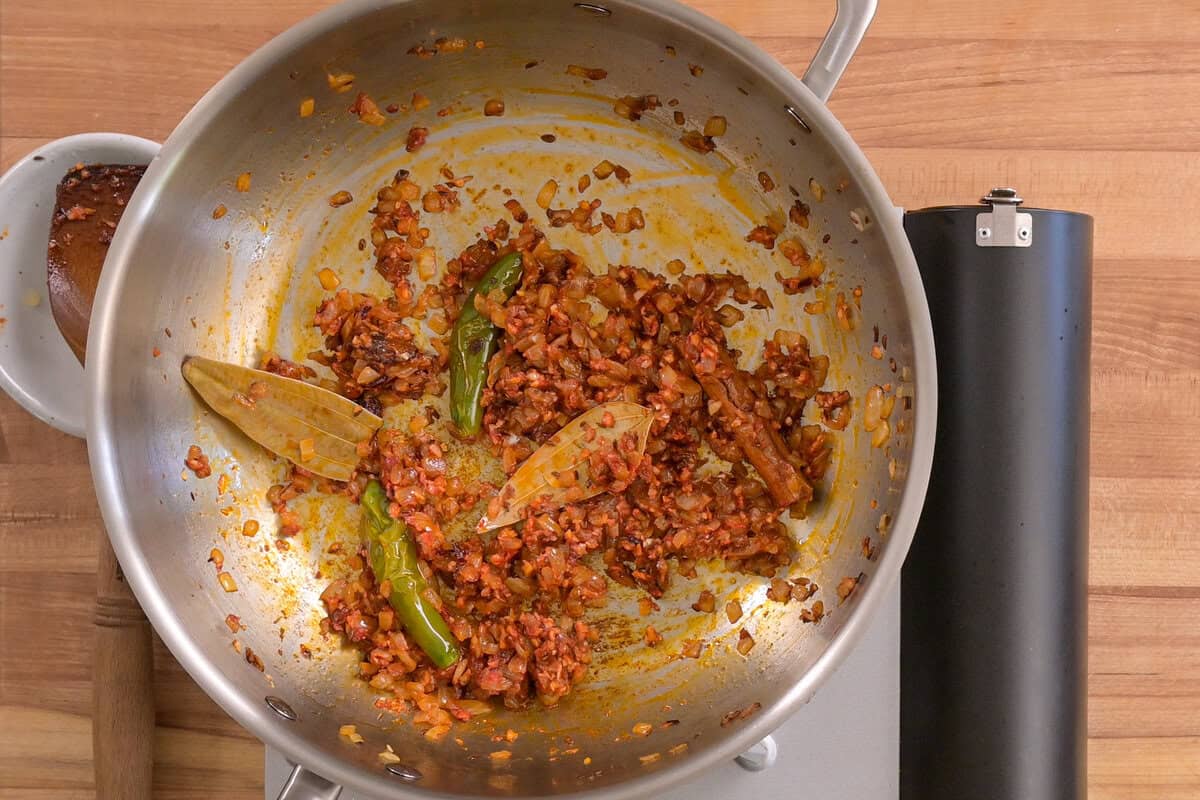
- Stir almost constantly for 90 seconds.
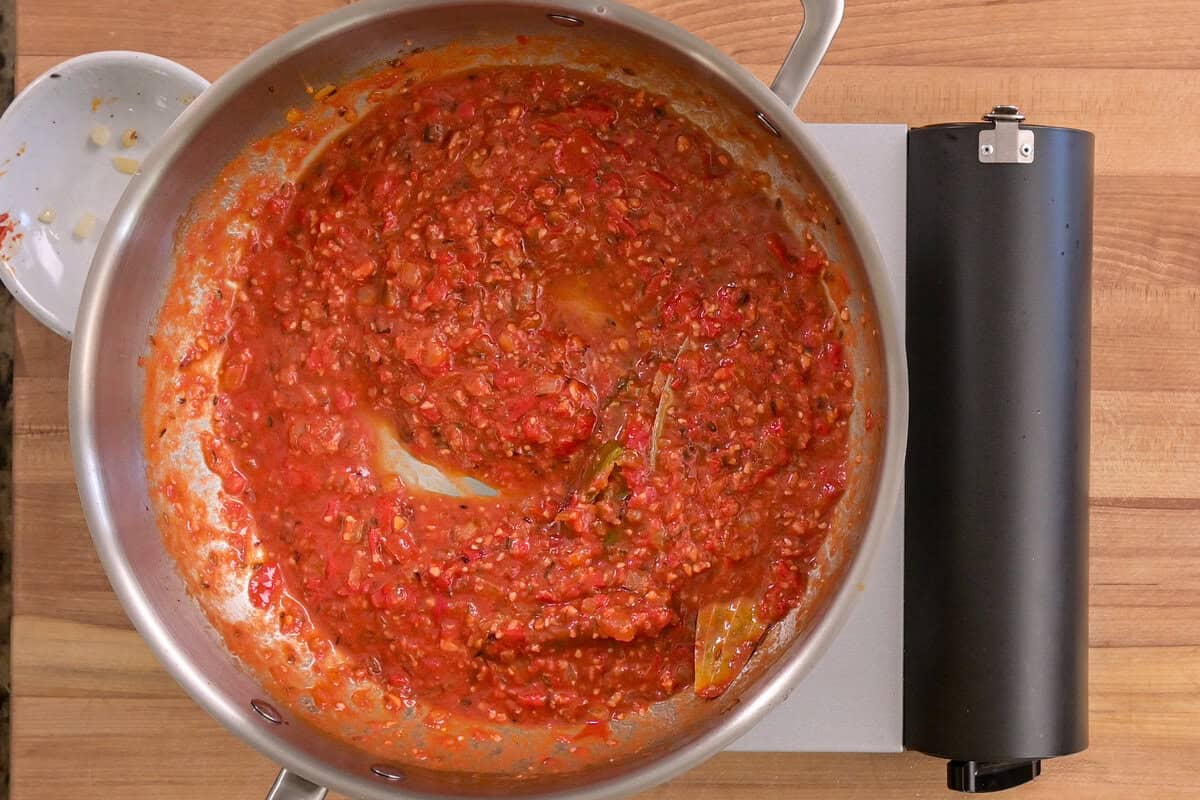
- Add the blended tomato puree, salt, and pepper. Cook for 10 minutes at a rapid simmer, stirring occasionally, until you have a concentrated dark red paste.
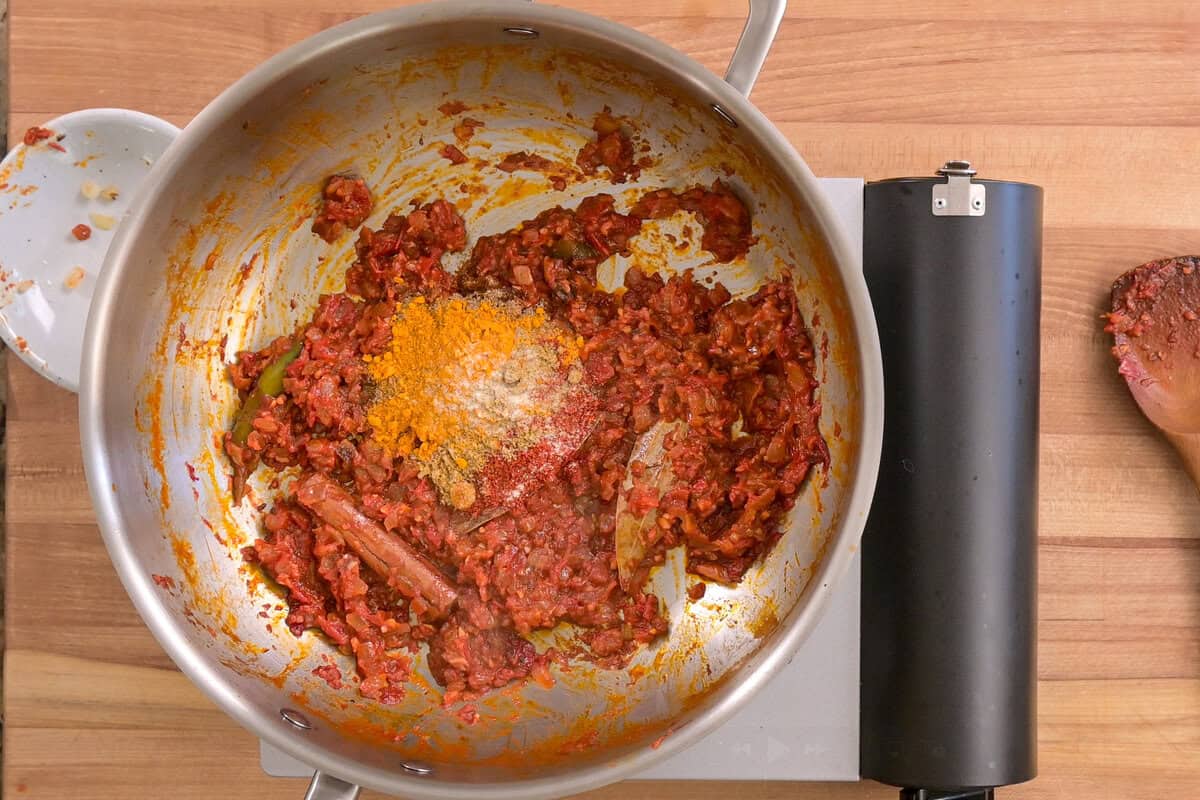
- Add the ground spices—coriander, chili powder, cumin, turmeric, and optional asafetida—plus a big splash of water.
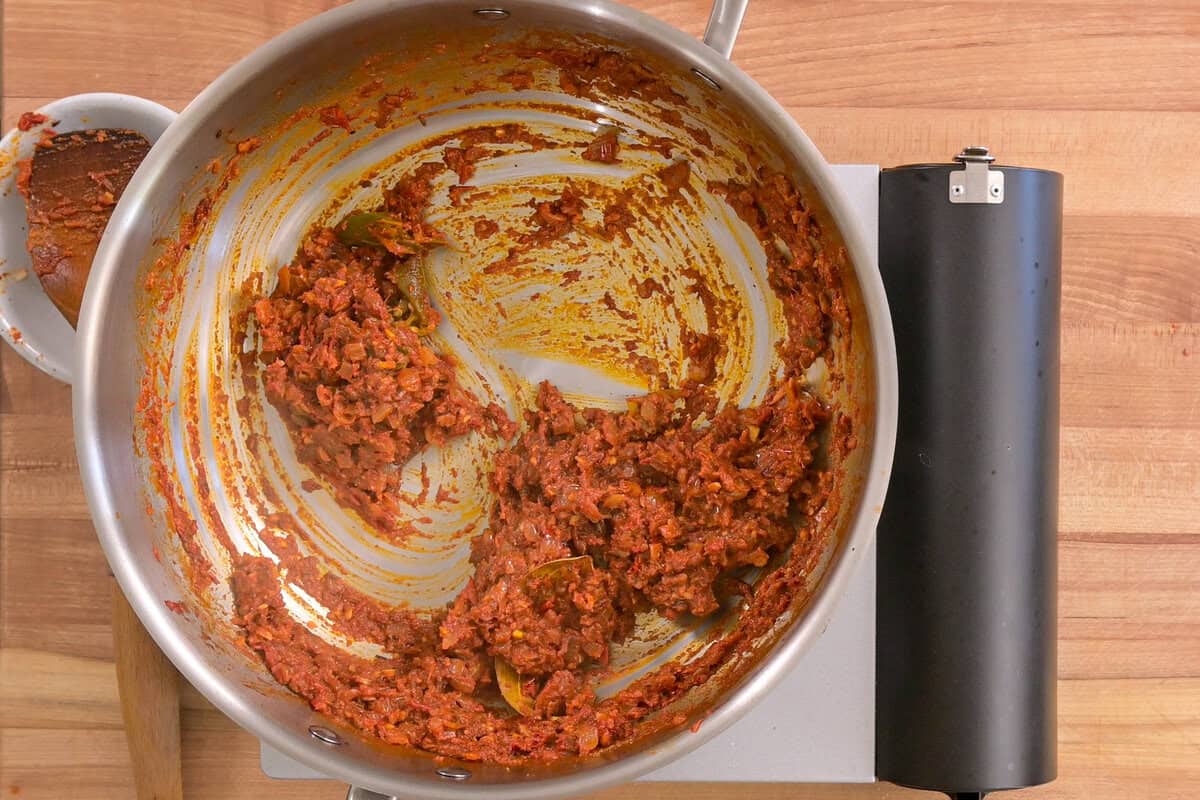
- Stir frequently for 1 minute until thick and combined.
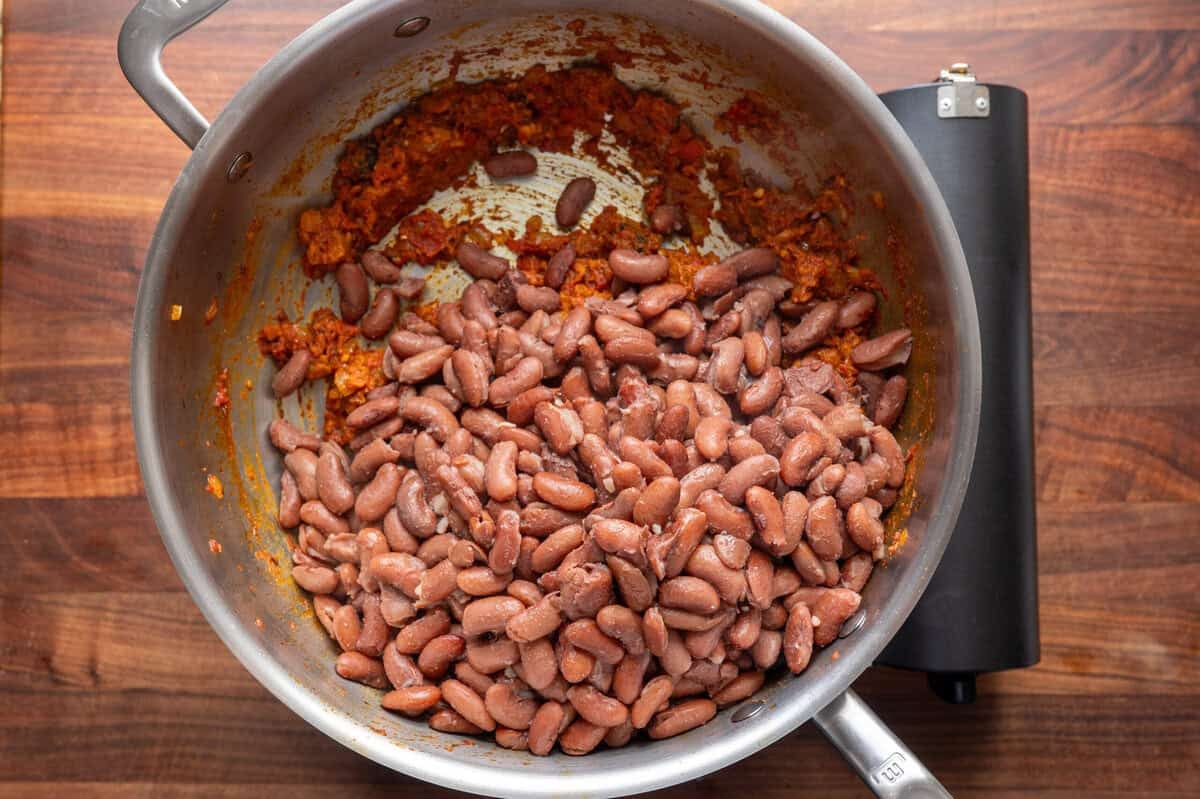
- Combine beans and masala: In the pan used for the beans (or other large, deep saute pan), combine the drained beans and masala. Toss the beans into the masala for 1 minute.
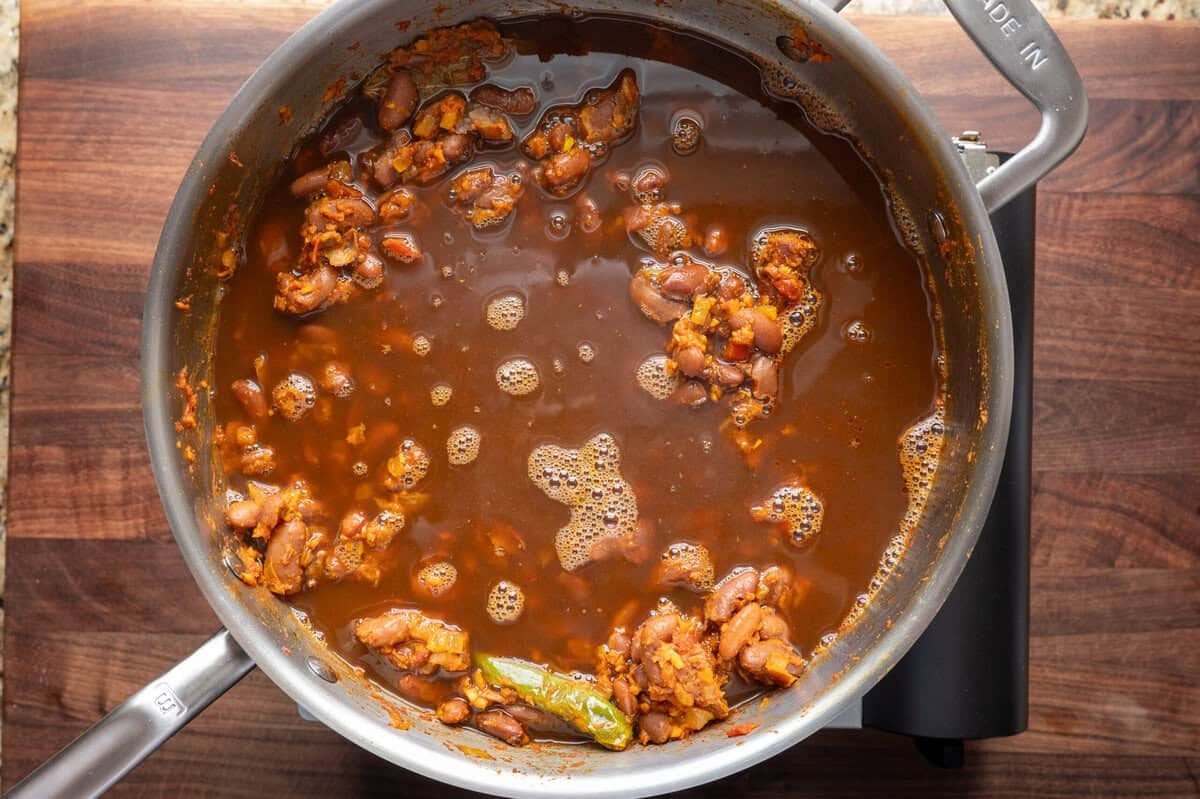
- Add the reserved bean-cooking liquid (4 ½ cups / 1.1L). If you have less than that amount of reserved liquid, top off with water.
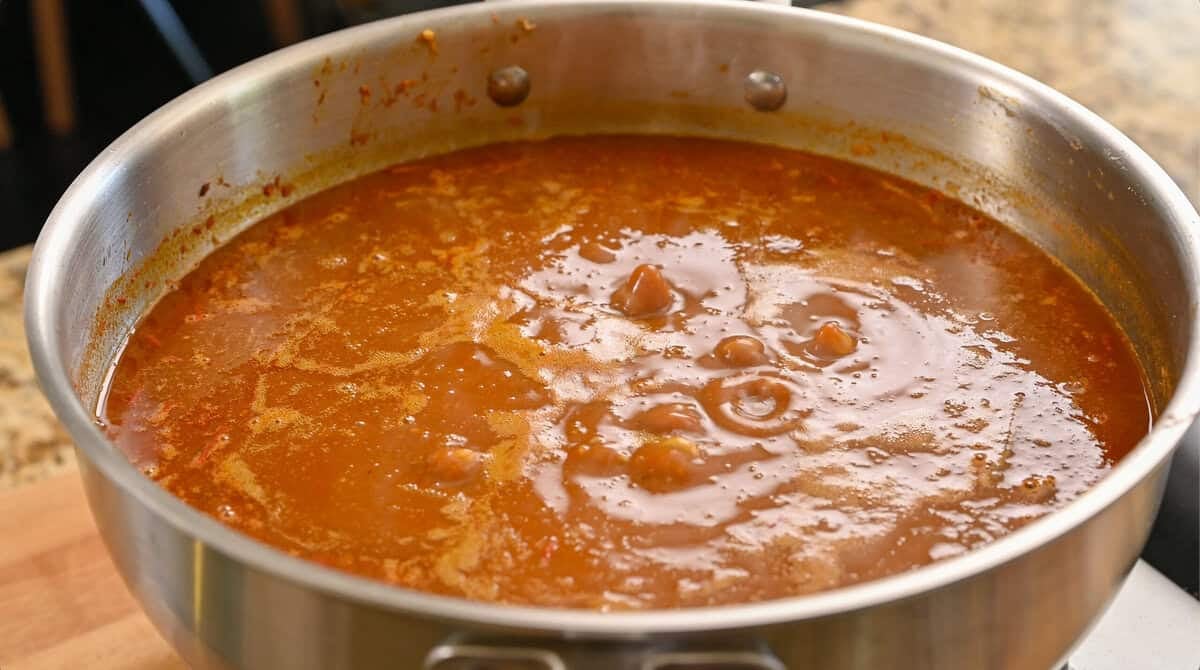
- Bring to a boil, then reduce the heat, and simmer, covered, for 20 minutes, uncovering occasionally to stir.
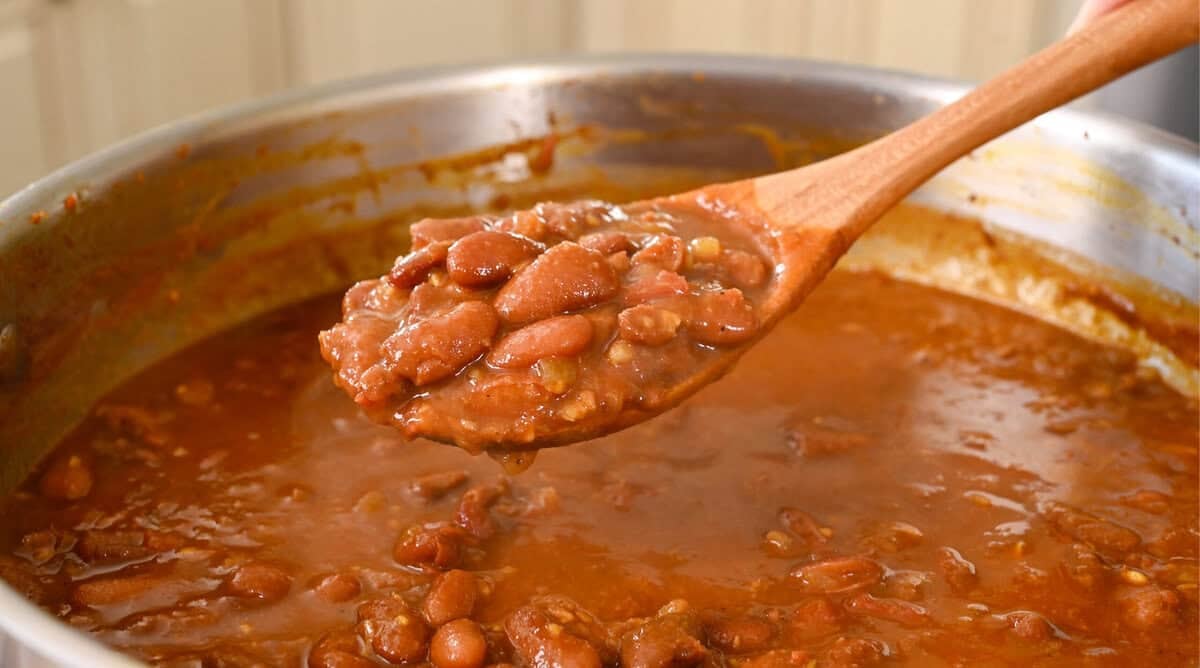
- Uncover and rapidly simmer for 10 final minutes until you have a velvety gravy.
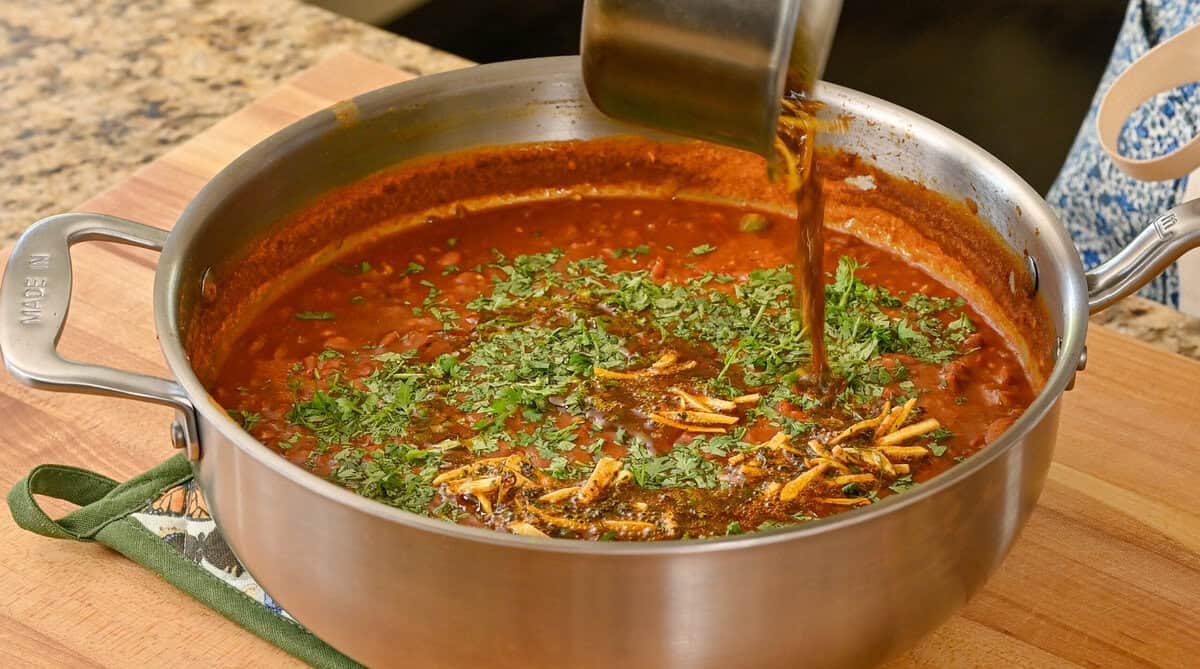
- Remove from the heat and pick out the whole spices and chiles.
Stir in cilantro and lemon juice, and pour the tadka on top just before serving.
Tips for making this recipe
For greatness, don’t skip the tadka
I’ve kept the tadka optional because this dish is still good without it, but it really shines with it, so I’d recommend not skipping it.
In case you’re not familiar, a tadka simply refers to briefly cooking spices and sometimes aromatics in a fat source, then pouring the entire thing—oil and spices—over the final dish. The hot oil releases the fat-soluble oils in the spices AND the oil gets infused with the spices’ flavor, so it’s a win-win, adding tons of dynamic flavor to the finished dish.
5 tips for the perfect beans
- Soak the beans in salty water. Beans are extremely dense and need salt from the get-go. Even a bangin’ masala can’t cure bland beans. Plus, soaking beans in salty water has been shown to make them more tender!
- Add baking soda + oil to the bean-cooking water. Baking soda helps soften the beans faster (by about 20 minutes in my tests) and thickens their texture, making the final texture similar to chili. If you prefer a soupier texture, omit the baking soda. The oil helps minimize the amount of foam the beans release as they come to a boil.
- Boil the beans for 10 full minutes. Raw kidney beans contain a toxin that can give you food poisoning, so boiling them for 10 minutes ensures the toxin is destroyed. I recommend keeping the beans partially covered during the boil so you don’t lose a ton of water to evaporation.
- Top off with water as needed. If not using baking soda, the beans will take longer to cook, and you may need to top off with fresh water to ensure they’re submerged.
- Use texture as your doneness indicator. While I offer estimated times, they will vary based on how long you soaked the beans, whether you used baking soda, the freshness of your beans, etc. The beans are done when you can easily mash one between your fingers but before they become super mushy.
After a 10-hour soak, I’ve found the below:
- With baking soda: 40 – 45 minutes of cook time
- Without baking soda: 70 minutes of cook time
Want to make these beans in your Instant Pot? See the recipe card notes for detailed instructions!
When and how to multitask
There are several opportunities for “multitasking” in this recipe, by which I mean using inactive or mostly inactive cook time to do other prep work.
- While the beans cook… start prepping the masala ingredients! After you’ve boiled the beans for 10 minutes, you’ll add the whole spices and reduce the heat. The beans don’t need babysitting so use this time wisely!
- While the onions brown… prep the garlic, ginger, and tomatoes! The onions need 12 – 15 minutes to brown and need only occasional stirring, so if you feel comfortable, use the time to blitz the garlic and ginger in the food processor and puree the fresh tomatoes.
- While the tomatoes cook… measure the ground spices in a bowl (and do some cleanup!).
- While the rajma simmers… prep the tadka ingredients. Wait to actually cook the tadka (2 to 3 minutes) when the rajma is done so you can pour it on fresh.
Prep ahead, if you want
This dish, like a lot of Indian dishes, is a labor of love, so it’s not something you’d whip up on an average Tuesday night. That said, you can prepare lots of the items in advance to make this process more streamlined.
Cook the beans ahead of time. You can cook the beans and store them separately from the liquid and refrigerate for 2 to 3 days.
Prep the aromatics: If you’re in the habit of doing a little meal prep on the weekend like I am, chop/blend all the aromatics. Store the onions and serrano peppers together in a ziploc bag, then in an airtight container (to prevent onion odor in the fridge). Store the garlic and ginger together and the tomato puree separately for 3 to 4 days.
Frequently Asked Questions
Sure! See the notes at the bottom of the recipe card for detailed instructions.
I highly recommend soaking. In my tests, kidney beans that were unsoaked cooked very unevenly: some were overcooked, while others were still very firm.
This also applies to the Instant Pot—unsoaked kidney beans cooked very unevenly in our tests.
If you don’t have time to do a full soak, try a quick soak. Follow the instructions from the Food Network.
First, omit the baking soda from the beans, as it tends to thicken and soften them into a more chili-like texture.
Two, the recipe calls for adding 4 ½ cups of cooking liquid, so you can start with 5 cups and add more water as needed.
Technically, yes, but you won’t get the same level of flavor development and certainly not texture with canned beans. As dried beans cook, they release this thick starchy liquid, which helps thicken the rajma as it simmers so it turns velvety. Canned beans won’t be able to yield the same results.
Canned beans are also firmer than ideal for this recipe, so you might want to simmer everything longer to soften them.
If you do want to use canned beans, the equivalent would be four 15-ounce/425g cans.
No problem. I use this simply to speed up the prep process, but you can definitely use a knife to finely chop the garlic and ginger and to finely chop the tomatoes.
Since this will take longer, you may need to prep these before cooking the masala instead of multitasking while the onions cook.
Store leftover rajma in a sealed container in the fridge for 5 to 6 days.
This is also a great candidate for freezing, especially because it makes a large quantity, and will stay good for 3 to 6 months—but it is best to not pour any tadka on the portion you plan to freeze. I like to freeze them in my Souper Cubes for easily portioned leftovers that are quick to defrost.
Reheating tip: The rajma thickens a lot as it sits in the fridge (from the bean starch), so you’ll want to loosen it with some water as you heat up leftovers.
This dish is typically served with rice (AKA rajma chawal), but you could also do flatbread (a batch of my homemade vegan naan would be divine but store-bought pita / naan is also great).
I recommend dolloping some plain coconut yogurt on top for a cooling contrast (fave brands: Cocojune, Culina).
If you’re feeling ambitious, you can top it with raita.
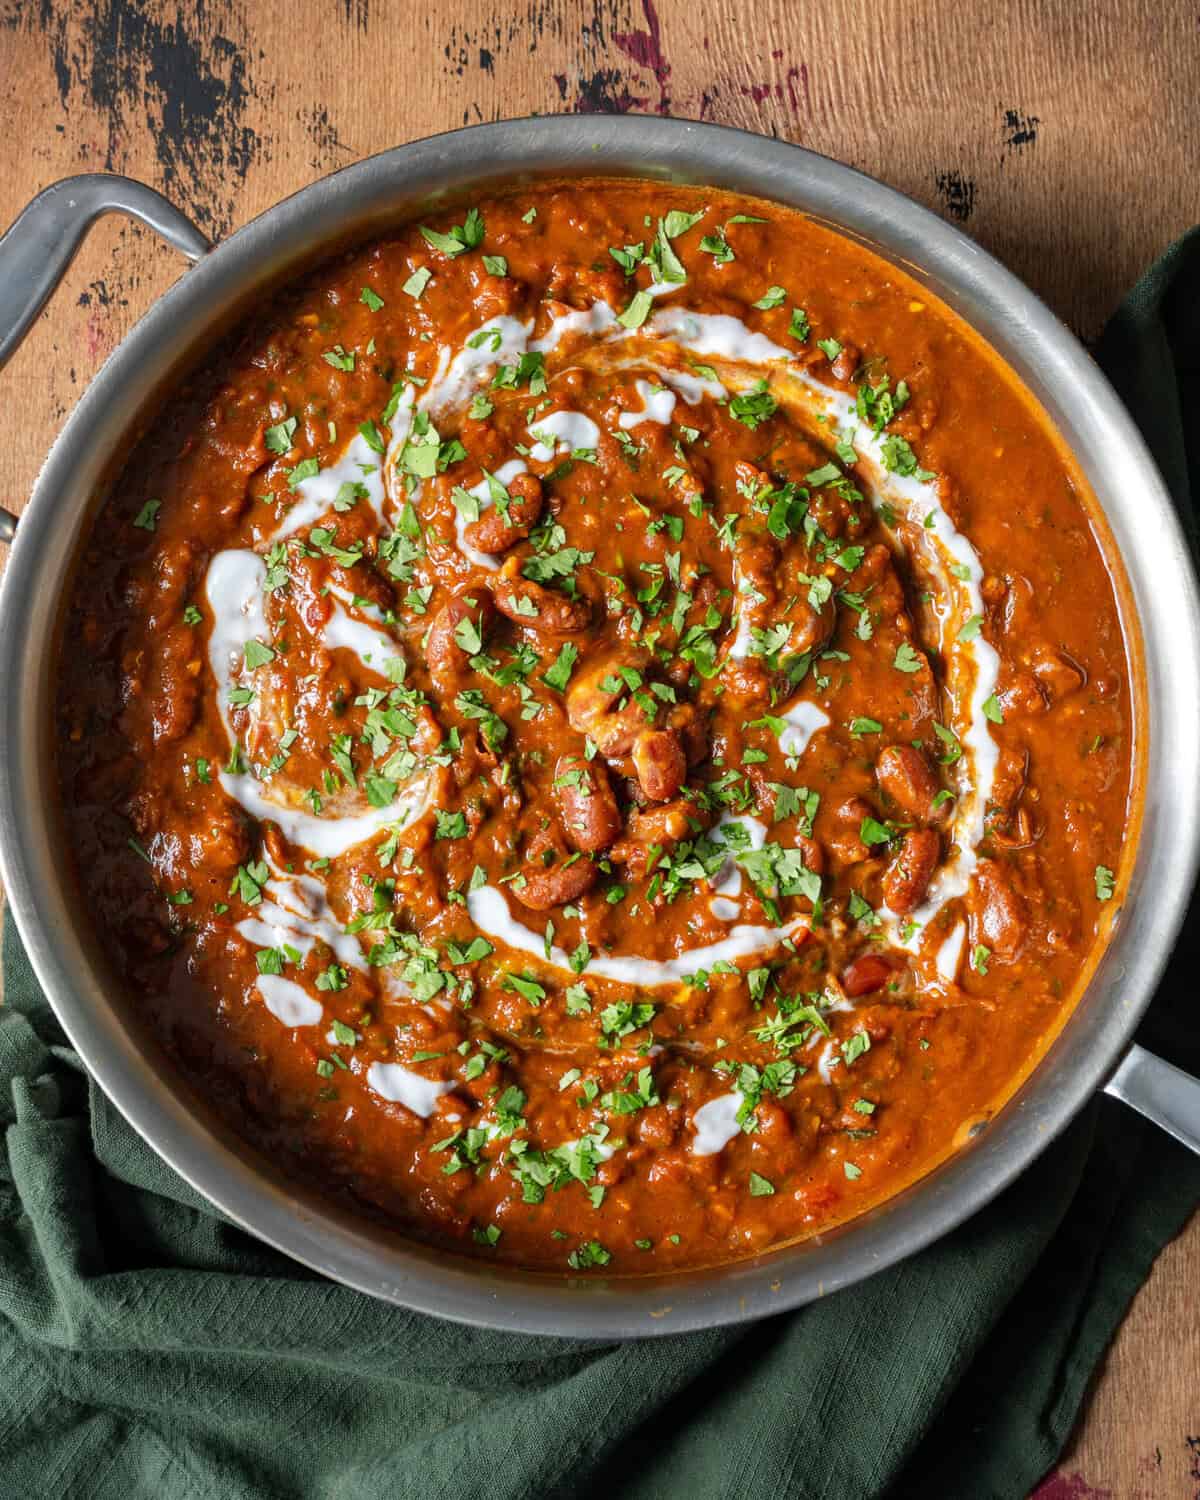
Swooning over this velvety rajma masala? Let me know by leaving a rating and review below! Reading your comments makes my day 🤗

Introducing
Big Vegan Flavor
Techniques and 150 recipes to master vegan cooking.
Rajma Masala (Kidney Bean Curry)
Ingredients
For the kidney beans
- 1 lb (450g) dried red kidney beans
- Kosher salt and freshly cracked black pepper (see Note 1)
- ½ teaspoon baking soda (optional, see Note 2)
- 1 teaspoon neutral-flavored oil
- 1 (2 to 3”) cinnamon stick
- 2 Indian bay leaves (AKA tejpatta; or regular bay leaves)
Whole spices and aromatics
- 3 tablespoons (42g) neutral-flavored oil
- 1 (2 to 3”) cinnamon stick
- 2 Indian bay leaves (AKA tejpatta; or regular bay leaves)
- 2 black cardamom pods, lightly pressed down on with your finger (optional, see Note 3)
- 2 teaspoons cumin seeds
- 1 large yellow onion, finely diced (2 cups / 300g diced)
- 1 to 2 serrano peppers, de-stemmed and slit open slightly (2 for spicy; omit for mild heat)
- 6 cloves garlic smashed down to remove peels
- 1" piece (8g) fresh ginger, peeled
- 14 ounces (400g) ripe tomatoes (see Note 4)
- 2 tablespoons (30g) tomato paste
Ground spices
- 1 ½ tablespoons (9g) ground coriander
- 2 teaspoons Kashmiri chili powder (see Note 5)
- 1 teaspoon ground cumin
- 1 teaspoon ground turmeric
- A few pinches asafetida (optional, for extra oomph)
Finishing
- 1 cup (16g) fresh cilantro leaves and tender stems, chopped
- A few squeezes of lemon juice
Tadka
- 2 tablespoons (28g) neutral-flavored oil (or vegan butter)
- 2 cloves garlic, sliced into thin matchsticks
- 1" piece (8g) fresh ginger, peeled and sliced into very thin matchsticks
- 1 tablespoon dried fenugreek leaves, crushed between your fingers (see Note 6)
- 1 teaspoon garam masala
- ½ teaspoon Kashmiri chili powder
Instructions
- Soak: Cover beans with cold water, stir in 1½ TBSP kosher salt (see Note 1), and soak 8–12 hours. Drain and rinse.
- Boil the beans: Add soaked beans to a large saucepan with 9 cups (2.1 L) water, the baking soda if using, and the oil. Bring to a boil (covering the pot speeds this up), skimming off thick foam. Partially cover and boil for 10 minutes.
- Simmer the beans: Stir in 2 tsp kosher salt, 1 cinnamon stick, and 2 bay leaves. Reduce to a very gentle simmer (just a few tiny bubbles). Cook uncovered until beans mash easily between your fingers (don't overcook until mush though): for a 10 hour soak, this is ~40 to 45 minutes with baking soda, ~70 without.
- Strain: Drain beans over a bowl, reserving the liquid; discard the spices. You want 4½ cups (1.1 L) liquid—top off with water if short. Keep beans and liquid separate.
- Start the masala: Heat a large sauté pan over medium until hot, then add 3 TBSP oil. Once shimmering, add 1 cinnamon stick, 2 bay leaves, and 2 black cardamoms (if using); stir 30–45 seconds until aromatic. Add 2 tsp cumin seeds and sizzle for 10 seconds.
- Brown the onions: Add onion and serranos with a big pinch of salt. Cook for 12 to 15 minutes until deeply browned, adding a splash of water if they brown unevenly.Meanwhile: In a mini food processor blender cup, blend garlic and ginger into a coarse paste; transfer to a bowl with the tomato paste; Then add the tomatoes to the machine and blend into a puree.
- Build the base: Add the garlic-ginger-tomato paste mixture to the pan, stirring almost constantly for 90 seconds. Add the tomato purée, deglazing the pan, then season with 1 tsp kosher salt and black pepper to taste. Rapid-simmer ~10 minutes, stirring occasionally, until you have a concentrated, dark red paste.Meanwhile: Combine all the ground spices in a bowl.
- Bloom the ground spices: To the pan, add the Ground Spices plus a big splash of water. Add the combined ground spices plus a big splash of water. Stir 1 minute until thick, then remove from heat.
- Combine: In the large saucepan, combine the masala and drained beans over medium heat, tossing to coat for 1 minute. Add the reserved 4½ cups (1.1 L) liquid.
- Simmer: Bring to a boil, then cover and simmer on low for 20 minutes, stirring occasionally. Uncover and rapidly simmer for 10 minutes until the gravy has thickened.NOTE: If you didn’t use baking soda, mash ~10% of the beans against the pan to thicken.)Meanwhile: Prep the Tadka ingredients.
- Finish: Off the heat, fish out the bay leaves, cinnamon, serrano, and cardamom. Stir in cilantro and a few squeezes of lemon. Set aside while you make the Tadka.
- Make the Tadka: Add the oil or butter to a cold small saucepan, then turn to medium heat. Once shimmering or melted, add garlic and ginger; stir 1 to 2 minutes until the ginger frizzles at the edges. Add fenugreek, garam masala, and chili powder; stir for 20 to 30 seconds, then pour over the rajma.
- Serve: Taste and adjust salt and lemon. Serve with rice or flatbread, and yogurt if desired. It thickens as it rests, so loosen with water as needed.
Notes
- Salt: Amounts are for Diamond Crystal kosher salt. Use roughly half if using table salt, sea salt, or Morton’s kosher salt.
- Baking soda: Softens the beans faster and thickens the rajma to a stew/chili texture. For a soupier result, skip it but use 10–11 cups (~2.5 L) water to offset the longer cook and extra evaporation.
- Black cardamom: Adds a smoky, savory depth typical of Punjabi rajma, but optional. Lightly crack the pods with your fingers — don’t fully crush or pound the pods, as the aroma can be overpowering.
- Tomatoes: No good fresh ones? Use 14 oz (400g) canned whole peeled tomatoes, crushed or puréed.
- Kashmiri chili powder: A mild Indian red chili powder. Substitute 1½ tsp sweet or hot paprika plus ¼ to ½ tsp cayenne pepper.
- Fenugreek leaves (kasuri methi): Bring a bold, savory note to North Indian dishes. Find them at South Asian grocers or online.
- Instant Pot beans: Soak per step 1. Add drained beans, 1 tsp oil, 2 tsp salt, cinnamon, and bay leaves (no baking soda) with 5 cups (1.2 L) water to the Instant Pot. Cook at high pressure for 8 minutes, followed by a natural release for 10 minutes, then manually release remaining steam. Beans should mash easily; strain per step 4.
Nutrition
Nutrition information is automatically calculated, so should only be used as an approximation.
 Love this? Leave a rating below!










What a hearty, flavorful, healthy, unique dish! I don’t like traditional American chili (probably because I don’t like canned kidney beans) but this is a far superior kidney bean dish that I could eat day after day. This is a labor of love but definitely worth it. I scaled up 1.5x and I’ve got plenty leftovers to freeze.
Hi Sarah, Thank you so much for such a fantastic review! Appreciate you taking the time!
Love this recipe! Amazing on a baked potato. But we wish the recipe could automatically scale up and down so we could easily make 1.5x the amount!
We’re so happy you love it, Bill!
As for scaring: In the “print” section of the recipe card, you can scale it to 9 servings instead of 6! Just disregard the gram measurements, as they don’t change when the recipe gets scaled.
From the moment the aroma of cinnamon and bay wafted from the bean pot, we knew this would be a special recipe. The flavors are incredible! It is a bit of work but worth the time and effort. Since we are a 2 person household, I am hoping we can freeze the leftovers for another meal next week, but it is so delicious, it may not even make it to that point. Your recipes never fail to deliver. Thank you!🙏🏽
We’re so happy that the Rajma Masala turned out well for you, Anna. 🙂 Thank you for taking the time to leave a comment and for trying out the recipe!
I am super picky. Like, so picky that at 43 years old, I had never even eaten a kidney bean.
Then I fell in love with making butter chicken and decided to branch out and try some other recipes since I had already bought all the spices in bulk. I decided to give kidney bean masala a shot, and WOW.
This is hands down one of my favorite meals now. I seriously couldn’t shut up about how amazing it was. The flavor was incredible.
We’re over the moon to hear you enjoyed the recipe, Samantha. Thanks for giving the recipe a shot and for your kind words!
I have never had rajma so in all fairness I didn’t know what to expect, but I closed my eyes and did a happy dance after the first bite so I think that merits a 10/10! I can see why your recommended dried beans over canned, I have never experienced beans get so creamy and like you said velvety. Just wow!
Your review made our day, Fermina! Thank you for taking the time to share your thoughts and for trying out the recipe.
This dish is excellent! It will be a regular in our menu. Thank you, Nisha!
Thanks for the lovely feedback, Marta!
Wow! Channa Masala is one of my favorite dishes, but it has officially been replaced! The texture and flavor of the kidney beans takes this dish to texture heaven! As always, the masala flavor (shout out to the tadka) was out of this world delicious, but the texture of this dish is creamy with those tender beans instead of chickpeas. I’m definitely making this one again! Even my husband said this was better than the food at our excellent local Indian restaurant (which is high praise because the family owned restaurant near us serves homemade, authentic, insanely flavorful dishes). This is a keeper!
Also, I would LOVE to see this dish in the meal plan recipe list. 😉 Not to add to your insane workload, lol.
We’re so happy this recipe is a new favorite, Crystal! 🙂 I’ll notify the team regarding your request for us to add it to the meal planning site. Thank you so much for being a subscriber!
Just made this today and it turned out really well. The only thing is that my tadka turned out a bit too dry – think I need to add more oil next time. I also used red chilli powder instead of Kashmiri, and it was a bit too spicy though I mellowed it out by adding some more acid (apple cider vinegar, I didn’t have lemon), as well as blending up a portion of the cooked beans and putting it back into the pot. Thanks Nisha for the recipe! Big fan from Malaysia.
Hi AQ, thank you so much for your sweet review! Greetings from CA 🙂
I didn’t have black cardamom so I can’t say how it would be with that, but it was still excellent! So healthy yet it tastes rich and stick to your ribs.
Hi Lucinda, it’s great to hear you had success with the recipe. Thanks for the review!
Holy moly I didn’t know a bean dish could taste this good, this rich! you nailed the description of velvety. And the flavor, so warm and cozy and flavorful like all your Indian recipes. Definitely will be a staple in the winter!
Your positive feedback is the best reward for our hard work. Thank you, Roxie!
I made this tonight using the instant pot for the bean step. I did simmer it on high in the IP to remove the scum from the top before pressure cooking with the lid on, and there was a lot to remove!
Flavor was so unique, texture was velvety. in-season tomatoes made this even more wonderful. My household loved it!
Hey Paula, thanks for sharing! We’re always happy to hear when a recipe’s a hit with the whole household.
I meal prepped this a bit using your tips (cooked the beans on Sunday, did some other chopping prep as well), then made everything on Tuesday. PHENOMENAL! So happy I took the time to make this. This fed my soul in the best way possible.
Hi Rajni, Thank you so much for such a fantastic review! Appreciate you taking the time!
I’ve tried 3 rajma recipes and yours is by far the best!
It is a labour of love, but it is worth it. 😀
The best compliment, Sabina! Thank you so much for leaving a review 🙂
Thank you Nisha for teaching me the importance of spice and layering. The difference is really noticable, and I find the dishes taste more like the ones I buy from Indian restaurants (without tooting my own horn too much of course). I love learning new flavors and ways to enhance them, so I’m so glad I discovered your YouTube channel a year ago. Looking forward to try more recipes this fall (my favorite season for anything warm and spicy!)
You’re very welcome for the recipes, Katja! It’s so lovely to hear you enjoy them, and we can’t wait for you to try even more!
Another great recipe, has to deliver some flavour as is quite a few pots and pans for a big old bowl of beans, but like your excellent bean chilli does pass the taste test.
I did enviously watch the video though with your dried kidney beans, I buy organic good quality ones in the UK but they are small hard bullets after an hour still, nothing like the plump large soft things you show. I soaked overnight, used baking soda and after 70m+ they were starting to get a bit soft. Never had dried bean envy before.
Thanks for trying the recipe, Paul! We’re so glad you enjoyed it.
Haha, ‘dried bean envy’ is a first! 😅 I’m not sure if there are different varieties of beans in the UK, but my first guess would be that they were old. When dried beans sit on the shelves for too long, their cell walls harden and they take a very long time to soften and may never truly soften, no matter how long you boil them (even organic ones suffer from this!).
Next time, try soaking them overnight in water with salt AND a pinch of baking soda, or grab a bag from a local South Asian market where the turnaround for kidney beans is typically faster.
A pressure cooker works well for stubborn beans too—you can find our instructions for cooking them in an Instant Pot in step 7 of the recipe card! Hope your next batch gets as plump and buttery as these!
It’s official. And I never thought it was true. I’ve been eating bland food my whole life! This recipe knocked our socks off! It’s a little time consuming, and there are a number of moving parts, but soooooo worth it!! I learned a long time ago to double all of your recipes – we’re thrilled to feast on them for a couple days! BTW – my husband told me tonight that your parents should have their own show! 🙂 Thank you for all you do, friend!
Thanks for the sweet words, Tracey! 🙂 It makes us incredibly happy to hear the recipe was a knock out of the park!
Absolutely phenomenal. Takes some time to come together but it’s well worth it! I’ll be adding this to my regular rotation of meals!
Hey Owen! Wow, I can feel your enthusiasm about this recipe through the screen! Love it!
For anyone considering using canned beans( yes I know it’s not as good) could you recommend an amount , ie 3 or 4 cans?
Hi Jon, you can find the answer to your question in the FAQ section, but I will paste it here!:
Q: Can I use canned beans?
A: “Technically, yes, but you won’t get the same level of flavor development and certainly not texture with canned beans. As dried beans cook, they release this thick starchy liquid, which helps thicken the rajma as it simmers so it turns velvety. Canned beans won’t be able to yield the same results.
Canned beans are also firmer than ideal for this recipe, so you might want to simmer everything longer to soften them.
If you do want to use canned beans, the equivalent would be four 15-ounce/425g cans.”
I was just planning the menu for next week, and thought I’d like to make Rajma and here is the recipe! posted right on time 🙂
I will follow your recipe and share my review next week.
Thank you.
Perfect timing! We hope you love it 🙂
we loved it. full of flavour and richness!
Awesome, Th. Thanks for your comment and for taking the time to review!
Hi Nisha, this sounds amazing! Do you know whether I can cook the beans in my slow cooker? I don’t have an instant pot, but I used to cook my chickpeas in the slow cooker, so was wondering whether this would work for the kidney beans as well! I would soak for 10h, then cook for minimum 8h…
Hi Sophie, I’m delighted you’re excited by this recipe! I don’t own a slow cooker, but based on my research, you still want to boil the kidney beans on the stove for 10 minutes to start because of the toxin they contain (the slow cooker doesn’t reach a high enough temperature to boil them). You can then transfer the beans + water to your slow cooker.
Since the beans will be soaked overnight and then boiled for 10 minutes, I think low for 4-6 hours might be sufficient. Some of the standard guides for slow cooking beans I’ve seen online typically say 6 to 8 hours on low but they’re not boiling them for 10 minutes, so I think 8 hours could be too much.
I’d also skip the baking soda, as I don’t know how it will react during such a long cook time.
I wish I could be more help, but since I don’t have a slow cooker, these are just my best guesses based on research.
Thank you for the quick response! I didn’t think of the toxins becoming a problem in the slow cooker, so thanks for warning me! I will try it when I have the time, I am looking forward to it 🙂